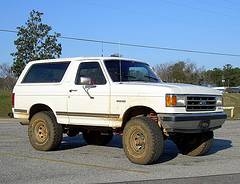
Sooner or later every motorist will twist the ignition key only to hear the sickening chatter of a faulty starter motor, but problems with your Ford Bronco's starting system don't have to mean an expensive trip to the dealership. Following these simple instructions, you will be able to replace your Ford Bronco or F Series truck's starter in a matter of hours.
Disconnect the battery by removing the negative power cable (usually black) from the negative battery terminal (marked with a "-"). On side-terminal batteries, simply use the appropriate size wrench to remove the retaining bolt from the side of the battery. On top-terminal batteries, loosen the retaining clamp on the end of the cable and slide it off the metal post.
Always refer to the owner's manual before attempting to lift any vehicle! Improperly lifting a vehicle can result in injury and/or death. Always park the vehicle on a flat surface, put the transmission in Park for an automatic or leave it in gear for a manual, and make sure the parking brake is set. For added safety, place wheel chocks around the rear wheels to prevent the truck from rolling away.
Lift the front of the vehicle and place jack stands underneath the frame (placing the jack stands underneath the body may result in vehicle damage). Place one on each side as close to the engine bay as possible, but the stands must be supporting a flat part of the frame.
Disconnect the wires form the starter solenoid, making sure to label each wire for easy reassembly.
Loosen the bolts that attach the starter motor. If the bolts are old or corroded, apply WD-40 or penetrating oil to the threads and wait a few minutes. Be careful not to break the bolts or damage the threads.
Remove the starter (on some models you may have to remove the frame brace or the idler arm to gain clearance).
Depending on how much room you have between the engine block and the exhaust manifold, you may have to reattach the wires to the starter solenoid before mounting the starter to the engine.
If the old starter mounting bolts are corroded or the threads are damaged, replace them. If you choose to reuse them, coat the threads with oil or an antiseize paste. This will make removal of the starter easier in the future.
Hold the starter motor in position against the block and finger tighten all of the mounting bolts. Be careful not to cross-thread the bolts. Once the bolts are finger tightened, you can tighten them to the correct specifications. On starter motors with two mounting bolts, torque to 15 to 20 ft.-lbs. On starter motors with three mounting bolts, torque the bolts to between 12 and 15 ft.-lbs. Reinstall the frame brace and idler arm if they were removed. Be sure to torque the idler-arm retaining bolts to between 28 to 35 ft.-lbs.
Connect the wires to the starter solenoid. Vibrations from the engine can cause the wires to loosen over time, so make sure the retaining nuts are tight.
Lift the vehicle up off the jack stands and lower it onto the ground. Reconnect the negative battery cable.