There are several things that can go wrong with the starter motor in your 1996 Ford F-150: Internal components may wear out; someone may have mounted the starter improperly, eventually causing it to fail; or mounting bolts may become loose. Bad connections to the starter or another component in the starter circuit may become faulty, as well. There are a few tests and checks you can perform at home to help troubleshoot your F-150 starter motor. Before you proceed with these tests though, make sure you have a fully charged battery in good condition.
Park your Ford F-150 on level ground, release the parking brake and raise the front of the truck with a floor jack.
Secure your truck on jack stands and block the rear wheels with a couple of chocks. Then apply the parking brakes.
Disable the ignitions system by unplugging the electrical connector at the coil pack to prevent your F-150 from starting during these tests. To find the coil pack, just follow the wires from the spark plugs to the other end where they attach to the coil pack.
Crank the engine and make sure it will not start before you begin troubleshooting.
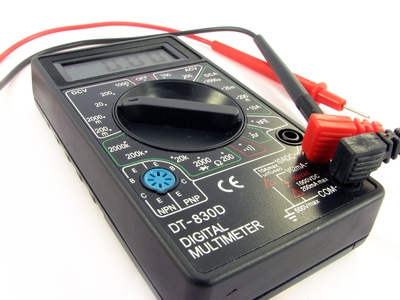
Set your voltmeter to the 20 volts range and connect the meter probes to the battery positive terminal and to the "B+" terminal at the back of the solenoid, which is the cylinder mounted on top of the starter. Crawl under your truck to reach the starter solenoid. The "B+" should be marked as such. If not, just follow the red battery cable to the starter, which connects to this terminal.
Turn on your voltmeter to measure voltage drop and ask an assistant to crank the engine for 6 seconds. Read your meter display. It should read 0.5 volts or less. If the meter detects a voltage drop of more than 0.5 volts, check the connections for dirt, corrosion and looseness between the starter "B+" terminal and the positive battery terminal. If the connections are clean and tight, you need to replace the battery cable.
Connect your meter probes between the positive battery terminal and the "M" circuit terminal at the back of the starter solenoid. This is the bottom stud with a small metal strip that connects to the starter case.
Set your voltmeter to the 20 volts range and ask your assistant to crank the engine for 6 seconds. Read your meter display. It should read 0.5 volts or less. If the meter detects a voltage drop of more than 0.5 volts, there is high resistance within the starter. Take your starter to a repair shop for inspection or replace it. Turn off the voltmeter.
Connect the coil pack electrical connector and try to start the engine. If the starter passed the first two previous tests and fails to engage, the starter or solenoid might be faulty. Also, you might have a faulty ignition switch, Park/Neutral position switch (if equipped with automatic transmission) or clutch pedal position switch (if equipped with a manual transmission). Also, make sure the starter is properly mounted, if it is not disengaging. Otherwise, you might have a faulty starter, solenoid or ignition switch.
Remove the starter motor and take it to a repair shop for inspection, if the starter engages but fails to turn the engine. There is a possibility the starter is in good condition, but your F-150 engine is seized, says James E. Duffy in "Modern Automotive Technology."
Check the mounting bolts at the starter motor and make sure they are tight and the unit is properly mounted. The starter may become noisy if the bolts are loose. Also, a bad armature, field pole shoes or some other internal component may cause the starter to make noise. Take the starter to a repair shop for inspection.