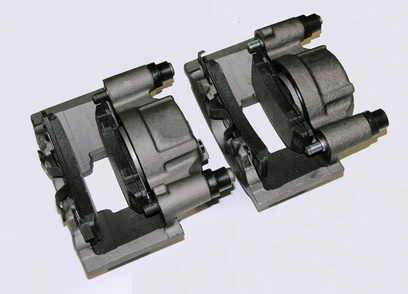
The bleeding of any vehicle's brake system offers a number of benefits including firmer, more responsive braking and longevity of the system's calipers, the master cylinder and the antilock control unit. On a 1998 Ford Taurus and most other modern vehicles, bleeding is performed by changing out the old brake fluid and replacing it with fresh new fluid. Do this every two years as suggested by most manufacturers or when braking becomes soft. Also, if you have had new brake pads recently installed on your Taurus, bleeding of the system is recommended.
Raise the right front of the car by placing the jack beneath the vehicle's frame, directly behind the wheel, and advancing the arm until a jack stand can fit under the frame. Once the jack stand is in position, remove the jack and perform this step for the three remaining wheels. When finished the vehicle should be completely raised, allowing you access to each wheel.
Unscrew all the lug bolts on each wheel with a lug wrench and put them in a sturdy plastic container. Remove all four wheels and set them aside.
Loosen the bleeder valve bolt on any of the four wheels using a box wrench of the correct size (to ensure the bolt is not stripped). The small valve bolt is located directly behind the brake mechanism on a Taurus.
Open the hood of the car and locate the master cylinder reservoir -- it will be topped with a labeled cap. Remove the cap and suck the old brake fluid out of the reservoir with a squeezable baster. Squirt the fluid into a plastic bottle. Top up the reservoir with fresh brake fluid.
Place one end of a length of plastic tubing over the bleeder valve bolt and the other into the mouth of a plastic bottle. Position the 1 inch x 4 inch piece of lumber directly beneath the brake pedal. This will prevent the pedal from being pushed to the ground during the bleeding process.
Position yourself underneath the car so you can easily access the bleeder valve bolt with your box wrench. Tell your helper to fully apply the brakes and to shout "Braking" while they are doing so. Loosen the bolt a quarter-turn while your helper presses the brake. Tell your helper to remove their foot from the pedal.
Watch carefully as the fluid drains into the plastic bottle. Repeat Step 6 until fresh clear fluid begins to drain. Tighten the bleeder valve bolt and move the tubing to the next brake.
Continue the bleeding process for the remaining three wheels using Steps 3 through 7 as a reference.
Re-install all four wheels. Ensure that all lug bolts are securely tightened with your wrench.
Position the jack beneath the vehicle's frame nearest to one of the jack stands. Advance the jack arm until the Taurus is raised slightly above the stand. Remove the stand and lower the jack. Repeat this step for the other stands.