In the warm months of summer a cool blast of A/C is always a welcome relief, so it's a good idea to keep your vehicle's cooling system serviced for optimal performance. Two engines were available for the 2003 the Ford Taurus: the 155-hp OHV V6 Vulcan or the 200-hp OHC V6 Duratec. It is suggested that coolant be flushed and replaced once a year. The 2003 Ford Taurus calls specifically for r-134a refrigerant.
Deliver to EPA approved air conditioning facility to remove refrigerant.
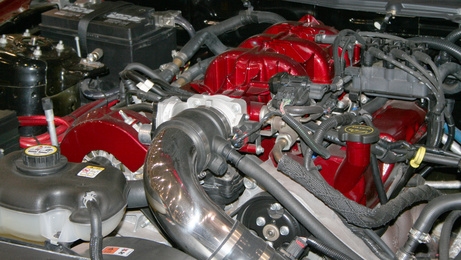
Disconnect the negative battery cable using the proper sized wrench.
Remove the right side cooling fan by disconnecting the electrical connector hooked to the fan. Remove the fan clips that hold the wiring harness, you can do this by pulling with your hands. Remove the fan assembly bolt using a ratchet and the correct sized socket.
Remove the power steering hose from the pump using the correct wrench. Remove the power steering hose nut using a ratchet and the correct size socket. Remove the manifold for the refrigerant by removing the mounting bolt with a ratchet and correct size socket.
Disconnect the refrigerant lines using the correct size wrench. Disconnect all electrical connectors from the pressure cut off switch as well as the compressor clutch by pressing the release tab on the connectors and pulling.
Remove the wiring harness from the compressor. Remove the mounting bolts for the compressor with a ratchet and the correct size socket. Lift the compressor from the bracket. Draining all refrigerant out of the compressor and into a measuring container.
Deliver to EPA approved air conditioning facility to remove refrigerant.
Disconnect the negative battery cable using the proper sized wrench.
Drain the cooling system by loosening the drain plug on the bottom of the radiator.
Remove the lower radiator hose from the thermostat housing and radiator by pinching the hose clamp with a pair of pliers. Remove compressor mounting bolts using a ratchet and the correct size socket. Remove the upper support for the radiator with a ratchet and correct size socket. Remove both cooling fan bolts with a ratchet and correct socket. Remove the fan shroud bolts with a ratchet and correct socket and push fan shroud forward.
Remove the manifold with a ratchet and correct size socket. Remove refrigerant manifold tubing with correct sized wrench. Remove electrical connectors from the pressure cut off switch and compressor clutch by pushing the release tab and pulling. Remove the wiring harness from the compressor.
Remove the oxygen sensor electrical connector by pressing the release tab and pulling. Remove the top compressor mounting bolts with a ratchet and correct size socket. Lift the compressor from the bracket.
Drain all refrigerant from the compressor into a measuring container and do not discard.
Drain all oil in new compressor into a new measuring container. Check to see if the old compressor oil amount was three ounces or less if so the new compressor should receive six ounces of new compressor oil. If the old compressor oil amount was more than five ounces then add that amount shown to the new compressor.
Set new compressor into mounting bracket and install mounting bolts using ratchet and correct socket.
Reinstall wiring harness into compressor bracket by pushing tabs into the holes. Reconnect all electrical connectors to compressor.
Reinstall refrigerant manifold and bolts using ratchet and correct size socket. Reinstall manifold lines using correct sized wrench.
Reinstall the power steering hose and mounting nut using the correct size wrench. Reinstall the fan assembly and bolts using the correct sized ratchet and socket. Reinstall wiring harness and mounting clips by pressing clips back into tabs.
Reinstall fan electrical connector. Reinstall negative battery cable using correct sized wrench.
Take vehicle to EPA approved air conditioning shop to have system recharged.
Drain all oil in new compressor into a new measuring container. Check to see if the old compressor oil amount was three ounces or less if so the new compressor should receive six ounces of new compressor oil. If the old compressor oil amount was more than five ounces then add that amount shown to the new compressor. Set new compressor into mounting bracket and install mounting bolts using ratchet and correct socket.
Reinstall wiring harness into compressor bracket by pushing tabs into the holes. Reconnect all electrical connectors to compressor.
Reinstall refrigerant manifold and bolts using ratchet and correct size socket. Reinstall manifold lines using correct sized wrench.
Reinstall fan shroud and bolts using ratchet and correct size socket. Reinstall cooling fan bolts with ratchet and correct size socket. Reinstall upper radiator support and bolts with a ratchet and correct size socket. Reinstall mounting bolts for the compressor using a ratchet and correct size socket.
Reinstall lower radiator hose onto radiator and thermostat housing using pliers to clamp hose. Refill cooling system with 50/50 coolant water mix.
Reinstall negative battery cable using correct wrench.
Deliver to EPA approved air conditioning shop for an air conditioning recharge.