The exhaust manifold on a Honda is responsible for clearing the exhaust gasses from the combustion chamber. Dampness and the heating and cooling of the exhaust manifold can make the metal rust, fatigue and crack. A crack in the exhaust manifold so close to the engine will result in an extremely loud exhaust leak. Not only is this a nuisance to the driver, in most cases it is also illegal.
Apply a generous coat of penetrating oil to the nuts and bolts on the exhaust manifold and the down-pipe. Let it soak in for about an hour before starting the repair.
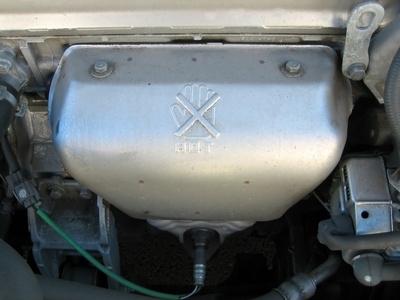
Disconnect the electrical connector for the oxygen sensor. Remove the oxygen sensor using a 7/8-inch wrench. Remove the exhaust manifold heat shield.
Remove the nuts that secure the manifold to the exhaust pipe. Remove the nuts that secure the exhaust manifold to the head using a crisscross pattern, starting in the center.
Scrape any gasket material that may be left behind off the head with a putty knife.
Install the new gasket onto the head. Slide the replacement exhaust manifold onto the bolts. Install the nuts snug onto the studs.
Tighten the nuts on the studs starting in the center and use a crisscross pattern while working your way to the outside nuts. Install a new gasket onto the bottom of the exhaust manifold. Install the down-pipe onto the exhaust manifold and tighten the nuts.
Install the heat shield. Insert the oxygen sensor into the hole and tighten it. Reconnect the electrical connector.