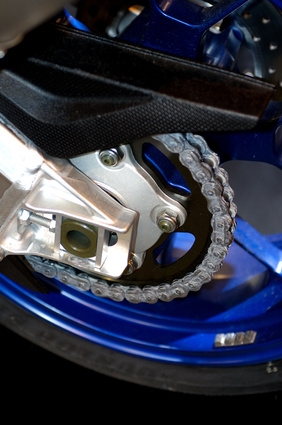
Motorcycle chains must be at the proper tension to drive the bike properly. Too much slack in your chain can cause a myriad of problems, such as decreased power transfer and chain slap, and it may even fall off completely at higher speeds. Unfortunately, most aftermarket motorcycle chains are sold to accommodate many different model motorcycles and are meant to be shortened during the installation process. Learn how to remove a link from your new chain and save time and money over waiting for the local shop to do it for you.
Refer to the owner's manual for your bike to determine how many links your chain should have. Count the links on the chain and determine how many links you need to remove.
Set the chain in a motorcycle chain tool at the link that you wish to split. Twist the handle of the chain tool to push the pin through the link. Be careful not to remove the pin completely as you will need it to put the chain back together later. Simply push the pin far enough to separate the chain links.
Pull the excess links apart from the rest of the chain and set them aside. Wrap the chain around the front and rear sprockets of the motorcycle.
Reset the handle of the chain tool and set the two ends of the chain together in the tool. Twist the handle of the chain tool to push the pin through the links, thereby connecting them. Be sure an even amount of pin is showing on both sides of the chain or the link may not pivot the way it is supposed to.