A worn out or blown out gasket in your General Motors 3.8 upper intake may cause oil, vacuum and coolant leaks. This leads to more serious problems and repairs if the failed gasket is not quickly replaced. Prevent expensive engine repairs by replacing the intake gasket yourself, following an organized and systematic approach. Once you have the correct replacement for your particular vehicle model, prepare the upper intake for removal.
Lift the front wheels with a floor jack and support it on two jack stands.
Place a drain pan under the engine in the direction of the lower radiator hose. Slide the lower hose clamp at the engine side toward the radiator with a pair of slip joint pliers and detach the hose at the engine side. After the coolant has drained, reconnect the lower hose and secure it with the clamp using the slip joint pliers.
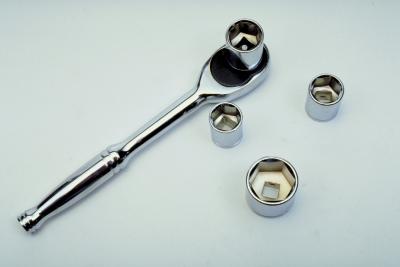
Detach the black (negative) battery cable, fuel injection sight shield and air cleaner duct, and unplug the passenger’s side spark plug wires from the ignition control module. Use a wrench, ratchet, ratchet extension and socket.
Wrap a shop rag around the fuel pressure test port. This is the tire-valve-like component at the end of the fuel rail. Depress the valve with a small flat-head screwdriver and catch the spray of fuel with the rag to relieve the fuel system pressure. Loosen the fuel tank filler cap.
Remove the fuel rail assembly, the heat shield from the exhaust gas recirculation (EGR) harness and the upper bolt from the throttle body bracket, then disconnect the brake booster vacuum hose from the upper intake manifold. Use a ratchet, short ratchet extension and socket.
Tag and unplug all the electrical connectors around the upper intake manifold that might interfere with the manifold removal, then detach the bracket holding the cables for the accelerator and cruise control to the throttle body using a ratchet and socket.
Unfasten the upper intake manifold mounting bolts gradually following a star pattern. Start at the middle section and work your way out toward each end of the upper intake. Use a ratchet, large ratchet extension and socket.
Lift the rear upper manifold about an inch or so and slide the manifold forward, away from the throttle body. Then remove the manifold. Carefully lay the manifold on a workbench, look how the gasket is positioned on the bottom of the intake and remove the gasket.
Compare the old gasket with the new gasket and make sure they both have the same configuration. Secure the new gasket to the upper intake manifold with the alignment pins at the bottom.
Lower carefully the upper intake manifold onto the lower intake manifold, aligning the pins at the bottom of the upper intake with their corresponding holes on the lower manifold.
Clean the upper manifold mounting bolts with a wire brush, apply thread lock compound to the threads. Install the bolts finger tight. Tighten the bolts in three steps, starting with the bolts in the middle of the intake and working you way out toward the ends, following a star pattern. Tighten the bolts to 30-inch pounds, then to 60-inch pounds and to 89-inch pounds, using a torque wrench, large ratchet extension and socket.
Plug all the electrical connectors you had to disconnect and install the bracket holding the cables for the accelerator and cruise control to the throttle body using the ratchet and socket.
Connect the brake booster vacuum hose to the upper intake manifold, the upper bolt to the throttle body bracket and the heat shield to the EGR harness, then install the fuel rail assembly.
Connect the spark plug wires to the ignition control module on the passenger’s side. Install the air cleaner duct and fuel injection shield, and attach the black (negative) battery cable. Use the wrench, ratchet, ratchet extension and socket.
Lower the front of your vehicle and tighten the fuel tank filler cap.
Replace the cooling system with a new 50/50 mixture of antifreeze and distilled water.