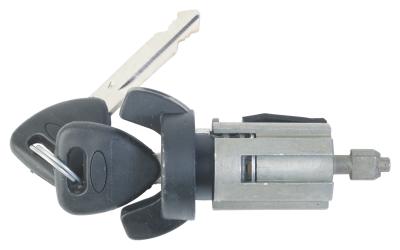
Replacing the faulty ignition switch on your 1997 Chevy Cavalier is a simple procedure. However, if your Cavalier model comes equipped with an Air Bag system, you need to follow a safety procedure. Still, you do not have to let that bad switch leave you stranded. With the help of a few common tools you may already have in your tool box, you can safely install the new switch in a matter of minutes.
Point the front wheels on your Cavalier straight ahead. Then remove the ignition key from the ignition switch.
Open the hood and disconnect the negative battery cable with a wrench. This is the cable connected to the battery post with the negative sign next to it.
Pull the Air Bag fuse from the fuse block in the engine compartment.
Remove the steering column panel from under the column using a Phillips screwdriver.
Locate both yellow two way connectors at the base of the steering columns. Then separate the plastic rod lock (Connector Position Assurance [CPA]) from each of the connectors and unplug both wires.
Separate the steering column from the instrument panel. Use a ratchet, ratchet extension and socket. Carefully lower the column from the panel.
Locate the ignition switch at the base of the steering column and unplug the wire harness form the switch.
Unscrew the two mounting screws from the switch using a small ratchet and deep socket. Then remove the switch assembly from the steering column.
Position the new ignition switch assembly in place on the steering column.
Start the two switch mounting screws by hand using the deep socket.
Tighten the two switch mounting screws using the small ratchet and deep socket.
Plug the wire harness to the ignition switch assembly.
Attach the steering column to the instrument panel using the ratchet, ratchet extension and socket.
Plug in both yellow two way connectors and secure each connector with the CPA.
Install the steering column filler panel under the column using the Phillips screwdriver.
Install the Air Bag fuse to the fuse block in the engine compartment.
Connect the negative battery cable using the wrench.
Seat on the passenger side and turn the ignition switch to the Run position. Make sure the Air Bag warning lamp on the dashboard flashes seven times. Otherwise, make sure that all the wires you unplugged are properly installed or take your vehicle to a service station to erase any Trouble Codes (TCs) that might have been stored in the computer memory when you disabled the Air Bag system.