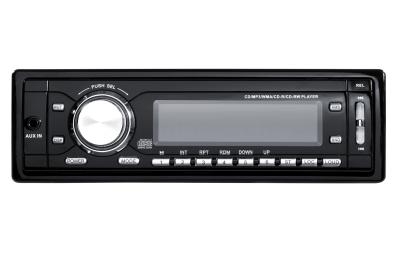
The 1998 Toyota Avalon (and Camry) is equipped with the standard AM/FM stereo deck with CD player. Avalon owners who desire a more capable and powerful car stereo system, or those who need to replace a malfunctioning stock unit, can choose an aftermarket replacement for more power and capability. Once you have chosen the stereo deck, you can have the replacement handled by a professional car audio technician, or swap the decks yourself and save money.
Lift the Avalon's hood and disconnect the cable from the negative battery terminal. Turn the bolt on the cable's clamp two full turns counterclockwise with a 10-mm wrench. Lift the cable from the battery and set it aside. Move to the inside of the Toyota.
Open the center console storage compartment. Pry the forward edge of the compartment's opening from the console with a flat screwdriver or trim panel removal tool. Remove the two screw bolts under the removed panel with a Phillips-head screwdriver.
Grab the dash panel that surrounds the gear selector lever and pull it away from the Toyota's dashboard by hand. Disconnect the wiring connector from the back of the panel (cigarette lighter) and set the panel aside.
Grab the thin panel below the climate controls and pull it away from the dashboard. Remove the two screw bolts behind the panel with a 10-mm socket and ratchet. Pry the vents above the stereo away from the dashboard with a trim panel removal tool. Remove the two screw bolts at the top of the stereo assembly with the 10-mm socket and ratchet.
Slide the stereo assembly from the dashboard. Disconnect the stereo wiring and antenna cable from the back of the unit. Remove the two screws on either side of the stereo bracket with the Phillips-head screwdriver. Slide the stereo unit from the bracket.
Slide the faceplate adapter into the stereo bracket. Replace the two screws into the sides of the bracket to secure the faceplate adapter in place. Slide the new stereo into the faceplate adapter until it locks in place.
Plug the stereo wiring connectors into the wiring harness adapter leads. Plug the wiring harness into the outlets on the back of the new stereo. Insert the antenna cable lead into the FM antenna outlet on the back of the aftermarket stereo.
Slide the stereo assembly back into the Avalon's stereo mounting dock. Replace the screw bolts at the top and beneath the stereo and climate group with the socket and ratchet.
Place the vents into their slot on the dashboard above the stereo. Press firmly to snap them back into the dashboard. Place the thin panel along the bottom of the climate panel and press it into place.
Align the panel that surrounds the gear selector with the dashboard. Plug the electrical wiring connector (for the cigarette lighter) back into the outlet on the back of the panel. Press against the edges of the panel to snap it back into place on the dashboard. Replace the two screws at the forward edge of the center console storage compartment's opening with the Phillips-head screwdriver. Replace the panel over the screws. Close the compartment's lid.
Reconnect the battery and close the hood.