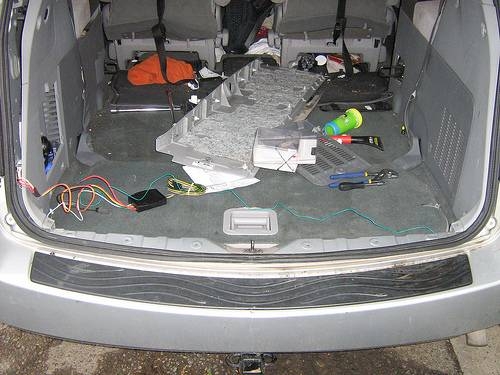
A trailer light pigtail is an electrical connector with four leads attached. Trailer pigtails come in two varieties. Later model vehicles use a harness made specifically for each vehicle, which can be quickly installed and removed with no alterations made to the vehicle's electrical harness. Earlier vehicles use a connector that must be hardwired into the vehicle's electrical system. Before you begin, contact a trailer parts supplier and find out if there is a harness specific to your make and model.
Light-duty trailers use a four-pin connector and always have the same four color wires. The green wire controls the right turn signal. The yellow wire powers the left turn signal. The white wire connects the trailer's ground to the tow vehicle's ground, and the brown wire powers the trailer's taillights.
If you have a later model vehicle and have purchased a vehicle-specific pigtail harness, you must begin by locating the trailer lighting connectors in the vehicle's taillight wiring harness. Look in a service manual or in the instruction manual provided with the pigtail harness, but generally, the connectors will be located behind one of the taillight assemblies or behind the trim piece on the back of the trunk. On trucks, full-sized vans, and SUVs, the connector will usually be behind one of the taillights or along the wiring harness underneath the tailgate. Once you have located the connectors, pull them apart. The trailer pigtail is designed to fit between the connectors and will fit only one way, making it impossible to mess up. Tuck the coupling back behind the the taillights or trim panel or secure it underneath the vehicle with wire ties. Cars and minivans usually route the trailer harness next to the trunk latch and then store the connector in the trunk when not towing. Trucks usually mount the connector with wire ties to the rear bumper. The four-pin connector should have about six inches of extra length in the wires so it can easily connect to the trailer connector. Just make sure it isn't too long or it will drag against the road and could be damaged.

Hardwiring a trailer light pigtail on an older model vehicle is a little more difficult but is not out of the reach of the average home mechanic. You will need a 12-volt test light, a drill and screwdriver bits, some side crimp connectors, a ring terminal, some electrical tape, and a self-tapping sheet metal screw. Begin by laying out the four-pin connector so there is about six inches of wire between it and the vehicle's rear bumper. If you are wiring a car or minivan, locate a spot on the vehicle's body just inside the trunk lid or rear doors. On a truck, full-sized van, or SUV, locate a spot underneath the tailgate on the vehicle's frame, not the rear bumper. You will be installing a screw here for the trailer's ground wire, so make sure you are not drilling into the gas tank or any wiring harness. Cut the white wire on the pigtail harness so that it's long enough to reach from the four-pin connector to the ground screw. Remove 1/2 inch of insulation from the end of the wire and slide it into the ring terminal. Use an electrician's pliers to crimp the terminal closed. Place the ring terminal on the self-tapping screw and drive it into the vehicle's body or frame.

Next, access the left turn signal wiring harness on the vehicle and use the test light to find the left turn signal lead. Connect the ground clip on the test light to a metal part of the vehicle's frame or body. Turn the ignition switch to the run position and turn the left turn signal on. Use the probe on the test light to pierce the insulation on each wire until you find the wire that makes the test light flash with the turn signal. Use a side crimp connector to splice the yellow wire into this wire. Then use the test light to find the right turn signal lead in the right turn signal harness. Connect the right turn signal lead to the green wire in the pigtail harness using a side crimp connector. Lastly, use the test light to find the wire in either the left or right turn signal harness that powers the stop/tail lights. You may need an assistant to sit in the vehicle and operate the brake pedal. Connect this lead to the brown wire on the four-pin connector. Wrap each connection you made individually with electrical tape, then wrap the whole pigtail with electrical tape. Use wire ties to keep the pigtail from scraping against the ground, and run the wires underneath the trim panel if you are working in a car or minivan.
