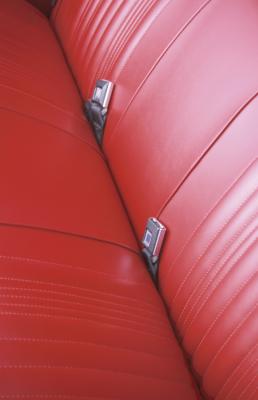
If you are looking for a finished yet durable style for a seat, consider neatly pleated vinyl. The pleats need to be straight, and you give form and depth to the vinyl by gluing on a layer of polyfoam and a layer of muslin. The polyfoam and muslin thicken the material and hold the stitches for the pleat better than vinyl would on its own.
Cut the vinyl to the shape and size of the seat, allowing 1/2-inch extra for each of the pleats (depending on what is being upholstered and the design, pleats might be horizontal or vertical in the vinyl). Use a pattern for the shape, or gently remove the old fabric and use that as a template. Or you can measure the seat and cut the vinyl to an approximate size. Lay the vinyl on the polyfoam and trace the outline, then cut the polyfoam to size.
Spray one side of the polyfoam with aerosol glue, and then press the vinyl on to it, keeping it exactly even on top. Only use a thin coating of the glue to bond the fabrics. Leave to dry.
Mark out the pleat lines as straight channels on the vinyl using a ruler and chalk, which washes off vinyl easily without leaving a mark. Allow 1/2-inch for each pleat. Turn the seat material over so that the polyfoam is on top. Cut enough muslin to the shape of the seat, and glue in place on the polyfoam.
Fold the vinyl at the pleat and begin to sew, either using a sewing machine and 16-ounce polyester thread, or a leather needle with polyester or upholstery thread. Work from the bottom. Use a long stitch and pull each stitch through the vinyl, polyfoam and muslin. Make the stitch tight enough to pull down on the pleat and create the right look in the vinyl. Repeat the process for all the other pleats you need to make in the vinyl.