Brakes constitute an essential component of any vehicle. Faulty or worn brakes can result in poor stopping and lead to accidents. A Dodge Dakota pickup truck has a common front disc brake system with rear drum brakes, and is fairly simple to replace if needed. If it's your first time replacing brakes on a Dodge Dakota, a few tricks of the trade will make this job much easier to accomplish.
Typically, when you think of replacing brakes, it's the brake pads that will be replaced. These are the parts of the brake that are seated within the caliper and push against the rotor to stop the vehicle. When your brakes need changing, this is due to the pad being worn very thin. Removing the pads is best done along with the caliper, especially if the caliper needs changing as well; however, the trick is to move the piston away from the pad. This makes taking off the caliper much easier.
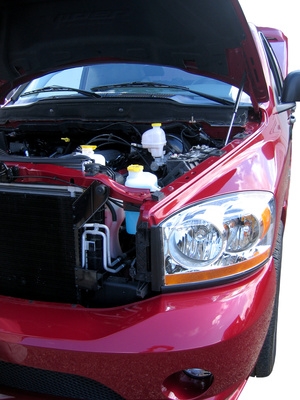
Once you've taken the wheel off and have exposed the brake caliper, look in between the caliper and the rotor. You'll see a round piston wedged against the caliper. Wiggle a long flathead screwdriver in between the caliper and the rotor and pry the piston back. This may take a minute of pushing very hard, but eventually the piston will be pushed away, freeing the caliper.
Once you've removed your wheel and are ready to take off the caliper, a few key points should be made clear. Inspect the bolts on the caliper. Two bolts hold the caliper on, and depending on how old your Dodge Dakota is, they could be seized on, or worn. If the bolt heads appear rounded off or stripped, you'll want to stop at this point and take your truck to a brake repair specialist rather than stripping the bolts further.
If the bolts are good, size up the bolt with the appropriate socket. For a Dodge Dakota, a T-45 Torque bit with a 3/8-inch ratchet will work best. Once the bolts are removed, the caliper may be hard to pull off. The trick here is to depress the bottom clips on the caliper and simultaneously lift up the caliper from the bottom. This will keep you from fighting with the caliper to remove it. Once you remove the caliper, you can remove the pads and replace them.
The brake line is connected to the brake hose by two nuts, the smaller nut on the line can be easily loosened with a 12 mm wrench. The big nut is loosened best with 16 mm wrench. For easier removal, using a transmission or brake "line" wrench will be best, though these tools aren't normally part of a common tool box.
In between the two nuts is a metal clip which must be removed. Often, this thin metal clip is rusted or seized on from moisture. Once the nuts are loose, using a pair of diagonal cutters or needle-nose pliers to wiggle the clip back and forth is the best option in removing the clip. Replacing the hose is a simple reversal of this process.
Several options are possible in bleeding the brakes. Pumping the brakes is the most often used, but this process can cause excessive strain to the master cylinder. Gravity bleeding is the best option for a first-timer, as this is the easiest.
Once you've positioned the pads, new caliper and brake hose onto the vehicle, unscrew the brake bleeder on the top of the caliper. Open the cap on the master cylinder, and wait for the fluid to start dripping out of the bleeder. This process causes air pressure to force out the fluid. Once the fluid is forced out, pour new brake fluid into the master cylinder and wait for clean fluid to drip out of the bleeder. Tighten the bleeder screw first, then replace the cap on the master cylinder.
Rear drum brakes are typically repaired by service specialists because they can be difficult to work on. Though you may never have to replace or repair the drum brakes, it is important to know a few tips nonetheless. A vehicle's rear brakes only makes up 30 percent of the vehicles braking power according to 2CarPros.com, and are greatly compromised when wet.
After removing the wheel, take off the drum and inspect the parts to see if anything is worn or needs replacement. If the material on the brake shoe is depleted to less than 1/8 inch, you should replace the shoes. This will require a special spring removal tool to remove the mounting springs. The tool resembles a pair of pliers with a special notched end to hold the spring. You will also need a special brake shoe removal tool to remove the shoes. This tool is placed over the shoe retainer pins and turned counterclockwise to release the pins and remove the shoes. These tools may be available from some auto parts stores, but they also may have to be specially ordered. During this process you should also remove the dust boot to check for fluid leaks from the wheel cylinder. If you see any fluid, replace the wheel cylinder.