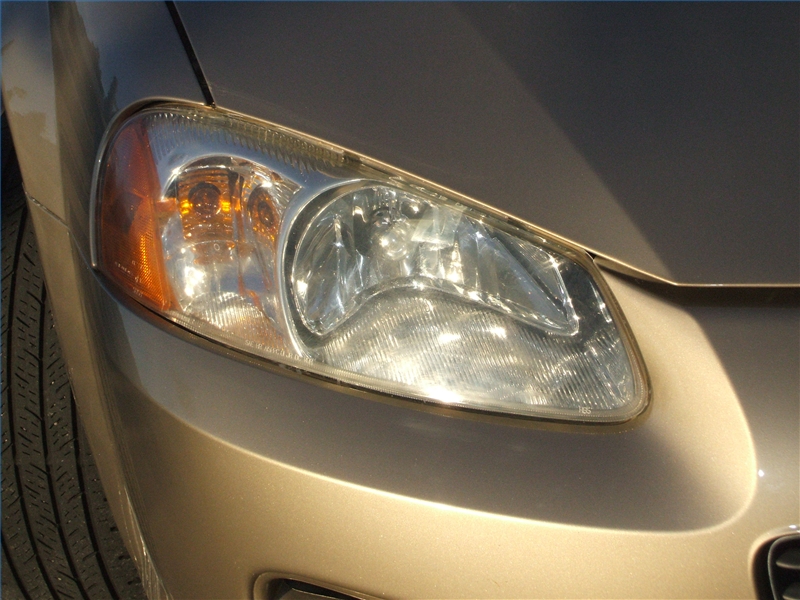
Headlight restoration can make plastic lenses look as good as new, making driving easier and safer. Plastic headlight lenses can yellow and haze from UV rays and weather; this occurs gradually and may not be noticed right away. Normal cleaning will not remove this cloudiness.
Headlight restorer kits are widely available to fix this problem. The one shown here is typical, and allows you to sand and polish the plastic lens to a clear finish. The restoration system includes several disks and polishing compound; you supply the cordless drill. Follow any instructions that come with the kit you buy.
Here's how it's done...
Headlight lens restoration cannot repair damage to the inside of the lens, so inspect the headlight first. Raise the hood, and clean both lenses with a wet towel. Look for any defects inside the plastic. The procedure shown here will only remove hazing and yellowing on the outside of the lens.

Cover the area around the headlight using two layers of masking tape. If the tape won't stick well, clean and dry the area first. This will protect the car from scratches while you work.

Sand the headlight lens using the course pad from the restoration kit. The restoration system shown here starts with a 500-grit disk. For best results:
Clean the headlight to check your progress. The lens should look frosted over its entire surface, and all defects and yellowing should be gone. If not, continue sanding.

Change to a medium pad (800 grit shown here) and repeat sanding the lens to remove the course scratches left from the previous disk. This step will take a little longer due to the finer grit paper. Clean the lens often to find spots you might have missed. Try to get the entire lens to look milky or cloudy.

Switch to the finest grit pad in the restoration kit. This kit uses a gray foam disk that must be wetted before use. Sand with this to remove any medium grit scratches. The headlight lens should start to look much clearer and less cloudy. Continue sanding, making sure to cover the entire lens.

After all course scratches have been removed, change to the final foam polishing pad. Apply a small amount of polishing compound onto the pad, and smear it over the lens before starting the motor, to reduce splashing. Polish the headlight until all cloudiness is removed. Results here depend on how well you did the previous sanding.

Wipe the lens clean, and check for scratches. If any are left, repeat final sanding and polishing steps. Remove the masking tape, and wash the headlights and the front of the car. Enjoy your like-new headlights!
