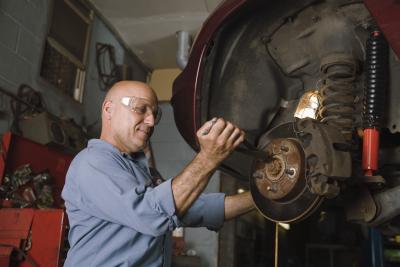
Squealing brakes can be an indication of worn brake pads or a symptom of another issue concerning your vehicle's braking system. Because the brakes are vital to safe motoring, attention should be paid to the noise immediately. Note whether the noise only occurs when the brakes are engaged; or if the brakes emit a constant squeal of noise while driving. Some noise when stopping is considered normal. A constant squealing most likely means that your brake pads need to be replaced. The noise will be accompanied by decreased braking performance and a softer than usual feel to the brake pedal when depressed.
Loosen the lug nuts on the wheel with the socket of the tire iron.
Place the jack beneath the frame of the vehicle and lift the vehicle. Place jack stands under the frame and lower the vehicle onto the stands. Leave enough clearance between the tires and the road surface to remove and replace the wheels.
Remove the lug nuts and take the wheels from the wheel bolts. For the front brakes, turn the steering wheel away from the brake you will fix first: turn the wheel to the left to work on the right brake, to the right for the left brake.
Remove the caliper bolts. The caliper is the metal apparatus that contains the brake pads and pistons. It sits surrounding the rotor. The two bolts are on the outside of the inside wall of the caliper (for a right-side caliper, the bolts are on the left. Left-side caliper bolts are on the right). Use a 13-mm wrench or Allen wrench to remove the caliper bolts.
Pull the caliper from the rotor and inspect the rotor for scoring. The brake-pad wear indicators rub against the rotor when the pads are worn to the point that they require replacement (the cause of squealing). If the rotor surface is gouged as a result of significant indicator scraping, the rotors need to be resurfaced or replaced.
Open the brake-fluid bleed valve with the 10-mm wrench. The bleed valve is near the upper caliper bolt. Two full turns of the valve will open it. Place a drip pan beneath the brake to capture any leaking fluid.
Remove the brake pads from the caliper. The pads will be fixed to the caliper sides by thin metal clips. The clips will slide from the caliper for some vehicle models. For others you will need to pry the clips from the caliper using a flat screwdriver.
Open the caliper piston or pistons. There will be one or two metal rings protruding from the inside of the caliper wall. Place the C-clamp on the piston(s) and the side of the caliper. Screw the C-clamp to force the piston(s) against the caliper wall. Brake fluid will be expelled through the bleed valve and into the drip pan below.
Apply brake grease to the surface of the caliper side once the pistons have been forced flush on the side of the caliper.
Place the new brake pads onto the sides of the caliper. The brake pads, once installed properly, will face each other. The curve of the pads will mirror the curve of the caliper.
Place the caliper around the rotor and replace the caliper bolts with the 13-mm or 3/8-inch Allen wrench (depending on the vehicle). Close the brake-fluid bleed valve with the 10-mm wrench.
Turn the steering wheel so that the wheels are pointed forward. Replace the wheel onto the wheel bolts. Screw on the lug nuts by hand.
Remove the jack stands and lower the vehicle to the ground. Tighten the lug nuts with the socket on the tire iron.
Fill the master cylinder with brake fluid. The master cylinder is found under the hood of the vehicle near the windshield. The kind of brake fluid needed for your vehicle can be found in its owner's manual.
Press the brake pedal repeatedly. The pedal will easily be pressed to the floor of the vehicle the first time you press it following the brake pads replacement. Press the pedal until the response is normal.