A common feature on modern cars, including all Toyota models, is the cabin air filter. The cabin air filter filters the air that comes in through the cabin air intake and comes out through the vents and defrosters in the passenger compartment of the Prius. This reduces the amount of dust and dirt that blows into the passenger cabin and can even reduce allergens to make the ride more comfortable. If you don't change this filter when it becomes clogged, however, it can reduce the air flow coming through your vents, reducing the effectiveness of your heat and air conditioning.
Open the glove compartment on the passenger side of the car and take everything out.
Unscrew the screw located on the right side of the open glove box hatch. Once the screw is removed, pull to the right on the retaining bar surrounding the mount for the screw and move it to the side.
Squeeze the sides of the open glove box hatch toward the center and gently pull forward toward you. Once the sides of the hatch clear the sides of the opening in the dash, the whole glove compartment will come forward and hang down, exposing the space behind it.
Look for a rectangular, black plastic compartment in the area behind the glove box. Remove the hatch on the front of this compartment.
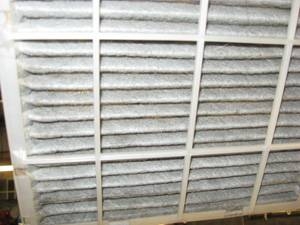
Note the direction of the arrow printed on the outside frame of the filter in the compartment, then pull the filter out. If you're not sure if it's time to replace the filter, you can examine it now to see if it still has some life left in it. If so, you can put the old one right back in.
Put the new filter in if the old one is too dirty. Make sure the arrow on the frame of the new filter is pointing in the same direction as the arrow on the old filter was.
Replace the hatch on the cabin air filter compartment.
Lift the glove compartment back up and squeeze the sides together again as you push it back into place.
Lift the retaining bar you moved in Step 1 and put the hole back over the screw mount. Replace the screw you removed in Step 1.
Put everything back into the glove box and close the hatch.