 Drew Hardin
Contributor
Drew Hardin
Contributor
The first step in treating rust is keeping it from forming, which means keeping your truck's metal painted, plated, or otherwise protected so oxidation can't get a foothold. If it's already too late and you see those tell-tale bubbles under the paint or surface rust spreading across a panel or framerail, you've got to take immediate action. Once rust starts, it'll keep growing until your sheetmetal looks like that really old Swiss cheese you found buried in the fridge behind last week's meatloaf.
How you deal with your rust problem depends on how badly the rust has damaged the metal. If the condition is serious enough to have poked holes and/or compromised the metal's integrity, then surgery-cutting away the affected metal and replacing it-is the only recourse you have. If the rust is just superficial and the metal is still sound, then you can remove or neutralize the rust with mechanical or chemical treatments, and then treat the area to keep rust from forming again. Here's a quick rundown of each of these strategies.
We'll start with the worst case. If you're seeing daylight through the metal, the rust is bad enough that the affected area should be trimmed away and replaced. Anything from a grinding wheel or cutting disc to a plasma cutter or torch can be used to do the cutting. If you're using heat, be sure to stay clear of upholstery, wiring, fuel lines, and other components that could be damaged or catch fire. Don't just cut out the rust; cut about 11/42 inch or more beyond the obvious damage so that you're left with uncontaminated metal to work on.
Speaking of welding, opinions vary as to which weld type is best for this kind of repair. John Morrow of Johns Customz & Performance, an automotive restoration and performance shop, prefers MIG-welding as it's easier for him to control the heat in the weld. Jim McSorley, head fabricator at Land Cruiser specialty house TLC, chooses TIG welding since the TIG weld is easier on a metal finish. Adds TLC's Jonathan Ward, "Be sure you match the [TIG] filler rod to the same kind of metal you're welding, so the welded area remains as pliable as a virgin panel."
Patch panels can be either butt- or flange-welded to the repair area. The flange weld, where the new piece overlaps the old, is generally stronger, though you'll have to smooth the overlap area to get rid of its visible seam. Morrow recommends putting the patch underneath the original panel so you'll have a smaller area to cover with body filler. A butt weld won't have that kind of overlap, but you will have to carefully trim the patch panel so that it's just slightly smaller than the hole, and then be careful to fill the gap with weld. Morrow feels that butt-welding is best done by experienced welders only.
If the damage to the panel is extensive enough, it may be easier to replace it than patch it. The good news is that plenty of companies offer reproduction floors, tailgates, fenders, and other body parts. Some even specialize in particular makes, like James Duff for Broncos; Heritage Sheet Metal for Land Cruisers; and Year One, Classic Industries, and Goodmark Industries for Chevy and GMC trucks. (Those last three deal primarily in musclecar restorations, but each has pickup parts in its inventory.)
Jerry
"That undercoating, that's a rip-off, isn't it, David?"
David, a car salesman
"Oh, we don't even know what it is."
Rust-prevention talk hit the mainstream when Seinfeld took a jab at it in an episode called "The Dealership." And it's the question that will not die: Do you need to buy the extra protection? To get the answer, we hit up Toyota, GM, and DaimlerChrysler for the scoop on what happens at the factory to eliminate modern-day rust-buckets.
Back in the '60s and '70s, safer driving in winter became a national obsession-at least in the northeastern U.S. and the southeastern part of Canada. In fact, Canada created the Canadian Corrosion Code (now obsolete), which required a corrosion check to be part of the vehicle inspection. Even some U.S. states experimented with such a code. Vehicles did indeed leave the factory back then with some rust protection-but not a lot. Most of the sheetmetal was bare steel with some areas hosed down in dip primers or Zincrometal coating, and there was wax in cavities. But joints weren't covered to prevent water intrusion, and junk could build up throughout the vehicle because of poor drainage, eventually causing corrosion. Yet keep in mind that this was back when vehicle life expectancy wasn't intended to be much beyond 5 years.
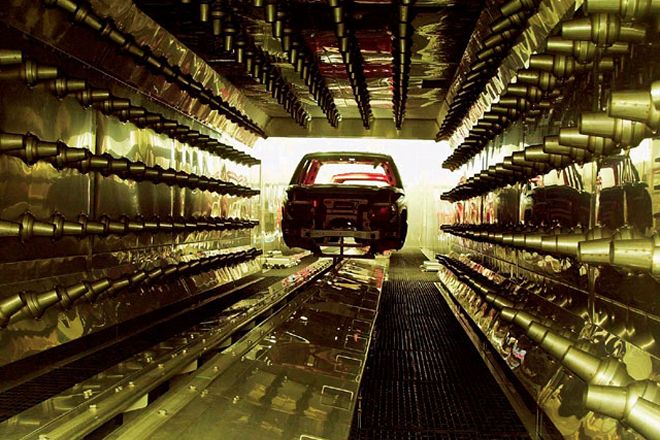
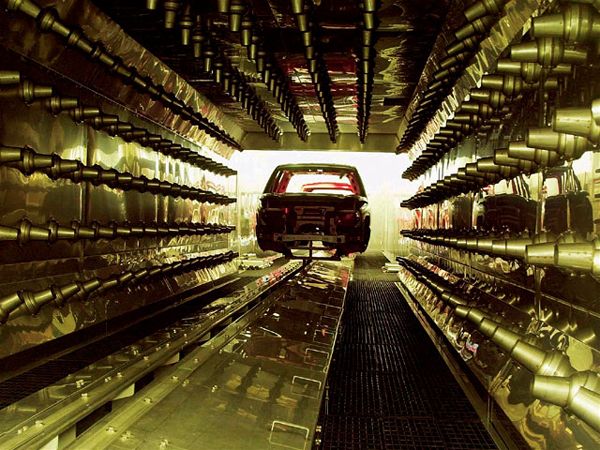
But then automakers switched steels. Rather than building vehicles with untreated mild-steel exterior panels, they teamed up with the steel suppliers, paint suppliers, and other suppliers to develop steel with the rust-fighter already on it before the body panel even was stamped out. The result was a precoated steel sheet-specifically, galvanized (hot zinc-dipped) and galvannealed (cold zinc-coated). Zinc has the power to heal thyself; scratch or ding the paint, and the zinc will "grow" to protect the steel base material beneath the surface. While automakers already were using some galvanized steel prior to this, that version was more difficult to paint and weld, so its application tended to be hard-to-see places.
Immersion paint systems (phosphate formulas) also were utilized, as was an electrodeposition coat (EDC or e-coat, which is primer that covers every inch of steel panel, done through an electrical-current "bath"). This ensured that the body cavities were painted (since it wasn't so easy to get to those through spray primer). Automotive paints and clearcoats also improved, becoming more advanced at resisting scratches. Heck, even the emblems and exterior trim switched to being attached via adhesive rather than locating pins that would make holes in the panels.
Vehicle design improved too, such as with smaller gaps between panels, watertight seams, and fitted, nonmetal bumper covers. Automakers also ensured that the paint wasn't cut at any point during the build, and that dissimilar metals weren't being joined in such a way that there'd be a bad galvanic interaction. The good galvanic interaction that keeps galvanized steel from corroding can go awry when the wrong metals are mated. Some of the larger cast-iron underbody chassis pieces are left untreated, but any surface corrosion that makes its way onto them is simply cosmetic, nothing that will affect performance.
One more thing: It hasn't been just the factory that's helping the cause. A lot less road salt is being used today. Earth-friendly products have replaced that mineral, and they're much kinder to paint. Even street sweepers are contributing. The paint on fenders, rocker panels, and bumpers is positioned to get pretty abused from dust, sand, and other particles, but that parking ticket you received between 8 and 10 a.m. on Tuesday was worth it in the long run since the streets are cleaner for your truck.
But back to that undercoating. Skip it-it really won't add any value to your truck. Does all this factory prep mean it'll never rust? We would never say never, but it has a good chance of living a long, cancer-free life.
-Tori Tellem
Hopefully your rust situation isn't so dire that you need to cut up your truck. If the rust is superficial and the metal is still in good shape, you can remove the rust and then treat the affected area with paint or a sealer to keep the rust from returning.
Rust removal takes two forms: mechanical or chemical. "Mechanical" means grinding or otherwise abrading the oxidation off of the metal. If you're dealing with just a thin covering of surface rust (which is usually a bright orange), you can sand it off using coarse sandpaper on a sanding board, block, or power sander. For deeper rust or hard-to-reach areas, a stripping disc or cleaning wheel mounted on an electric or pneumatic drill should do the trick.
If your rust problem isn't concentrated in one area, you may want to consider having the rusty parts-or your entire truck-media blasted. Notice we didn't say "sand" blasted. There's a variety of different blasting media used on automotive surfaces these days; sand isn't used much anymore except for stripping framerails, axletubes, and other rigid components that won't deform when hit aggressively. For body parts, it's best to use a medium like aluminum oxide or DuPont's StarBlast, which are aggressive enough to cut through rust but won't warp the metal (unless your blaster doesn't know what he's doing). There are even gentler media available, like baking soda and glass beads, but these won't remove rust, just the paint around it.
Professional blasting can be spendy. Job prices vary, but expect a bill in the thousands, not hundreds, of dollars if you're doing an entire vehicle. Plus, you'll need to prep your truck prior to blasting by gutting the interior and removing all the exterior trim and glass. What you'll get back, though, is a thoroughly cleaned truck in essentially virgin sheetmetal. All the rust will be gone, and you can make any necessary sheetmetal repairs on fresh, healthy metal.
Chemical rust treatments take many forms. The one you choose depends on the extent of the rust damage. For example, surface rust can be treated with a rust sealer, like POR-15 or Eastwood's Rust Encapsulator. These products can be applied directly onto the rusted surface, after you've cleaned off any loose oxidation, to form a barrier between the metal and moisture in the environment. These sealers don't get rid of rust, but they prevent any further corrosion.
The chemical products that remove rust fall into two general types: acid-based or acid-free. The more aggressive of the two are the acid-based solutions. Many, like Naval Jelly or Eastwood's OxiSolv, contain phosphoric acid that eats away at the rust. The problem is they'll also eat away at the base metal if you leave them on too long, and they can damage other materials they come in contact with, including plating. So when using these products, it's best to wipe or brush them on, let them work for a few minutes, then neutralize them (with water, ironically) and assess if you'll need more treatments. Heat affects how quickly these solutions work, so the job will take longer in winter than summer. In fact, Eastwood says you can heat its OxiSolv to 100 degrees F to speed the process even further.
Using water to neutralize acid-based rust removers can cause the formation of what's called flash rust. This thin layer of oxidation can be removed by wiping it with a rag dipped in the remover, followed by a wipe with a rag coated in acetone or a prepaint prep solution, according to Eastwood's John Sloane. "If you're gentle enough with the water rinse you'll leave a minute phosphate coating behind that will keep rust away," Sloane added.
The acid-free removers work on rust using a process called chelating, in which the chemicals bond to the oxidation and lift it away from the metal. This is gentler-and more time consuming-than an acid wash, and it typically requires submerging the rusted part into the solution. According to Sloane, an acid-free rust remover, like Eastwood's Rust Dissolver, is a better choice than an acid-based one "if you're talking about cleaning rust from an area with a pinched seam, such as a door skin wrapped around a door frame. The dissolver won't leave an acid residue behind that could be reactivated [and ruin a fresh paint job] by moisture due to condensation."
Speaking of paint, it's best to cover freshly cleaned sheetmetal with a self-etching primer, as the acid in the etching primer promotes adhesion between the bare metal and subsequent paint layers.
Of course, paint is just the most obvious of the coverings you can apply to your newly rust-free sheetmetal. You could powdercoat the sheetmetal, cover it with a spray-on bedliner, the list goes on. But that's another story.


