"My name is Jim and I'm a gauge-o-holic!" Now you're supposed to answer back cheerfully, "Hi, Jim," and wonder why a fella would want to add nine monitoring instruments to a truck that already has factory instruments to cover the basics. Knowledge, of course! Factory gauges seldom give you a numbered reading, are heavily dampened, and notoriously inaccurate.
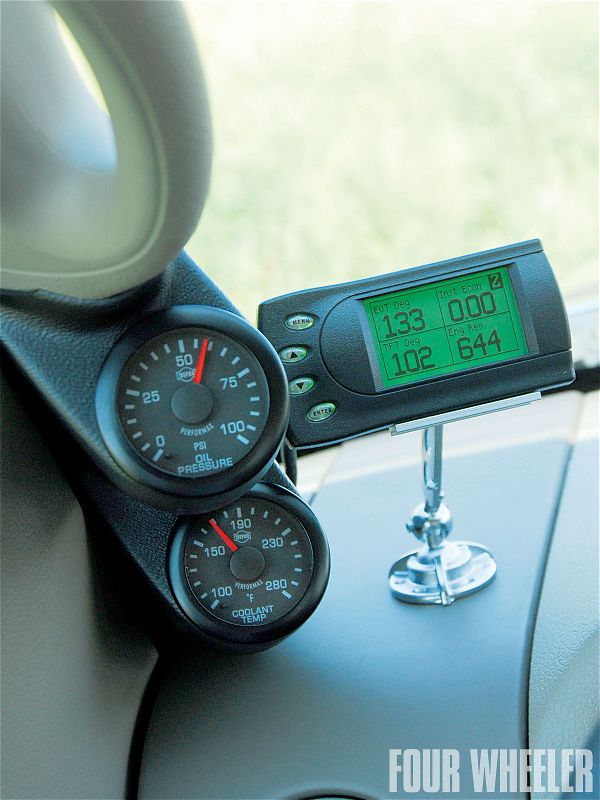
 The biggest problem with nine new Isspro gauges is staying focused on the road. Fortunately, Isspro offers data logging, so you can view and save the readings for later study.
Mounting nine gauges in a truck usually involves a forearm-sized wiring bundle and serious mounting challenges. Well, the mounting challenges are still there, but Isspro's new Performax system cures the wiring part and adds a lot of useful capability to boot. Isspro currently has 37 gauges available for this system, with more coming.
Isspro is a name long known and revered in the diesel performance realm, but recently tapped Four Wheeler to test the waters in a new area by installing their Performax system on a gas-powered truck. Some of their gauge line is definitely diesel-oriented, but many are universal and some of the diesel stuff is useful to a gassers. For a Four Wheeler tech writer, some of these more unusual instruments will prove useful for product testing down the road, as they could be for any home gearhead with "tinkeritis."
The Skinny On Performax
The heart of Performax is the ESP, or Electronic Signal Processor, a computer that takes inputs from up to 17 different sending units and runs them though a single wire that can be daisy-chained to up to 17 gauges. Each gauge has a chip that accepts only the coded signal it's programmed to read. The other two wires are a ground and the lighting wire.
You don't have to have 17 gauges, either. If you have room for only a few, you can install all the sensors but swap the gauges in or out to monitor what you think is important for the job at the time. Diff temp, for example, isn't all that important unless you are towing, but a vacuum gauge is more important for monitoring fuel economy day-to-day. When you tow, you simply swap the vacuum gauge out for the rear axle temp.
The gauges themselves are super accurate stepper-motor types, with each step equaling one-tenth of one degree. They snap into the hole rather than using clips on the back, making them easy to move around. Plus, these instruments are LED illuminated, so they will stay lit virtually forever without onerous bulb changing. Isspro's factory is in Portland, Oregon, and they also offer custom gauge faces. For an extra charge, they can put just about any color, graphic, or even a photo onto the gauge face.
Installing and Testing Performax
We installed the Performax system and nine gauges into our long-suffering '05 F-150 HD testbed that does double duty as a farm truck. The fact that a magazine writer can do this unaided is proof of how easy a job it was. We chose to install the following instruments: oil pressure, coolant temp, trans fluid temp, rear axle oil temp, fuel pressure, volts, exhaust temp, exhaust backpressure, and air temp. The first six on the list probably make sense to you. Exhaust temperature is vital to diesel owners, but is seldom seen on gassers. We'll use it for some custom EFI tuning. The backpressure gauge will help us test exhaust systems, and air temp will help us measure the incoming engine air for testing CAI systems. That sensor will also be a "rover," and may be temporarily moved to other locations.
Mounting nine instruments was a challenge. We wanted to hide the depth of our "gauge-o-holism" by doing a clean installation. We found a few mounting products specific to the 2004-08 F-150s, but nowhere near enough to mount nine gauges in a super-clean way. We adapted and found some good generic compromises.
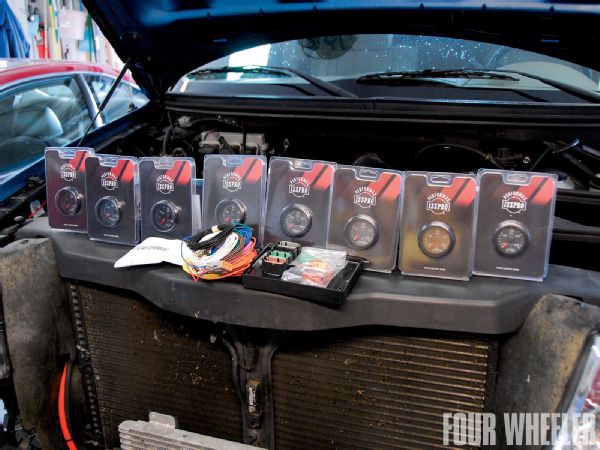
1. Here are eight of the nine gauges we installed, the ESP wiring, and the ESP. Each gauge kit includes a sensor, a wiring harness to the ESP and, as needed, sensor adapters. They are standard 21/16-inch-diameter (52mm) instruments.
2. Perhaps the hardest part of our job was drilling the exhaust manifold for the exhaust temp thermocouple and backpressure fitting. We removed the plastic inner fender to gain access to the manifold on the driver's side. Using a letter "R" bit, we drilled the holes with a greased bit to catch as many chips as possible.
We drilled through the last part with the engine running to blow out what chips the grease didn't catch. This is a "measure twice, cut once" type of job.
The big caution we would offer on late-model trucks is to take the time to find good power sources and to tie them in cleanly into the system. New trucks have complicated electrical systems, and picking up power from the wrong place could create electrical problems. Avoid using Scotch-Lock-type connectors because they are not always a reliable connection and are subject to corrosion if exposed to underhood moisture. The rest of this install is best described with the accompanying photos.
Thus far, the gauges are proving very useful and informative. The only problem is that so many can be distracting. We're missing some sweet looking scenery.
This story is dedicated to Curt Bourgoine, Isspro's Aftermarket Sales Manager, who went the extra mile to see this story completed, but lost his battle with cancer before it was.
3. For the backpressure sensor, you need at least 12 inches of minimum 3/16-inch-diameter tubing to keep the sensor cool. We used about 18 inches and made a nice coil that's in the fan airflow.
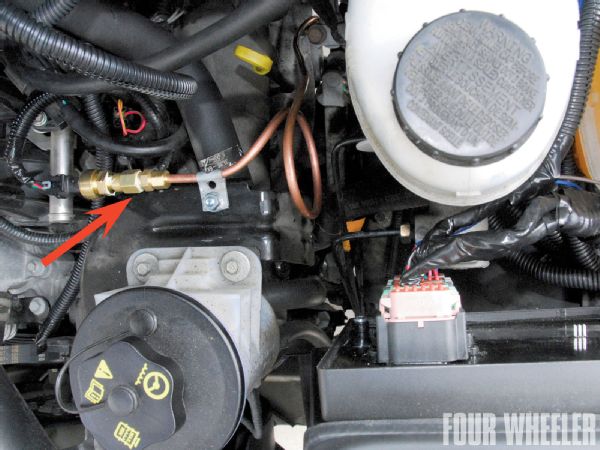
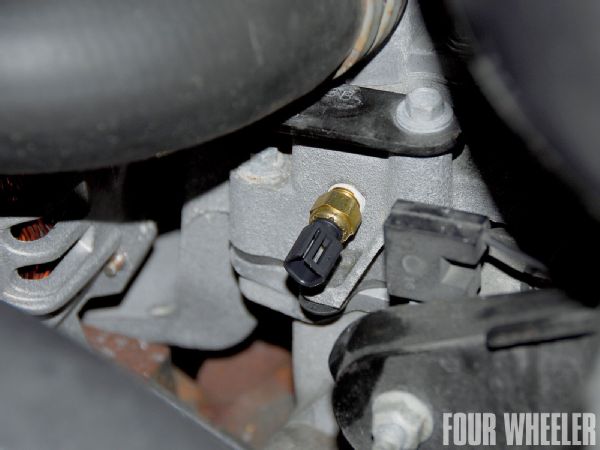
4. We learned the 5.4L engine in our '05 does not have a coolant temp sensor of the normal type, so we couldn't tee into the same area with a new sensor. The Ford setup interprets cylinder head temp to give a coolant temp indication on the factory gauge. In order to install the Isspro sensor, we drained the cooling system below the level of the thermostat housing, removed the thermostat, and very carefully drilled and tapped a hole for the 1/8 NPT sensor in the coolant crossover manifold. Use Teflon sealer to ensure no leaks.
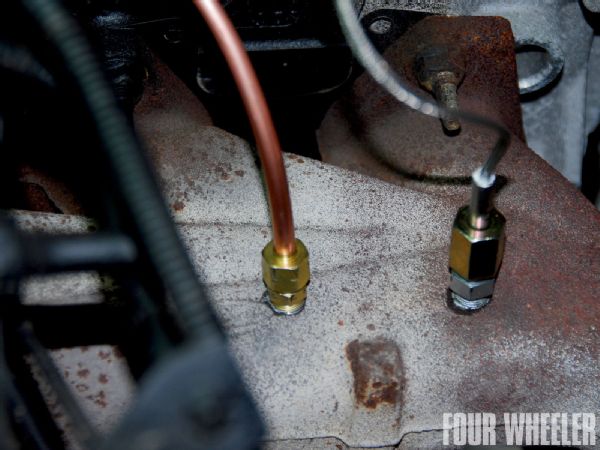
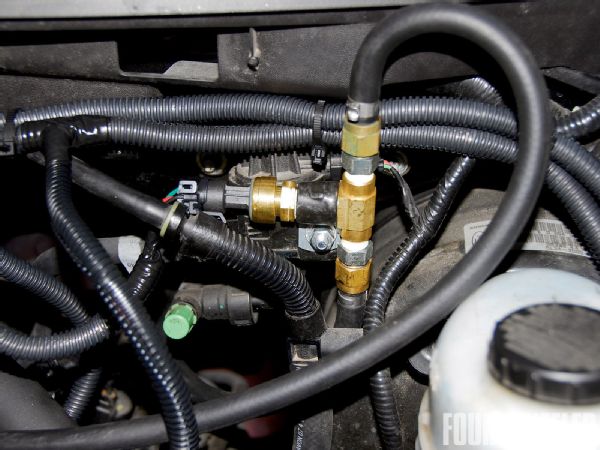
5. The fuel pressure sensor required a little thought to avoid a potential fuel leak. We found factory fuel line connectors, spliced them onto high-pressure fuel line using crimp-type clamps, and added a brass tee for the sensor. We then mounted the tee and sensor solidly to a bracket.
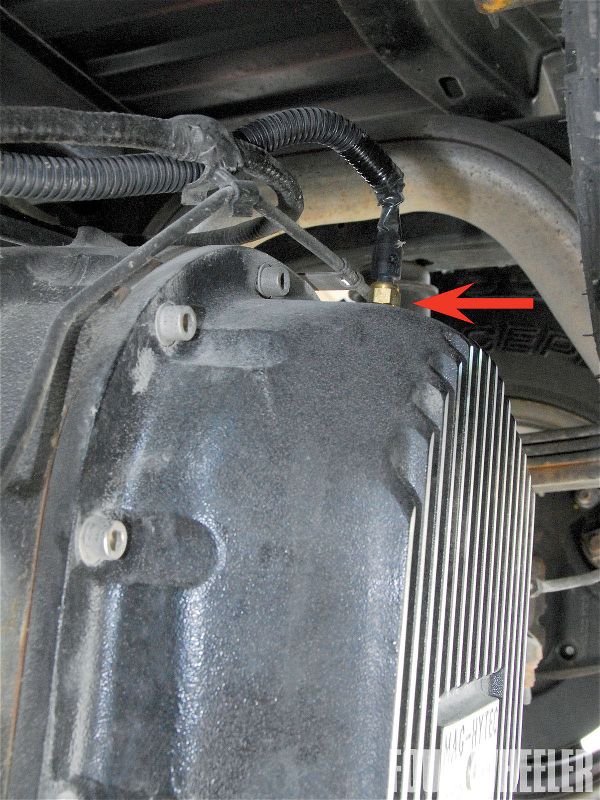
6. The rear axle temp sensor went into a convenient fitting built into our Mag-Hytec diff cover. If you had a stock metal cover, you'd need to weld a 1/8 NPT bung into the cover, or drill and tap a hole into the diff housing. The fitting in the Mag-Hytec housing is designed to read the oil being slung off the ring gear. Many experts think that this is the most accurate spot, but it will read a bit hotter than measuring the bulk oil temp.
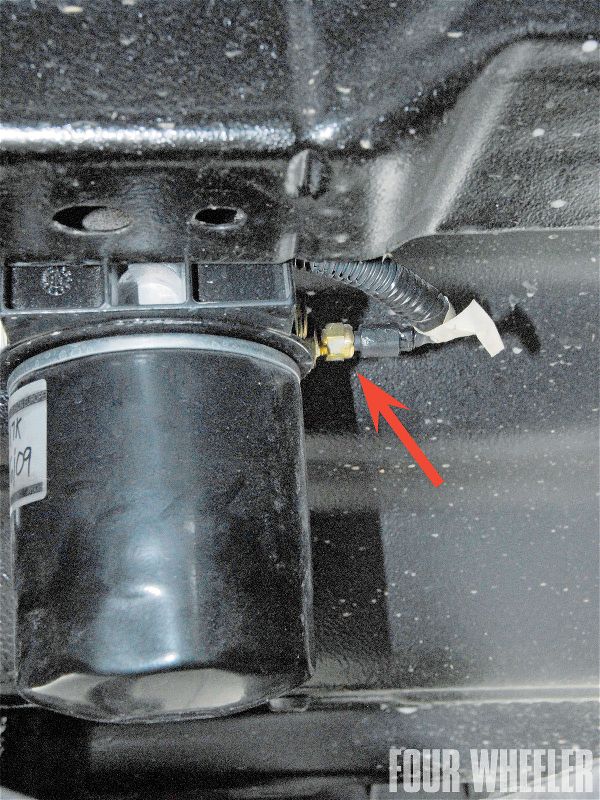
7. The trans temp sensor can be mounted in a variety of places, including the pan or the cooler lines. Many experts think the best place is in the "out" line to the cooler. That's the hottest oil in the trans because it comes right out of the torque converter. You can install a tee in the cooler line, but again, a previous modification made it easy for us. We had recently installed a Racor LFS transmission filter in the cooler line and it had extra ports for a sensor. We then made a harness for trans and diff sensor wires and ran it all to the ESP.
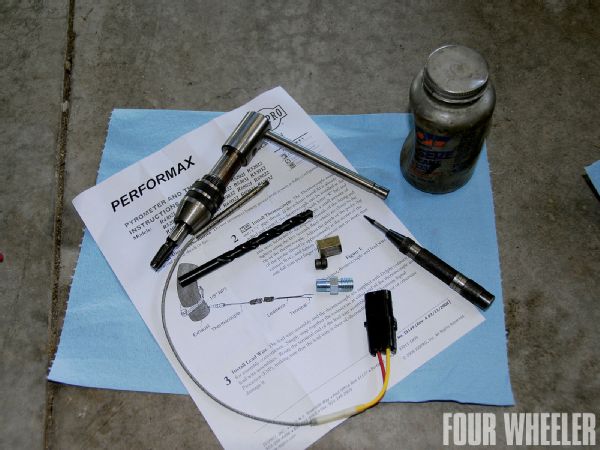
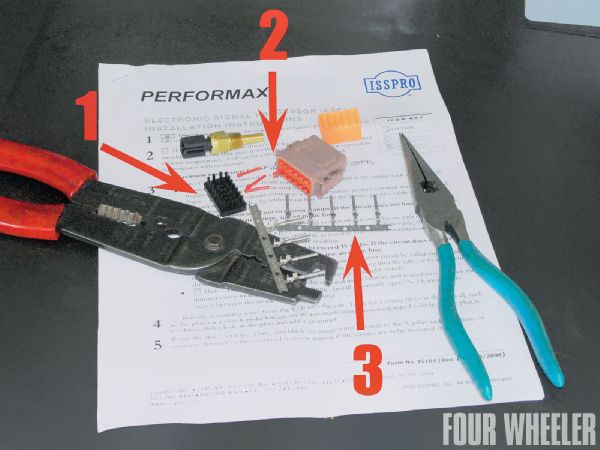
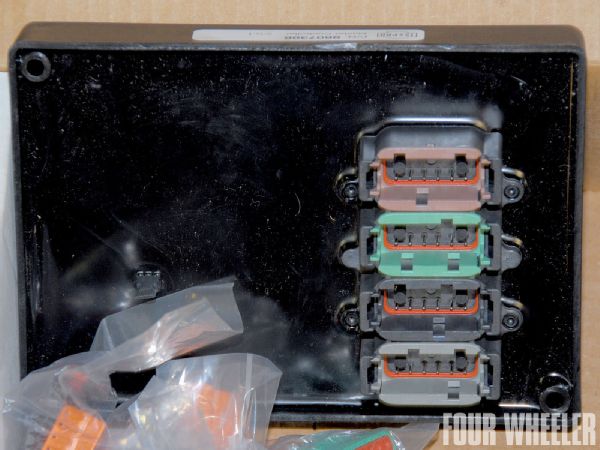
8. When you wire up the system, make it easier by ordering a few inexpensive extras from Isspro. They include the wire installation tool (1), and a stick of the ESP connectors (3). The wire install tool will make plugging the wires into the gauge connector much easier. The little red plugs (2) are removed from the waterproof ESP connectors to insert the sensor wire connectors (3).
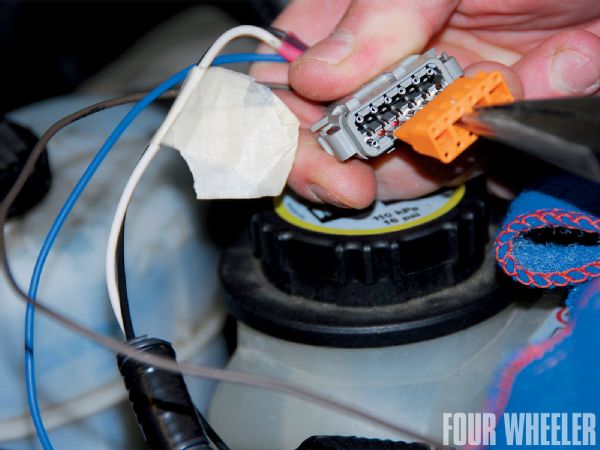
9. The gauge instructions will tell you which ESP connector and numbered position in that connector the sensor wires go into. To install, remove the orange wedge lock and the red pins that seal the empty holes, then insert the pins and reinstall the wedge lock.
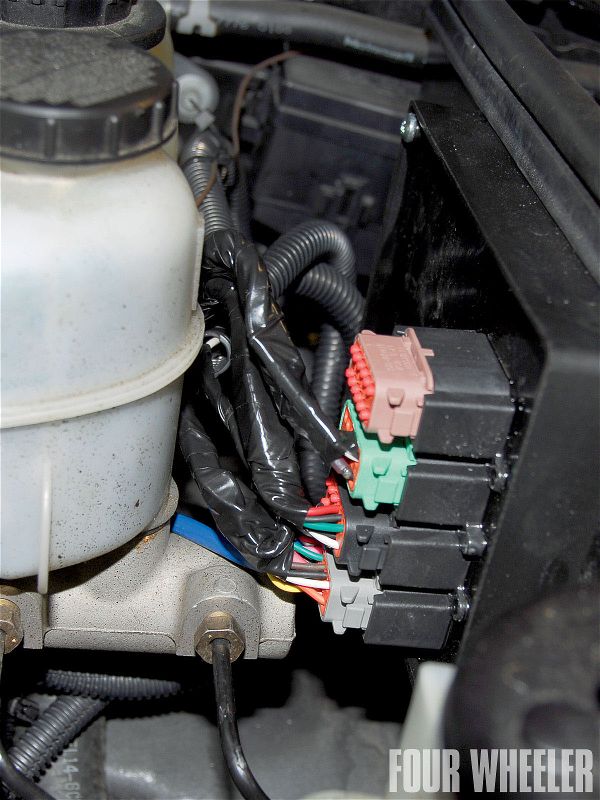
10. The ESP is a durable unit that can be mounted in the harsh environment of the engine compartment without fear. It's waterproof, highly vibration- and shock-resistant and suitable for temperatures up to 257 degrees Fahrenheit. For mounting, it comes with screw bosses or some super HD Velcro.
11. We mounted the ESP to the AEM Brute Force CAI box. We used plastic conduit to shield all the sensor wires from damage and used electrical tape as necessary. We drilled a special hole in the firewall to feed the three wires for the gauges, using a grommet and RTV to protect and seal.
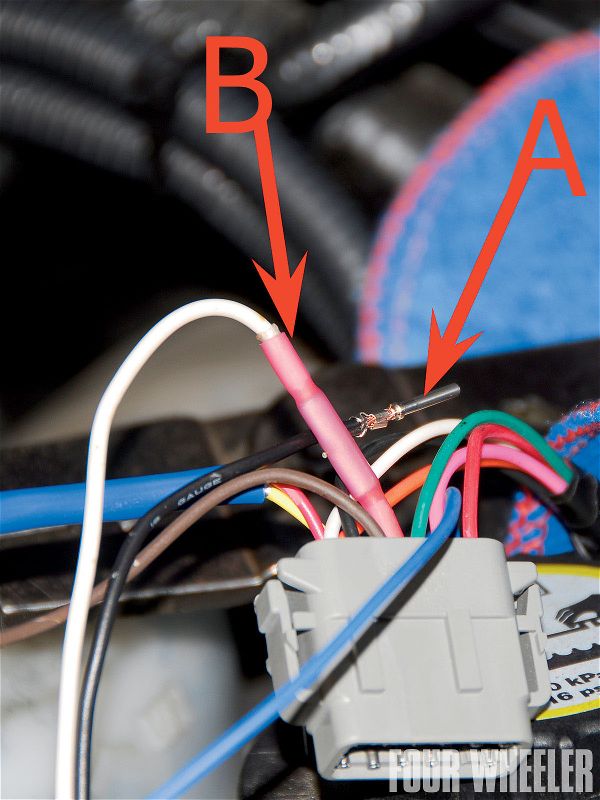
12. If you have to shorten or lengthen the wires, the best method is to install a new connector (A), though you will need a suitable crimping tool. Isspro recommends the Deutsch DTT-20-00, or an Ideal Crimpmaster 30-506 with 30-599 dies, which can usually be found at Home Depot. You can cut and splice with butt connectors, but be sure to use shrink tubing or waterproof connectors (B ) to avoid corrosion.
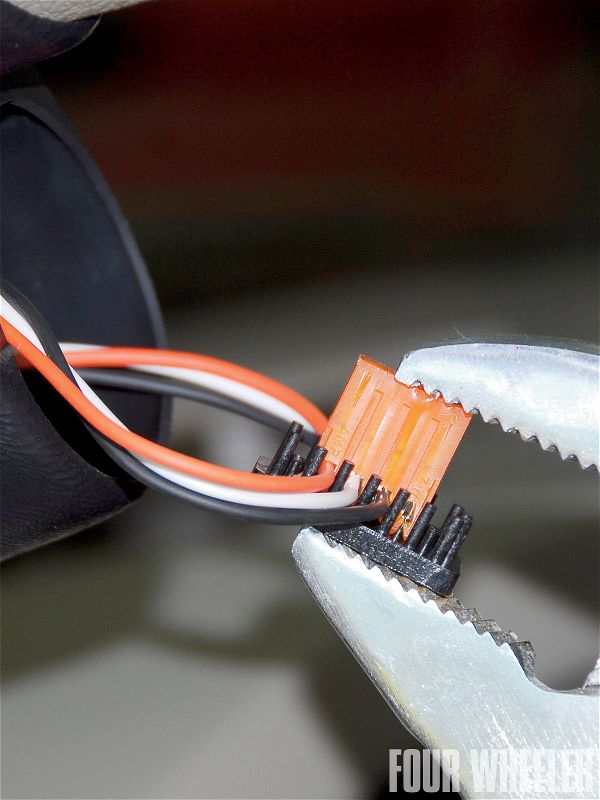
13. You can push the wires individually into the gauge connectors, but for a few extra bucks you can get some of Isspro's wire installation tools. Having done it both ways, we'd highly recommend the tool; it cuts the install time by three-quarters and ensures a good connection. Get a couple of them, as you may break one if you get ham-fisted. The orange connector snaps into the back of the gauges.
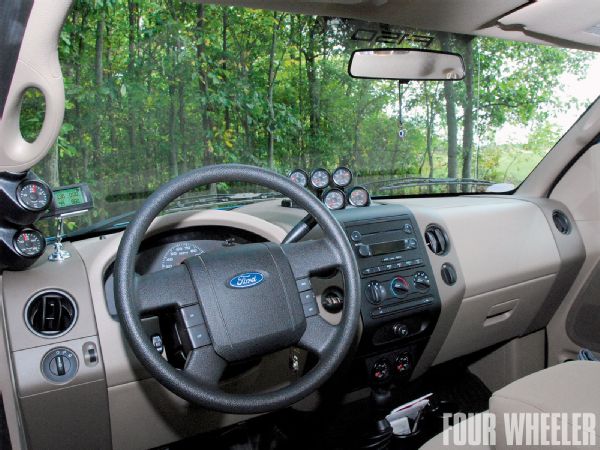
14. Using Isspro's 2004-08 F-150 pillar pod, we installed the oil pressure and coolant temp gauges. We had to relocate our Gryphon programmer from its integrated dash pod onto an old-style Edge mount.
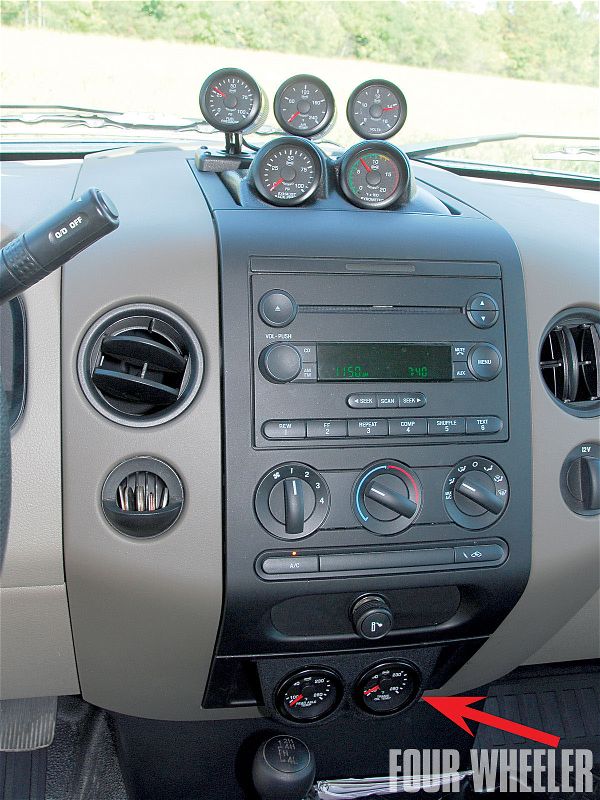
15. On the top, in the foreground, are the exhaust backpressure and EGT gauges in a Lotek twin mount pod, designed to fit in the 2004-08 F-150 dash tray. Behind them is a universal Glow Shift triple swivel pod that holds, left to right, fuel pressure, air temp, and volts. Below, as indicated by the arrow, are the diff and trans temp gauges in a Glow Shift universal dash pod adapted to fit in the empty ashtray pocket.
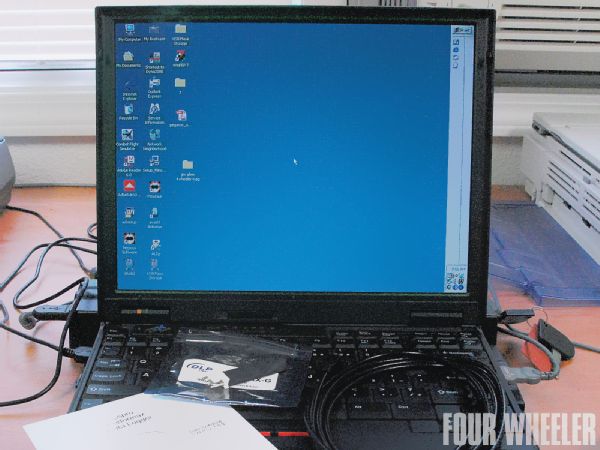
16. Optional are the hardware and software needed to data-log ESP inputs on your laptop. The kit includes the software CD, USB cable, dongle, and a connector. The dongle connects into the three wire harnesses, just like a gauge, and you plug the small end of the USB cable into it. Once connected, you can read real-time data on up to 17 sensors, and the software creates a running file that can be turned into an Excel spreadsheet for graphing. Minimum computer requirements are Windows 2000 or Windows XP operating systems, and you must have Microsoft Excel installed.