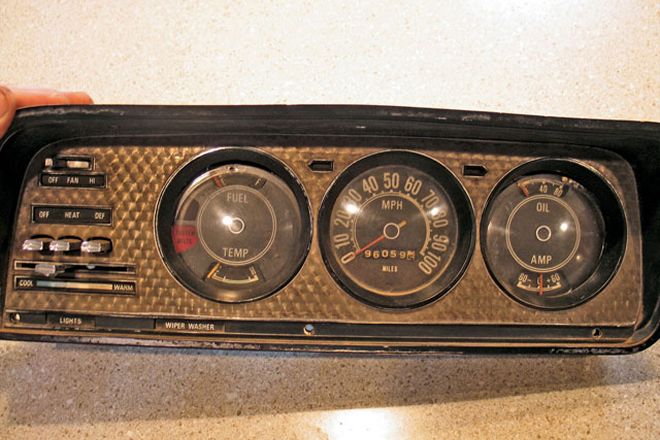
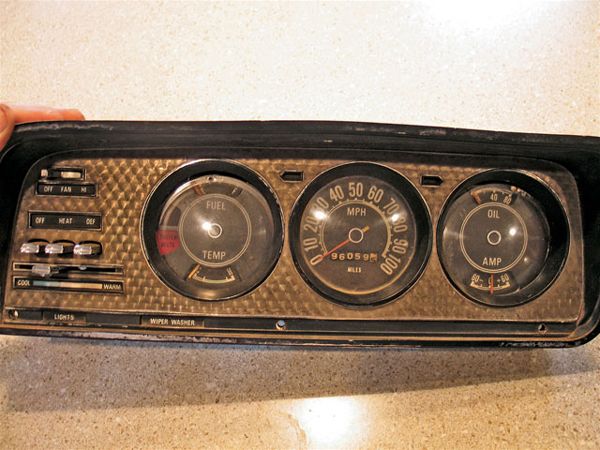
BJs Dakota Digital Jeep Gauge Kit - Jp Magazine

BJ's Dakota Digital Jeep Gauge Kit - Modern Reading bjs Dakota Digital Jeep Gauge Kit Modern before Gauges Photo 8466790 Before

One of the most overlooked areas of fullsize Jeeps is the gauge cluster. We add lift kits and other upgrades, but rarely give much thought to the cluster often filled with non-functioning gauges.
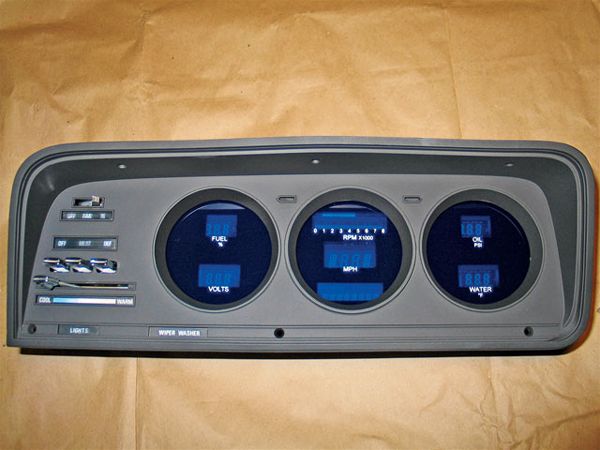


bjs Dakota Digital Jeep Gauge Kit Modern after Gauges Photo 8466793 After

The gauges are something you will always have to look at. Why not switch to something that stands out, looks great, and gives more accurate readings? To do this we ordered a Dakota Digital gauge kit (part number 11-2090) from BJ's Off-road. Our FSJ has a '73-'85 cluster; however other Jeep models from '55-'91 are available and install similarly. it's an easy upgrade that can be done by any beginner in just a few hours.


PhotosView Slideshow If your gauge cluster was anything like ours, it'll need a good cleaning and some touching up. We knocked out the yellowed plastic bezels for a cleaner look and sanded down the remainders of the plastic nubs that held them in place. The Dakota Digital FSJ gauge kit comes with everything you need for the install, including easy-to-follow instructions and the sending units. We also peeled off the dated sticker overlay. Some stickerremover or WD40 will aid in this process. Once it was scrubbed clean and sanded with 200-grit we sprayed the entire faceplate with flat black paint. The first step is to disconnect the battery and remove the stock gauge cluster from the dash, which is held in place by six screws. You'll need to disconnect the wires, speedo cable, and HVaC hoses (it's a good idea to mark where these go). Then, remove the gauge pod from the faceplate. The gauge pod is held to the faceplate with several screws along the backside. The new gauge assembly attaches to the faceplate the same way as the original. The ribbon wire plugs into the back of the gauges, and the other end is attached to the Dakota Digital control box, which needs to be located and mounted behind the dash. The sending unit wires are also connected to the control box. Finally, the gauge cluster is ready to go back into the dash. You need to swap out your stock sending units for those included with the Dakota Digital kit. These new sending units are required, as the stock units won't give the correct signals, and your gauges will read incorrectly or not at all. Swapping the old units out takes about 15 minutes with regular hand tools. Once completed, you can reconnect the battery and give the cluster a quick test. The last step is to calibrate the system using the supplied instructions.