Speedy Auto > Car Tech > 4x4 > Engine

How to Replace Jeep Wrangler Motor Mounts - Jp Magazine

Rick Péwé Editor-in-Chief, 4Wheel & Off-Road

Replacing old, broken motor mounts on your Jeep is much easier than you might think-regardless of your mechanical aptitude. If you can hold a wrench and work a jack, you can probably do it yourself in your garage.

154 9903 How To Replace Jeep Wrangler Motor Mounts wrangler Yj Hood Open Photo 30597839

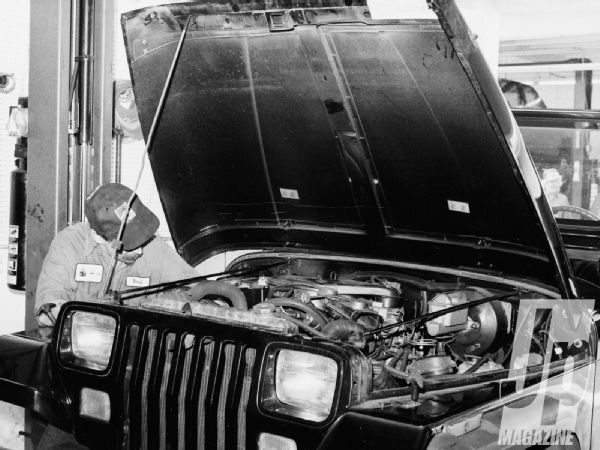
For this story, we enlisted the help of Four Wheel Parts Performance Center in Burbank, California, but the work can be done with simple handtools and a floor jack.

The motor mounts' job is to keep the engine and transmission in their proper positions and to insulate passengers from engine vibration. When a mount breaks or the rubber gets mushy, the drivetrain can move around and cause damage, such as allowing the fan to hit the radiator. Around town, this might not be too serious, but being stuck in the boonies with a shredded radiator can be a huge bummer.

Follow the photos to see how simple it was to replace the motor mounts on this Wrangler, and remember that the procedure is similar for many other Jeeps.

PhotosView Slideshow The owner complained about a severe noise coming from underneath the Jeep, especially when he accelerated from a stop while turning left. The rear output yoke on the transfer case was hitting the heat shield above the muffler-the rear mount was toast and the fronts weren't much better. That allowed the transfer case to slide over about 6 inches and hit the shield. Engine torque causes the engine to twist up on the left-side and down on the right, which is why the left-side mount usually fails first. The good design of YJ mounts includes a strap over the top of the mount, which restrains it should the rubber fail. By applying the brake and gassing the engine at the same time to twist the motor, the gap in the toasted mount becomes evident (arrow). To remove the mounts, first support the engine on a floor jack with a piece of wood in between the jack and the pan to protect the pan. Take the nut off the large cross-bolt and adjust the jack until the bolt is loose. It's difficult to use a ratchet on the passenger side shown here, since the nut is next to the fuel pump, and the head of the bolt is close to the oil filter.
After various hoses and tubes are moved out of the way for easy access, the top bolt is unscrewed. Motor mounts are also known as engine mounts or insulators, but the vernacular is motor mounts. We selected Crown Automotive for the new mounts because it's one of the biggest distributors of replacement Jeep parts. The bottom fastener is a nut that unscrews from the stud sticking out of the mount. It's handy to use a creeper, along with a good light and safety glasses, to reach this nut under the mounting tower. The cross-bolt can be pulled out and the mounts removed after the jack is raised slightly. The easy way to install new mounts is to place them in the engine bracket and to first slide in the cross-bolt as shown. On the passenger side, the nut must be installed on this bolt before inserting it all the way due to the minimal clearance near the fuel pump.
Have a friend slowly lower the engine while you guide the mount stud into the slot. Sometimes it's necessary to use a large prybar to position the engine so that both mounts will go into the holes. Loosely install the nut on the stud so the other bolt on top can be inserted.
You may need to work the jack up and down some and pry around to line up the top bolt. A prybar is useful when aligning the holes so the bolt can be inserted. After you loosely install all the nuts and bolts, it's time to attack the rear mount.
A total of 11 nuts and bolts are twisted to replace the rear mount, including the six holding the crossmember to the frame. First zip off the three nuts in the center of the crossmember, also known as the skidplate.
Support the transmission with a jack or a fixture so that the weight is off the skidplate. Undo the six crossmember bolts and move the crossmember out of the way. A second jack is helpful under the fairly heavy crossmember.
The actual mount (arrow) is bolted to a plate that's attached to the transmission. Unbolt the old mount and slam home the new one. Check the torque-reaction mount to the left. Replace the crossmember and tighten all the bolts, then tighten the engine mounting bolts.