
Leaf springs live a hard life under your 4x4. They are constantly blasted by sand, covered in mud, splashed with water, and dragged across rocks. Every time the suspension flexes or hits a bump, each leaf in the spring pack moves against the others, grinding the dirt and rust deeper into each layer of your springs. Factory rubber bushings dry out and crack while the metal-on-metal squeaks become louder. There is no need to toss your springs in the trash though. Elbow grease is all you need to make your leaf springs like new again. We refreshed our leaf springs at home with just a few tools and a bit of time.
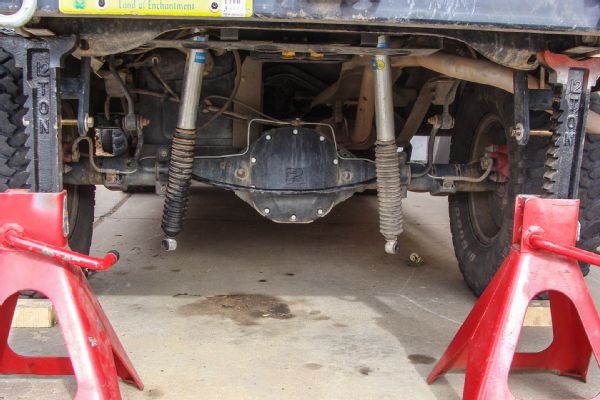
Start by removing the weight from the springs by supporting the frame with a sturdy pair of jackstands. Make sure you also block the wheels so the axle does not roll away when the springs are removed. Remove the U-bolts and their plates, followed by the bolts from the frame bracket and shackle. In our case, the U-bolt plates were attached to our shocks, so we removed them completely in order to apply a fresh coat of paint to each plate.
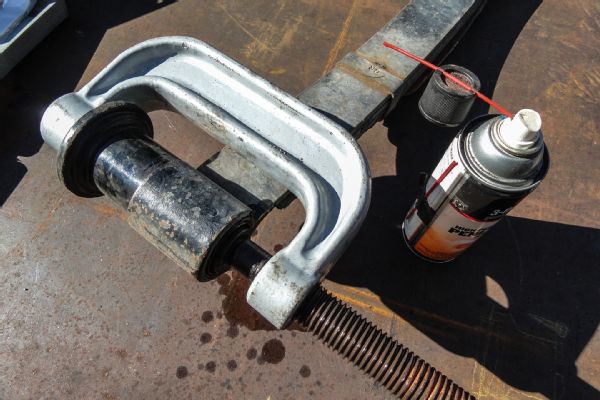
Our old bushings were stuck in the spring eye, so we gave them a shot of penetrating oil before attempting removal. There are several methods to remove the factory metal-sleeved bushings from the spring, each taking varying amounts of patience. Drilling out the rubber and then cutting out the remaining parts is time consuming. A hydraulic press is the easiest method, or we found that a ball joint service tool drove out the bushings far enough that we could tap them the rest of the way out with a hammer.
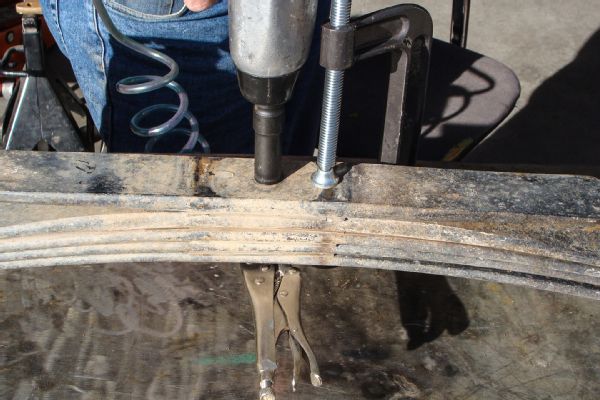
Use a C-clamp to hold the springs together, and remove the center pins. We used a locking pair of pliers and an impact wrench to loosen and remove the bolt. Sometimes the center pin and nut will be damaged or rusted together and cutting will be the only way to remove it. If this happens, be very careful not to cut into the spring. Slowly loosen the clamp and separate the leaves, taking note of the order and which side they are removed from.
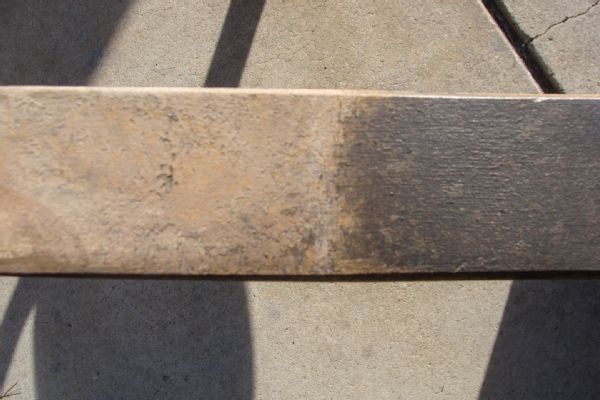
We used a wire wheel and brush to remove the years of dirt and surface rust accumulation from each leaf. The left side of the spring is how it looked before; the right is after we polished it up. Make sure to clean the inside of the spring eyes as well so that the new bushings will have a clean surface to slide into. At this point we took a sander and lightly went over any deep scratches, rough spots, and sharp corners before giving each individual leaf a coat of paint.
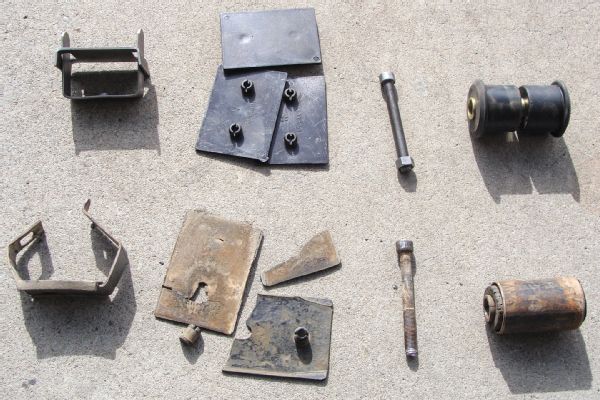
We gathered up our old parts and made a trip to the local spring shop, where we bought new spring clamps, Teflon wear pads, and center pins. The top row shows our new parts; on the bottom are the old rusty and broken parts. Grab an extra center pin to throw in your trail bag to carry as a spare—don’t ask us how we know!
We applied a thin layer of clear RTV to the wear pads before snapping them into place. We figured if the locating buttons ever break off, the RTV should hold the pads in place for a while. If you do not want to use Teflon wear pads, you could use a special graphite paint that reduces friction between each leaf in the spring pack.
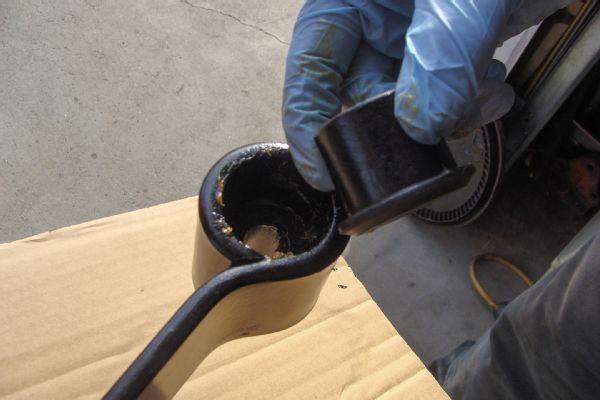
We ordered a complete set of replacement spring bushings from RockAuto. After we applied a light coat of grease, the new polyurethane bushings slipped in with a little effort. While the springs were out, we replaced the shackle bushings in the frame as well.
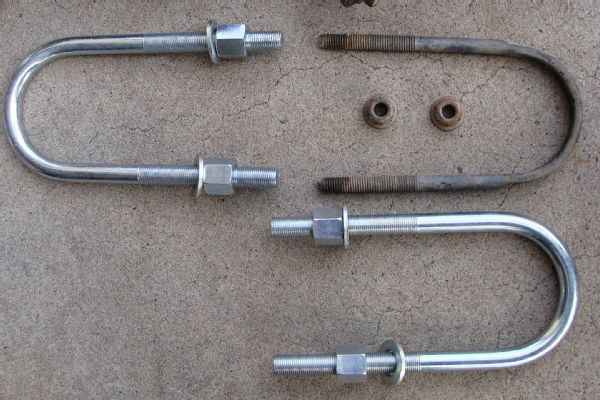
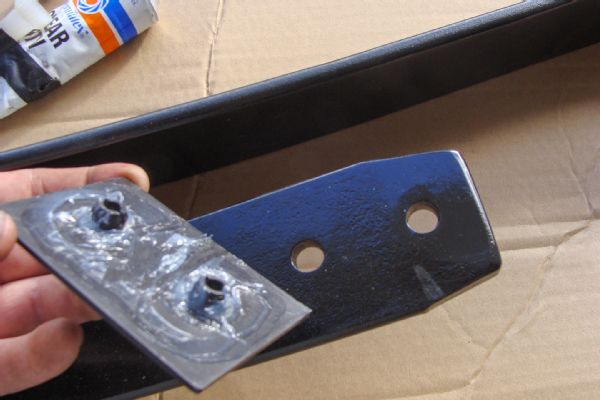
New U-bolts should always be used anytime they are removed. The bolts stretch every time they are torqued and the rolled threads become distorted. Once this happens, the nuts do not hold their torque as well and loose U-bolts can lead to failure of the suspension. We took the opportunity to upgrade the 9/16-inch bolts to the 5/8-inch bolts we bought while at the spring shop. To fit the larger bolts, we had to slightly enlarge the holes in our spring plates.

After installing new center pins and clamps, we hung the springs back under the frame and buttoned everything up. Our armored U-bolt plates were reinstalled with a fresh coat of paint, and we torqued the new U-bolts to 125 lb-ft. Recheck the torque after driving around for several miles.