Hummer H2 Rancho Suspension Lift - Four Wheeler Magazine

Hummer H2 Rancho Suspension Lift - Elevated Ken Brubaker Senior Editor, Four Wheeler hummer H2 Suspension front View Photo 17509195

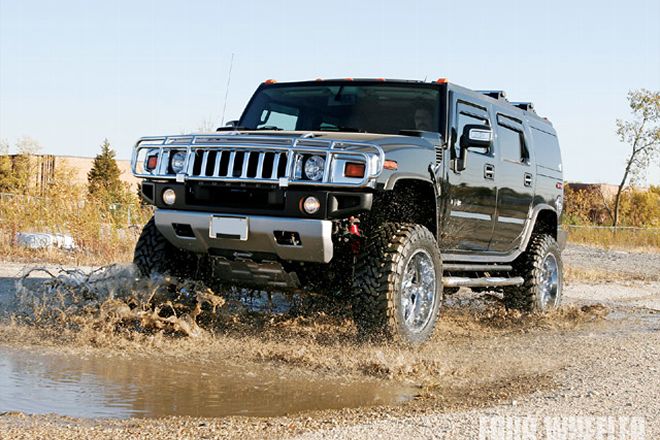
The Hummer H2 evokes a number of responses from people, ranging from envy to amusement to dislike. If you're a reader of Four Wheeler you know that we've tested H2s extensively, in both SUV and SUT forms, and we haven't been shy in pronouncing them to be some of the most off-highway-capable fullsize rigs available. They're designed with some of the best approach, departure, and rampover angles in the biz, and they come standard with an electric rear locker. All things us wheelers want and love. We fall into the envious category.

hummer H2 Suspension rancho Lift Kit Photo 17509201 
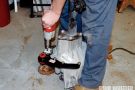
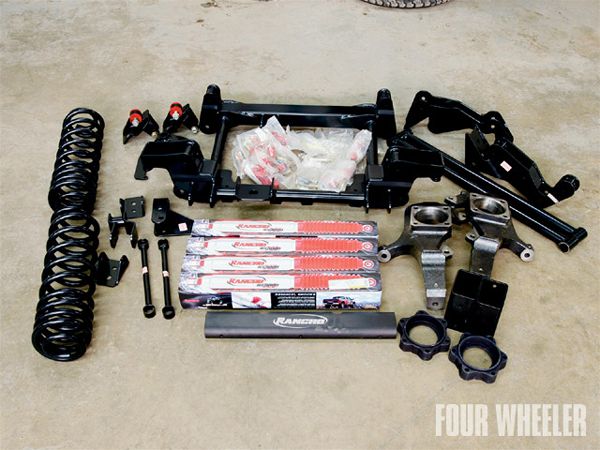
1. Here's the kit (RS6556) as it arrived. The owner of this rig chose the black finish, but the kit is also available in red. The H2 we lifted did not have the optional rear air-spring suspension, so new rear coil springs were included. For those H2s fitted with air springs Rancho offers a kit (RS6557) that includes aluminum air-spring spacers.

The aftermarket has responded to the H2 over the years, and we're not talking about chrome accessories, though there are most certainly enough of those things. We're talking about suspension kits that further enhance the H2's capabilities. One of those companies is Rancho Suspension, and this month we look at how its 4-inch kit for the H2 helps to modify the rig to make it an even better performer on the trail.

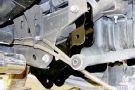
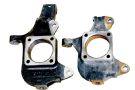
We know what you're thinking. You don't own an H2 and you never will. Well, this story may be relevant to you anyway because some of this suspension kit's architecture is similar to that found in other Rancho late-model GM light truck and SUV suspension systems. Rancho engineers like to say they're the "same parts, but different." For instance, the Rancho H2 subframe has similarities with the subframes used in other Rancho GM lifts. Another example is that the knuckles used in the H2 kit are the same used with the '01-'08 GM 2500 HD suspension system.

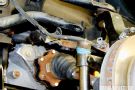
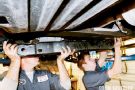
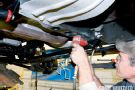
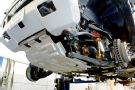
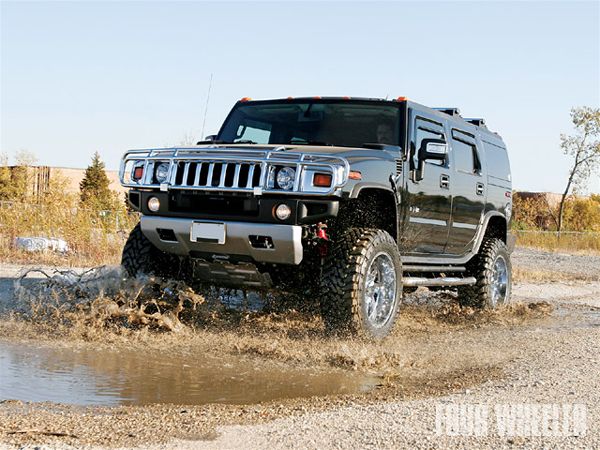
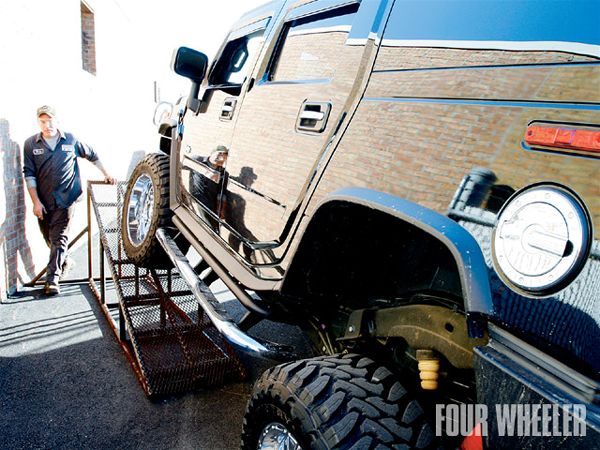
We installed this kit at Attitude Performance in Arlington Heights, Illinois, under a vehicle that had already been fitted with 37x15.50-20 tires. The vehicle had no lift, so the larger-than-stock tires were rubbing when the steering system was at full lock. The owner chose to install the kit to solve the problem. Here are the major components and installation highlights of the Rancho kit.

PhotosView Slideshow 2. We began the install up front. After removing a number of components including the torsion bars, lower control arms, shocks, end links, steering knuckles, axleshafts, sway bar, and front differential, the driver-side crossmember/lower control-arm bracket was cut off to facilitate installation of the new subframe. 3. Once the bracket is cut off, a supplied box plate is welded to the inside of the lower control-arm frame bracket. It's then painted to inhibit corrosion. 4. Next, the upper mount is cut off from the front differential. Printed instructions with illustrations show how the differential should look when the process is completed. 5. A differential support bracket is then attached to the front differential. Some differentials (like ours) have a boss that must be drilled out for one of the mounting bolts. 6. The front-differential assembly is then mounted to the new one-piece reinforced subframe. 7. It takes a couple of people to lift the subframe/differential assembly into position due to its weight. The subframe mounts in the factory lower control-arm frame brackets. Ours bolted right in. With this assembly installed, the front driveshaft is reconnected. 8. At this point it's important to ensure that the grease fitting on the steering relay rod does not contact the left side of the differential as the steering system is cycled. We had to remove a bit more material from the differential case to eliminate contact. 9. Next up are the new extended cast steering knuckles. Here you can see one of the new knuckles (left) compared to the stock knuckle. 10. The new knuckles are installed to the upper and lower ball joints as shown here and then the O-rings, splash shields, ABS cables, hub and bearing assemblies, brake rotors, and calipers are installed on each side of the vehicle. PhotosView Slideshow 11. Due to the extended knuckles only minor steering adjustments are required. The tie-rod jam nuts are loosened and the tie-rod ends are threaded inward 2.5 complete turns. The jam nuts are then retightened and the tie rods are attached to the new knuckles as shown here. In this photo you can also see one of the axle spacers that mount between the differential flange and the axleshaft on each side. 12. The torsion-bar crossmember is lowered via a pair of drop brackets. Two holes per side need to be drilled in the frame and then self-tapping screws are used to mount the brackets. With the crossmember installed the torsion bars are then reinstalled. 13. Aft braces help support the new front suspension and they're installed to the new subframe up front and the transmission crossmember in the rear. Drilling is required to mount the aft-brace brackets to the transmission crossmember. 14. The H2 comes standard with a transmission cage. The outside tubes on the front of the transmission cage must be ground to facilitate installation with the new kit. 15. Likewise, the factory skidplate must also be cut and filed to ensure proper fitment at the new subframe front pockets. The instructions detail how and where the modifications are to be done. 16. Here's the completed front suspension. Notice the stock front skidplate mounts to the new drop bracket and it integrates two new center-mounted bolts to the new Rancho subframe. It also uses the factory mounting points at the rear. 17. The rear suspension lift installation begins by removing a number of parts including the sway-bar end links, shock absorbers, gas-tank skidplate, and coil springs and insulators. The first parts to install are the link drop brackets. Rancho recommends only removing the forward ends of the upper and lower links on one side of the axle at a time. The driver side is done first. Here you can see the new driver-side link drop bracket in place before the links are reattached. The bracket attaches using four bolts, one of which has to be drilled. After this, new bumpstop spacers are installed on each side of the vehicle. 18. This is the new track-bar bracket. It attaches to the OEM bracket with supplied hardware and requires only one hole to be drilled (for the bolt on the left). 19. The final steps for the rear include installing a new brake-line bracket, the extended sway-bar end-link assemblies and the RX9000XL adjustable shocks. hummer H2 Suspension comparison Photo 17509315 
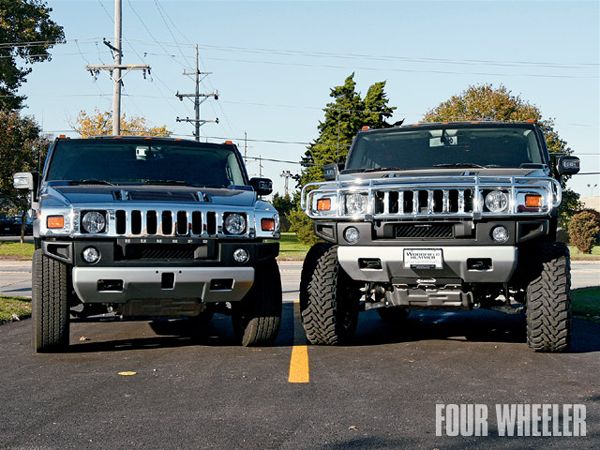
Here you can see the difference between a stock H2 (left) and the lifted H2.

Bottom Line
Not only did the kit solve the tire-rubbing issue and improve angles important to off-highway travel, it improved the H2's performance on the RTI ramp. Before the kit was installed the H2 traveled 53.5 inches up a 20-degree ramp. This earned it a score of 436. After the install the H2 traveled 60.5 inches up the ramp to earn a score of 493.

The Rancho kit was developed using a 37x12.50R17 tire on a 17x10 wheel with 5 inches of backspacing, however it will allow use of up to a 40x13.50R17 tire on a 17x9 wheel with 6 inches of backspacing. We're digging the fact that no driveline or exhaust mods are required to install the kit and we like the overall simplicity of the kit and the fact that it blends nicely with the underbody of the rig. On a short drive after the install we noticed no weird handling and no driveline vibration issues.

This Rancho kit has an MSRP of $2,900, and that price includes shocks.

hummer H2 Suspension articulation Photo 17509321

The new kit contributed to the H2 being able to travel 7 more inches up a 20-degree RTI ramp.