Advanced Adapters Jeep CJ Power Steering Conversion Kit - Jp Magazine

Advanced Adapters Jeep CJ Power Steering Conversion Kit - Steer Gear Christian Hazel Brand Manager, Four Wheeler installing Power Steering Kit under View Photo 11169714

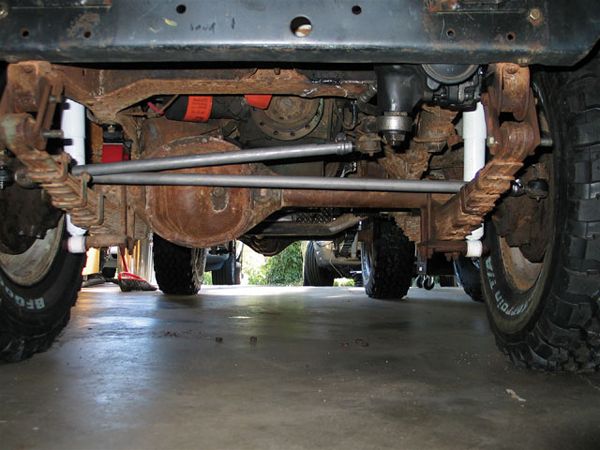
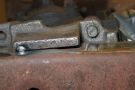
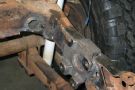
The steering system of early Jeeps equipped with the factory Ross cam-and-lever mechanism can be marginal at best. When new or freshly rebuilt, it performs adequately with stock-sized tires, but add a locker or bigger tires and you'd better hit the gym to turn the wheel. Once these systems get a little wear in them, there can be as much as a half-turn of play in the steering wheel. Sure, the bellcrank can be rebuilt, the drag link can be rebuilt, the steering box can be rebuilt, and so on down the line, but we can't see putting all that effort into a steering system that isn't going to make your Jeep easier to steer on the road and won't help you turn the wheels on the trail.

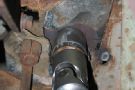
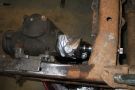
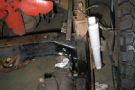
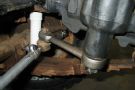
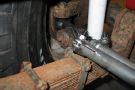
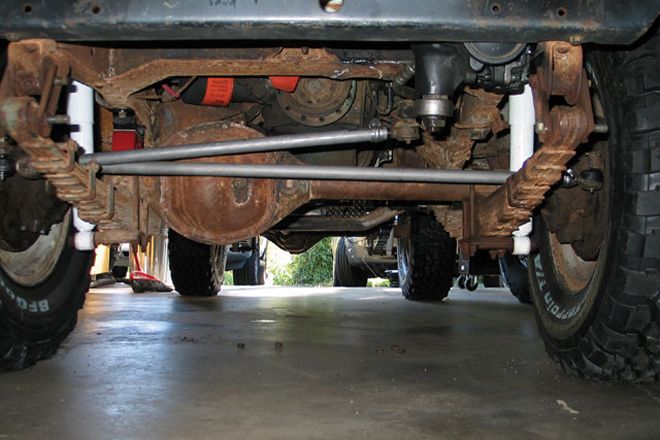
When it came time to upgrade the steering of our '71 CJ-6, we briefly considered rebuilding the stock steering system but then came to our senses. Our Buick V-6 already had a pump attached to it and we had an old Saginaw car box in the shed, so by using Advance Adapters' power-steering conversion kit (PN 716806 for early Jeep vehicles), converting our '71 over to power steering was easier and considerably less messy than fooling around with the stock manual system.

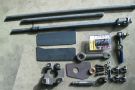
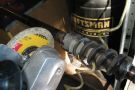
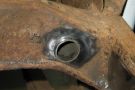
Advance Adapters has done its homework to make the conversion relatively painless. There is a little bit of fabrication required, but the Advance Adapters kit includes everything you need to complete the conversion except for a power-steering box, pump, and hoses. We completed ours in an afternoon and were rewarded with one-handed steering in any terrain.

PhotosView Slideshow The Advance Adapters power-steering conversion kit (PN 716806) comes with everything you need minus the box, pump, and hoses to convert your Jeep to power steering. Included are high-quality Borgeson U-joints and telescoping steering shaft, frame and floor reinforcement plates, a new tie rod and drag link, a passenger-side tie-rod end, a high-quality nodular iron steering-box mount, steering-box bolts, a steering-box spud shaft, a bronze steering-column shaft bushing, new clamps and hardware, and instructions. The first step is to remove the factory bellcrank, steering box, tie rod and drag-link assembly, and steering column. With the steering shaft removed from the steering column and box, the worm gear can be cut off for use with the Borgeson U-joint. The steering-column tube can be test-fit through the floor to see where you want to cut it. Once cut, the steering shaft can be reinstalled back in the column, the steering wheel reinstalled, and the Advance Adapters bronze bushing installed over the shaft. The Advance Adapters instructions walk you through drilling the holes for the Borgeson U-joint set screws. Most early CJ-6 and Renegade Jeeps already have the front framerails boxed. If not, weld in the Advance Adapters-supplied frame reinforcement plates. We bolted the steering box to the Advance Adapters mount and positioned it so the input shaft pointed to the middle of the radiator crossmember and so the spud shaft would protrude through the other side after the crossmember was modified. 154 0507 06 z+installing power steering kit+floor With the column cut to length, the floor reinforcement plate can be ground for pedal clearance if necessary and then welded to the floor. The plate secures the bottom of the steering column and prevents it from moving. With the plate welded in, the steering column can be bolted in place and the U-joint installed. Before finish-welding the box mount, we bolted on the steering box and spud shaft to check out clearances. We had to remove some metal from the lower lip of the crossmember to clear the spud- shaft clamp. Notice how the spud shaft passes all the way through the crossmember, leaving enough room for the steering-shaft U-joint to mount onto it. Once everything was clearanced, we fully welded the steering-box mount to the framerail and welded up all of our radiator crossmember modifications. When welding the steering-box mount, we get as much coverage as possible, including the inside of the box, the framerail, and from underneath. However, we didn't try to fill where the mount edges passed over existing holes in the factory frame. To allow the spud shaft to pass through, we used a 111/42-inch hole-saw bit and drilled through the crossmember. We welded a piece of 111/42-inch, 0.120-wall DOM into the hole for reinforcement. In hindsight, we would have made the hole for 131/44-inch tubing to allow for a little more clearance, but we got lucky and our shaft doesn't rub anywhere. With the box mounted for the final time, we installed the steering shaft at the column and measured where we needed to cut it for length. Since the shaft is telescopic, this cut doesn't need to be exact. We put the shaft in the middle of its travel before marking, so after the cut was made, we still had a few inches of leeway in either direction. With the box mounted, we bent our old junkyard power-steering lines to fit from our pump to the box. Since our tie-rod ends were in good shape, we reused them on the Advance Adapters drag link and tie rod. Advance includes a new passenger-side tie-rod end that accepts the drag-link tie rod. We installed the Advance Adapters pitman arm using red Loctite on the nut and installed the drag link and tie rods. On vehicles with stock suspensions, the drag-link tie rod may rub on the spring clamp. We just took a cutoff wheel to the clamp, cutting it flush with the top of the spring pack. We set the toe-in to 31/48-inch, adjusted the drag link to center the steering wheel, topped off the power-steering fluid, and have been enjoying the benefits of power steering since.