 Harry Wagner
Contributor
Harry Wagner
Contributor
Installing new gears and differentials is one of those jobs that even skilled mechanics and fabricators typically don't like to tackle at home for many reasons. Setting up gears requires specialized tools and has a low margin for error, and if you get it wrong you will likely be stuck on the side of the road and have to purchase new parts and start all over.
Not all differentials are created equal though. Adding a spool to a Ford 9-inch differential is significantly easier than installing a Yukon Gear & Axle Zip Locker in a Dana 44. Why is that? For starters, the 9-inch uses a removable third member that allows you to work on a bench without removing the entire axle. It also uses screw adjusters instead of shims to position the carrier, and the removable pinion support makes it much easier to set the pinion depth. If you know what you are getting in to, the odds of success are much higher.
Top 10 Diff Install Tips
Remove the axle from the vehicle (if possible).
Keep track of all the parts that come out of the diff during disassembly and where they go inside the axle.
Have a clean work area, and clean all parts thoroughly.
Buy quality parts. They are manufactured to tighter tolerances and ease setup.
Have all the parts you need on hand before you begin.
Take your time and be patient, taking photos and making notes along the way.
Start by setting the pinion depth, then the backlash. Next set the carrier bearing preload and finally the pinion bearing preload, in that order. If you have a solid spacer instead of a crush sleeve or removable pinion support, the pinion bearing preload can be set after the pinion depth.
Move the pinion closer to the ring gear to set the pattern deeper or farther to set the pattern shallower.
Move the ring gear closer to the pinion to decrease backlash or farther to increase backlash.
Properly break in gears and change the gear oil after installation.
If you know what you are getting in to, the odds of success are much higher
01 Mark the location and orientation of the main caps during disassembly. The caps are machined for a precise fit so you need to reinstall them in the same position.
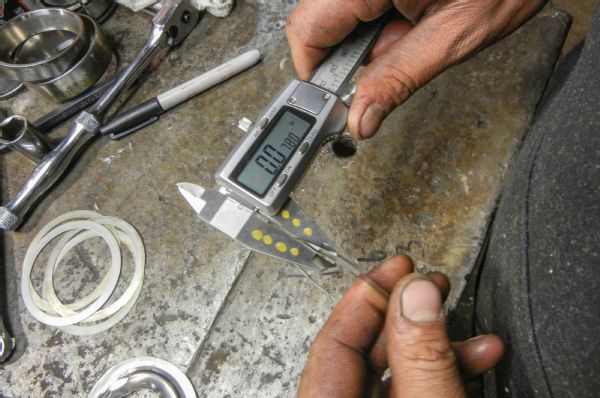
02 Note the shim thickness on each side of the carrier you are removing and also on the pinion bearing. These shims provide a useful starting point when setting up the new ring-and-pinion.
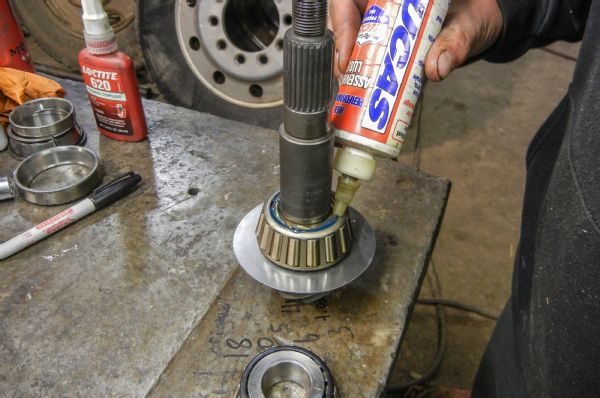
03 During assembly, coat all bearings and seal surfaces with gear oil. Never use bearing grease on pinion or carrier bearings as it will negatively influence assembly readings. Coating seals with white lithium grease will help hold the spring in place and make them easier to install without damaging the seals.
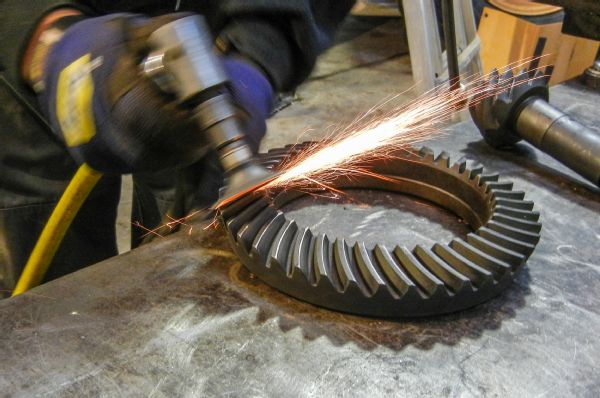
04 "Dressing" the ring-and-pinion involves running a fiber sanding disk mounted on a die grinder over each tooth. This small step will make it easier to set a pattern and allow the gears to run quieter upon break in, but you must thoroughly clean the gears following this step.
05 Assemble the pinion with its original shims yet without a crush sleeve to establish an approximate pinion depth. Removing shims increases pinion bearing preload, while adding shims decreases preload.
06 Pinion preload doesn't exist until the bearings contact the races, but the preload increases rapidly once the bearings meet their races. Tighten the nut in small increments until the preload reaches the ideal setting. Tightening the pinion nut beyond the ideal preload threshold effectively destroys the crush sleeve. An alternative is to use a solid spacer with shims to set the preload.
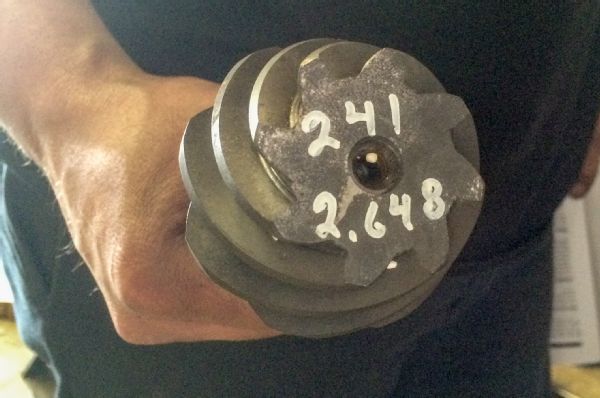
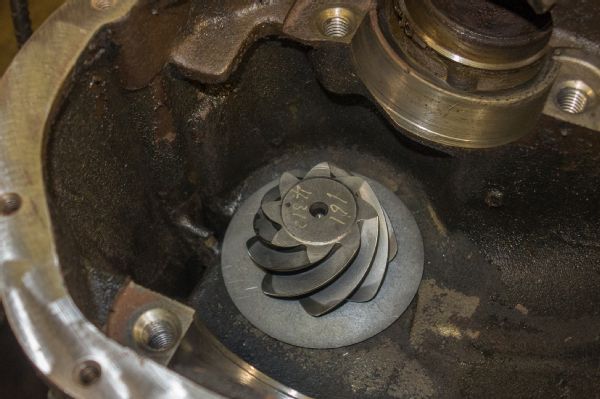
07 Yukon Gear & Axle marks the recommended pinion depth on the top of the gear. Between this and measuring the shims you remove from the old pinion, setting the pinion depth will hopefully only take a few attempts.
08 When changing the pinion depth, make large changes until the pattern is close to ideal. By "large change" we mean 0.005 to 0.015 inch. Intentionally make adjustments that move the pinion too far at first. If the pinion moves too far and the pattern changes from one extreme to the other, the correct pattern lies somewhere between the two and you can then hone in on it.
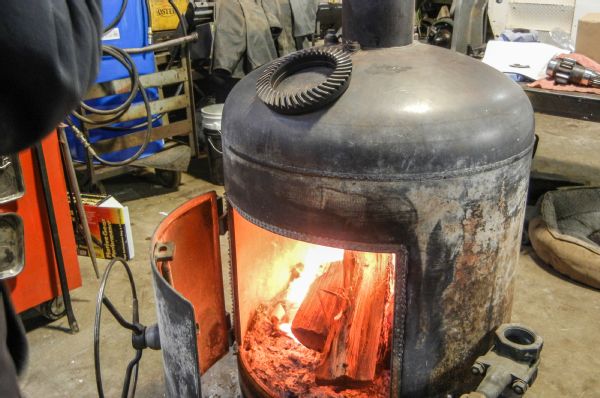
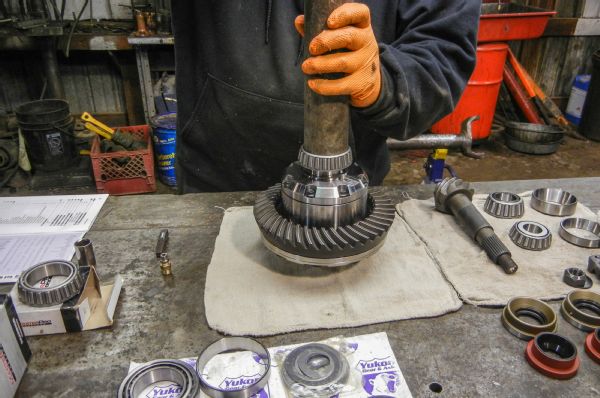
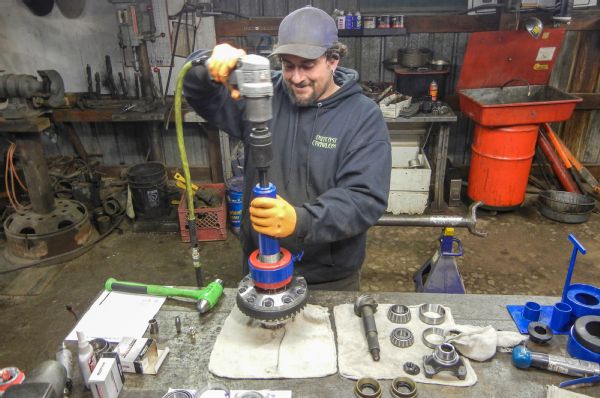
09 Heating the ring gear will cause it to slightly expand, making it easier to slip over the carrier. Don't heat the gear about 200 degrees though or you risk harming the hardening. Never pull a ring gear down onto a carrier by using an air gun on the ring gear bolts. Doing so can cause the ring gear to become cocked and you will never be able to get a good pattern.
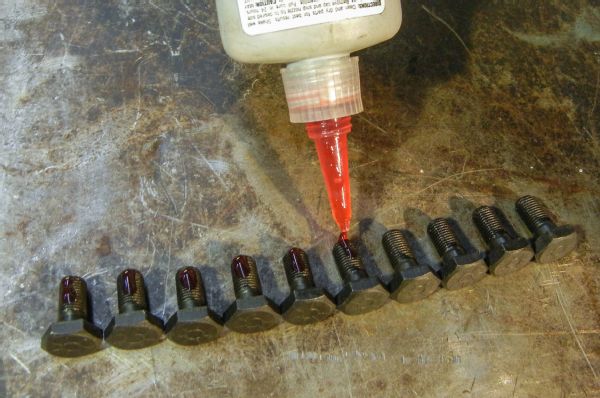
10 Always use new ring gear bolts, since they can stretch once they are torqued, and use thread-locking compound to keep them from backing out. Locking compound on the pinion nut helps retain the nut position and pinion bearing preload, and an anaerobic gasket maker on the pinion washer will keep it from leaking. A lubricated washer reduces friction and prevents the nut and washer from galling during tightening procedures.
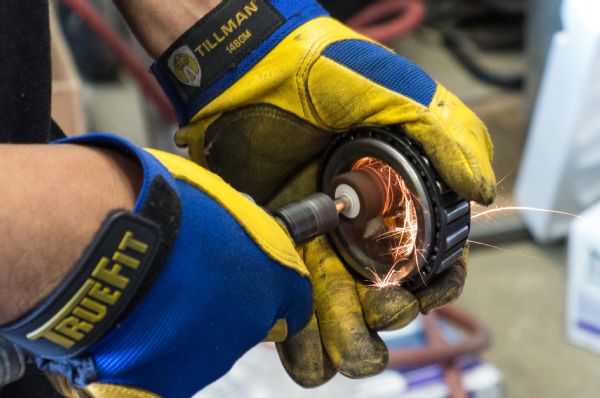
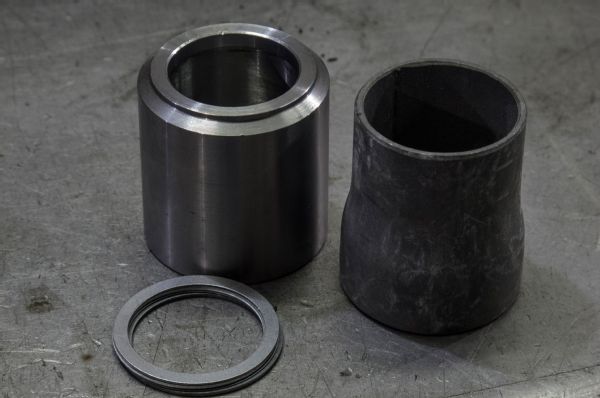
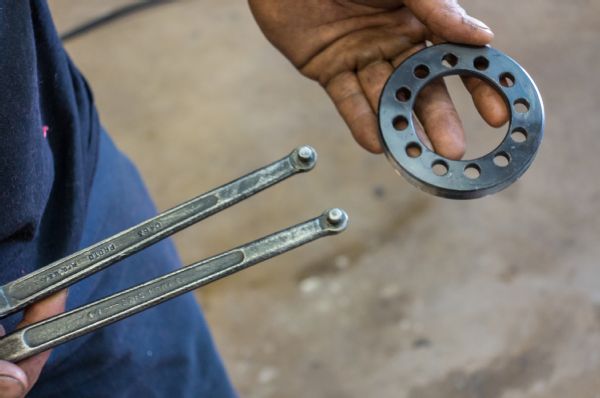
11 Yukon Gear & Axle offers setup bearings that allow you to change shims without the need to press the bearings on and off the carrier and eliminate the risk of damaging your new bearings. You can also make your own setup bearings by slightly increasing the ID of old carrier bearings, as shown here.
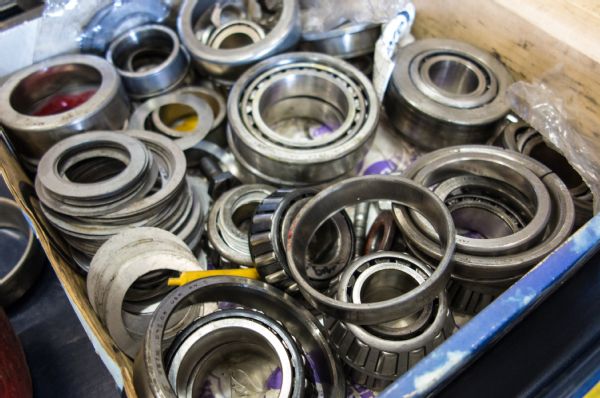
12 Removing bearings without damaging them is nearly impossible without a tool like Yukon's bearing puller. This puller fits many sizes of bearings and allows both bearings and delicate shims to be reused during setup or if you want to transfer bearings from your existing differential to a new differential.
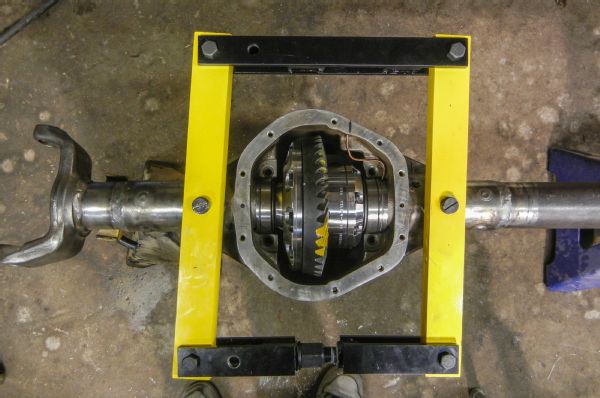
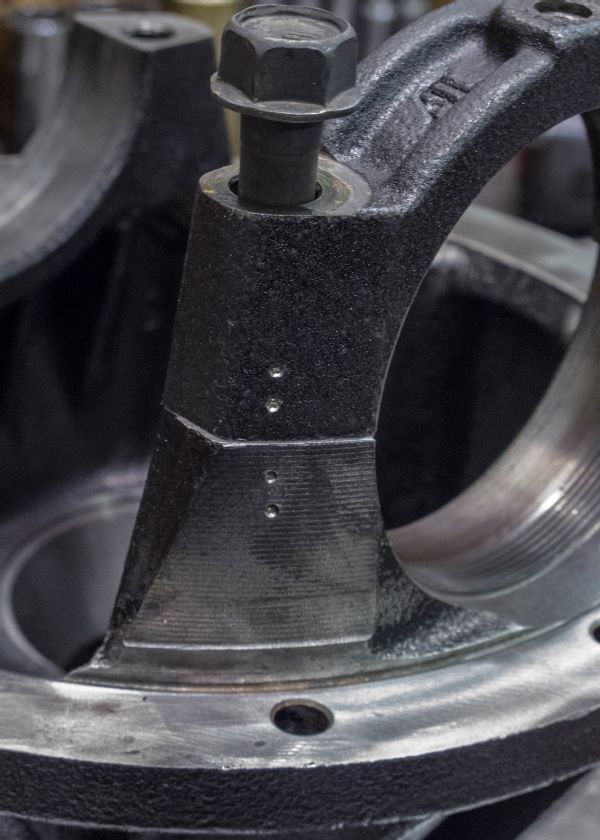
13 Oftentimes you can use a pair of pry bars to remove a differential and a dead blow hammer to install the new differential into the housing. One notable exception is when using a differential like the Yukon Zip Locker, which has a seal housing and air line on the outside of the carrier bearing and shims. In order to avoid damage to these sensitive components, a case spreader, such as the one available from Yukon Gear & Axle, must be used.
14 If the preload is close and the backlash is loose, add shims to the left side. This increases the carrier bearing preload and tightens the backlash at the same time. If the preload is close and the backlash is too tight, add shims to the right side. This increases both the carrier bearing preload and the backlash at the same time.
15-16 Three different shim or adjustment methods are used on different differentials. Screw adjusters are the easiest to install since they do not require shims. Shims outside of the bearings are the next easiest to install, following by shims inside the bearings, which unfortunately is the most common method of locating the carrier and ring gear.
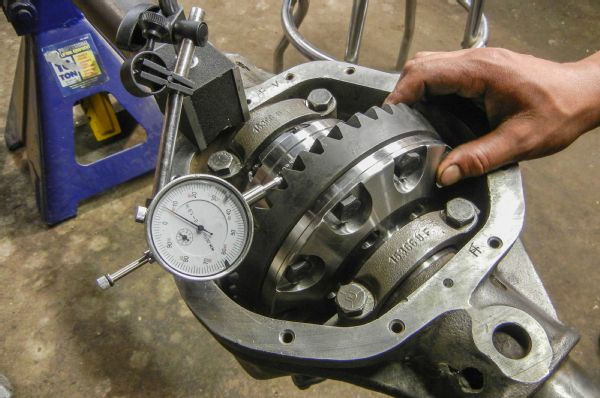
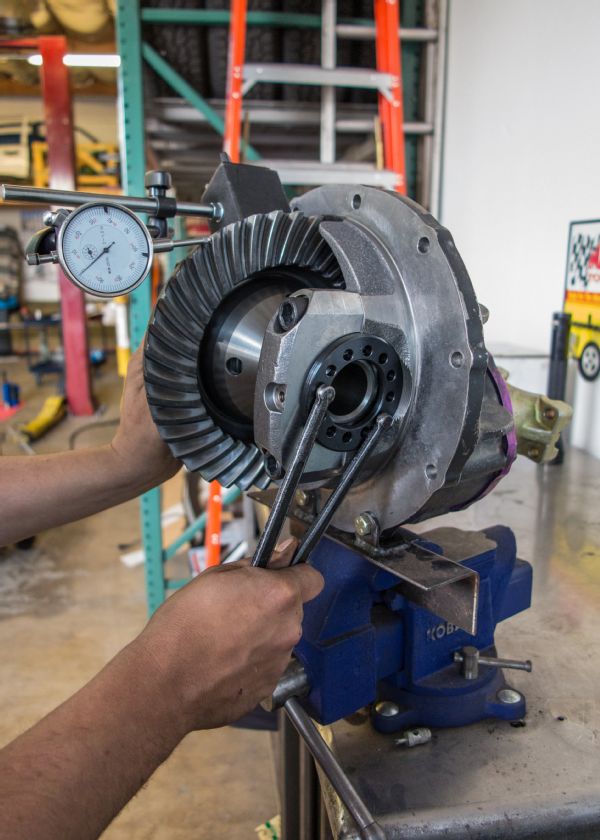
17 Backlash refers to the amount the ring gear can rotate forward and backward when the pinion gear cannot move. To measure backlash, prevent the pinion gear from rotating and rotate the ring gear back and forth. The amount the ring gear can move determines the amount of backlash.
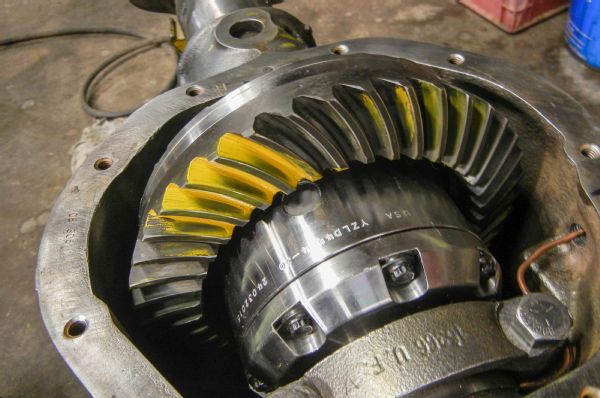
18 We can determine how gears mesh by changing how close the pinion gear is to the ring gear centerline. The pattern's position to the tooth's ridge and valley is an indication of the pinion depth. Disregard the pattern's position to the tooth's heel and toe.
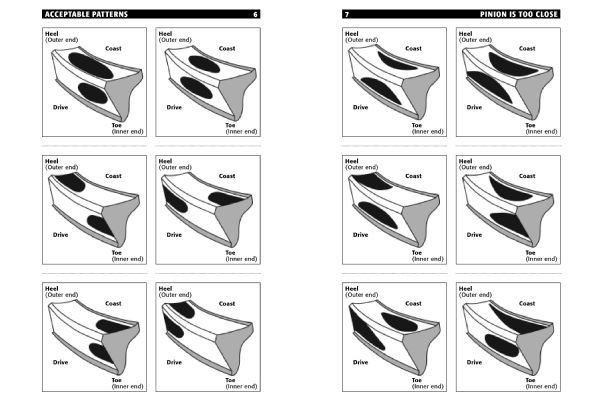
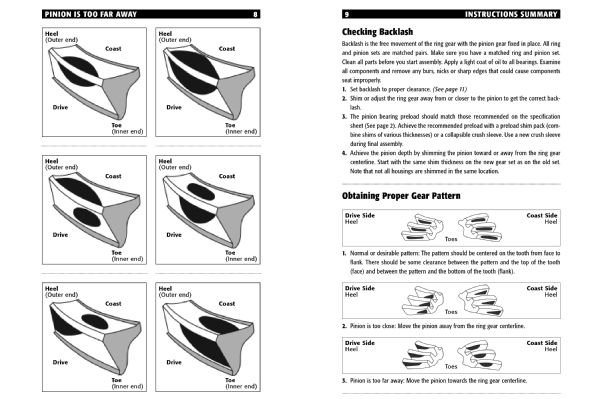
19-20 A contact pattern centered from face to flank indicates the correct pinion depth. A pattern closer to the gear face means the pinion is too far away from the ring gear. To improve the pattern, move the pinion closer to the ring gear centerline. A contact pattern closer to the gear flank means the pinion is too close to the ring gear, so the pinion should be moved away from the ring gear centerline.
Differential Installation (From Easier to Harder)
Drop-in Locker or Mini Spool. No bearings or shims need to be replaced when installing these traction devices, making them perfect for the novice installer. Sometimes you don't even need to remove the carrier to install a locker that replaces the spider gears (often referred to as a lunchbox locker) or mini spool if the ring gear is thin enough. Full Replacement Locker or Spool. If you are installing a new full case differential such as a Yukon Grizzly Locker without changing gear ratios, the pinion gear does not need to be removed. This eases installation; typically the shims from the previous case can be reused with new bearings for an easy setup.
Selectable Locker. Adding a selectable locker such as a Yukon Zip Locker complicates the installation for a few reasons, but the ability to turn the locker on and off can make the complexity worthwhile. In addition to the need to drill a hole in the housing and route an air line, the Zip Locker uses a thin bearing opposite the ring gear and a seal housing with an air line. This requires added care during setup.
All Axles Are Not Created Equal
Ford 9-Inch. One of the reasons the 9-inch is so popular is how easy it is to set up. The third member can be easily removed from the vehicle, allowing it to be assembled on a bench rather than under a vehicle. Plus it uses a removable pinion support that makes it easy to set the pinion depth, and the 9-inch uses screw adjusters instead of shims on the carrier bearings.
Corporate 14-Bolt. The 14-bolt is like a bigger version of the Ford 9-inch, with screw adjusters and a removable pinion support. The only downside to the Corporate 14 bolt is that the differential is cast into the housing, so the entire axle must be removed or your must do gear work under your vehicle.
Suzuki/Toyota. Like the Ford 9-inch, Suzuki and Toyota 4x4s use removable third members. They also use screw adjusters for the carrier bearings; however, they do not have a removable pinion support.
AAM. American Axle & Machine differentials also use screw adjusters, although they do not have removable third members. Some AAM axles, such as the 10.5-inch differential that is the descendent of the 14-bolt, also have removable pinion supports.
Ford/Sterling. Ford axles, such as the 8.8 and 10.5, do not use removable third members, bearing adjusters, or removable pinion supports. They do, however, use shims outside the carrier bearings, so there is no need for setup bearings. Newer Dana axles have outboard shims
Dana. While Dana are the most common axles you will find under most Jeeps and older fullsize trucks, they are also the most challenging to work on. They do not have removable third members or pinion supports, and they typically use shims between the carrier and bearings. There are some exceptions, such as some new Dana 44s that use outboard shims and the "Super 70" that use screw adjusters, but these are less common.