
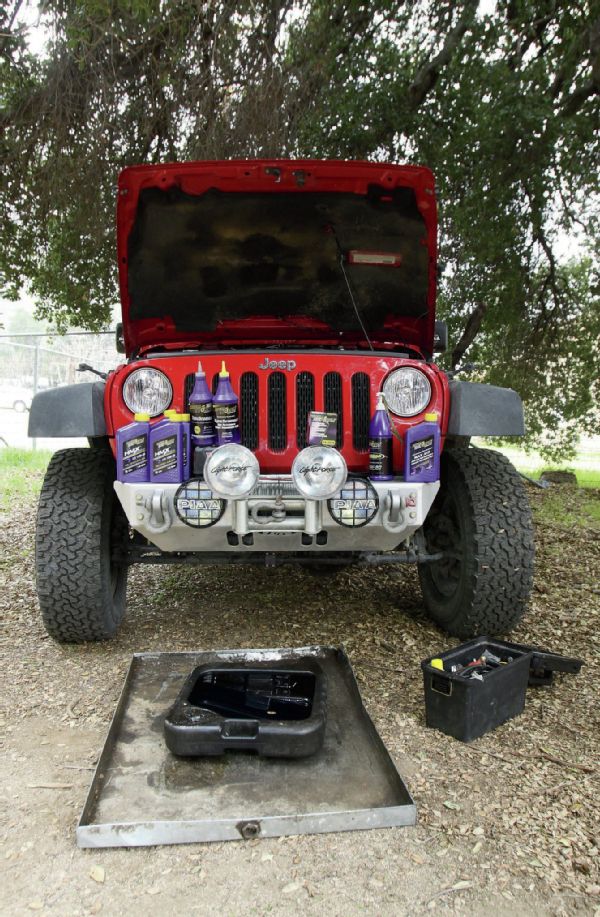
One of the best ways to get to know your new vehicle is by doing your own maintenance— loving it, taking care of it, and then fixing everything you broke while out abusing it. Basic maintenance is the first step in keeping your vehicle in tip-top condition. There is nothing worse than having to cancel a trip because of lack of maintenance, except for being “that guy” who breaks down on the trail, delaying the whole group. Enough breakage happens off-road without neglect adding to the problem. While we started at a young age learning how to maintain our vehicles, not everyone has had that opportunity. For those who haven’t, a good place to start learning is with fluid changes. Engine, transmission, transfercase, and differential fluids, as well as the engine air filter, are all very important to vehicle longevity, relatively simple to change, and great confidence boosters.
Being new to the Jeep world, my ’11 Jeep Wrangler Rubicon is my first Jeep. Being mechanically inclined, I had a good idea of what was involved but still had a couple of questions. I called up Editor Trasborg to pick his brain a little and was redirected to his good friend, Kayla, who happens to do all his work for him—go figure. In the end, we got it all figured out. After a quick look to make sure we had all the necessary tools and such, we got down to business. Now, this not having been our first rodeo, the service went pretty smoothly. Don’t be too worried about making a mess though—it happens to all of us. The most expensive part of my first few oil changes were the rolls of rags to clean up when I was done. While I’m on the subject of making a mess, be sure to be off to the side when you pull the drain plugs. Lying in the path of a stream of hot oil is most definitely not where you want to be—take my word for it.
 Make sure you have everything you need before you get started. It’s never fun when you get part way through a service only to find you are missing some critical item and do not have a functioning vehicle to get you back to a parts store.
Before we begin, a couple of pointers. Since warm oil flows better then cold, it’s always a good idea to warm the vehicle up before doing an oil change. All you need to do is take it for a short drive, 10 or 15 minutes should be adequate. This allows more of the old, dirty oil to be drained out and disposed of. One other point I would like to make is on the subject of the fluids themselves. When in doubt, use what the manufacturer recommends. Because of the stresses that vehicles see in offroad use, such as low speeds and hot, dusty conditions, oil can break down faster. Due to previous experience with the brand, we chose Royal Purple synthetic fluids for everything. Using synthetic oils, provided it meets the manufacturer’s standards, can help extend the life of the oil and prolong the life of the drivetrain.
Once you finish the oil change, make sure to double-check everything before you start the engine. The last thing you want to do is to start the engine and find out the hard way that you forgot to refill the oil or reinstall the filter. The same thing goes for everything else. Be sure to do a quick once over with a rag on all of the drain and fill plugs, filters, and gaskets just to make sure all is back together and not leaking oil. Go ahead and start the engine, let it idle, and look around again for any leaks. After a couple of minutes of warm-up to allow that fresh oil to work through the engine, we recommend a quick run around the block to get everything working. Since you wiped everything down when you were done, any leaks you may have should show up easily. Remember to always dispose of your oil properly.
Manufacturer Recommended Service Intervals and Fluids (’07-’11 JK) Service Interval Recommended Fluid Oil We Used Engine 8,000 miles SAE 5W-20 SAE 5W-20 Transmission 32,000 miles Mopar MS-9224 Synchromax Transfer Case 64,000 miles Mopar ATF +4 Automatic tranmission fluid Differentials 15,000 miles SAE 75W-90 SAE 75W-90
 Drain the engine oil from the JK’s 3.8L V-6, by removing the plug in the rear of the oil pan with a 13mm box end wrench or socket, letting the oil drain into a catch pan. To help drain as much of the old oil as possible, it is helpful to remove the oil fill cap.
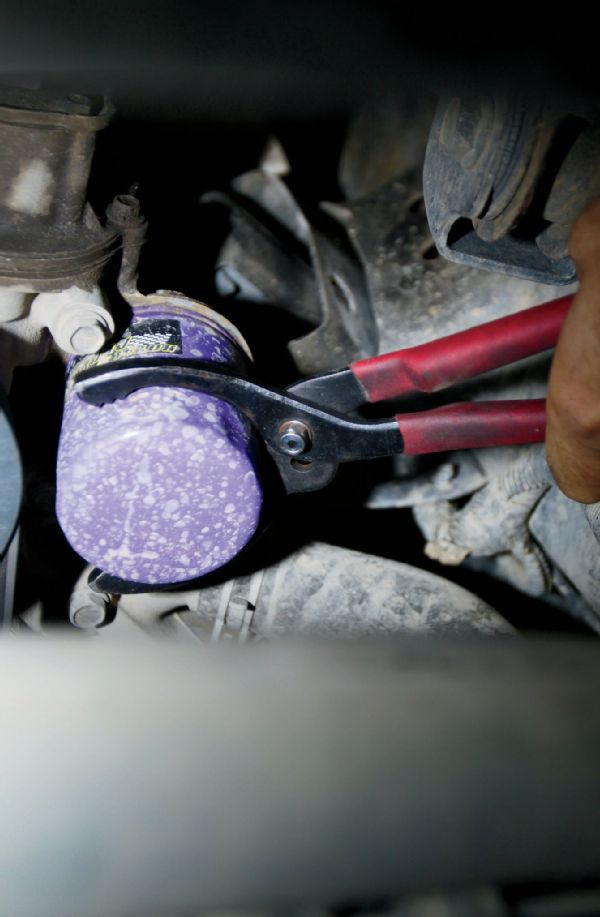 Remove the old oil filter using a small filter wrench, if necessary, and replace with the new filter. You should always lubricate the gasket on the new filter with a small amount of engine oil, as well as put some fresh oil in the filter. Due to the JK’s horizontal oil filter, take care to not over fill it; otherwise, you may be taking a bath sooner than you planned. Never use a wrench or any other tool to tighten the new filter. Hand tighten only!
 After cleaning any gunk off the drain plug, reinstall it into the oil pan, torqueing it to 20 ft-lbs, refill your engine oil. Even when pouring in the manufacturer’s recommended five quarts of oil, always double check the level on the dipstick, while parked on level ground. Feel free to take a moment and wipe up the inevitable mess. Don’t worry, we all do it. My first oil change might have needed an extra quart of oil and a roll of rags.
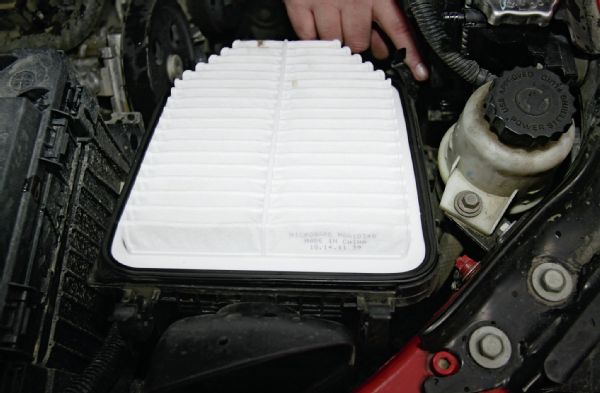 Since you’re already up there, it would be a good idea to go ahead and change the air filter now. Undo the top cover by popping the four clips loose and replacing the filter with a new one, making sure it is well seated in the air box. One of the great mysteries of the world is the placement of the front-right clip. If you have large clumsy hands like me, a long screwdriver may help you to put that clip back in place.
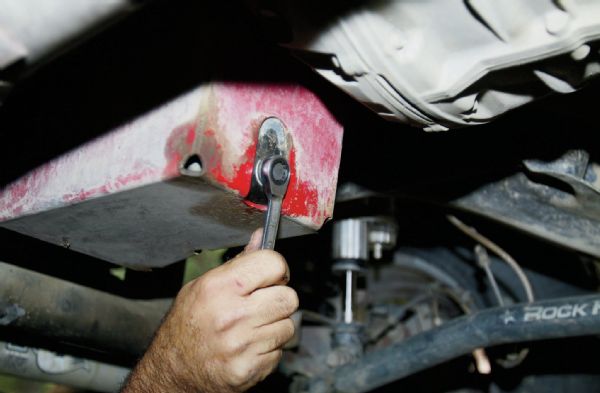
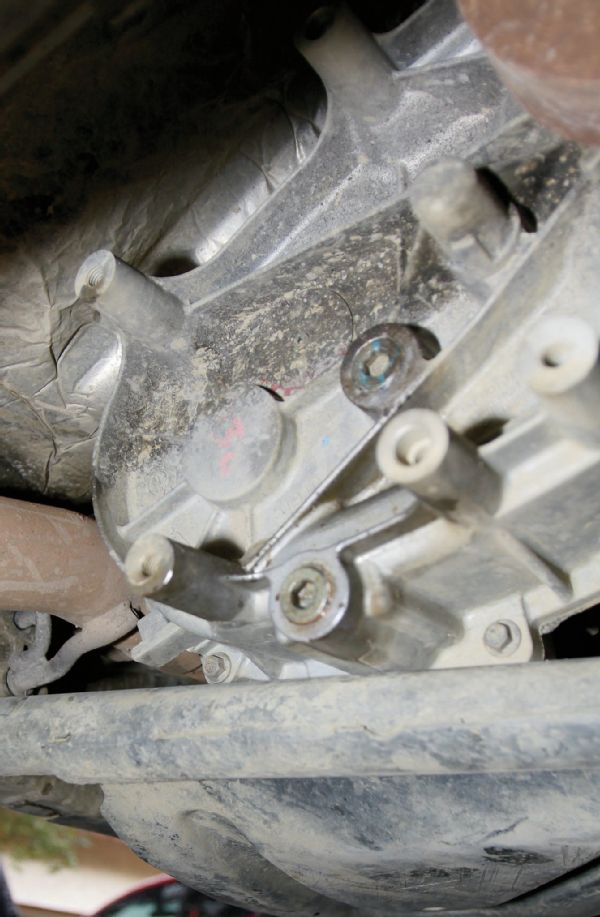
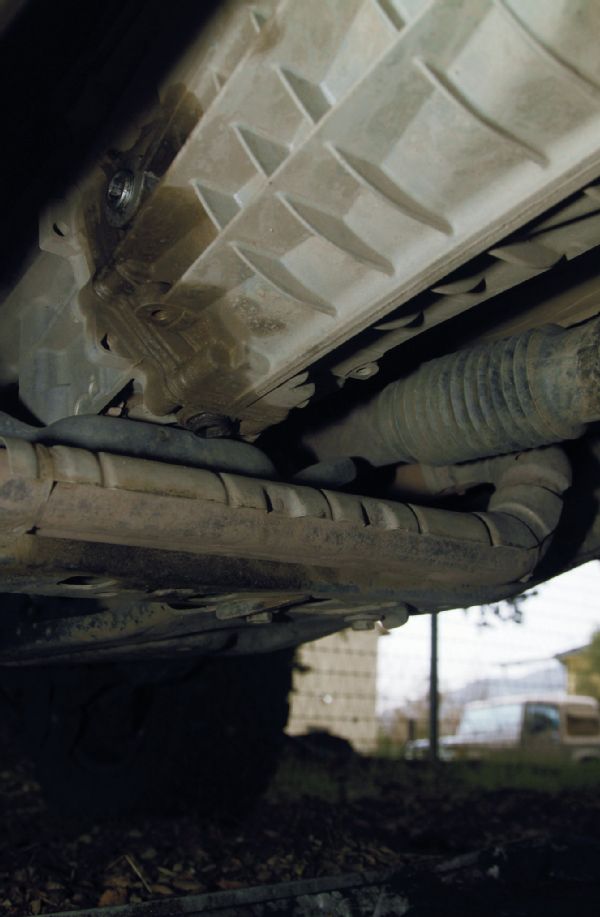 You will need to get the factory skidplate out of the way first, but the transmission and transfercase can both be drained while lying in roughly the same location. Drop the skidplate by removing the four bolts with an 18mm wrench or socket. The drain plug for the six-speed manual transmission is in a pretty bad spot, directly above the exhaust crossover. This necessitates the use of a special tool to remove the drain plug without dropping the exhaust.
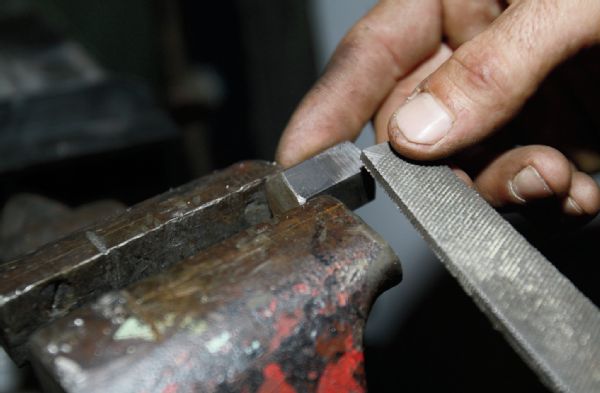 The transmission drain plug takes a 17mm hex key to remove. Being frugal people, we decided to make our own. Rooting around in the tool box we discovered a 3⁄4-inch hex key lying in the bottom. We cut off a piece approximately 11⁄2 inches long and then filed down each side until it fit into the plug. A 3⁄4-inch open-end wrench allows us to get in there and turn the thing.
 After cleaning the drain plug magnet off again, a thin covering of light shavings is perfectly normal—reinstall it and wipe everything down. You can then start refilling your transmission with the Mopar MS-9224 transmission fluid or equivalent. An approved equivalent fluid will say “Meets MS-9224,” usually found on the back of the bottle. You will need a 14mm hex key for the fill plug, located midway up on the passenger side of the transmission.
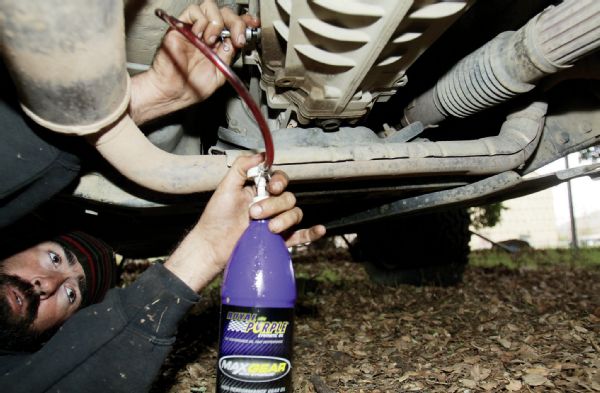
 For the transfercase, a 10mm hex key will be used for both the drain and fill plugs located on the back of the case. After cleaning and reinstalling the drain plug, torqueing to 20ft-lbs, you can refill the transfer case with 2 quarts of automatic transmission fluid. For both the transmission and the transfercase, you will know it’s full when a small amount of oil starts running back out. We highly recommend a gear oil pump for filling both the transmission and transfer case, it just makes life much easier.
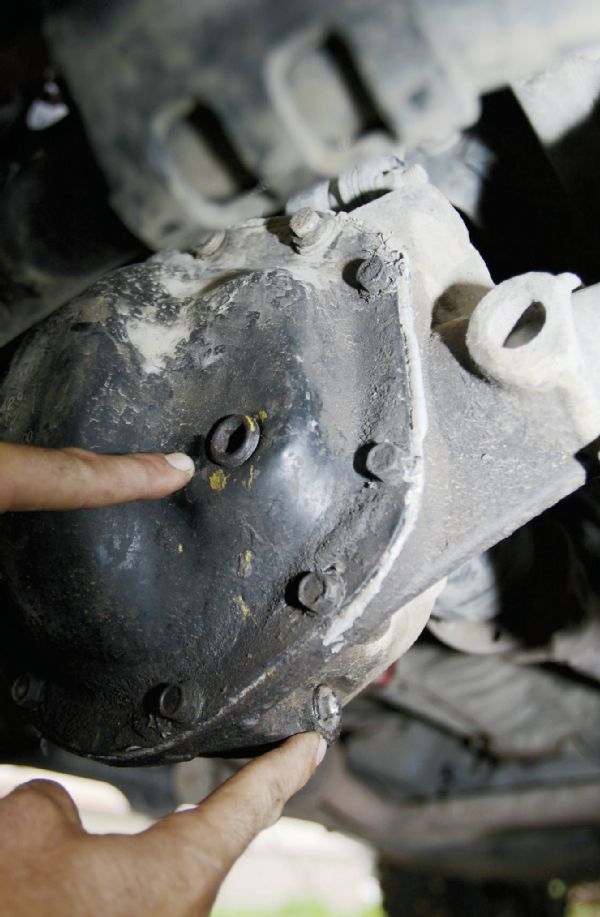 Both front and rear differentials use the same basic procedures. Unlike previous models of the Wrangler, the JK Rubicon axles have drain plugs machined in the bottom of the housings. My personal preference is to drain through the plug and inspect the oil and magnetic plug for sludge, major metal particles, or anything else that looks out of the ordinary. Providing everything looks normal and there are no cover leaks, I just drain and refill the differential with 1.4 quarts (front) and 2.4 quarts (rear) of SAE75W-90 gear oil.
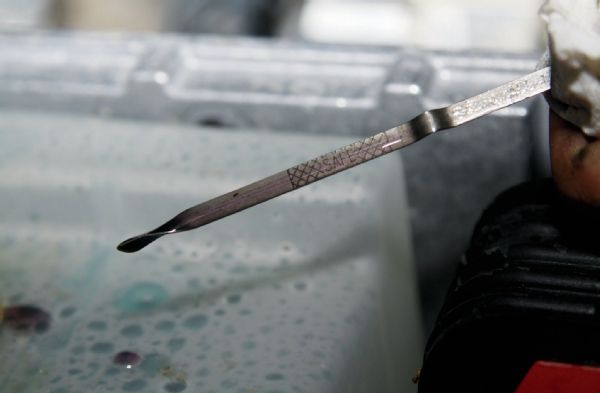
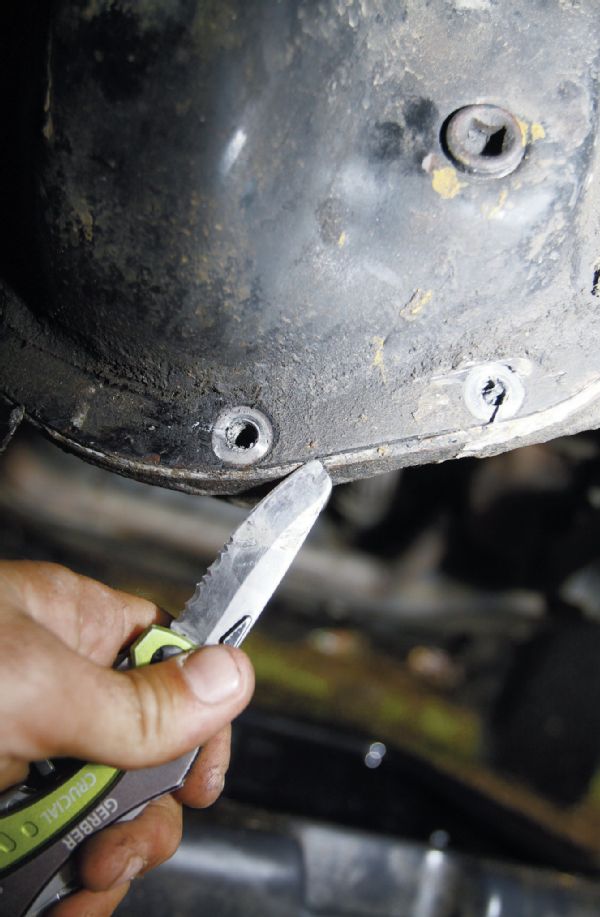 If you find it necessary to pull the cover, drain the oil first, and then use a 13mm socket to pull the bolts. Use a thin knife blade, putty knife, or scraper to break the seal on the gasket. Do not force the cover off, as you can bend it enough to cause a leak. Just continue to work whatever tool you are using around the cover until it pops off.
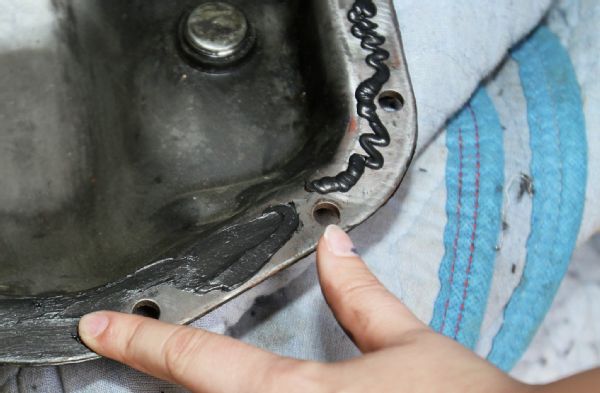 To reinstall, scrape the sealing surfaces on both the housing and cover so it’s clean and smooth, then use a gear oil safe silicone gasket material. My preference is for Permatex brand silicone, but Right Stuff is another very popular brand. There are several schools of thought on applying silicone, but the way I like to do it is by applying a thick ring all the way around on the housing, then smearing it around with my finger to make sure the entire surface is covered. Another method is to apply an even approximately 1⁄8-inch-thick bead down the center of the sealing surface, applying a ring around each bolthole, and then bolting the cover on. Either way, once torqued down to 30 ft-lbs, the silicone will spread out to fill any imperfections and give a good, leak-free seal.