We recently made the command decision to induce rapid climate change inside our 1957 Ranch Wagon. We began installing a new Vintage Air Gen IV Magnum heat and air conditioning unit. Due to the huge interior in our station wagon Vintage Air recommended running the large unit, plus this is one of their "smartest" units as it blends air to the desired temperature and can also blend the direction of airflow from defroster ducts to floorboards. All the way around it is a great unit.
In the previous issue we mounted everything inside the car, the underdash unit, A/C ducts, outlets, and the drain hose from the evaporator to drain of condensation water. Now we will turn our attention to the underhood work and connecting all the A/C components and wiring. We began by draining and containing the coolant from the engine and disconnecting the battery cables. Next we removed the radiator from the car. After removing the alternator and bracket we turned our attention to the lower crank pulley. Since our 312 Y-block had a single groove pulley on the crankshaft we must add another pulley to provide a second groove to drive the A/C compressor. Happily Vintage Air has the perfect cure in the form of a very nicely machined aluminum lower pulley. We removed the large bolt from the crankshaft. The new pulley actually bolts to the existing pulley with two bolts. We took the time to run a tap through the old pulley to clean out the long-unused threads. Then using the bolts supplied with the pulley kit we bolted the aluminum pulley to the existing pulley and installed the new center crankshaft bolt. A drop of blue Loctite provides peace of mind.
Next we mounted the A/C compressor and Alternator brackets to the motor. Vintage Air has brackets designed for the Y-block Ford and we really like the fact that the A/C compressor is mounted down low and out of sight, while our chrome alternator is mounted up top. There are a number of spacers supplied with the kit to facilitate 272,292 and 312 Y-block motors so it may take a bit of mixing and matching to fit the brackets to your particular engine. Once the brackets were in place we mounted the compressor and alternator to check for pulley alignment. With the belts mounted we had perfect pulley alignment. We loosened the bolts and removed the compressor belt for now.
With the compressor mounted we turned our attention to mounting the condenser. Vintage Air recommends mounting the condenser independent of the radiator. That way should you have to remove the radiator you don't disturb the A/C system. The condenser that came with our kit was sized to fit the 1957 Ford and came complete with universal-style mounting brackets. We opted to make our own upper brackets from some 14-gauge aluminum and use two universal straps for the lower mounts. These brackets mount to the condenser with the supplied sheetmetal screws and then bolt to the radiator core support. The four brackets make for a very solid mount.
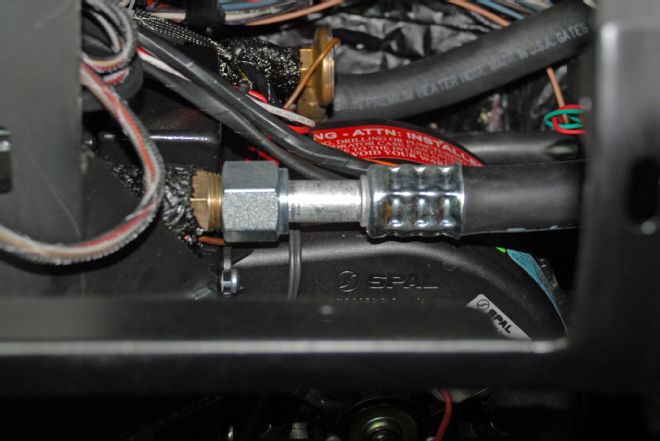
The last piece of A/C hardware to mount was the drier that also has a port for the binary pressure switch that protects the compressor. We opted to mount the drier to the condenser using a hard line, Vintage Air PN 35175-VFG and bracket PN 64776-VUB. Purchasing the hard line did three things: it kept the drier out of the engine compartment for a clean look; it placed the drier out front in a cool air stream; and using a hard line eliminated the need for a hose from the condenser to the drier. This hard line was suggested by one of the helpful techs at Vintage Air, which brings up another point. When in doubt, give the good folks at Vintage Air a call, they are well versed in these installations and are always willing to help.
With all the A/C hardware mounted it was just a matter of routing the hoses to flow the refrigerant through the system. We actually began by installing the heater hoses from the water pump and intake manifold to the Vintage Air heater fittings. The hoses were routed over the inner fenderwell and enter the car through the side of the cowl behind the wheelhouse. The A/C hoses follow the same route.
Next up was routing the A/C hoses. This took us a while as we spent a lot of time just routing hoses with no fittings installed to find the best location for the hoses. It is important to keep the hoses clear of exhaust manifolds and we wanted the hoses to be as invisible as possible while still remaining inside the engine bay. Two charging ports must be installed and they can go inline or attach to the compressor. We opted for the compressor mount because it was cleaner looking and eliminated four crimp joints compared to an inline installation. Working the hoses from the compressor to the condenser was tight, but with some patience we found a relatively easy way to make the connection from underneath the car.
Once we had settled hose routing, we drilled two holes in the radiator core support and installed two rubber grommets sourced from Vintage Air. We carefully cut and fit the hoses in place and crimped the ends. When it comes to crimping the hoses you have several options. You can rent a hand-operated hydraulic crimper from a local auto parts store or Vintage Air will loan you a crimping tool that can be used in a vise for no charge. You can also cut the hose and clock the fittings and send them to Vintage Air where they will crimp them for only the cost of shipping. We opted to rent a hand-operated hydraulic unit to crimp our hoses. A word of caution, be certain you are using the proper dies and crimper to ensure you don't crush the inner aluminum tube. After crimping, the hoses were installed using the proper size supplied green O-rings with a drop of the supplied oil. One last tip, where hoses pass through a bulkhead, crimp one end on the workbench but slide the hose through the grommet and then crimp the fitting in place. This allows for smaller holes for hose pass through.
So now we had all the plumbing in place the final piece of the puzzle was the wiring. The system is largely simple plug-in wiring that this is a very simple part of the job. Our Ron Francis Wiring panel had a fused power supply right on the panel so that was easy. The other power supply must connect direct to the battery. The Vintage Air wiring harness incorporates a 30-amp circuit breaker. They recommend the breaker be mounted as close to the battery as possible. With that in mind we mounted it very close to the fenderwell-mounted starter solenoid. We connected the wire direct to the battery cable on the solenoid. Likewise it is recommended the ground wire be connected directly to the battery. Since our Optima battery has both top mount and side mounts we fabricated a small stud using a pair of stainless steel bolts. We threaded that piece into the battery side mount and attached the ground wire from the harness direct to the side mount. By wiring in this manner the top of the battery maintains a clean appearance. The wires to the binary switch and the compressor were attached following the very clear Vintage Air directions and the wiring was complete.
We filled the radiator being certain to have a 50/50 mix of antifreeze and water. This is important since the A/C evaporator could actually freeze the heater core. We ran the engine up to temperature and tested the Vintage Air heating system. The fans worked perfectly and we had plenty of hot air. Now all we needed was some refrigerant.
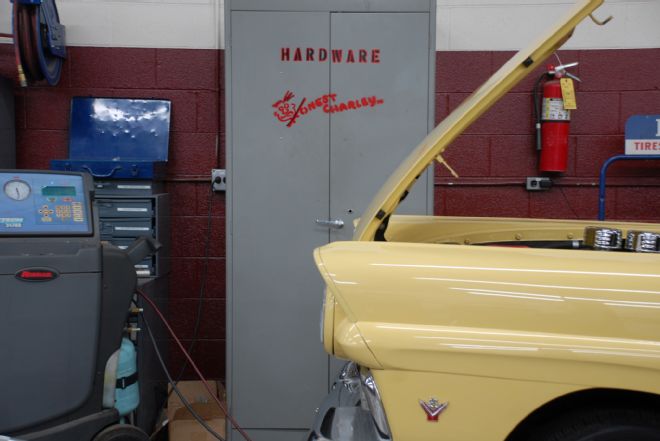
We made the short drive to Honest Charley Garage in Chattanooga, Tennessee, to have our system charged with refrigerant. The team there has the proper equipment to charge the A/C system and we like the idea of having someone who builds hot rods for a living doing the work. Of course Honest Charley Garage is part of the Coker Tire group along with Honest Charley Speed Shop.
After pulling a vacuum on the system we were pleased to see we had a tight system, no leaks. The refrigerant was added without oil as the desired amount of oil is already in the compressor when it ships from Vintage Air. Once the system was charged it was out on the highway for a little cruising with the windows up.
We were blown away by the performance of this unit. Our 1957 Ranch Wagon was super cool and the Vintage Air Gen IV Magnum unit delivered the air in quantity. Adjusting the fan speed and temperature was as simple as sliding the levers and we couldn't be happier. The only question we really have for ourselves is why did we wait 10 years before going with this great climate changing equipment?

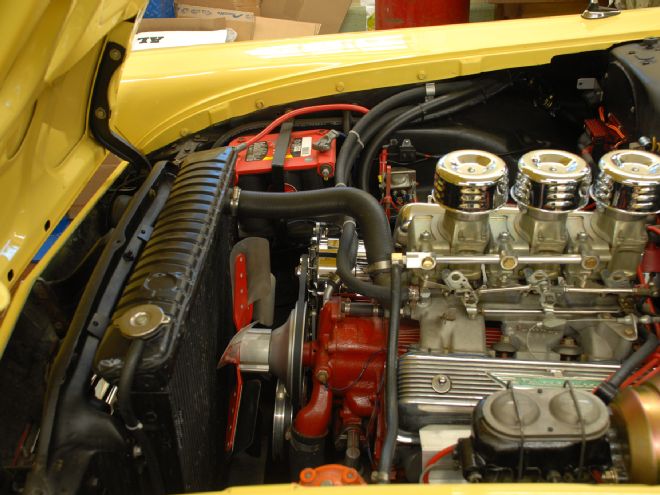
At first glance you don't even notice the A/C components on our 1957 Y-block. With careful planning and Vintage Air parts we managed to do a clean A/C conversion.
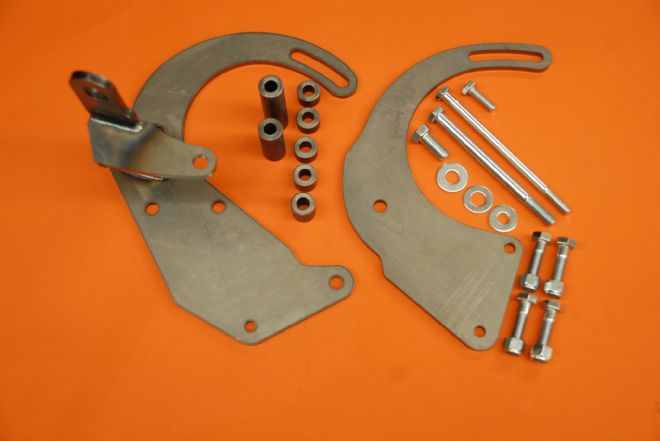
We were pleased to discover Vintage Air has brackets for the Y-block Ford family of motors. The brackets mount the A/C compressor down low on the motor with the alternator mounted in front of the valve cover.
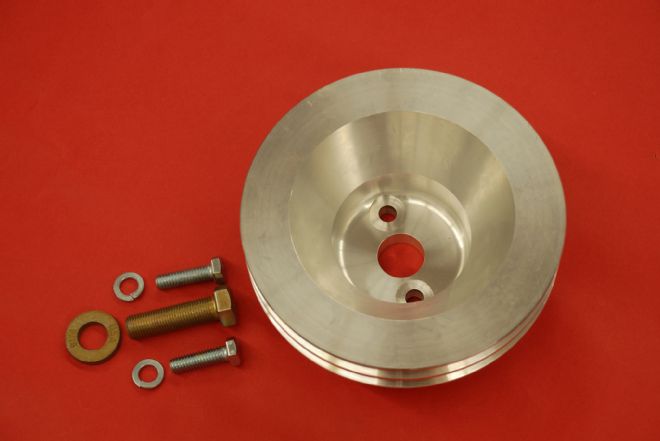
Our 312 Y-block had a single groove pulley on the crankshaft. Once again Vintage Air to the rescue with this nicely machined aluminum pulley. We'll mount this piece first.
After removing the radiator we ran a tap through the two mounting holes on the stock cast-iron pulley. Our new aluminum pulley bolts to the existing crank pulley.
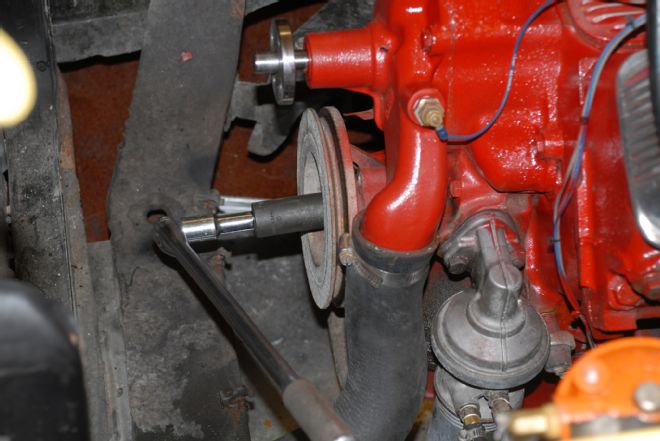
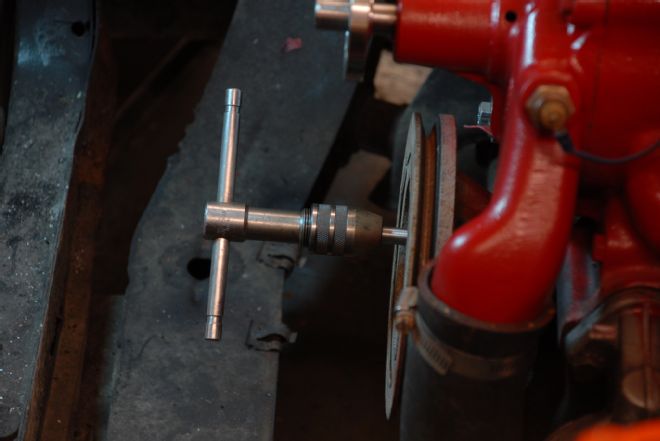
Before we could install the new pulley the large center crankshaft bolt must be removed. A longer bolt is supplied with the new pulley.

First we bolted the pulley in place with the two 5/16-inch bolts supplied in the kit, then the longer crankshaft bolt was installed. This pulley gave us two extra grooves but will only use one of them.
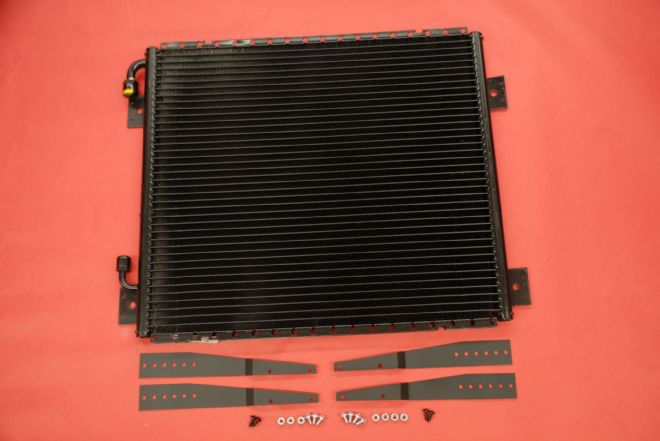
The next piece in the A/C puzzle is the condenser. Vintage Air sourced the proper size unit for us based on the radiator area of a 1957 Ford.
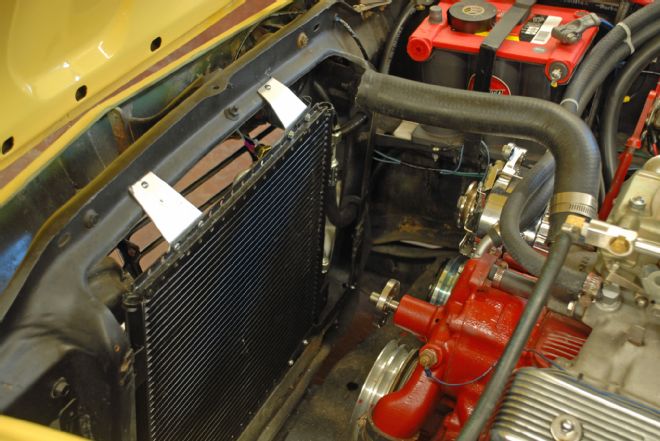
The universal straps supplied with the condenser would have worked fine, but we opted to fabricate these simple upper brackets from aluminum. We used two of the supplied mounting straps for the lower mounts.
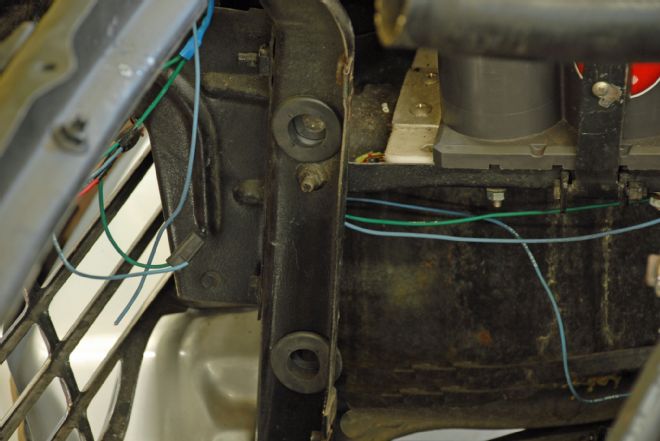
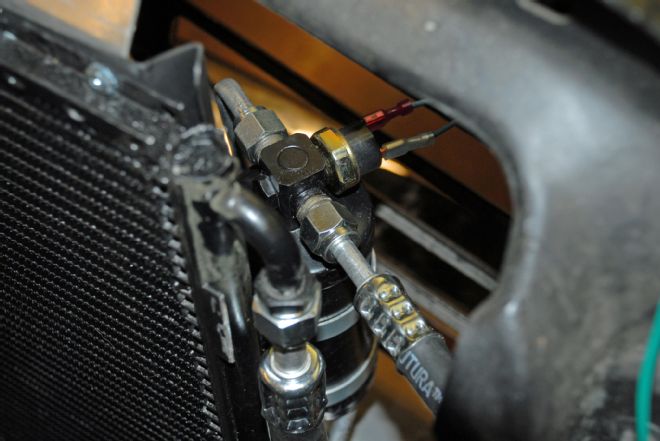
It took us a while thinking and looking for the best way to route the hoses to the condenser before we finally drilled these two holes in the radiator core support. Rubber grommets from Vintage Air will protect the hoses.
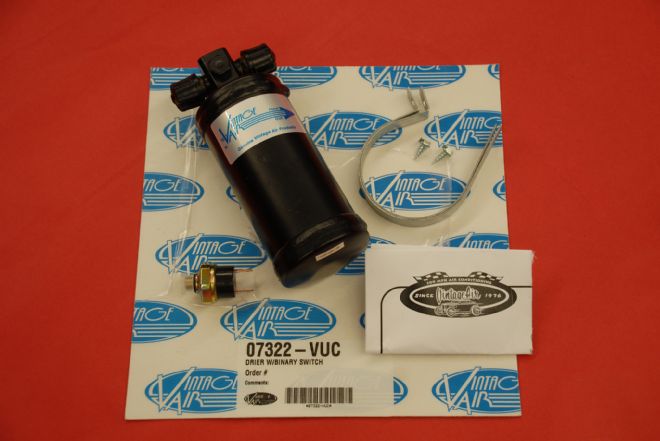
The drier also has a threaded port for the binary pressure switch that protects the compressor. Initially we were going to mount the drier inside the engine bay but then a better solution was found.
The drier was mounted to the front of the condenser using Vintage Air mounting bracket PN 64776-VUB in conjunction with a pre-formed hard line PN 35175-VFG. This greatly simplified the hose connections.
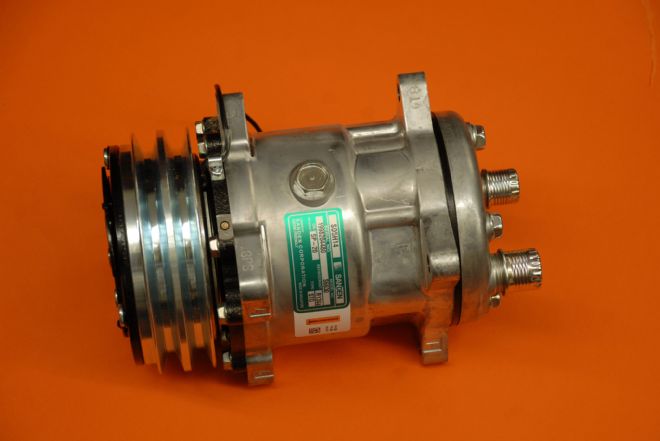
The S6630 Sanden compressor is perfectly matched to the Vintage Air Gen IV Magnum A/C system. By sourcing everything from one source we are sure of proper performance.
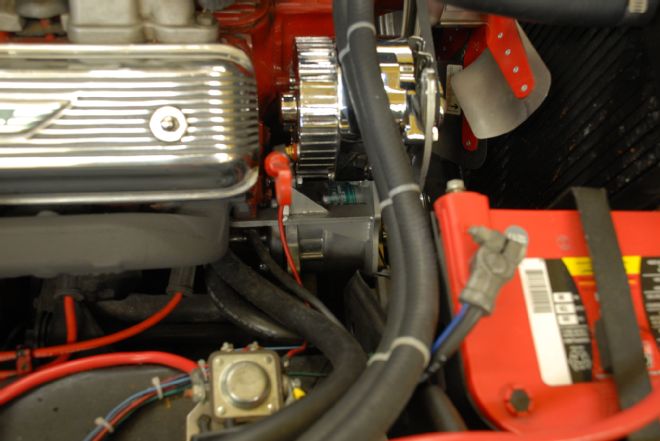
We love the fact that the Vintage Air compressor is out of sight. Look between the hoses and you'll see the compressor mounted low with the Vintage Air brackets.
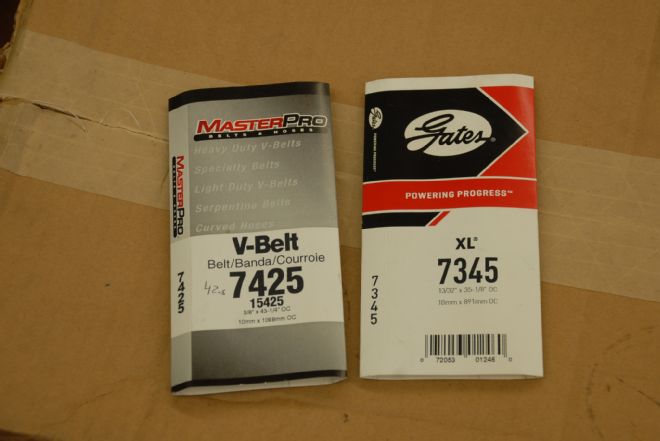
After mounting the compressor and alternator it was time for new belts. Belt size can vary from on different engines due to the variation in water pump pulley sizes. We used a 13/32x35-1/8 belt on the compressor (Gates 7345) and a 3/8x43-1/4-inch belt on the alternator (left, PN 7425).
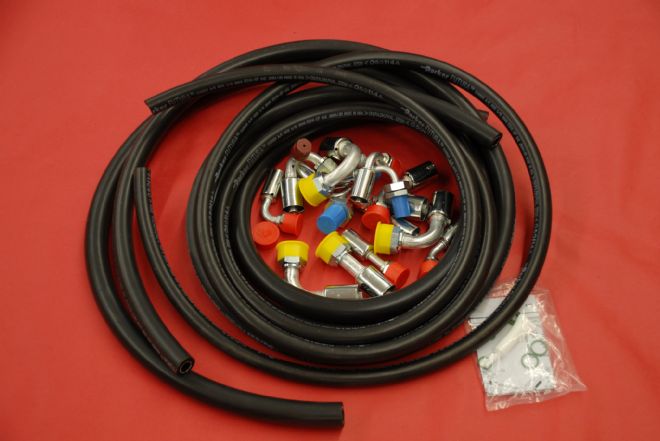
The Vintage Air hose kit comes with enough hose and fittings to plumb most cars. Firewall bulkhead fittings are extra and available in many shapes and sizes. The way we routed the hoses no bulkhead fitting was required.
We carefully fit, cut, and crimped the hoses using the green O-ring and proper oil to attach the hose to the evaporator. We rented a handheld hose crimper from the local auto parts store.
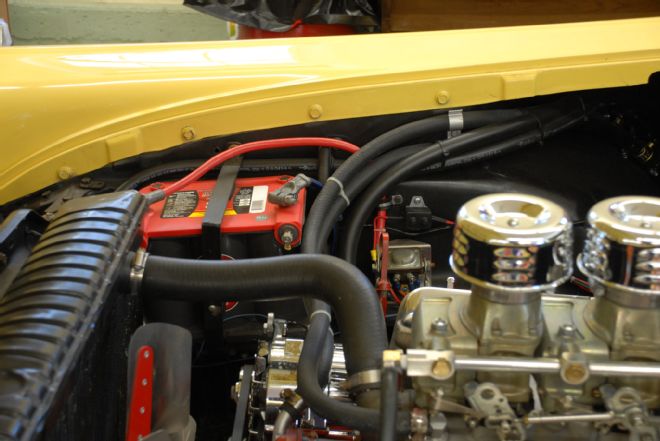
We spent a lot of time carefully routing the hoses to keep the engine bay clean and tidy. The heater hoses were routed first, and then the A/C lines followed the heater hoses. Note the one A/C line just above the battery tucked out of the way.
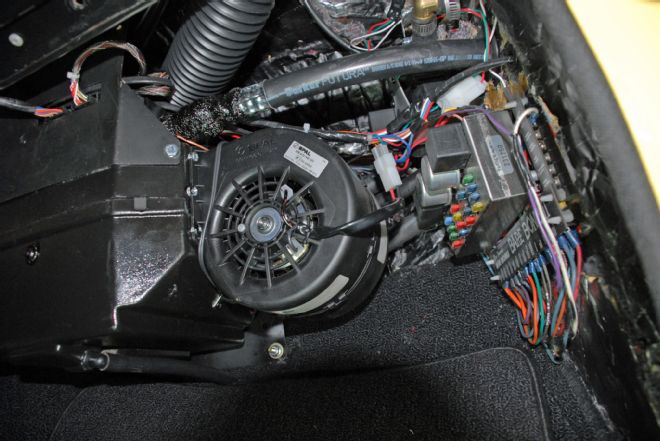
It's a tight fit under the dash, but the close proximity of the Ron Francis wiring panel made one power source connection quick and easy, as there was a fused post for A/C on the panel.
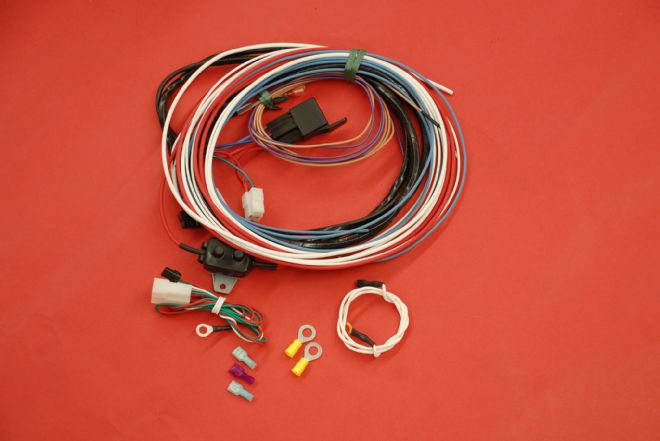
The Vintage Air Gen IV Magnum kit comes complete with the required wiring. Much of it simply plugs in while there are about six other simple connections involved.
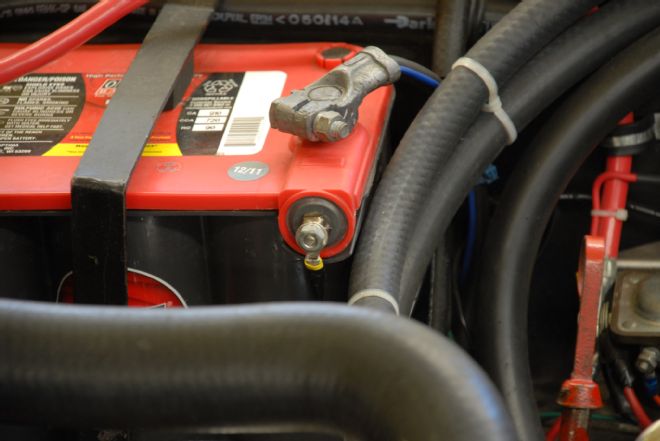
As per the instructions we ran the ground wire directly to the battery. We made this simple stud for the side mount on the Optima battery for a clean and simple connection.
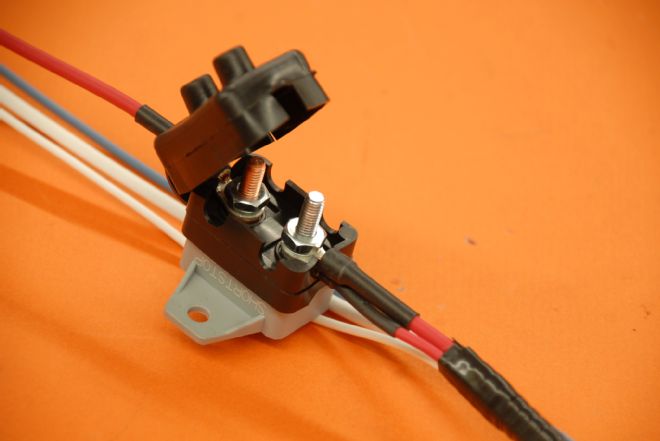
This 30-amp circuit breaker protects the entire A/C system and comes pre-wired with the kit. The rubber boot keeps the elements out. All the A/C wiring is very straight forward.
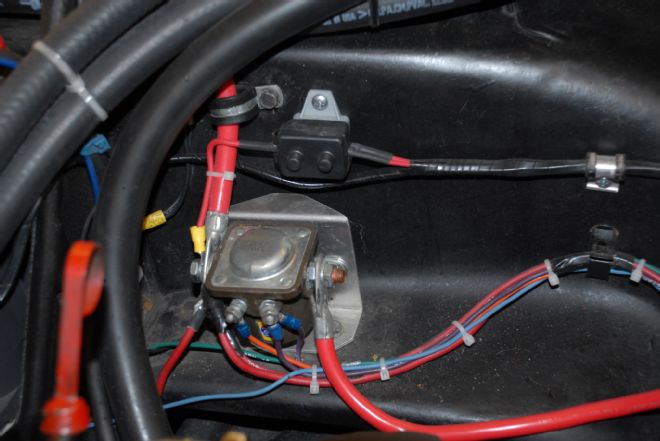
Vintage Air recommends the 30-amp circuit breaker be mounted as close as possible to the battery. We made the connection on the battery cable side of the fenderwell-mounted starter solenoid.
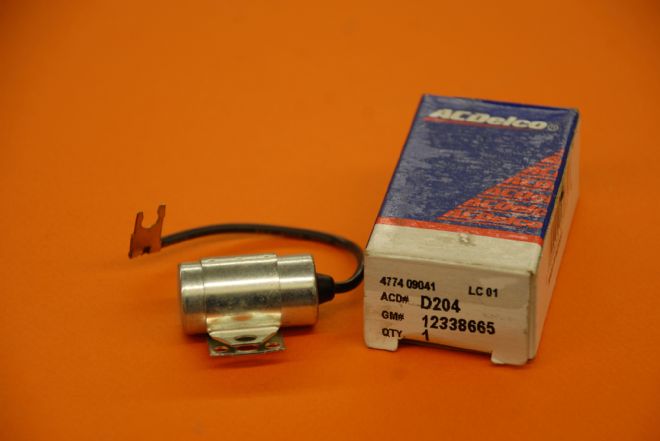
Because the Gen IV A/C system is electronically controlled it is important to keep the electronics isolated from electrical noise. Just to be safe we added this capacitor to the positive post of the coil. A/C Delco, PN D204.
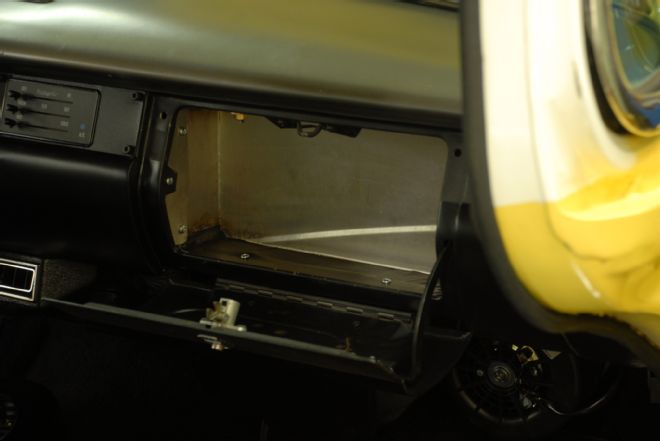
It sure was handy working through the glovebox opening, but now that the A/C is up and working we fabricated a new, albeit shallow, stainless steel glovebox. This is a big step up from the original cardboard Ford provided.
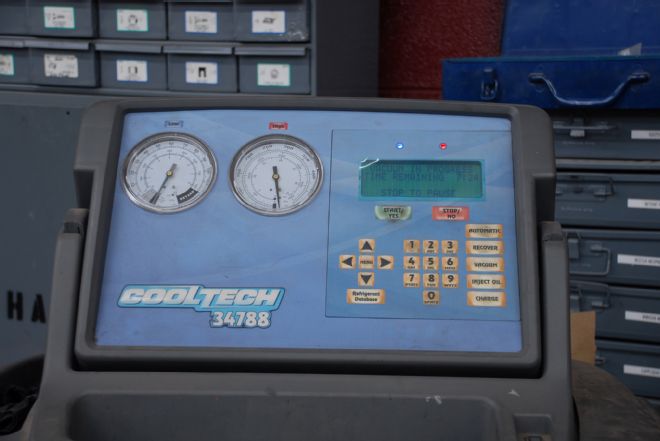
After the installation was complete we drove down to Honest Charley Garage in Chattanooga and had the system vacuumed and the filled with refrigerant. The system has proved to be simply amazing, with the interior cool even in 95-degree weather—what an improvement!