Convert: 1976 GMC 1500 Axle Swap - 4-Wheel & Off-Road Magazine

Here's the dilemma: For most forms of off-roading, you can't beat a short wheelbase. That's why Jeeps, early Broncos, Scouts, and the like are so popular. In the fullsize spectrum, that's also why Blazers, Jimmys, Ramchargers, and 1/2-ton trucks are the rage. But with any of the fullsizes, you get 1/2-ton running gear with tons (literally) to stress the axleshafts, gears, pinions, and driveshafts. These components have their own way of letting you know when you've asked too much.

131 9902 Convert 1976 Gmc 1500 Axle Swap gmc Front Three Quarter Photo 31619824

It's no surprise that the most popular upgrade you can make to these vehicles is to swap in 3/4- or 1-ton axle assemblies. This fixes almost all the shortcomings of the lighter-duty axles, and in most cases the parts aren't that difficult to install.

The truck used for this conversion is a '76 GMC 1500 that came with a Dana 44 frontend and a 12-bolt rearend. Dana 44s were used until the mid '77s, when the 10-bolt frontend became 1/2-ton equipment. The 10-bolts replaced 12-bolts completely in 1983. Both 3/4- and 1-ton GM trucks used 14-bolt rears, so the real difference is in the front. Through the mid '77s, the 3/4-ton frontend was the same Dana 44 used under 1/2-tons. The rotor and hub were different and had the eight-lug wheel pattern. The 1-ton trucks used a Dana 60 up front, which is the ultimate in strength, but these are extremely pricey pieces. If your tire size or type of wheeling demands the strongest you can find, you'll want the 60.

131 9902 Convert 1976 Gmc 1500 Axle Swap stripping Front Axle Photo 29718422 
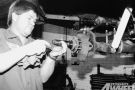
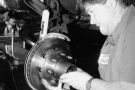
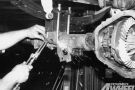
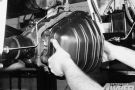
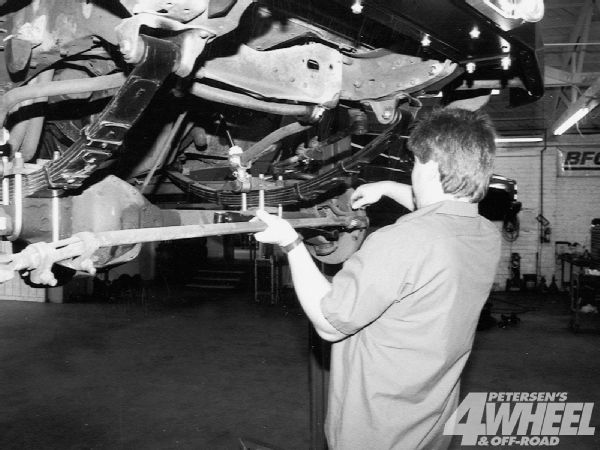
The crew at Off Road Unlimited (ORU) does plenty of 3/4- and 1-ton axle upgrades in addition to all sorts of custom and bolt-on work on four-wheel drives. After discussing a few options, a 14-bolt was selected for the rear of this truck, while the original Dana 44 frontend would be converted to eight-lug. The first step was to strip the front axle of all of its steering, brakes, and axle components.

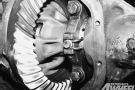
The 14-bolt advantage is undeniable strength while the drawbacks include cost, lost ground clearance under the pumpkin, and weight. In addition to larger pieces and a pinion that's fully supported, eight-lug 14-bolts are full-floaters. This means that the weight of the vehicle is on the hubs instead of the axleshafts.

We've heard both ends of the spectrum regarding swapping a 1/2-ton to 3/4-ton gear: It's more expensive and difficult than you think versus it's an easy bolt-in. We went to Off Road Unlimited to find the truth and realized that, while it's not a 100 percent bolt-in procedure, it's not that intimidating either.

So What?
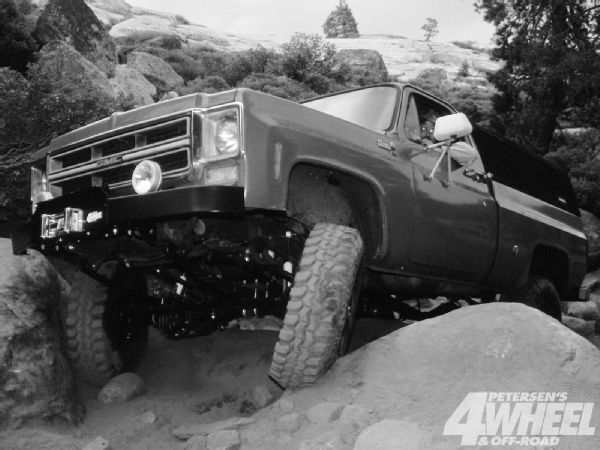
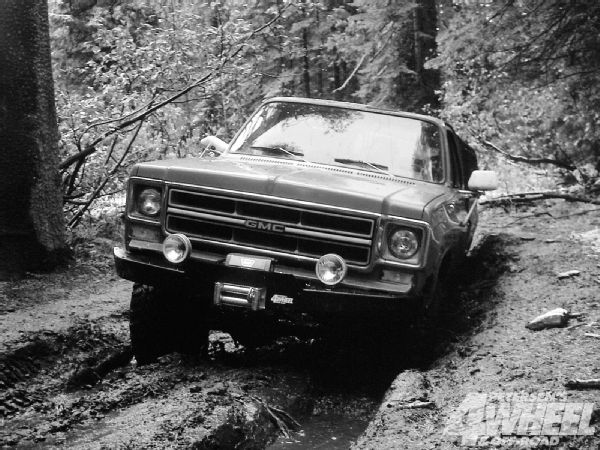
Everyone talks about swapping axles, and a few people actually do it, but how do you know for sure what it will really do for you? Inquiring minds wanted to know, so a mere 15 hours after this GMC had finished its axle surgery, it was on the Rubicon Trail. A tough trail by most four-wheeler's standards, it's even more challenging for a fullsize truck. It seemed like a great place to test a heavy-duty axle swap combined with the addition of lockers and gears.

131 9902 Convert 1976 Gmc 1500 Axle Swap front Shot Photo 29718446

The 4.56:1 gear ratio turned out to be perfect with the 36-inch Swampers, SM465 four-speed tranny, and half-worn-out 350 engine that kept on chugging all the way down to 400 rpm. The combination of a Detroit Locker in the rear and an ARB Air Locker in the front also proved to be a winner. Detroits are nearly indestructible, and both of these lockers survived the two days of abuse without even a whimper. In fact, we found the Detroit barely noticeable on the eight-hour drive to the trailhead and back home. The limited turning radius of this GMC made having the ability to turn off the front locker a true blessing. We engaged the Air Locker only when it was really necessary, which turned out to be less than a dozen times on the Rubicon. But when we needed it, the front locker saved us from resorting to throttle or a more precarious line.

The Swampers worked incredibly well. Even with snow and copious amounts of water and mud on the rocks, the tires slipped only a few times. The ride on the freeway was cush and not quite as deafening as nonradial Swampers, although it was still loud enough to remind you of your investment in rubber. The steel wheels were also the correct choice because they were unavoidably rubbed hard against rocks.

Finally, those fancy-looking aluminum diff covers survived the trip. The front one smacked some rocks with only a few scrape marks to show for it. The best summation of the testing is the fact that there was zero breakage.
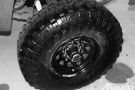
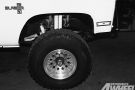
PhotosView Slideshow The spindles used on '71 through mid-'76 model Dana 44s were a little smaller in diameter than those used on late-'76 through '87s. Maurice Rozo at ORU says that the larger spindles bolt onto the earlier housing and are a little stronger. The larger ones, from either a Dana 44 or 10-bolt, will fit an earlier 44, and they will require later hubs to match the larger size. An ARB Air Locker and 4.56 gears were going into the pumpkin of this Dana 44, so the axleshafts were removed too. The stubshafts, axleshafts, knuckles, and steering U-joints are all reused for a 3/4-ton conversion, so inspect them for wear and consider changing the steering U-joints since you have them out of the axlehousing. 
Other maintenance you should consider while the frontend is torn apart is whether to replace the ball joints. These take a beating if you 'wheel hard, and they usually aren't noticed until they separate. The added expense of changing them is minimal with the axle taken apart. Eric Garding at ORU set up the ARB Air Locker and Precision 4.56 gears in the 44. The copper air line from the collar required that the driver-side main cap be modified for clearance. The line then snaked around to the top of the housing where a bulkhead-type fitting was installed. Garding used an inch-pound torque wrench to measure the drag on the pinion. He also used the marking compound included in the full installation kit from Reider Racing to check pinion depth and gear contact. With the locker installed and the gears set up, the axleshafts could be installed. The only parts really changed to make the Dana 44 a 3/4-ton are the brake rotor, hub, and backing plate. You can either buy rotors and hubs new as a unit, which comes with the studs pressed in, or find a used pair, which is much more economical. The original 1/2-ton brake calipers are retained.

The Right Tires And Wheels
When you swap from five- or six-lug axles to eight-luggers, you must change wheels. Depending on your brake choices, you may also need to shift from 15-inch wheels to 16s or 16.5s, which also requires new tires. The truck used for this article had 15x8s with 33x12.50 tires before the axle swap. The front calipers and backing plates had been ground slightly for the 15s to fit, but the rear disc brakes required 16s for proper clearance.

Everything this truck needed to cure its wheel and tire dilemma was available through Tyres International. In addition to having an incredible selection, Tyres offers one-stop shopping and will deliver your tires mounted and balanced on your wheels. You can even order your lug nuts and locks from the company. This truck called for some serious meats on all-business wheels: 36x12.50R16 Super Swamper TSL radials on 16x10 American Racing type 767 steel wheels. The increase in tire height lifted the 14-bolt to maintain the ground clearance the truck had with the 12-bolt and 33s. The radial Swampers are a hair quieter on pavement and offer the same traction off-road as their steel-belted brethren.

PhotosView Slideshow A GM Corporate 14-bolt is found under 3/4- and 1-ton two- and four-wheel-drive trucks, making them fairly common. They were also used under dualies and vans, but these have different overall widths from regular pickups and Blazers, and the spring perches are in different locations. If you're doing a swap on a '73-'87 truck, Blazer, or Suburban and are looking at one that's not bolted in a truck, the rearend you want is 72 inches from end to end (measuring from the end of the axle-retaining bolts) and 66 1/2 inches from wheel flange to wheel flange (with drum brakes), and the leaf-spring centering-pin holes are 42 3/4 inches apart. For '67-'72 trucks, Blazers, and Suburbans, you'll need one 70 3/4 inches wide, 66 3/4 inches from flange to flange, and 40 inches from pin to pin. A 14-bolt is a heavyweight in more than one way; it tips the scales at about 525 pounds fully dressed with drum brakes. That does wonders for axle droop but makes it a serious pain to install. Gary Valencia positioned the rearend on jackstands (using an engine hoist) to lower the truck onto the rear. If you've located the correct rearend for your GM truck, the springs will sit perfectly on the perches. The axle tubes are larger in diameter than a 10- and a 12-bolt, so new U-bolts will be required. Valencia whacked off the excess thread on the U-bolts once the nuts were torqued to 150 lb-ft. One of the drawbacks of a full-floating rear axle is that the drum brakes are challenging to service. You must remove the axleshafts and two interlocking hub nuts just to pull the drums. To avoid this and increase the braking power of the truck, this GMC was fitted with an ORU disc-brake kit. The original hubs were used for this swap so the lugs were driven out and the hub and drum separated. 131 9902 16 o+131 9902 convert 1976 gmc 1500 axle swap+super swamper The tires still hit, badly. This truck has a 6-inch Pro Comp suspension lift and no body lift. The body is less than perfect, so a Sawzall came to the rescue. The majority of the rubbing was on the front of the fenders, so cutting at the line shown here ended that problem. At the rear, a little metal needed to be shaved at the bottom on each side. Here's an example of nicer metal trimming. The front of the fenders were whacked in line with the prerunner bumper, but the trailing edge of the fender openings were swept back. A rolled lip makes it look factory. A Detroit Locker from Reider Racing was used in the 14-bolt. The unit for this rearend is a little different from other Detroits. The locker (lower left) functions exactly the same as a Detroit for other applications, but it replaces only the two side gears and four pinion gears inside the original carrier. For most other axles, Detroits replace the whole carrier. Another gear-installation kit from Reider Racing was used by Valencia to set up the 14-bolt and check all vital statistics. In addition to the parts provided in these kits, ORU installed new inner and outer axle bearings and seals to complete the rebuild on the front and rear axles. The original shocks bolted right up to the mounts on the new rearend. Because the 14-bolt is heavier, however, there will be more axle droop and you should check for adequate shock length. The mounts on this rearend were tweaked pretty badly, so Valencia cut and replaced them with custom brackets that ORU offers. Mauricio Natera installed all of the disc-brake parts on the 14-bolt, including a custom spacer, new backing plates, rotors, and calipers. The rotors are the same diameter as the front, and the calipers are GM units. Valencia installed Pro Comp braided-steel brake lines from the calipers to custom-bent hardline mounted on the axlehousing. luminum ORU diff covers were used front and rear. They add fluid capacity to the axles and dissipate heat more quickly than steel. They also look a heck of a lot better. There was some question about their durability on tough rockcrawling trails, which is addressed in our "So What?" sidebar. The brakes were finished front and rear with a Pro Comp braided-steel line kit. These hoses are extra long to allow for plenty of axle movement and are DOT legal. The 3/4-ton swap didn't require any special lines because the 1/2-ton calipers were retained up front, and Valencia bent new hardlines for the rear and used the junction block off the 12-bolt. The final step in an axle upgrade is to connect them to your 1/2-ton truck's transfer case. One route is to have your original rear driveshaft shortened and have the axle end replaced with one that holds a 1350 U-joint (the 1/2-ton rear used a 1310). The 1350 U-joint is larger and stronger. The best option is to have an all-new driveshaft made. This one is from Denny's Drive Shaft Service, and it features sealed U-joints and an extra-long slip joint. Denny's also provided a new output for the NP205 that accepts a 1350 U-joint. A new shaft from Denny's was used up front. While it used the stronger sealed U-joints and heavy-duty steel tubing, it retained the 1310 U-joint and CV joint. This truck has a four-speed, which made this shaft relatively short and, with a 6-inch suspension lift, created the potential at full suspension droop for greater front driveshaft angle than the larger 1350-series joints can operate at.