The comprehensive, self-tuning kits from companies such as Holley, Edelbrock, FAST, and MSD have made EFI conversion a truly bolt-on, DIY project, while the inclusive control module kits from Chevrolet Performance complement their crate engines to make LS swaps amazingly straightforward.
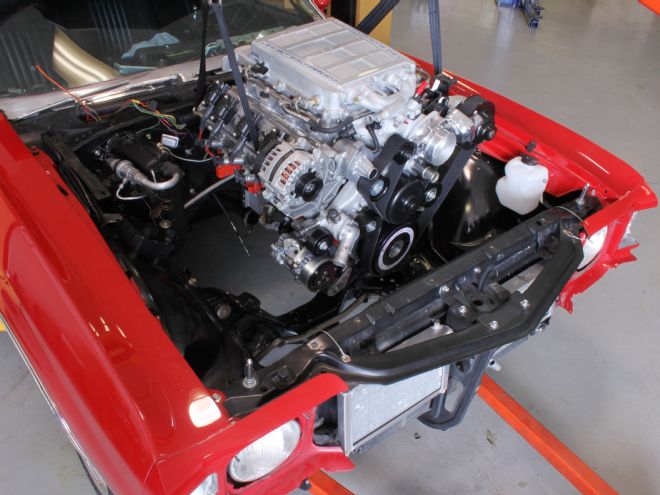
Yes, it is unquestionably a new world of performance, but even with products that make the project easier than ever, converting to electronically controlled fuel injection in your older Chevy – whether you’re going with a simple TBI-style conversion on the existing small- or big-block, or taking the plunge with a full-on LS conversion – involves more than simply slapping on the throttle body, plugging in a few connectors, and installing a high-pressure fuel pump.
There are a number of supporting elements required to get the engine started and keep it running, from wiring the engine to the controller and the all-important fuel system considerations. Thanks to healthy aftermarket support, addressing these issues is comparatively easy, although fabrication of one sort or another is highly probable. You just have to plan for them at the outset of your project.
We’ve outlined 10 of the most common items and sub-projects of a typical EFI conversion, which will give you a practical idea of what you’ll be facing when you finally decide to pull off that carburetor and bolt on a throttle body. Nothing here is all that complicated, and even moderately experienced wrench-turners should have no problem tackling them.
Don’t let all the wires dissuade you. Jump in and make the conversion!
Mass Airflow Sensor Installation
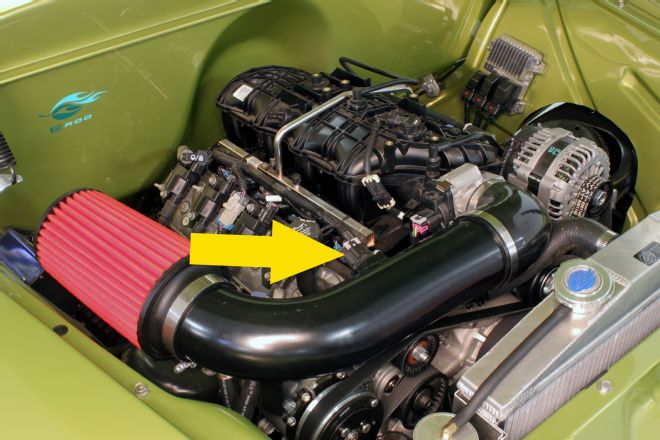
If you’re going to run a mass airflow metering system on your vehicle, such as the system used on production GM LS port-injection engines, proper positioning of the airflow sensor is critical for ensuring accurate readings and, consequently, optimal performance. The sensor should be mounted a minimum of 10 inches away from the throttle body and more or less in the middle of a straight, unobstructed intake tube that’s at least 6 inches long. GM recommends for its control systems that the tube be at least 4 inches in diameter and that the mass airflow sensor is oriented so that the connector end is mounted between horizontal and fully upright. Chevrolet Performance’s universal air induction kit (PN 19301246) includes a straight tube with a boss already installed to accept a GM mass airflow sensor.
Accelerator Pedal
When using a GM-based system with an electronically controlled throttle, the original, cable-operated throttle pedal is eliminated and an electronically compatible pedal must be swapped into the vehicle. A sensor tells the engine controller how much to open the throttle when you step on the pedal. For safety and accurate readings, GM recommends the pedal should be mounted at least 2.5 inches to the right of the brake pedal and 2 inches below it, with at least 3/4-inch clearance between the pedal and the transmission tunnel. You can source a pedal from a late-model salvage vehicle, but the easier (albeit more expensive) way to go is one of Chevrolet Performance’s control module/harness kits, which include the electronic pedal as well as the engine controller itself, and more. See the Engine Control Module tip for more details.
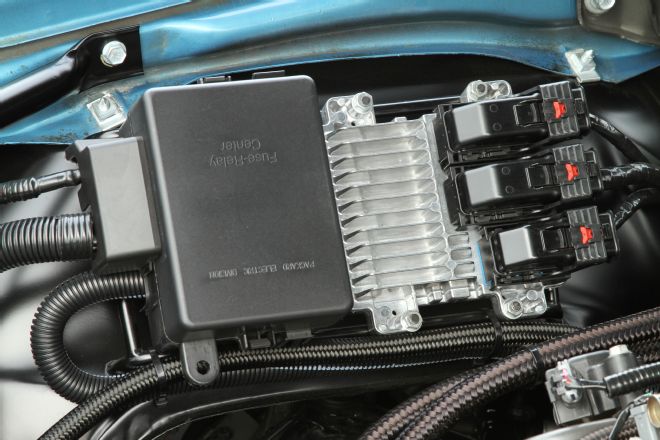
Engine Control Module
Inclusive EFI kits such as MSD’s Atomic EFI, Edelbrock’s E-Street, FAST’s EZ-EFI, and Holley’s HP EFI include the necessary engine control module and harness — and they’re great because they basically tune themselves. But if you’re building a system from scratch or installing a Chevrolet Performance LS crate engine, you’ll need an appropriate control system. For those with some nerd in their blood you can build your system and try your hand at tuning with products such as MegaSquirt’s systems. If you’re more into the plug-and-play method and you’re using a crate engine, we highly recommend one of Chevrolet Performance’s control module/harness kits. Along with the controller and harness, the kits generally include the throttle pedal for electronic throttle control, oxygen sensors and their mounting bosses, a mass airflow meter, a fuel pump power module, and more. It’s pretty much everything you need to wire up the engine and get it running.
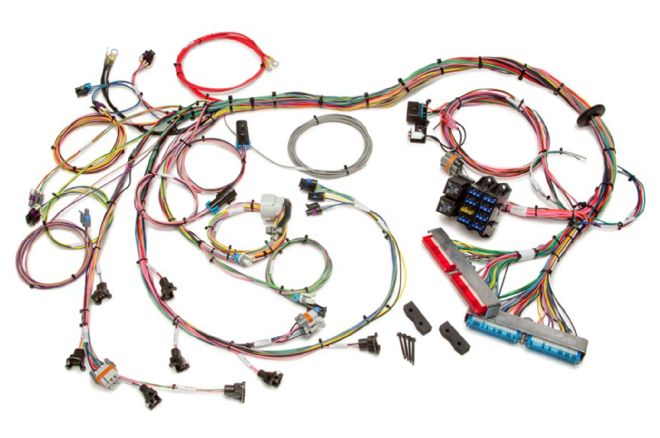
Wiring Harness
If you haven’t purchased an inclusive EFI kit and plan to forage in the salvage yard or on Craigslist for your components — and maybe even an entire engine — you’re going to need a wiring harness to connect the engine control module to the injection system and related sensors. And even if your used engine comes with a controller and a big wad of wiring, the OEM harness will likely have way too many unnecessary connections that won’t be used in your retrofit project. Rather than spending days trying to figure out what’s necessary and what isn’t, the easier alternative is spending a few extra bucks on a harness designed for such swaps, like those from Painless Performance or Performance Systems Integration. Along with a much easier and more straightforward installation, these dedicated harnesses are more aesthetically pleasing, too, with minimal wiring that doesn’t clutter your engine compartment.
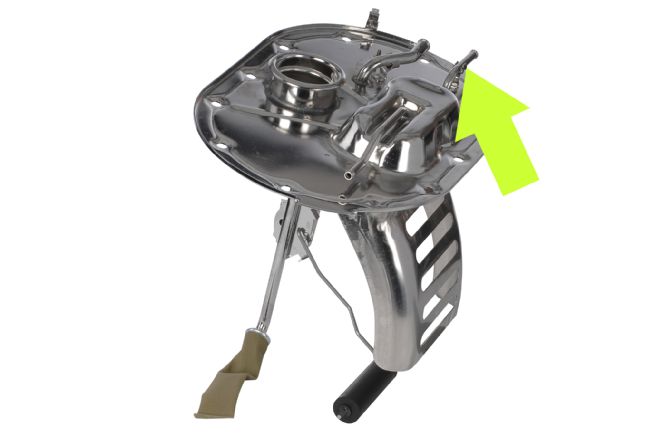
Fuel Pump – In-Tank vs. Inline
Even if you’re an EFI newbie, you’re probably aware of the need for a high-pressure fuel pump to support the system. There are countless options, from production-based pumps to a plethora of aftermarket pumps to support a vast range of projected horsepower ranges. The question, however, is whether to use an external, inline-type pump or an in-tank pump. The in-tank pump is the ideal solution, mostly because its immersion in the fuel helps keep it cooler. But for EFI conversions on a budget — and featuring mildly or moderately built engines — a high-quality inline pump will suffice (don’t forget the appropriate filter, too). Just mount it close to the fuel tank and below it, because it will still need gravity feed. As for the in-tank options, you can get your fabrication on and craft a system yourself that replaces the stock fuel sender assembly; adapt a universal kit such as the one from Tanks, Inc.; or step up to a replacement, EFI-capable tank (see the Fuel Tank Considerations tip.).
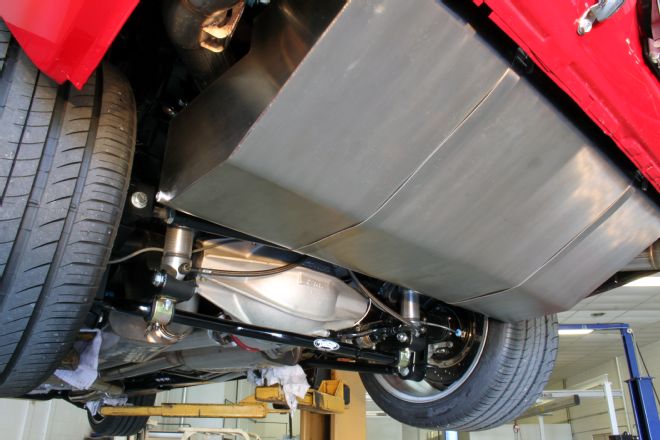
Fuel Tank Considerations
If you’ve decided to go with a replacement fuel tank to support your EFI conversion, there are several choices and, like everything else associated with building a performance vehicle, only your checkbook balance binds them. For applications intended primarily for street driving, there are tanks that look like stock units but with modifications to support drop-in pump modules. They’re reasonably priced, too, from vendors such as National Parts Depot and Rick’s Camaros, priced in the few hundred dollars range. After that, you’re looking at custom, high-performance tanks such as those from Rick’s Tanks. They are for more serious performers such as the street/track Pro Touring crowd and those regularly running on the dragstrip; and they are typically baffled to minimize sloshing and/or surround the in-tank pump to ensure the pickup remains immersed during hard launches and hard cornering. Generally, you’re looking at around $1,200 to more than $2,000 for one of these tanks.
Fuel Return Line
Unless you’re using a factory-style returnless fuel system, your EFI conversion is going to require a fuel return line from the engine back to the fuel tank. That’s a 3/8-inch fuel hose for the vast majority of systems. If you’re going with an aftermarket, EFI-compatible fuel tank it’s just a matter of cutting the hose to length (probably around 15-18 feet for most vehicles) and connecting it. If you’re retaining the stock fuel tank, it will have to be modified to accept the new line. In many cases, you can modify the sending unit module by drilling the appropriate hole and TIG-welding on a length of 3/8-inch stainless steel line. The tank itself can be drilled if there’s no room on the sending unit. You’ll also want to swap the original feed hose from the tank to the engine with a new hose that’s suitable for high-pressure fuel injection.
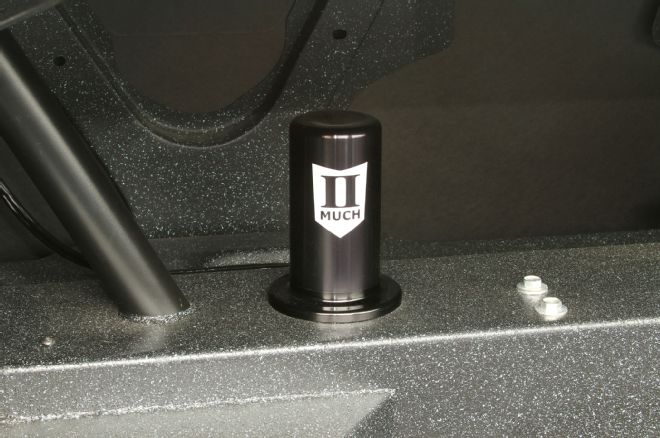
Fuel Tank Venting
Just like in a carbureted system, proper fuel tank venting is essential for preventing vaporlock, fuel slosh, fuel odor, and more. In fact, it’s even more of a concern with EFI as the return system is bringing hot fuel back to the tank, which can quickly build vapor pressure. In that regard, the traditional vented gas caps of older vehicles may not provide adequate relief, while the design of many custom tanks for a high-pressure EFI fuel system may not accommodate venting at all. You can add a small fitting somewhere near the top of the fuel filler neck — as long as it is higher than the tank itself and prevents fuel from entering it — and run a vent hose to the exterior of the car (away from the exhaust). There are aftermarket solutions, too, such as the vent from II Much Fabrication, which allows the use of a sealed fuel cap and provides filtered air to the tank. It mounts above the tank on a flat, level surface, which pretty much means somewhere in the trunk.
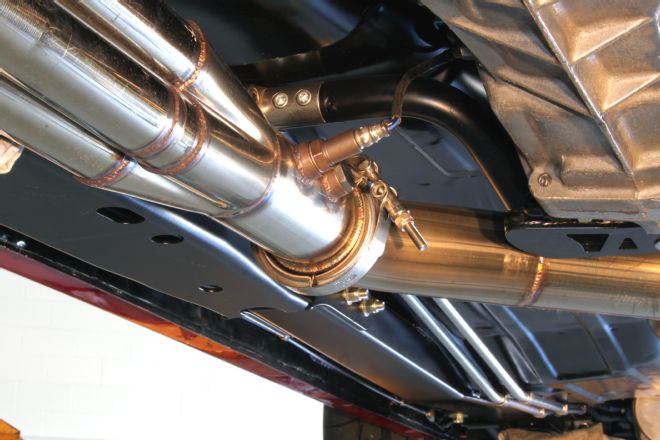
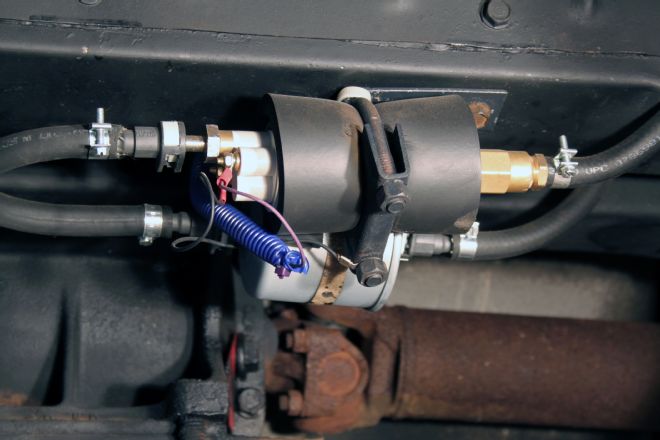
Oxygen Sensor Installation
Your EFI conversion is going to require the installation of oxygen sensors, which provide the engine control module signals related to the oxygen content in the exhaust, which helps determine the optimal fuel delivery. They’re mounted in the exhaust system, which means either your long-tube headers or the flow-tubes behind the exhaust manifolds will have to be drilled to accept the threaded bungs for the sensors. If you’re handy with a welder, it’s a DIY job. If not, you’ll have to have the modification made by someone who is. When it comes to locating the sensors, you’ll want them as close to the exhaust manifolds as possible so they’ll get up to operating temperature as quickly as possible. You’ll also want to install the bungs so the oxygen sensors aren’t positioned in a way where they’ll get bashed on speed bumps or scraped on steep driveways — and if your car has a catalytic converter or two, mount the sensors in front of them. One more thing: Use wideband sensors, because they afford greater tuning latitude. Narrowband sensors simply indicate lean or rich conditions.
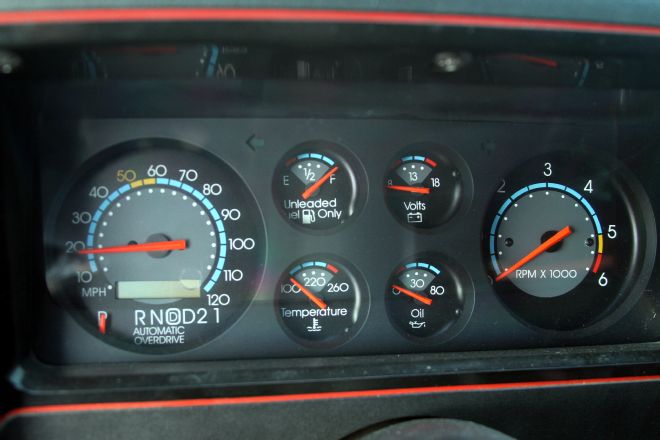
Instrumentation
This is really a tip for those of you planning an LS conversion, because the old, mechanical gauges aren’t going to work with the engine controller. Besides the electronic vs. mechanical issue, the range of the original instruments likely won’t cover that of the LS engine, like the oil pressure gauge, for example. The solutions vary, but the easiest is creating a custom gauge panel with electronically compatible gauges from the likes of Auto Meter or Classic Instruments. Other choices include Redline Gauge Works which can modify just about any factory gauge cluster with the guts of electronic instruments. There’s also Dakota Digital, which offers a number of VHX direct-swap clusters for popular vehicles featuring controller-compatible instruments. Don’t forget while Classic Instruments can make custom gauges they too can restore your original gauges or you can use their replacement panels with gauges that will work for just about any engine combination. We’re seeing more of them in restomod cars and they look great.