It’s hard to imagine, but the newest C5 Corvette is now 12 model years old, and the oldest C5 is one year shy of being 20 model years old. The model that redefined the Corvette for modern times, and ushered in one of the greatest V-8 engine families to come out of Detroit since the first generation of small-block Chevy, is almost of legal drinking age. Doesn’t seem like it’s been that long ago, does it?
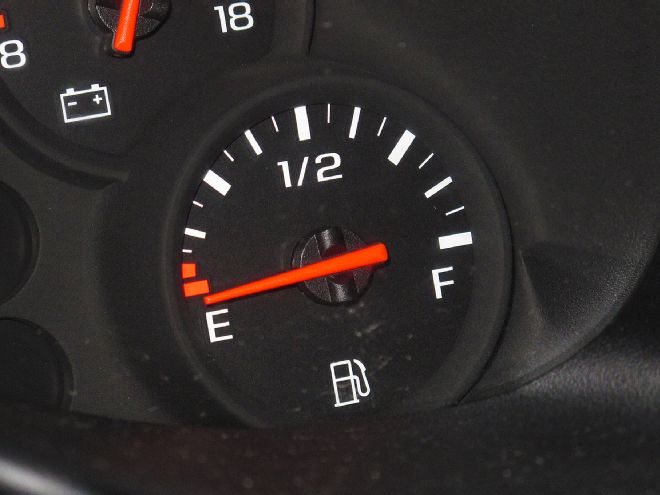
Over the years a few things have popped up with the C5; minor issues and idiosyncrasies that owners learn to deal with and GM and the aftermarket come up with solutions for. One of those is the fuel tank sending unit failing. One day you climb in, turn the key, and notice the fuel gauge says you are out of gas, usually just after you’ve filled it up.
This problem also occurs with early C6s, but to replace the unit on a C6 (and late-2003 to 2004 C5s) requires the removal of the whole rear drivetrain cradle to get access to the tank and fuel pump assembly. For earlier C5 owners, the process is much easier, and doesn’t require removing any major components. Recognizing the common issue, GM came up with an improved sending unit (PN 10333749) that has an improved design for longer life and better reliability.
The crew at Antivenom Performance in Seffner, Florida, happened to be doing this job on a very low mileage 2003 Corvette that had the sending unit fail. The whole job only took a few hours, and the biggest part that required removal was the driver-side rear wheel.
01. It is all too common for C5 owners to start their car one day and see the gas gauge bottomed out on “E.” Over time, the factory fuel tank sending unit starts to degrade and eventually stops working entirely. Thankfully, though, the solution to this problem is rather easy.

02. After removing the driver-side rear wheel, the first step is removing this shield from in front of the sending unit.
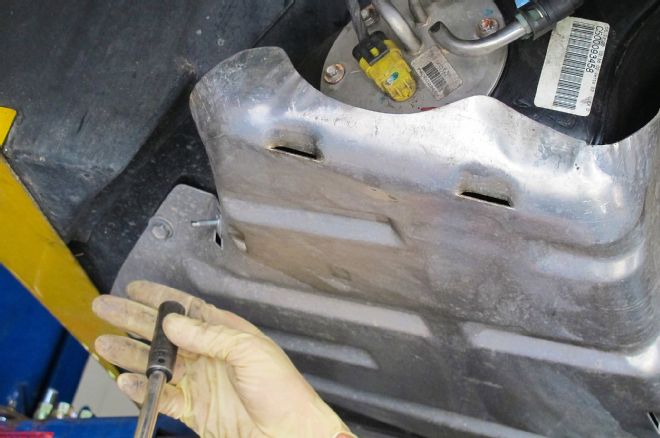
03. Next, the shield/plate that holds the tank in place is loosened, but not fully removed, so it can be pulled out of the way when removing the fuel pump/sending unit assembly.
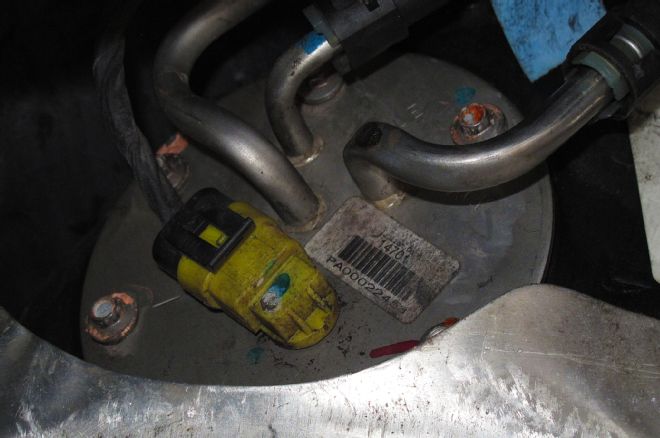
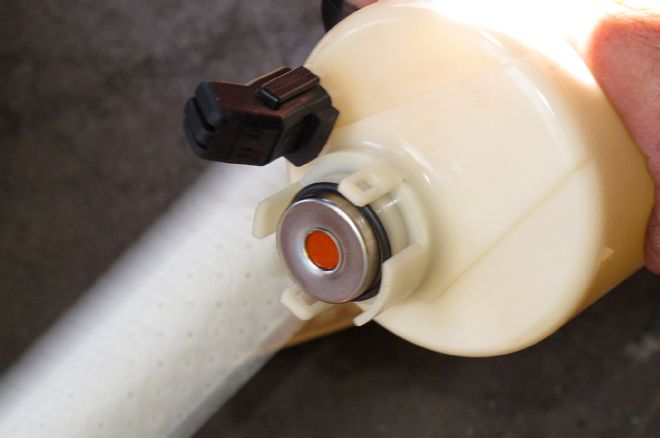
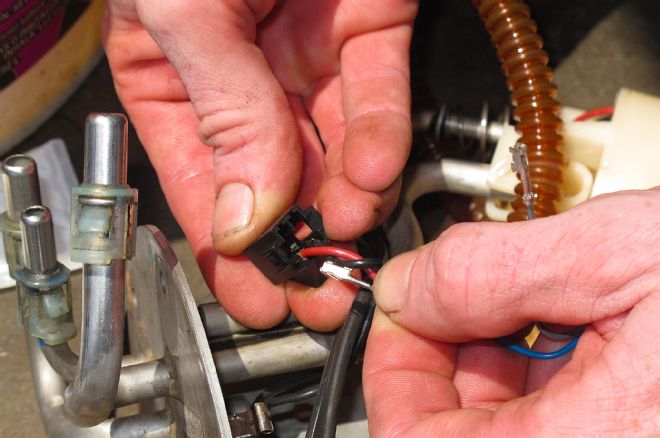
04. The fuel pump assembly is held in by four bolts. Before removing these bolts, disconnect the fuel lines and unplug the electrical connection.
05. With the bolts removed, the assembly is pulled part of the way out of the tank. Murphy’s Law is the sending unit will fail just after you fill the tank, just like the fuel pump seems to. Try and get as much gas out of the tank one way or another to make your life easier.
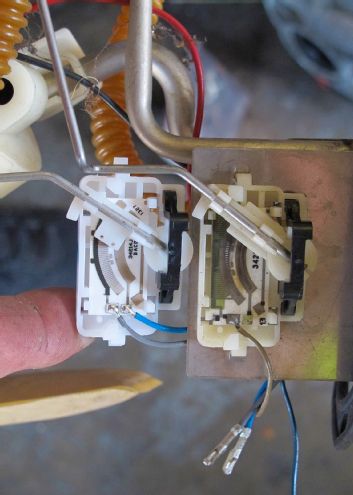
06. On the left is the new sending unit, and on the right the original. Recognizing this has become a problem with C5s, GM now offers an upgraded sending unit (PN 10333749) with better circuitry for longer life and reliability.

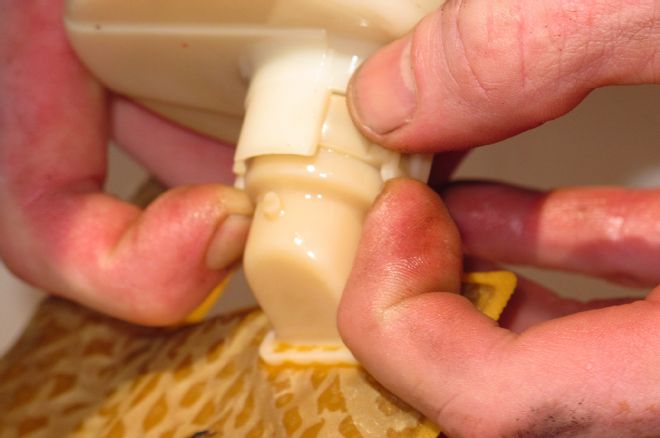
07. This is the plug the sending unit wires go into. Replacing the sending unit requires you to remove the wires from this plug to wire in the new sending unit. Don’t worry though, the wires are color-coded and it’s easy to push the leads out. When removing the pump assembly, it’s usually easier if you detach the sending unit part, freeing up the float arm from the assembly so it’s easier to get the whole thing out.
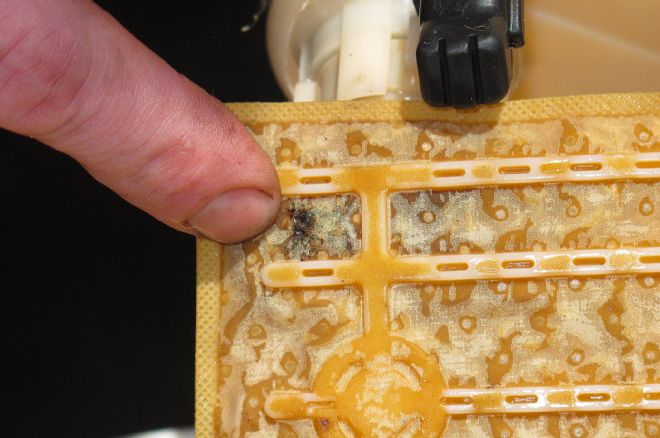
08. While this job can be done without removing the whole fuel pump assembly, it’s usually easier to pull the whole thing out. Depending on your car’s age/mileage, it makes for a great time to replace the fuel pump, too (with either a stock replacement unit or an upgraded one from a fuel system specialist, such as Racetronix), or at least the fuel filter sock from the end of the pump. Our car had less than 50k miles on the clock but had this kind of crud buildup in the sock so replacing it was a no-brainer.
09. The fuel sock locks in place on the end of the fuel pump and is removed by gently unlatching it from the pump and pulling it off.
10. Before you put the new sock on, make sure you install a new O-ring on the end of the pump (usually included with the new sock or the new pump) or else you’ll end up with fuel pickup issues.

11. After that, the new fuel sock clips into place on the end of the fuel pump.
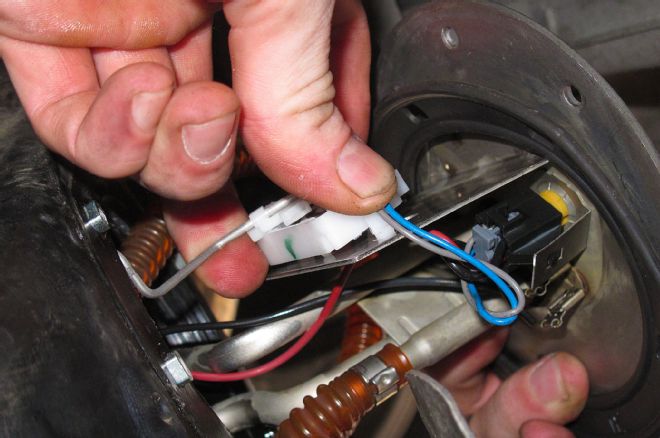
12. The wires from the new sending unit insert into the assembly plug like this. The blue wire goes above the red wire and the gray wire above the black. If you get these backwards the gauge won’t read properly.
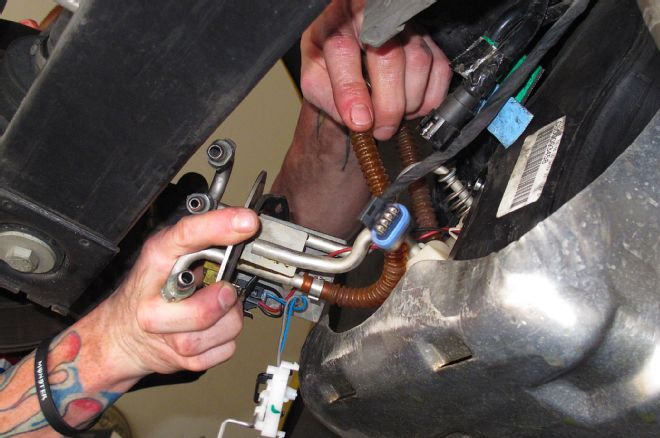
13. With the wiring installed, the fuel pump assembly is inserted into the tank, with the new sending unit still loose from the assembly. Doing it this way ensures you won’t bend the sending unit float arm or get it tangled up with the fuel pump assembly workings. One other thing to make sure of here is your fuel pump assembly gasket is in good enough shape to be reused, or you’ll need to install a new one. Otherwise, a massive fuel leak will ensue.
14. Next, install the sending unit into the tank, then clip it onto the fuel pump assembly. After that, check to make sure the float arm travels freely and in its full range of motion.

15. Once that’s done, you just have to bolt the fuel pump assembly back in place, reattach the fuel lines, and plug the harness back in. Then tighten the bolts on the fuel tank retaining plate and reinstall the shield you removed in the beginning.
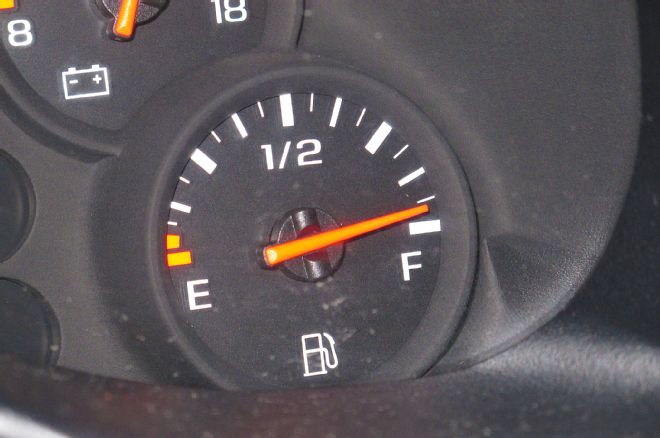
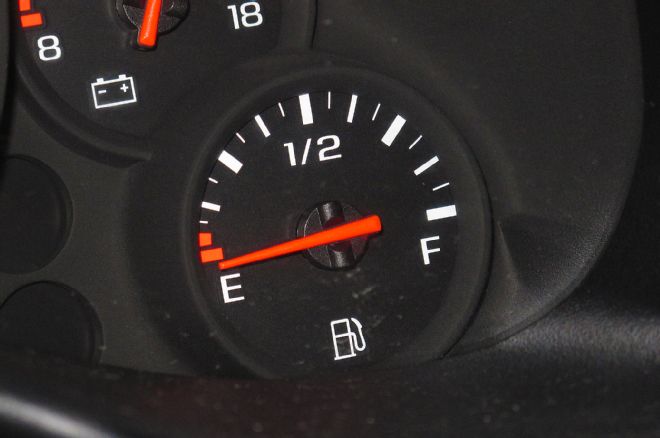
16. And this is what you should have after filling the tank with gas: a fuel gauge pointing in the right direction!