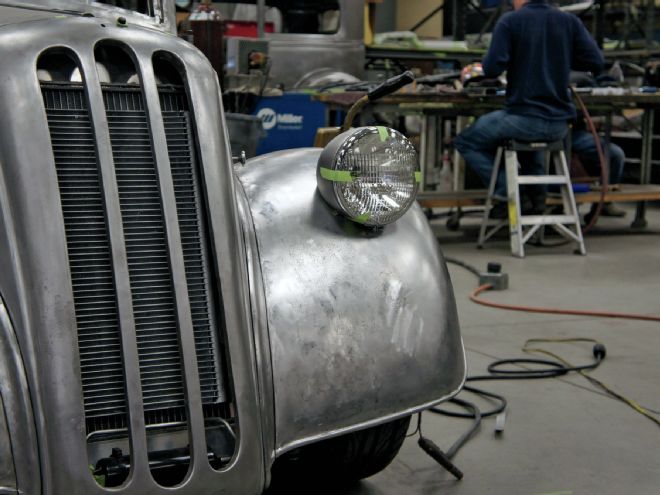
We tend to regard the headlight as a functional necessity but it played a pretty critical styling role. For example, back when grilles towered like monoliths over lower fenders the headlights acted as sort of intermediaries between the unlikely shapes.
Then, as the automobile changed through the '30s, the headlight sort of doubled as an evolutionary marker. As manufacturers redesigned their cars with lower hood profiles the headlights sort of migrated toward the fenders. It was a race of sorts that culminated in 1941 when the headlights took their rightful homes within the fenders, a place they stayed for decades. In retrospect this evolution states that reducing the headlight's prominence translates to progress.
Of course that puts most cars designed in the mid-to-late '30s at a bit of a disadvantage: their headlights, left to reconcile the difference between the high grille and relatively low fenders, mark the designs as antiquated. Simply eliminating those cars' lights or mounting them fully within the fenders ends almost always in disaster; without the headlights to run interference the grille usually stands out in all the wrong ways.
But that's not to say early style cars are beyond redemption. It just takes a little creative thought. Actually it takes plagiarism; by slightly sinking the lights as the designers did in the late '30s we can diminish the light's prominence and make the earliest car appear more progressive.
Matt Schmidt at Steve's Auto Restorations recently addressed this issue as part of the transformation of a '48 Thames. Though introduced that year, the Thames and the Anglia and Popular that followed amounted to a facelift on a car designed in the mid '30s, a period when tall, narrow grilles and separate headlights prevailed. So while this job may be specific, the general information that follows it applies to any car designed in the mid-to-late '30s, regardless of its origins.
The method Schmidt used to sink the headlight eliminates the stand on which it mounts altogether. Since the headlight swivels on that stand, eliminating the stand eliminates the aiming feature. It doesn't eliminate aiming totally but it requires precision work, intelligence, and one seemingly unrelated modification.
Preparation always makes a job better but it's simply required in this case. For this trick to work the car has to sit at its final rake. That means the car has to be at least mocked to the height that it will ride at when finished. Because to alter the rake after doing this the lights will point too far up or down. Second, the job as Schmidt did it requires converting the housing to use parts from a specific retrofit-style headlight design. That's actually a bit of a godsend in the sense that the new parts mount more modern headlights, which better focus light where it's needed most. Parts from other headlight housing models may work adequately but reproduction King Bee housings are flawed in a way that actually works in our favor.
The reproduction King Bee housings were designed around and include a specific European-style H4 lamp. Technically all H4 lamps are interchangeable with each other and U.S.-spec sealed-beam lights but the one in the repro King Bee is special: It's a little thicker than the rest. So any other H4 or sealed-beam headlight will in fact fit but fit loosely.
So to use a conventional sealed-beam or even another manufacturer's H4 lamp (recommended for reasons stated later) you must shim the lamp to take up the gap between its rim and the housing. And that gap makes this job possible.
We can aim the headlight's beam by juggling the shim stock between the back and front of the lamp at various places around its perimeter. For example, we can aim the beam downward if we apply more shim to the back than the face at 12 o'clock and/or more shim to the face than the back at 6 o'clock. And it works for lateral position too: Point the lamp left with more shim to the face than the back at 3 o'clock and/or more shim at the back than the face at 9 o'clock. Naturally the inverse holds true.
Though a sealed-beam headlight would actually work perfectly for this retrofit we highly recommend other manufacturers' H4-style lamps (Hella, Cibié, or Delta come to mind). For one, unlike sealed-beam headlights they cast light consistently across the entire field of vision rather than in two hard spots immediately in front of the car. They also maintain a sharp cutoff that better prevents stray light from dazzling oncoming traffic. But most importantly when the bulb burns out you just replace it rather than the whole lamp assembly, a relief since replacing a sealed-beam lamp in this system requires tediously re-aiming the headlight.
Admittedly this is a lot of legwork to endure just in the name of aesthetics. But if you think about it, it's not any different than the legwork we all sign up for when we consent to modify cars built in the early part of the last century.
So is it worth it? If you have a car designed when headlights also had to reconcile the difference in height between the grille and fenders it's certainly worth considering. It may seem like an awful lot of work for such a seemingly insignificant change but more often than not the small things make the biggest differences.
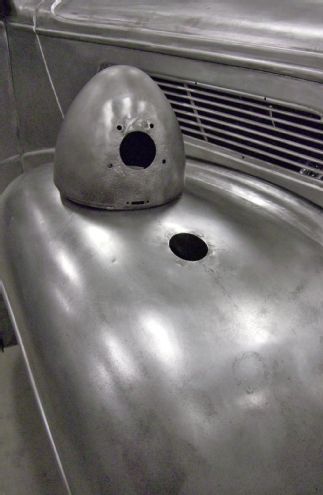
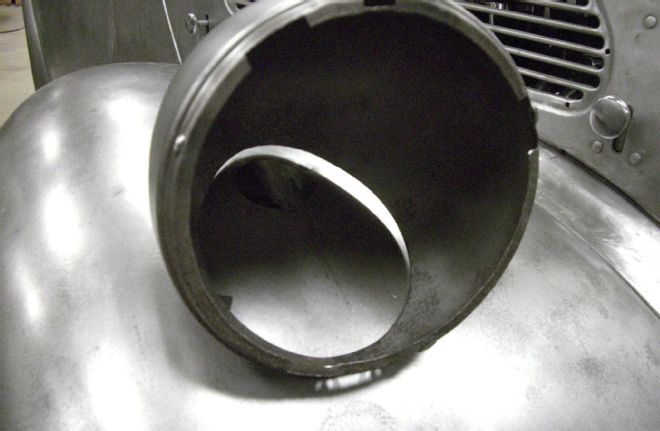
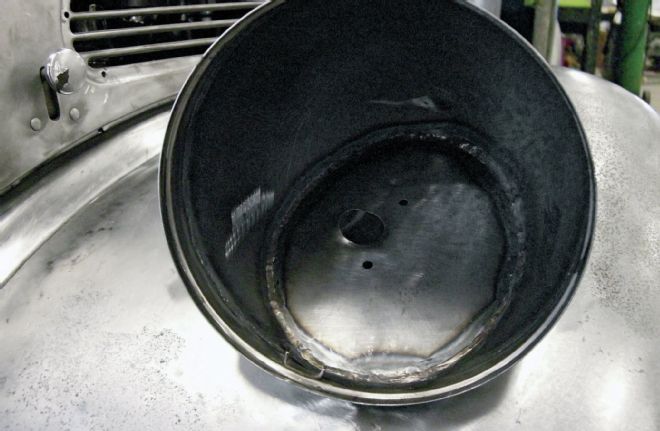
1. We're beginning at an advanced stage. Matt Schmidt already removed the ball and mount that supports and aims the headlight. The ball attaches to the five holes and fits in a cup that covers the hole in the fender.
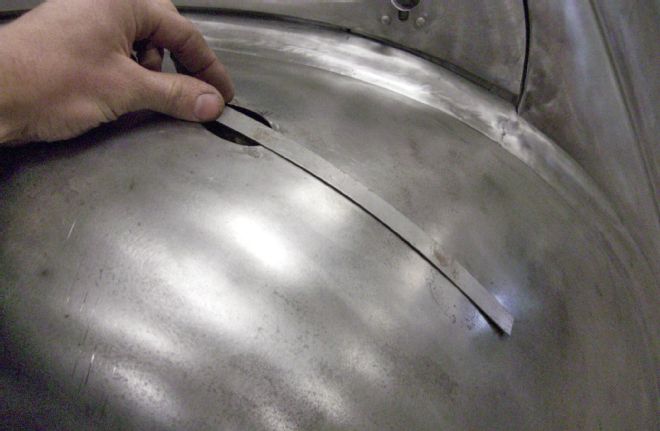
2. Schmidt began by setting the car at its intended ride height on its final wheel-and-tire combo. He then made a template of the fender's shape by simply bending a strip of bare steel to lay over the area where he intended to mount the headlight.
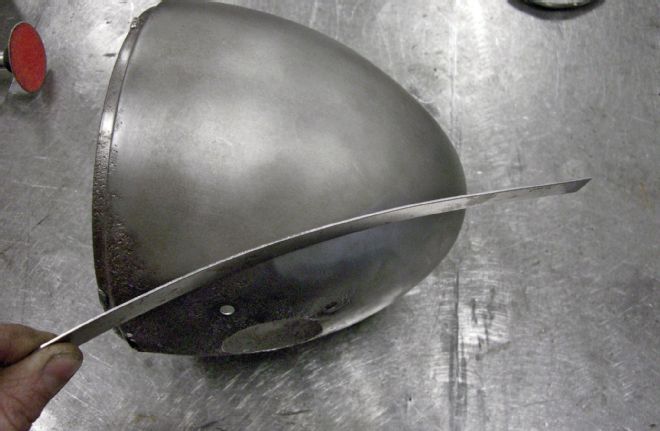
3. Then Schmidt transferred the general shape to the headlight housing. At this point the template is merely a guide.
4. The line is far from perfect, as seen by the giant gap between the cut line and the housing. Let the fit determine where to remove material for a tight fit.
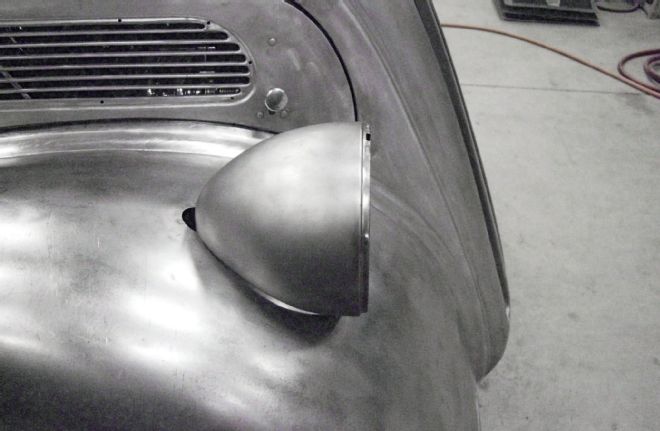
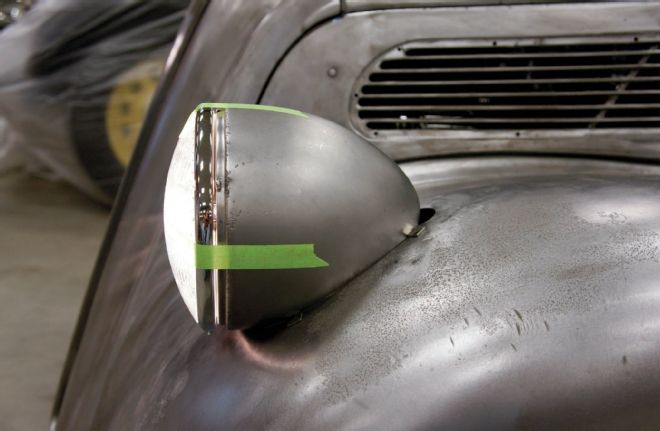
5. Don't commit early on to a specific location; the looks change as the headlight sinks. Subtle tweaks like pushing the light forward, as seen here, make a big difference.
6. As indicated earlier the fit determines where to trim the cut line. Make the parts fit as tight as possible to minimize or even eliminate machine work down the line. The acute angle makes those jobs tedious.
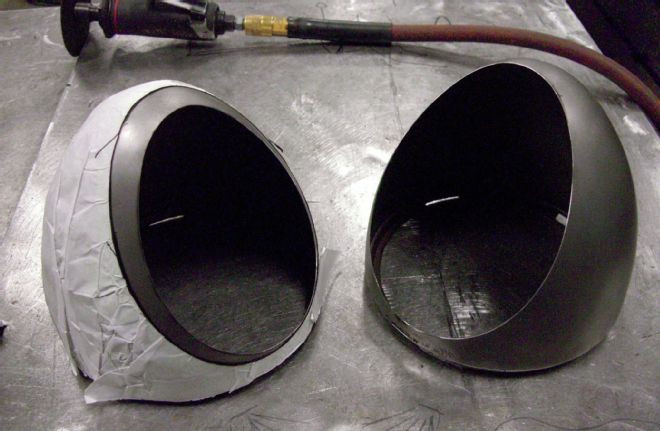
7. Schmidt wrapped the housing with paper and taped around the cut line to make a template. He inverted the template when he laid it on the other housing. He cut the new hole short of the line and enlarged it to fit the fender.
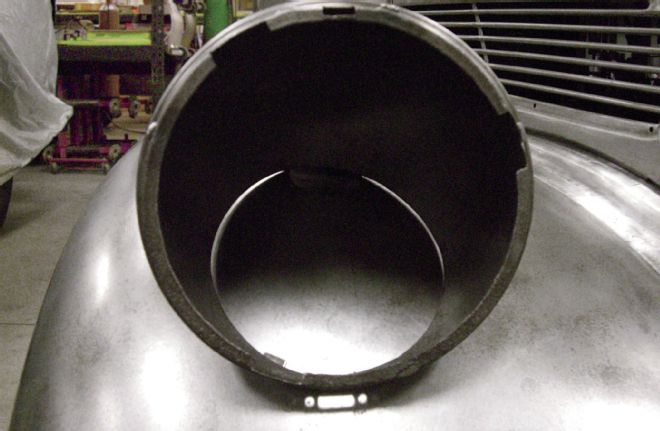
8. After trimming the bucket to fit Schmidt taped the headlight and King Bee rim in place to verify the look. At this point L-shaped tabs tacked to the fenders locate the bucket but Schmidt later tacked tabs tacked to the buckets and held them to the fender with temporary panel fasteners.
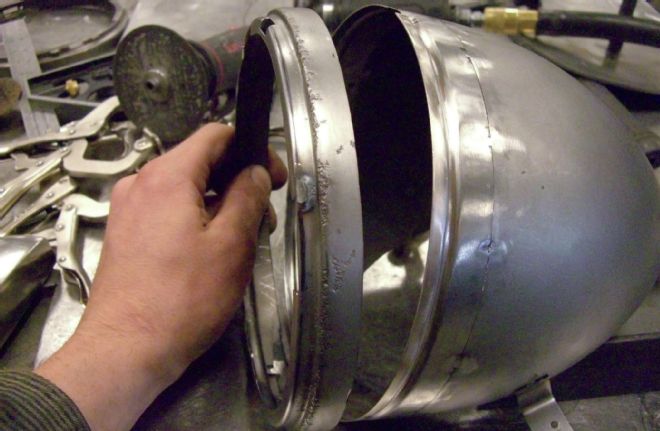
9. Schmidt then cut the front off the Anglia bucket at a point where the diameter matched a similar point on the King Bee bucket. Then he tacked the King Bee flange to the Anglia bucket. Note the L-shaped brackets from the previous step.
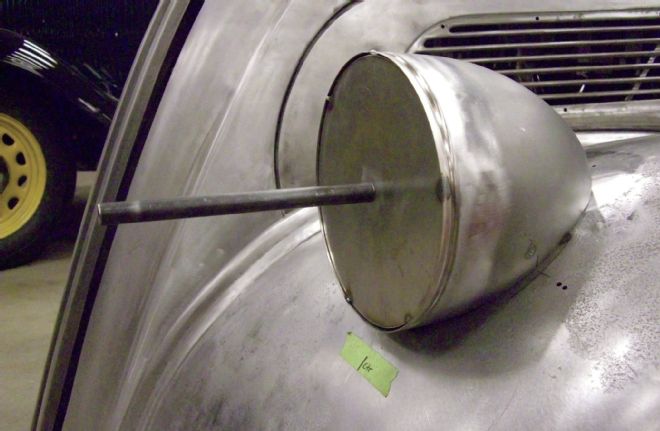
10. The housing rim determines the headlight location, which determines its aim. Schmidt cut a disc to fit against the mounting lip and welded bar stock to it perpendicularly. Then he tuned the opening to aim the lamp using a level, among other things.

11. Then he aimed the lamps horizontally. He established a centerline down the length of the car and then created a perpendicular line to it. All measurements refer to those lines. It takes a lit lamp for final aiming but this will get things very close.
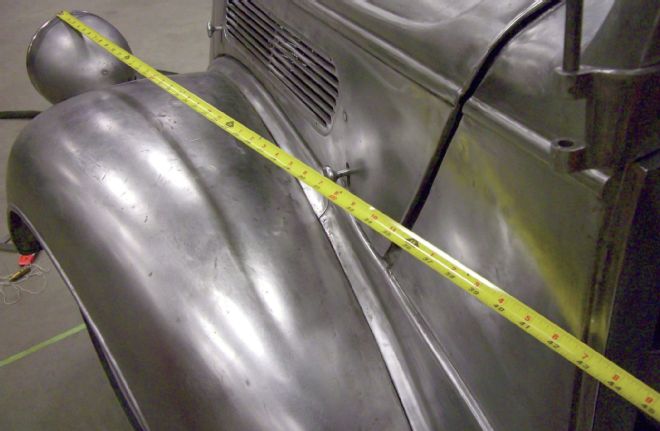
12. He backed up his data with other measurements, in this case the dimension from the A-pillars to the headlights. This improves visual consistency but leveling the beams with protractors on the rods welded to the discs offers the precision that makes it possible to later fine-aim the lights by thin shims.
13. Comfortable with the location Schmidt welded the buckets to the fenders. Working from the inside minimizes the weld bead's prominence on the outside. That in turn translates to a very small radius.
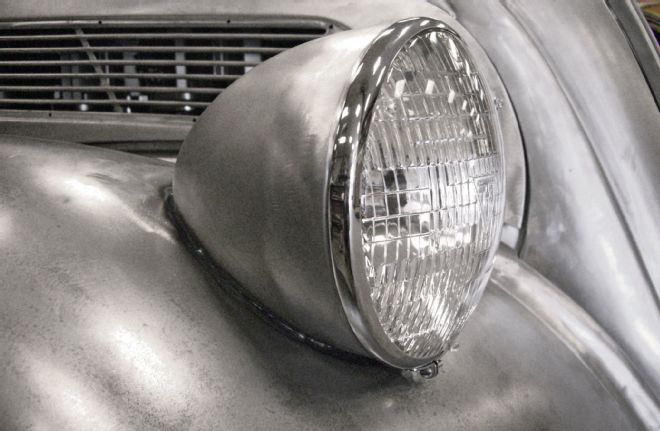
14. Schmidt finished by mounting the headlights. A thin layer of lead will create a softer transition. With the fabrication part done all that remains is to shim the headlights within the buckets.