Probably one of my favorite things to do when building classic trucks is making brackets. They are needed all over the car or truck you're building. Master cylinders and boosters hang from brackets. Throttle cables and such need brackets - brackets for tanks, shields, coolers, etc. The list goes on. They need to be strong enough to handle their job. They should also look good, like they belong there. This comes down to planning. All my brackets are planned out on cardstock first.
It took me a while to figure out how to make and use cardstock templates properly. But once I got it, it's the only way I make anything from scratch anymore. Cardstock is cheap; mistakes and design changes can and should be made here, not when you are working with the material. I lay out everything I need on the template: hole locations, lightening holes, if used, and any notes I need like drill or tap sizes and such.
Follow along as I create a Panhard bar bracket for a rearend housing from a cardstock template and a couple of dimensions.
First I need to know some measurements to build the template to. I start by measuring the diameter of the rearend housing tube the bracket will be welded to. This will give me the radius for the bottom of the bracket. Looking down from above, I hold a bar in place so I can visualize how it's going to be positioned when done. I want the bar to run parallel to the rearend housing so I measure from the front of the housing to the backside of the bushing on the end of the bar and the tape measure says its 4 inches. So now I know that I need the forward part of my bracket 4 inches forward of the axle tube's front face.
How high it will sit above the housing is the next dimension I need so I measure up from the top of the housing to the center of the bushing on the end of the bar. This time I'm looking at 2 inches. Since ultimately the bar needs to be parallel to the ground, another way to find this would have been to measure from the mount that is already on the frame for the Panhard bar to the ground. Then from the top of the housing to the ground and the bracket height would be the difference. This would work here because I have the chassis suspension sitting at ride height on the jackstands.
Ideally what we are looking for here is a bar that mounts to the rearend and to the chassis. This bar keeps the rearend housing centered in the chassis under side loads. Since it's a bar it will travel through an arc as the suspension travels up and down. The longer the bar, the less arc or deflection (side to side) of the rearend as it travels.
This truck started with a 15-inch bar that was frame mounted and then mounted to a bracket on the front of the third member at the pinion. By moving the mount to the far passenger side of the rearend, I increased the length by 10 1/2 inches. Although when I moved the bar's mounting point up on the new bracket I did also raise the roll center a bit. The rear of the truck is sway barred and it will never be road raced so I'm not too worried about the change.
Now that I know some dimensions, I can start laying out the bracket I need on some cardstock. The cardstock or poster board I use comes from the local Target; I use a lot of it and buy it in bulk packs. Almost every bracket I make will start on cardstock. If the bracket needs any bends, those are replicated with a piece of welding wire. The bracket is made from the cardstock template, then bent to the wire template.
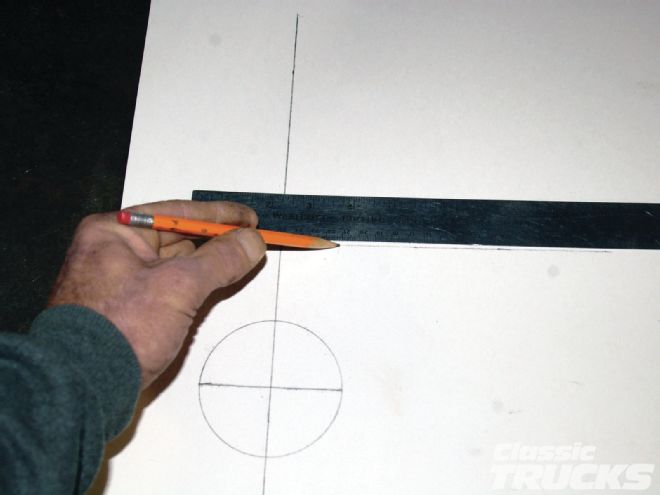
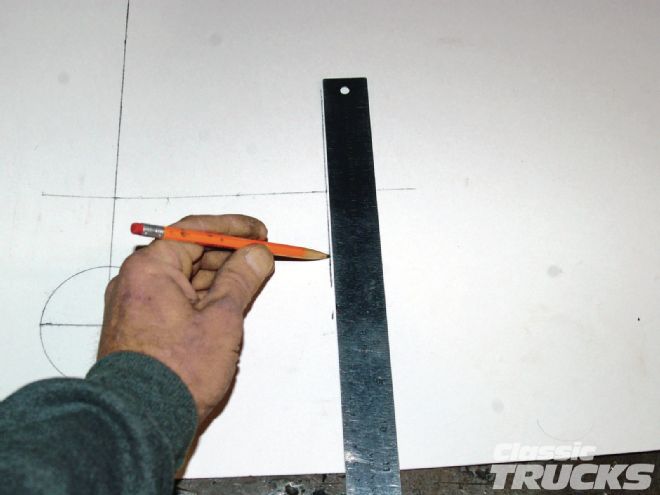
I start with a vertical centerline, then draw in the diameter of the rear axle tube with my circle gauge; in this case it was 3 1/4 inches. Next I measure up 2 inches for the bracket height and make a line, then I measure forward of the front edge of the circle 4 inches for the length of the bracket. I'm going to make the front mounting face of the bracket 11/2x11/2-inch square so I'll make the end of my bracket 11/2 inches wide.
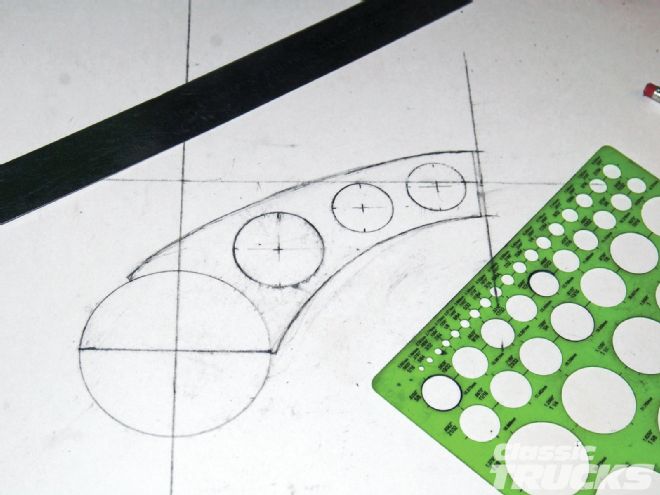
The bracket at the other end should take up about a quarter of the tube diameter so I eyeball in the distance and make marks. Connecting each end of the bracket to form the bracket is a matter of taste. I like swoopy, flowing designs, but it could also be done in a squared boxy style.
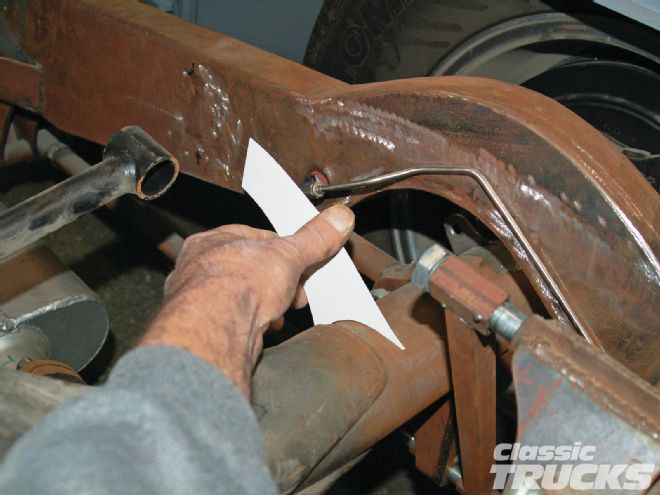
When I'm happy with my drawing I cut it out and give it a check fit. This way can see if I'm even in the ballpark. If all is good, I move on to the steel. Follow along with the pictures and captions as I make up a simple bracket with some design to it.
01 Cool-looking brackets are just a cardstock template away. Follow along as I start from some measurements and a piece of cardstock to come up with this new Panhard bar mount.

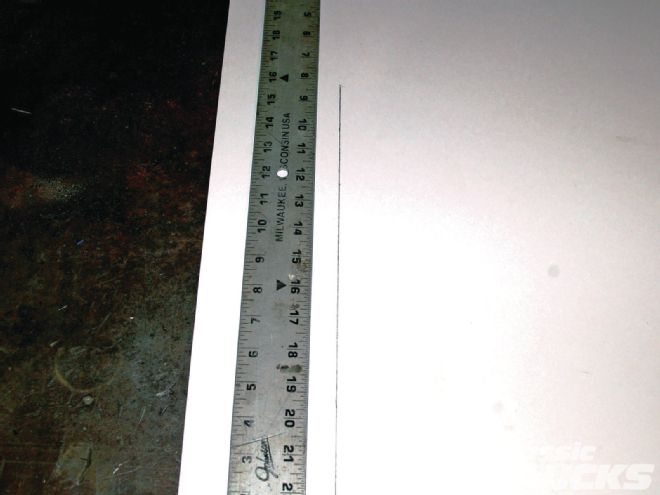
02 It all starts with a centerline. On a piece of cardstock I measure in an equal distance from the edge and make a line. In this case it will be the vertical centerline of the rear axle housing.
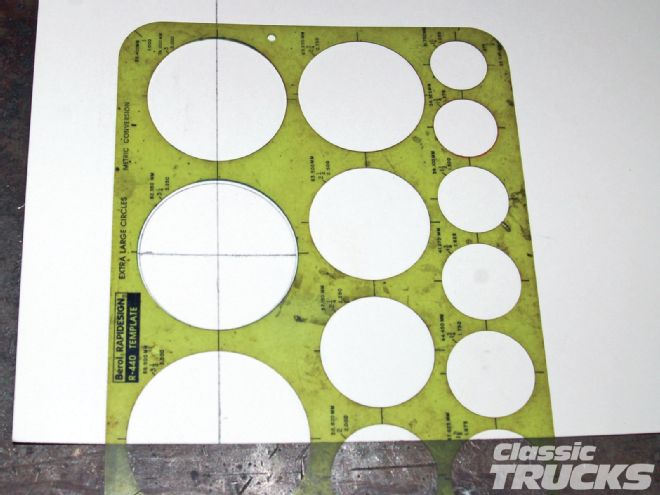
03 These rear axle tubes are 3 1/4-inches in diameter, so I find the 3 1/4-inch circle on my template and line it up with the vertical centerline I drew. I draw in the circle and also use the template's centerline gauge to mark the horizontal centerline, then I draw it in also.
04 I did some measuring and checking before I started and found that I need the attachment point centerline for the Panhard bar 2 inches above the top of the rearend housing. So I measure up 2 inches from the top of my 3 1/4-inch drawn circle and draw in that new centerline.
05 I also knew the mounting point needed to be 4 inches forward of the housing. So this time I measure from the front of the drawn circle, make a mark, and draw in the line. Now I have lines showing my limits.
06 I'm going to make the forward attachment piece 11/2x11/2-inch square with a 9/16-inch hole for the bolt. This is where the bushing on the end of the bar will bolt to. This being known, I divide the 1 1/2-inch half and make marks from the 3/4-inch centerline. This is how the width of the top end of my bracket is decided. The bracket's base width on the housing will be eyeballed in. You want about a quarter wrap of the bracket around the housing tube.


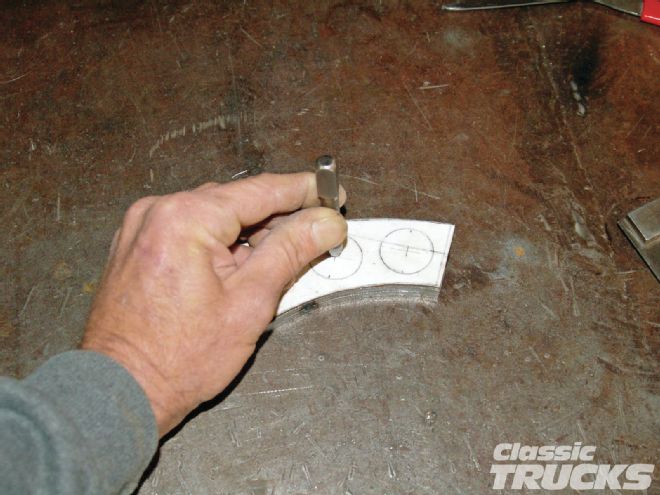
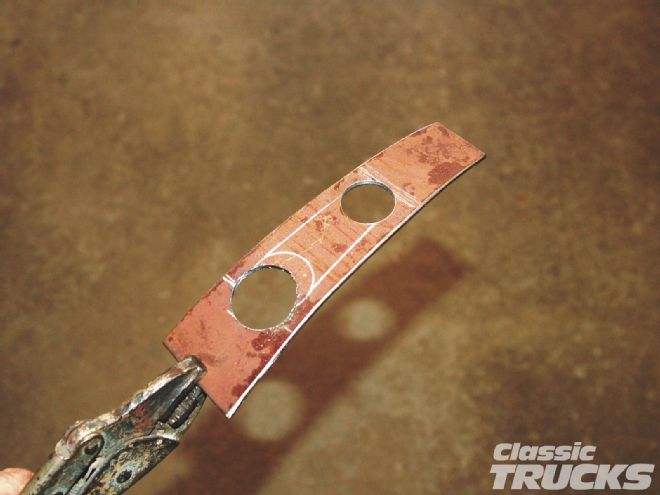
07, 08 Then it's just a matter of drawing in something that looks nice and flowing, or you could stay with a boxier style with straight lines. Here's where you decide and make your mistakes with the cardstock. If you cut it out and don't like it, you can easily start over. Since this is kind of a race truck theme, I like putting lightening holes in the brackets. Old racing trick and it looks cool. My smaller circle template works great for this. I decided on a 2-inch and two 11/8-inch holes on these side brackets.
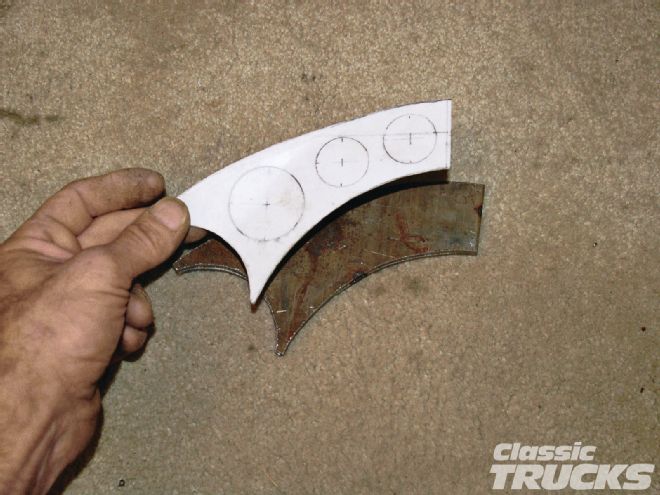
09 After I cut out the cardstock template, I check the fit to see if I'm even in the ballpark. Heck, it looks pretty good. Now I will move on to the steel. This is where you can get a visual feel of what the bracket will look like when finished. If you don't like it or think of something better, just whip up another template with your new idea.
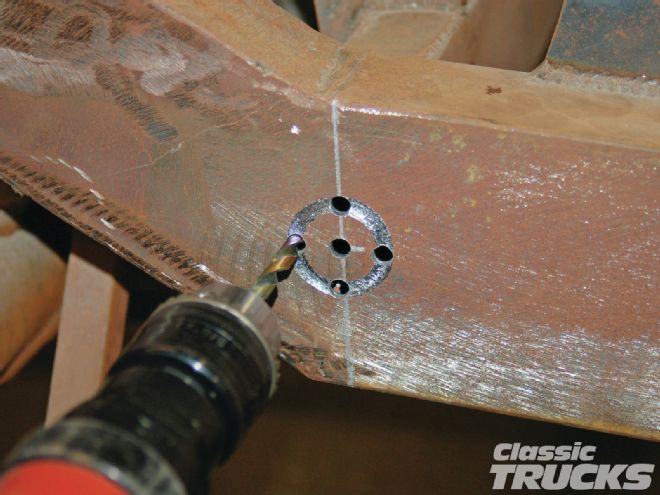
10, 11 I cut the pieces out of 3/16-inch steel plate on the bandsaw, but a plasma cutter could also be used. Then I tacked the two pieces together for the hole sawing operation. Using the template I mark the centers of the lighting holes onto the steel with my center punch. Now it's off to the drill press to saw these out.
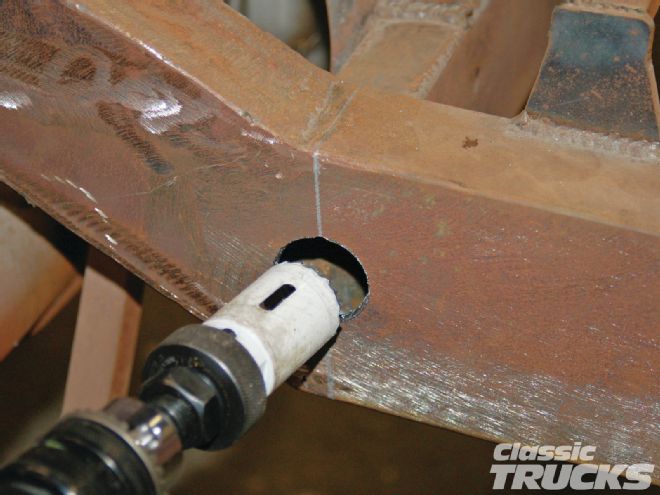
12, 13 By the way, here are a couple of images I had handy showing how I go about hole sawing in general. I hit the object with a hole saw just long enough to make the marking of the saw. Then I drill three or four holes in the cut line, 3/16 or 1/4-inch works great. This will give the saw cuttings someplace to go as the saw cuts through. You will cut it in half the time with a lot less heat buildup and wear on the hole saw.
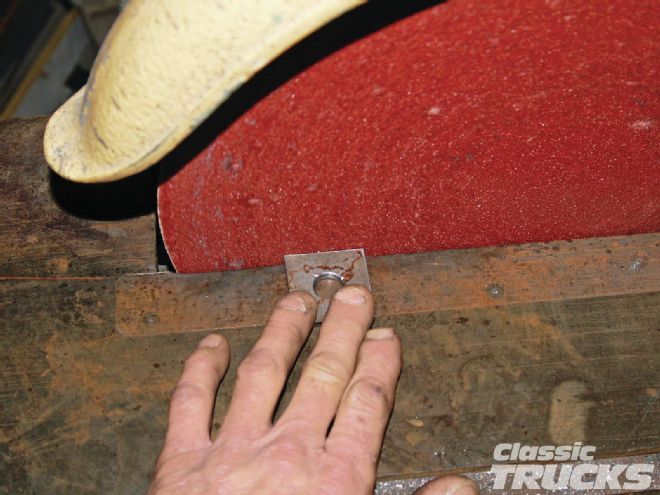
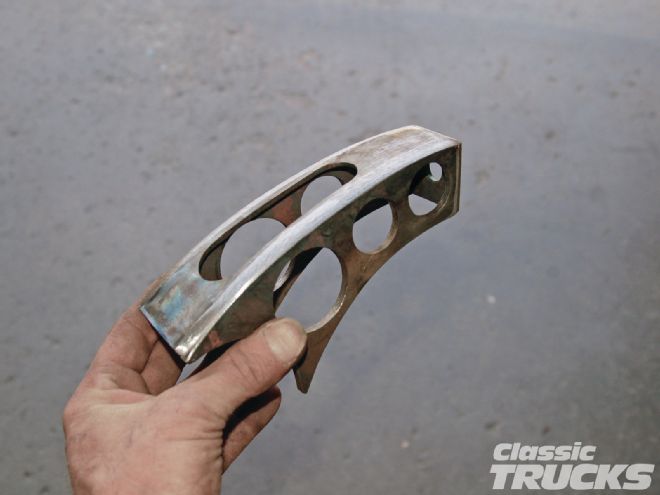
14 With the side pieces done, I measured out a 1 1/2-inch square and cut it out of the 3/16-inch plate. Then I drilled a 9/16-inch hole in it for the Panhard bar bolt. Here I'm dressing up the edges on the Apex grinder with one hand and taking the picture with the other. When I get smarter (read that injured) I'll use a tripod for these shots.
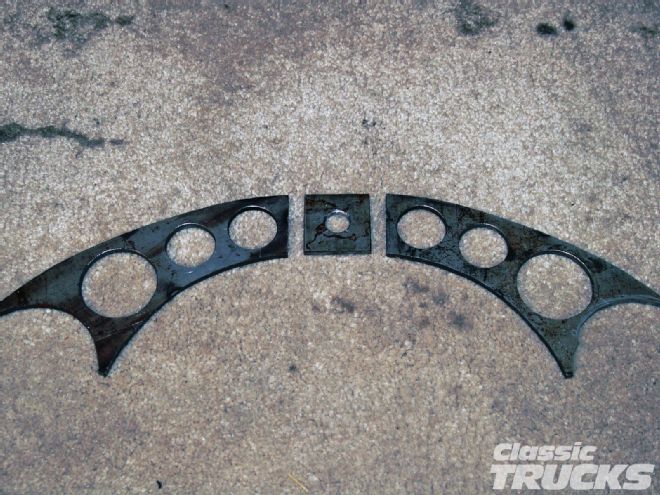
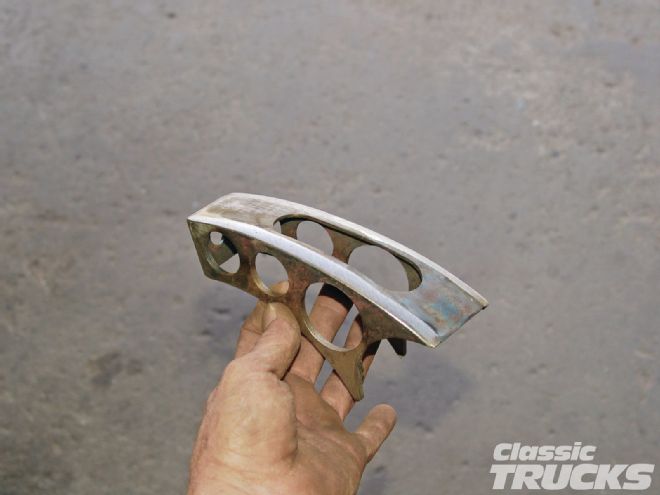
15 So here's what I ended up with. I dressed up the edges on the belt sander and ran a rat-tail file through the lighting holes. Now these three pieces will get tack welded together to form sort of a sub assembly.
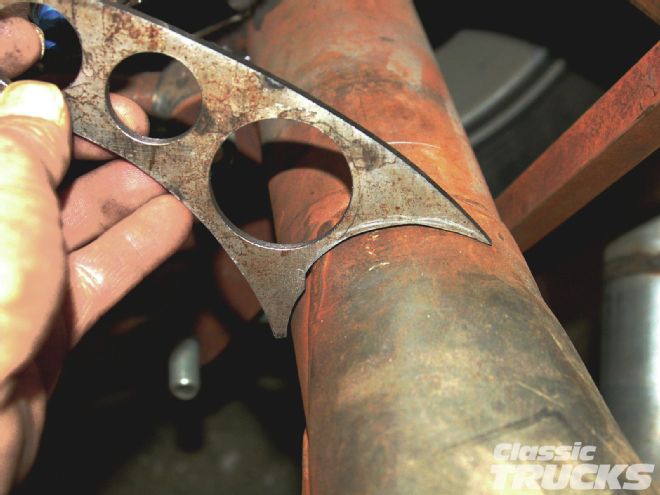
16 Before I weld them together I made the small notch in the bottom of the inside bracket. The housing does a weird thing right there where it was welded together. This little notch gives me the clearance I needed. I just held it on the housing and laid a small pencil in its side, on the housing, and drew the contour of the housing onto the bracket. This gave me the cut-out area required.
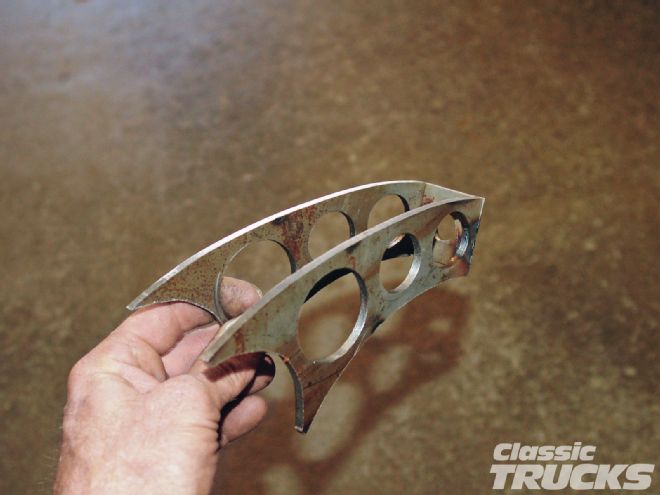
17 Here we have the side piece notched and the bracket tacked together. I have check-fitted it to the housing. Now I'm going to add a piece to the top and box it in.
18 Another cardstock template is made and from that comes this top piece. I just need to cut out the center of the two holes and file it up a bit.
19 Now it's starting to look like something - tacked together and ready for a final check fit.
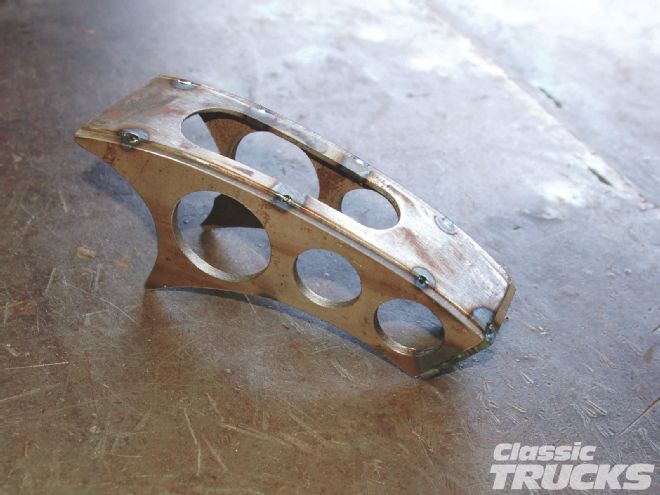
20 I'm happy with the fit and it looks pretty good too. Now I'll finish weld it and grind it smooth. I'm using the TIG welder, but a MIG would work fine too. After it's welded I'll use the Apex grinder and the belt sander to dress it up.
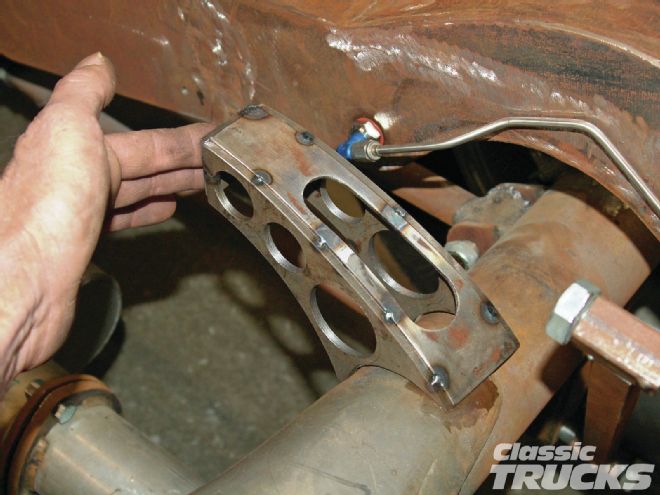
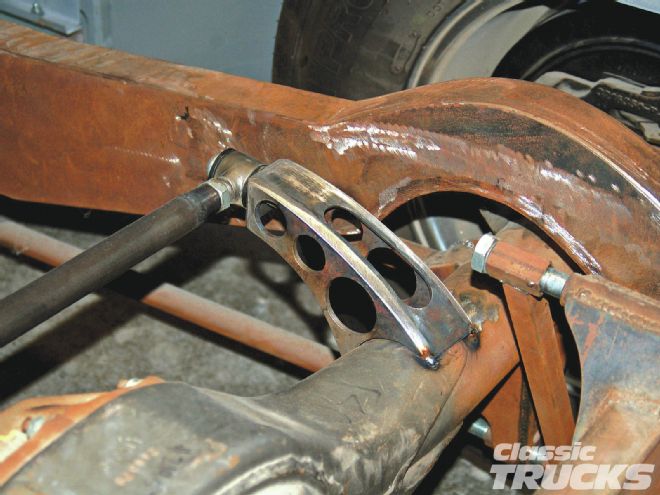
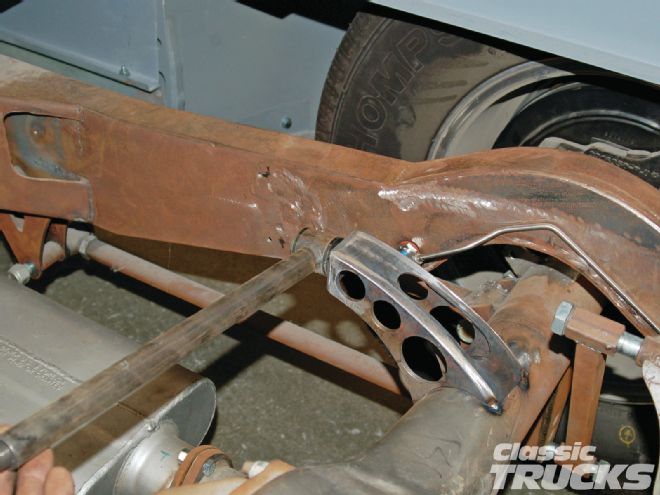
21, 22 Here's my finished bracket ready to place on the rearend housing and tack in place.

23, 24 Here's how it will work. The new Panhard bar will connect to the bracket and then go over and connect to the bracket on the driver side framerail. This will give me a 25 1/2-inch long bar with a lot less deflection than the shorter 15-inch bar that was on it.
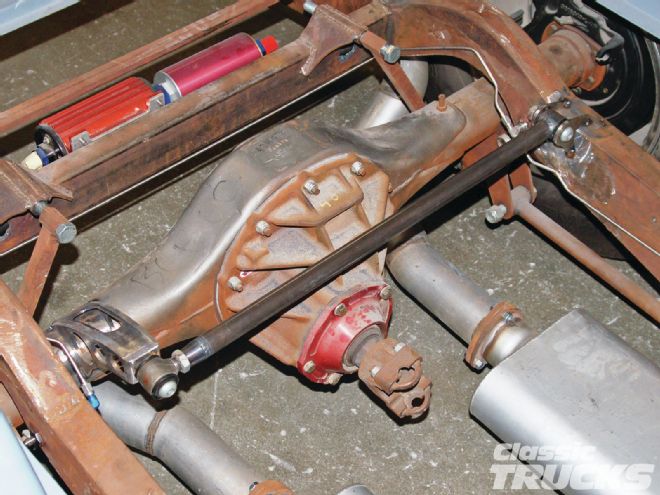
25 This is how it turned out after the new bar was made and installed. I didn't like the brackets that were on the frame so I remade those also. You guess it, using cardstock first.
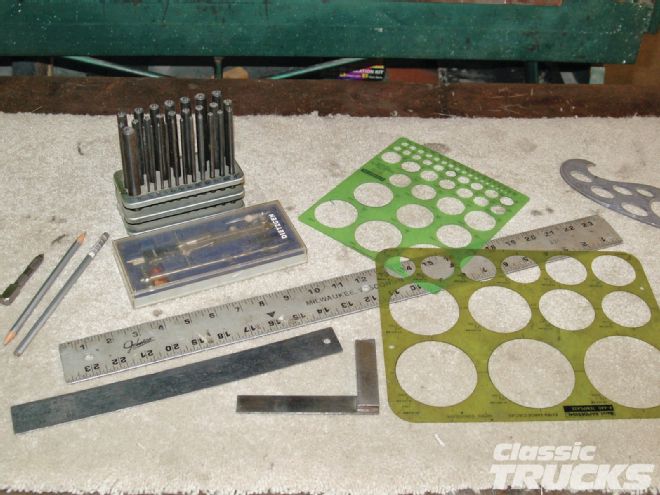
26 Here are my basic template-making tools. I would be lost without my circle templates. The transfer punch set is nice for transferring hole locations. I used to use a French curve quite often for making brackets. Not so much now, I just draw it in by eye. A good compass, center punch, and a couple of Berol 753 silver layout pencils about wraps it up. Missing from the image are my scissors.