Aluminum Tips
You can melt down almost any kind of aluminum—cans, even—but a piece that has already been cast (such as a water pump, wheel, or intake manifold) will have an alloy that's better suited for casting.
Aluminum pours at about 1,500 degrees, so have the proper safety gear in place and a fire extinguisher on hand.
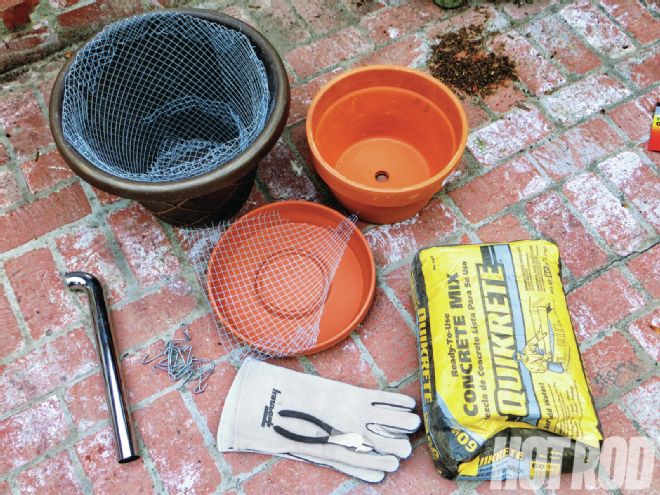
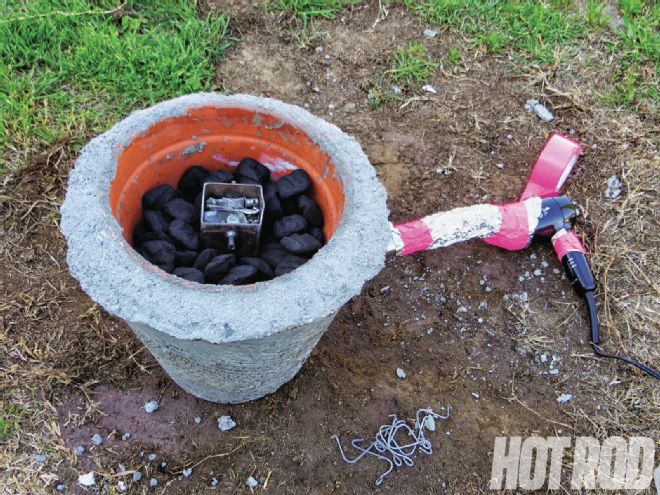
01] Here's the stuff we used to make our own crucible furnace for melting metal: a 12-inch terra-cotta pot, some galvanized hardware cloth, a plastic planter, a 90-degree sink-drain fitting, and a 60-pound bag of concrete.
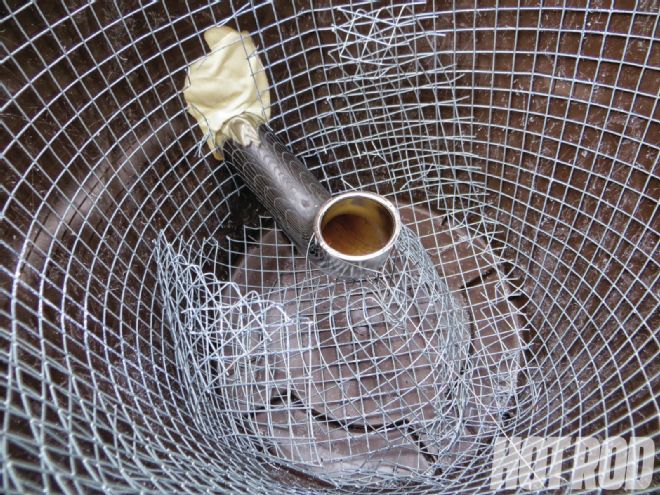
02] We cut the hardware cloth to fit inside our plastic container, then cut a hole in the side for our drain fitting to pass through. The drain was wired into the planter and hardware cloth so it would match the hole in the bottom of our terra-cotta planter and allow us to add air to our fire.
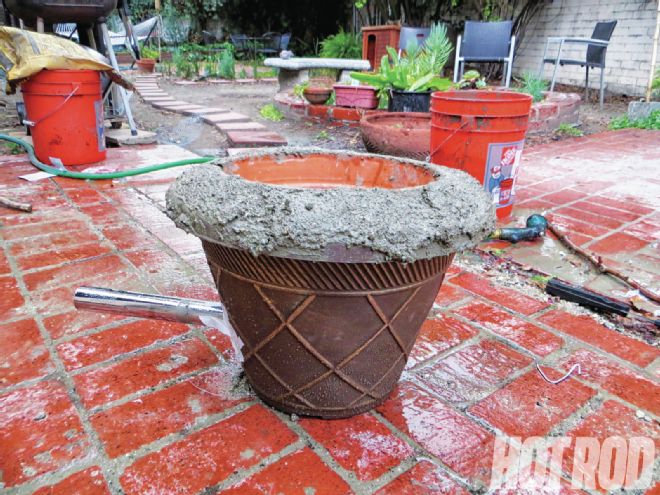
03] The mixed concrete was poured into the plastic planter until it met the drain. We packed some of the wet concrete into the hardware cloth before we dropped in the terra-cotta and packed concrete around it. We gave it four days to set.
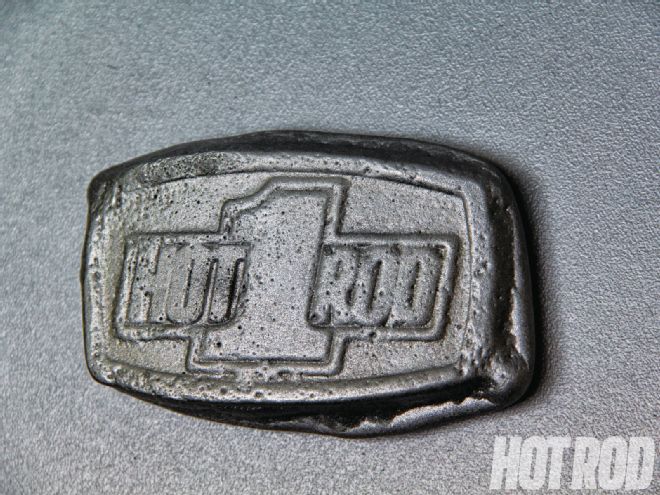
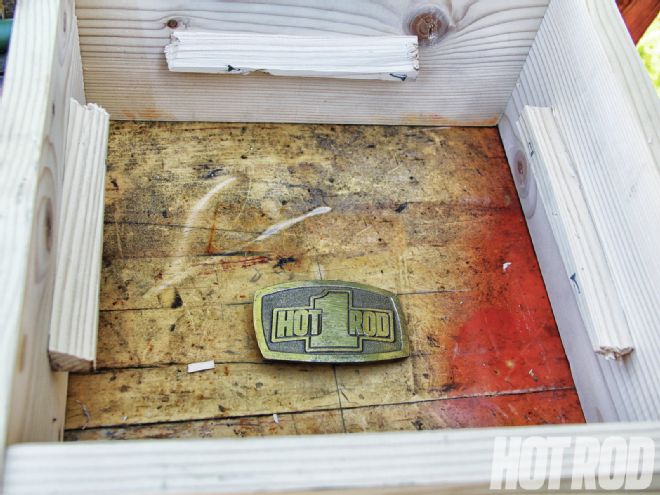
04] We used four pieces of 1x6-inch scrap lumber to make a casting flask. The strips of wood in the middle anchor the casting sand, since we'll need to flip the flask over during the mold process. We decided to go with a simple, one-part, open-top mold to create a clutch/brake pedal using a brass belt buckle as the pattern. Since it was something that had already been cast once, the buckle had a good chance of pulling cleanly from the sand.
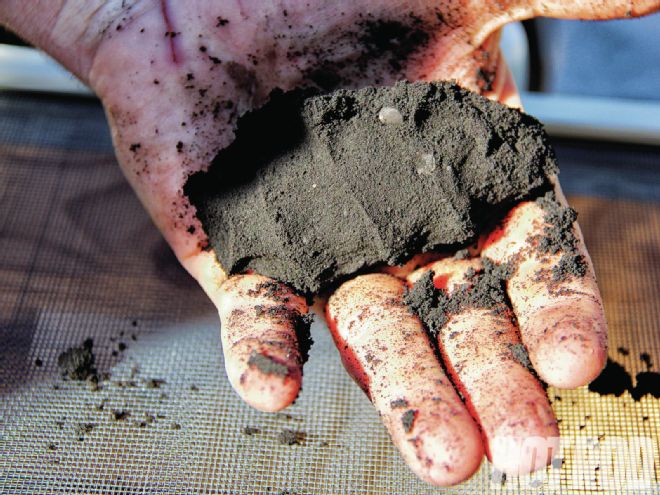
05] We got 5 gallons of casting sand from Alcast, a local foundry that casts everything from fuel nozzles to Ford Boss 429 heads. You can make your own casting sand, but we wanted to remove as many variables as possible. The sand is fine and contains binders and water that make it just a bit sticky. You know the sand is the right consistency when it keeps its shape after being formed by hand.
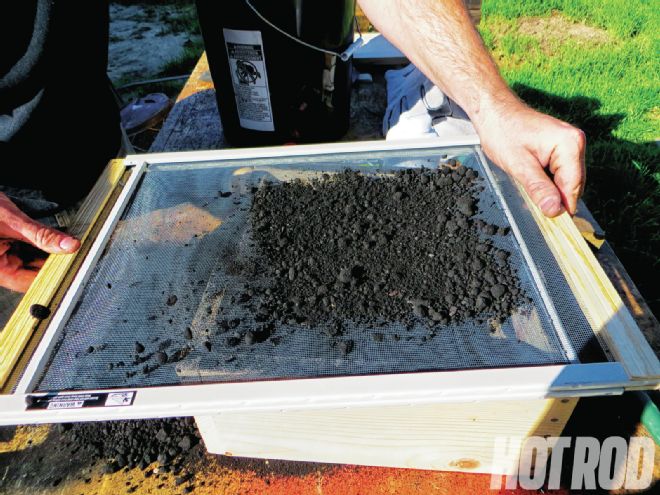
06] A $7 window screen was used to sift sand over the pattern. Sifting keeps fine sand near the pattern for a more detailed, smooth casting. You can see the clumps of sand that didn't get through the mesh.
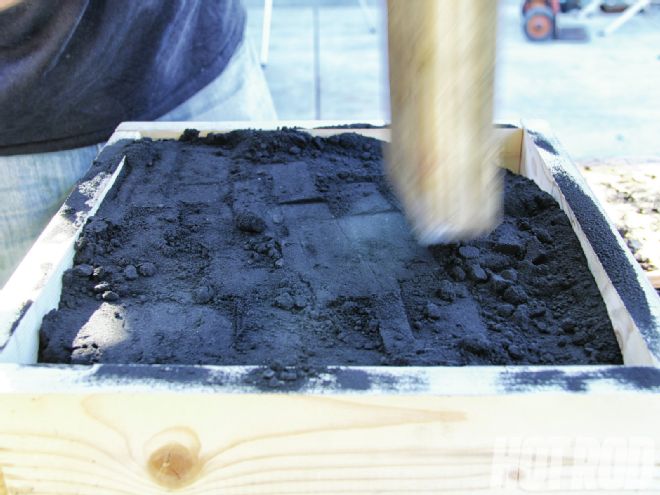
07] We sifted several inches of sand onto our pattern before we used a two-by-four to compact the sand all around the pattern. Sifting is only needed on the sand near the pattern, so we simply compacted scoops of sand until the flask was full.
08] Next, we carefully lifted the flask and turned it over to reveal our pattern completely packed in the dense sand. Although the sand is slightly sticky and binds to itself, the wood ribs in the flask give the sand a physical purchase inside the flask.
09] A couple of taps to the back of the belt-buckle pattern ensured it was loose before we pulled it free. The center of the mold was clean, so we just blew the loose sand from the edge and set the pattern aside.
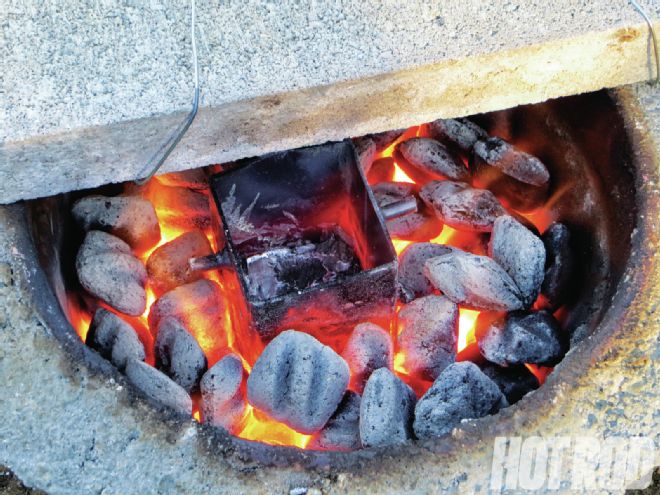
10] To get our furnace plenty of air, we built ducting out of aluminum foil and connected it to a hair dryer with the “cool” button taped down. Pink duct tape is optional. We put some scrap steel at the bottom to keep our homemade crucible from blocking our air inlet, filled the furnace with charcoal, added our scrap aluminum, and then lit it up.
11] Once all the charcoal was lit, we put our cinder-block lid on top, and in less than 10 minutes, we had molten aluminum at the bottom of the crucible.
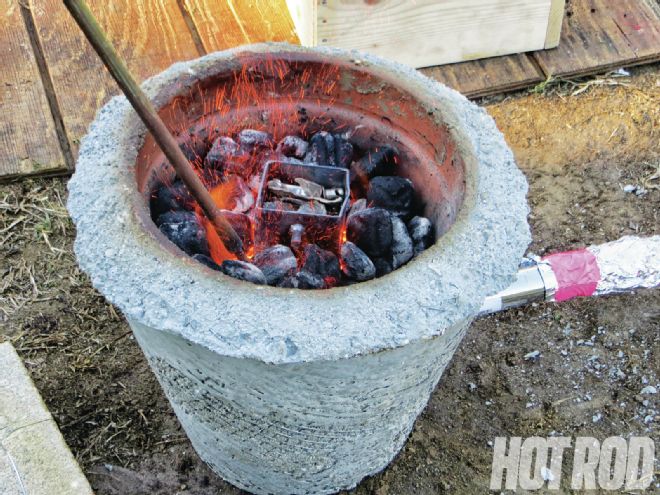
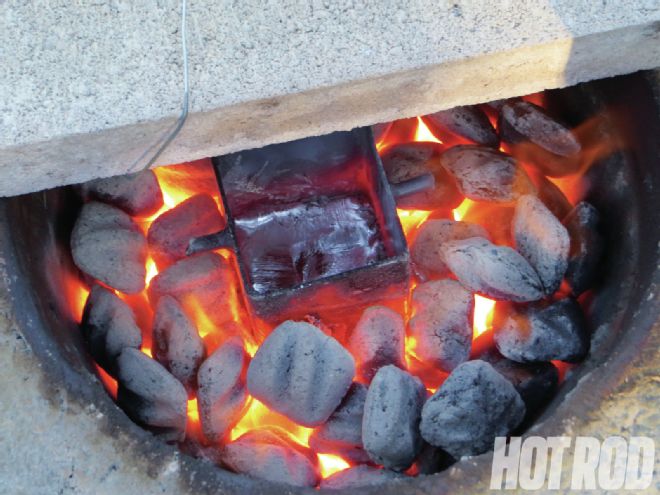
12] We added some additional aluminum, and soon it, too, was molten, but there was some slag on the top.
13] We skimmed the slag off the top using a set of long-handled tongs and revealed shiny, clean aluminum underneath.
14] The crucible we built from square tubing has two pins on the side that allowed us to use a forked tool to lift it out and a hook to tilt it. Not as elegant as tongs, but they worked, and the aluminum poured out easily.
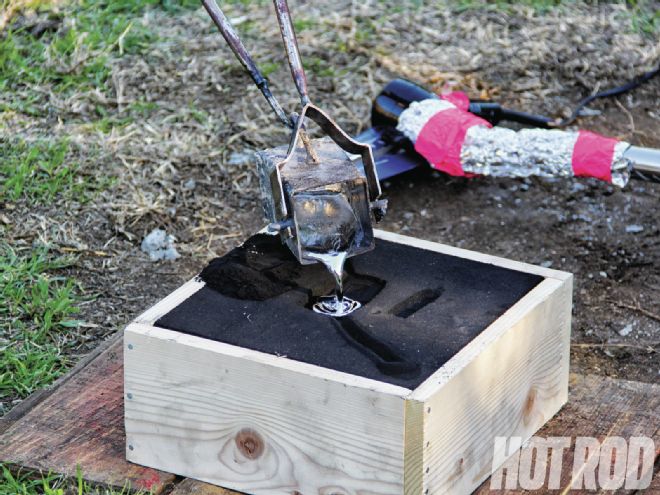
15] An empty aluminum can set in sand in our second flask served as a mold for an ingot of aluminum for next time.

16] It was difficult to leave our newly cast part alone long enough to cool, but we gave it nearly 30 minutes. Our first clutch/brake pedal had some porosity issues on the surface, but we'll be back at it again soon.
