Sometimes you just have to face the facts and realize that even a played-out cliché is hand’s-down still the best way to describe a situation. Exactly what string of words was being preluded to—none other than Sir Isaac Newton’s “Every action has an equal and opposite reaction.” That simple phrase is in a constant state of motion in all aspects of this world, including the rod and custom world.
Over the last few months Star Kustom Shop has been documenting their progress on a ’51 Chevy. With the foundation of its customizing set, it’s time to move on to finessing the last step of the silhouette of the Chevy. As mentioned before the Chevy was originally a hardtop, and Star Kustom had removed the top to create a roadster. Here’s where that age-old saying comes into play. When the top was removed, the transition from the roofline down to the body, along with the glass channel, was left for dead to impose a rather awkward-looking ducktail. Before the top’s removal, that gradual lip created a clean transition from the body to the top, but with the absence of the lid, all that’s left is a hump and lip that no longer serves a function. Not exactly a sleek profile, therefore the only fix is a new package tray.
Being that the Chevy is truly a roadster now, the plan is to cap off the interior and do away with all side glass. The new package tray will flow directly off the decklid and down into the cockpit. In order to do so the ducktailed area will need to be removed. At first Star Kustom figured just the peak of the ducktail could be removed, but once removed it was revealed that the trunk hinges actually sat up into the lip. In order to create a sleek transition it was apparent the stock factory package tray, which houses the hinges, needed to be sunken 1 1/2 inches. From there a new package tray could be fabricated to suit the design elements of the ’51. Star Kustom is first going to use a combination of 1/2-inch conduit and 1/4-inch rod to fabricate a new package tray substructure. Once created, the “skeleton” of the package tray can then be skinned in 20-gauge cold-rolled sheetmetal. Of course it’s not quite as simple and straight forward as the previous sentences have implied, due to the fact there are several key elements to keep in mind (which we’ll cover throughout the steps taken.)
Beyond creating a new package tray, Star Kustom Shop is going to mimic the pancaked hood (as seen in the Feb. ’13 issue of R&C) out back. Like the hood, the decklid will receive a pancake job. True, the rearend was shrunk in the initial section of the car, but like the hood, it wasn’t quite enough. To help refine the area, a small 1-inch sliver will be cut from the trunk to help downsize things once more. Being the decklid is more or less the same job as the hood; we’ll just highlight a few key points and move right along.
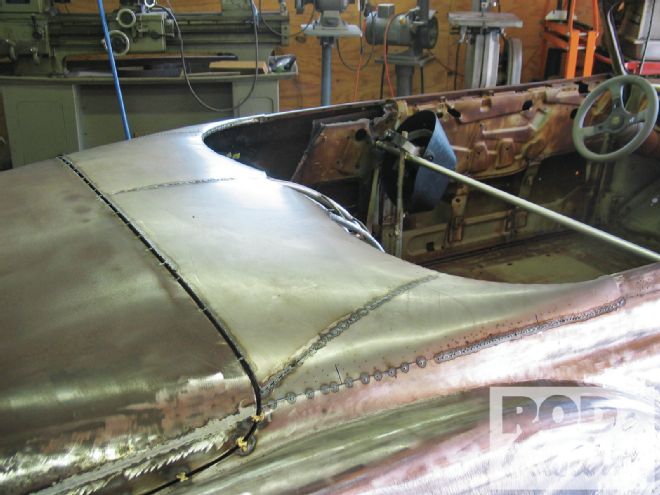
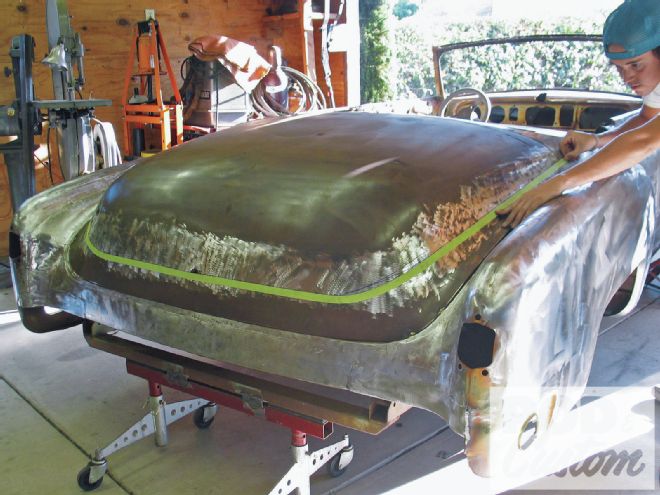
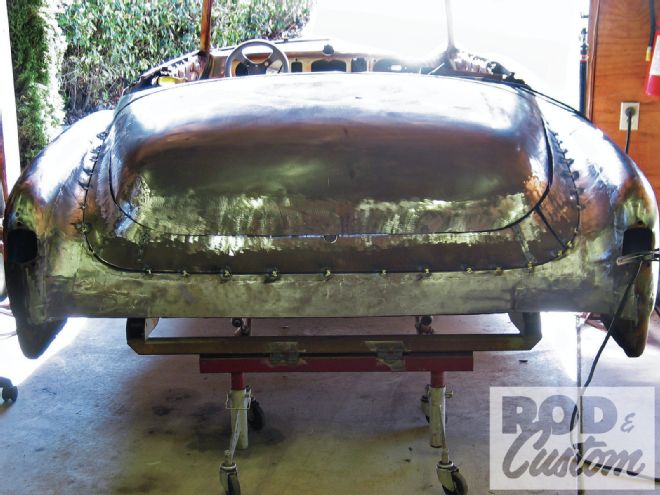
[1] Here’s what all the hoopla is about: this awkward ducktail protruding from the body. The only way to relieve the problem is to create a new package tray.
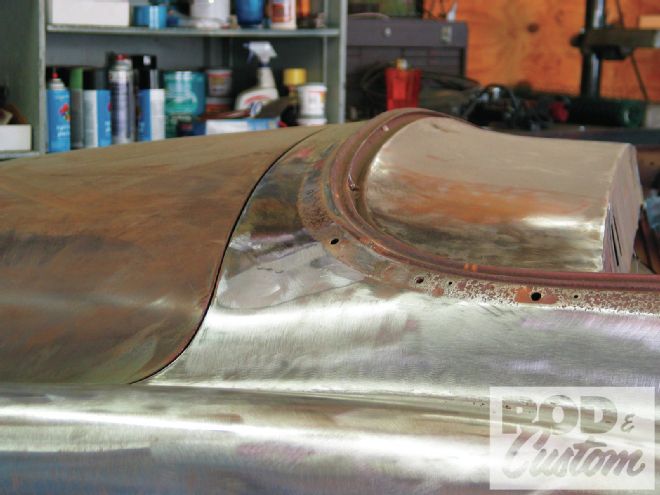
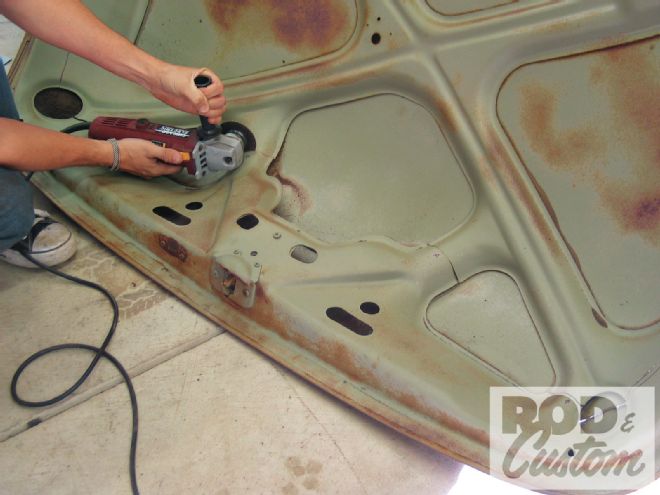
[2] In order to create a more streamlined package tray, the lip (the glass channel) of the factory tray was removed. Next, the lip of the rear of the actual package tray was cut away as well.
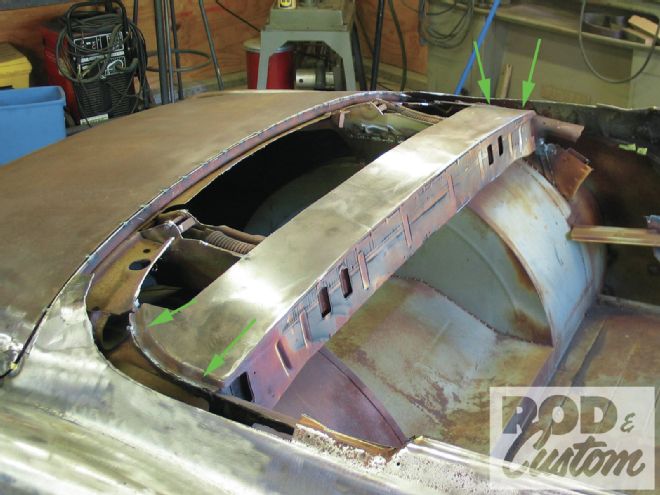
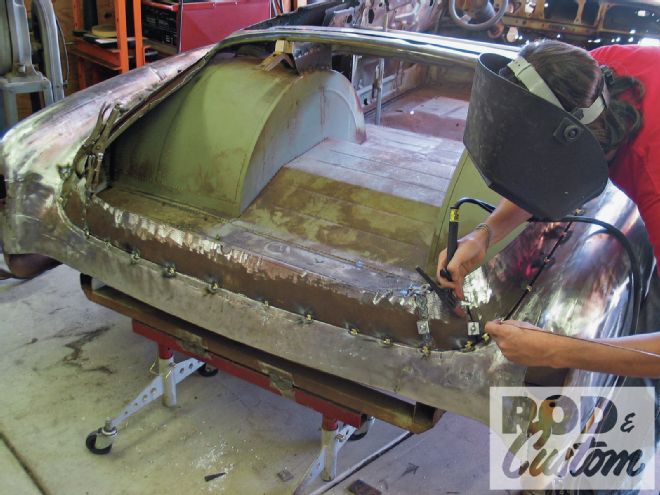
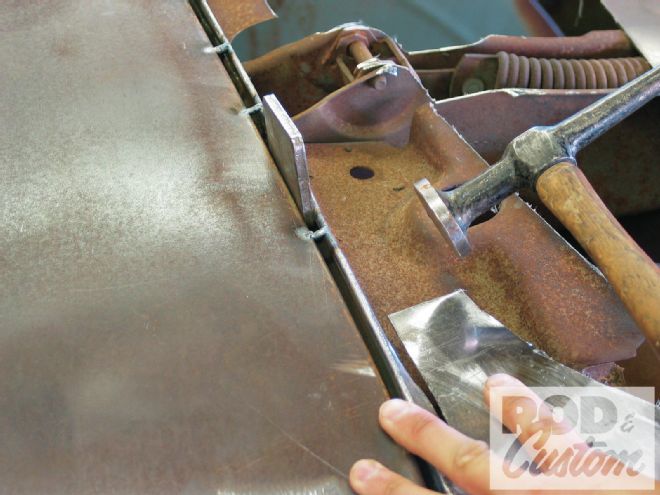
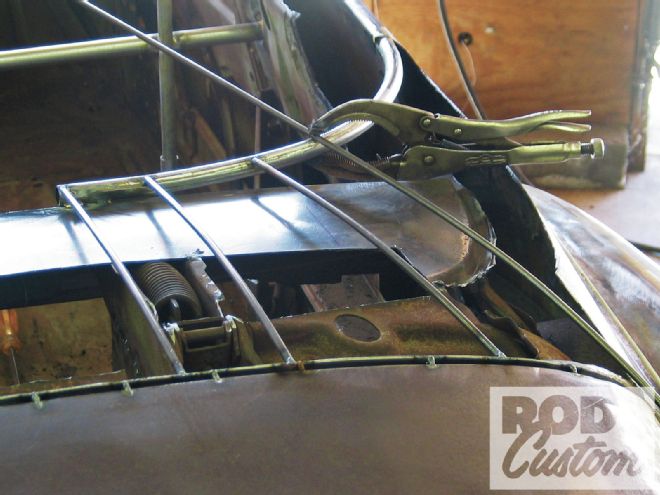
[3] The entire package tray was then sunk down into the car 1 1/2 inches. We opted to leave it in because the decklid hinges were part of the assembly, and it will maintain our internal bracing. Once sunk into place the tray was welded back to the inner body bracing like before (note arrows).
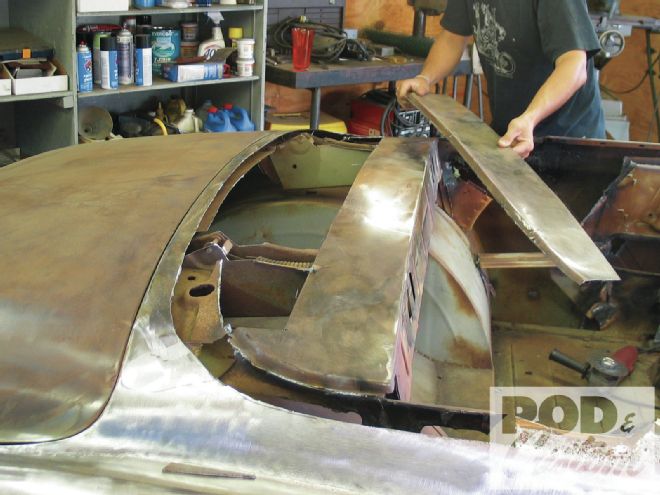
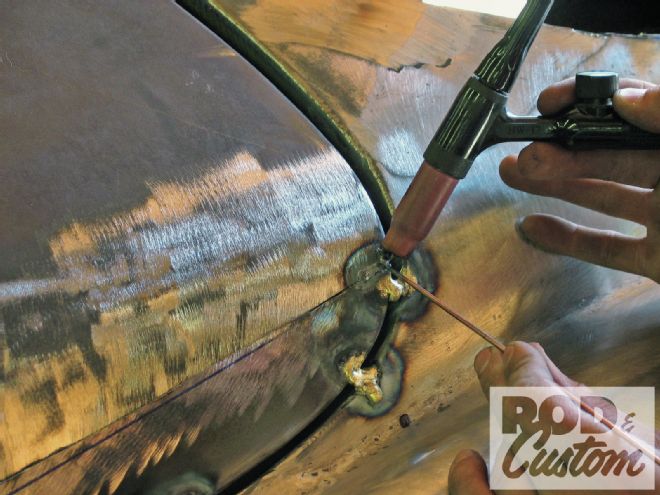
[4] It was then time to pancake the decklid, and just like the hood it begins with a starting line. From there we could lay out a 1-inch sliver around the decklid.
[5] The inner structure of a decklid is a little more complex than a hood. Therefore, any area pertaining to the sliver must be removed and replaced later.
[6] The decklid was cut along our pie-cut sliver and the top half was set aside. Because of all the different cuts we had going on (between the section, package tray, and pancake job) the bottom half of the decklid was cut into three pieces; two sides and a centersection. It was then tacked along the trunk opening to the correct gaps and angles.
[7] The decklid top was placed upon the bottom half and tacked at both rear corners.
[8] Here you can see how the trunk has fallen right into place, yet our corners will need to be worked. Therefore, like the Chevy’s hood we will make several relief cuts and piece the decklid back together.
[9] When the package tray was sunk down into the body it widened the gap at the rear of the decklid. Using a guide we reset the rear gap to our liking.
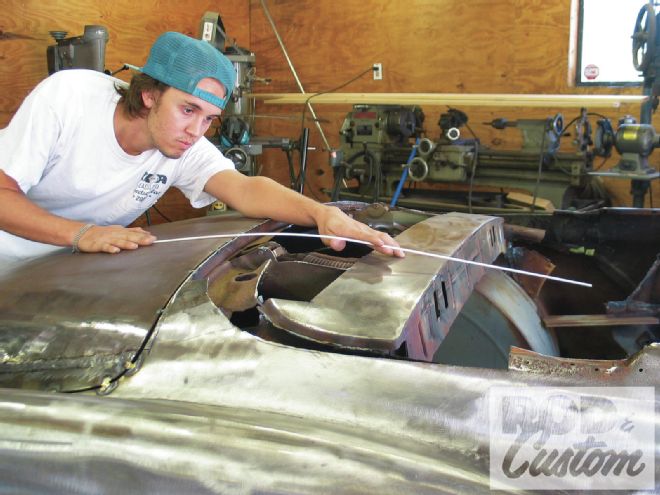
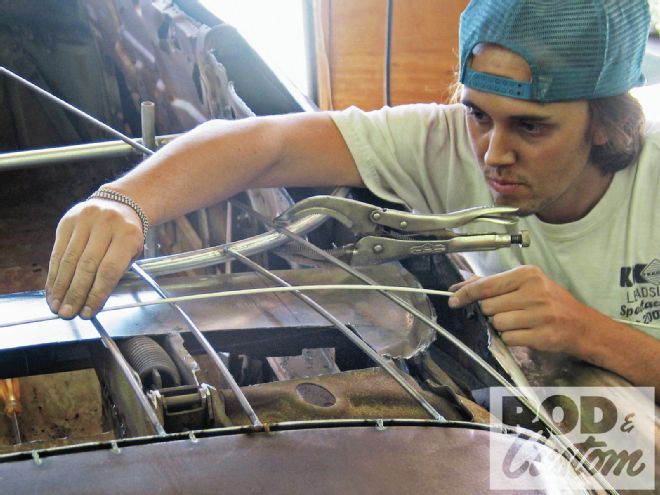
[10] With the ducktail now out of the picture we could focus on creating a new package tray. Here you can see how I’m eyeing what the layout will look like. There will still be some hump to the area, but a lot less obstructive, and it will slowly cascade down into the cockpit of the ’51.
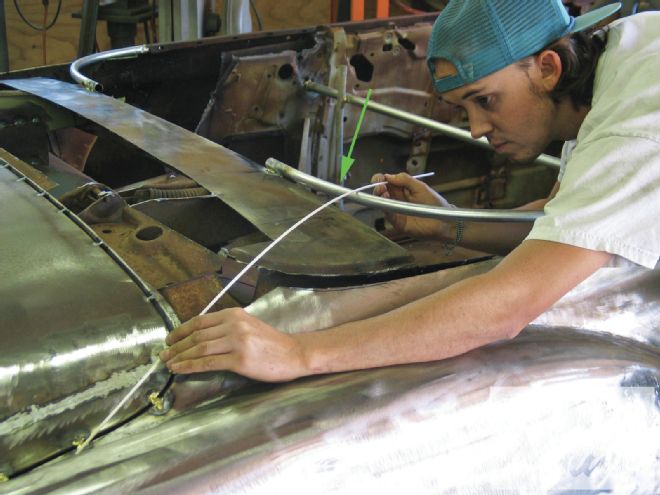
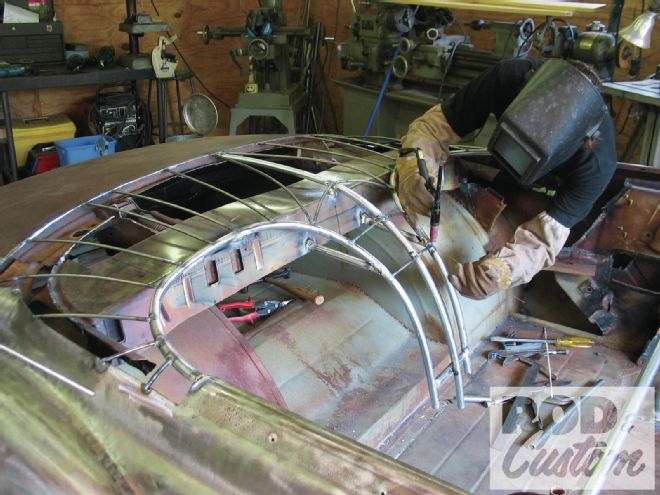
[11] The interior is going to be capped off; therefore, our first item on the agenda was to set the curve along the back seat (note arrows). From there we could create the new lines of the package tray off the contours of the decklid. Here I’m making a pattern for the first line of the new skeleton.
[12] Here’s how things are shaping up. The rods are running continuously off the decklid and down to the end of the package tray. As you can see it’s much easier to bend larger pieces of rod and then cut them to fit, as opposed to cutting a length and then trying to fit it. To maintain symmetry from side to side, I’ll make two pieces at the same time and place them congruent to their counterparts.
[13] When laying a skeleton out of rod, it’s crucial to keep things on an even keel. Although the lines coming from the decklid require different lengths, it’s important to make sure the center of the radii follow suit. Here you can see how the guide is flowing across the new package tray. If my radii were off you’d see dips and humps along my guide. It’s imperative to keep things of this nature in mind, because the sheetmetal will take the shape of the skeleton . . . whether you like it or not!
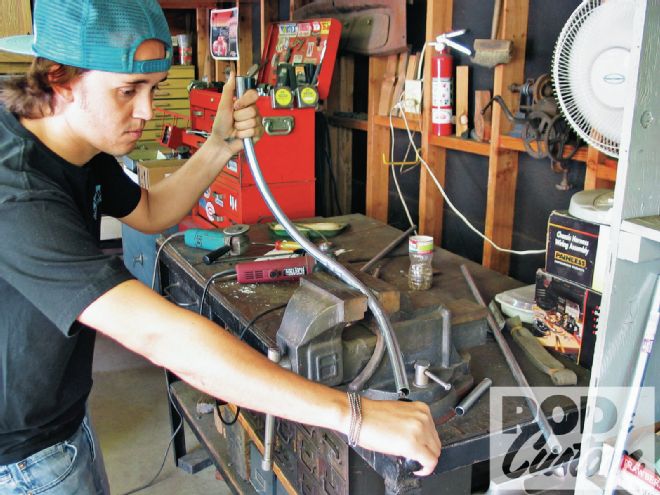
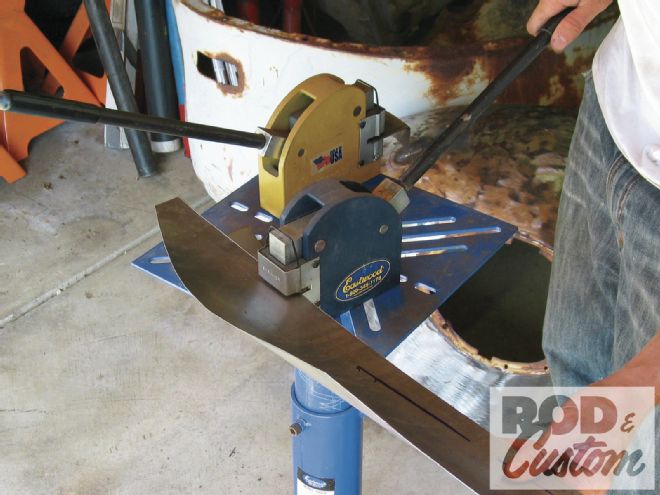
[14] When bending tight curves, or double-compound curves, a vise with a pry bar makes a world of difference. Here I’m making a double compound curve that will wrap around the rear seat, and down into the cockpit.
[15] The foundation for the new package tray is now set, but because I want the center of the package tray to be a little higher in the middle I’m going to raise my center bar up just a bit. Again, the general radius will stay true, but as it passes the center point of the radius the line will extend and flow down.
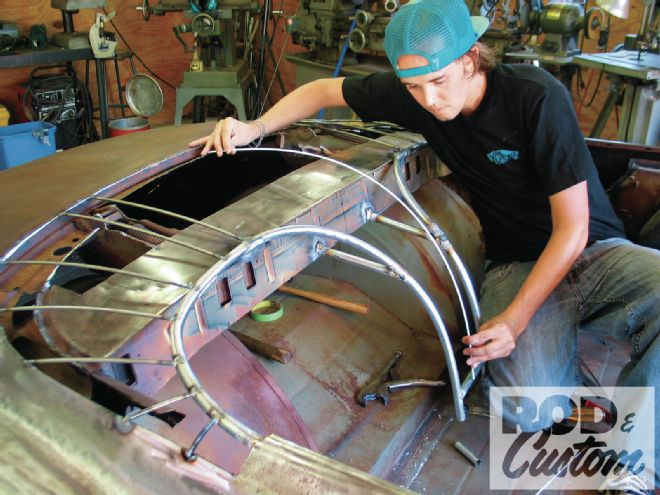
[16] The skeleton is now complete. Notice how the center rod is raised past the center of my continual radius, and how the struts coming from the center rod down to the rear seats begin to dive down once they pass the center radius.
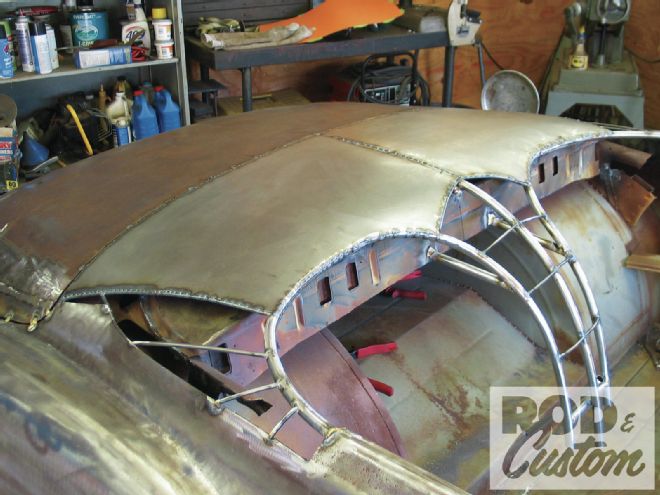
[17] Here’s the bulk of the package tray’s new 20-gauge cold-rolled skin tacked in position. As you can see it has taken the shape of the skeleton. Note how the inner corners again dive down, but not until after that center radius mark.
[18] When making tight curves, especially double-compound curves like such, it’s best to shape the sheetmetal as close as possible and then let the skeleton do the rest of the work. Here, the corner of the new package tray has been rolled in the general radius.
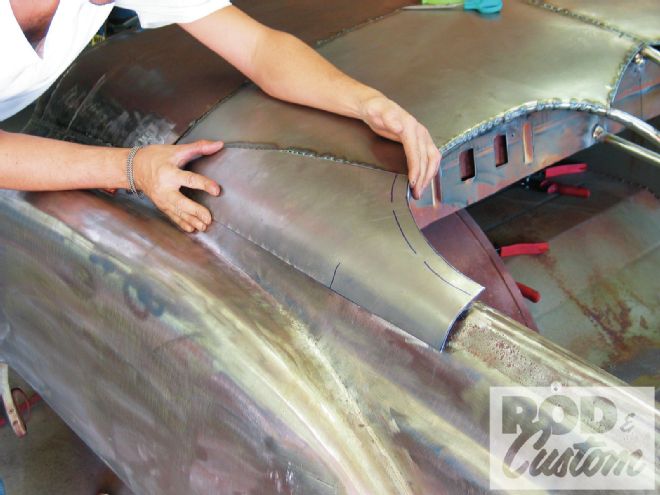
[19] Because the body begins to taper back, the corner skins are shrunk along the bottom edge to flow with the body lines. Without shrinking the bottom edge the corner would buckle . . . the skeleton is a guide not a miracle worker! Once the corner is tacked along the upper rod of the skeleton, the rest of the skin will fall down into place.
[20] A look at the tray all tacked together shows how things have shaped up, and more importantly how the skin has taken the form of the skeleton.