Used to be, heaters, like fenders, carpeting and even a radio, were superfluous to the true hot rod experience. If the part couldn't help the car go faster, it was jettisoned like deck chairs on a sinking ship, but maturity has a way of altering your perspective.
Whether you view maturity as reaching new levels during continuous personal development or simply another word for being old, there's no denying that enthusiasts these days are demanding more creature comforts from their street rods. Be it a more forgiving ride or the increasing importance of air conditioning, it's the little things that making driving a hot rod all the more enjoyable; especially on long drives.
Heat is one of those little things. You may not give it a second thought on a sunny afternoon, but if you're cruising when the sun sets or you get caught in a rainstorm that fogs the windows, the absence of the heater becomes an acute problem. Of course, aftermarket heaters for old cars and street rods have been around since the vehicles were brand-new and many a handy enthusiast has bolted one up in his hot rod. But, we thought the idea of adding a heater was worth revisiting as a back-to-basics project.
Besides, our buddy John recently purchased a '52 Pontiac that used to have a heater and we were tired of listening to him grouse about shivering in the colder months. Then again, he lives in the Detroit area, so that's a pretty legitimate gripe come October and November. So, we called up Maradyne Mobile Products (www.maradynemobile.com), a Cleveland-based company that produces a variety of universal heater kits for the auto and marine industries and discussed our needs. They're more well-known for electric cooling fans. They suggested a compact unit from their "5000" series of 12,500-btu heaters, which would be more than enough to kill the chill in the old Poncho.
The MSRP for the unit, plus a defroster kit and a switch kit with a three-speed fan controller, would come at around $280; approximately $198 for the heater, $31 for a defroster kit and a switch/wiring harness kit for about $51. However, we found all the parts on Amazon.com for substantially less; $127 for the heater, $26 for the defroster kit and $18 for the switch/harness kit. That adds up to only $171. Tack on a few bucks for shipping and the total would still be less than $200. Better still, the installation would rank only slightly higher than installing a chrome air cleaner in regards to difficulty. Cheap and simple are two of our favorite words, especially when they're both used to describe a DIY project, so we ordered the parts and told our friend to drive around with his mittens on until they arrived.
It's worth pointing out; however, that tracking down the Maradyne parts wasn't easy online. Some of the big Internet-based parts warehouses, such as Performanceparts.com and Autoanything.com carry Maradyne's electric fan kits, but we didn't find the heaters on those sites. The same went for Summit Racing and Jegs' Web sites. Your best bet is Amazon.com or eBay.
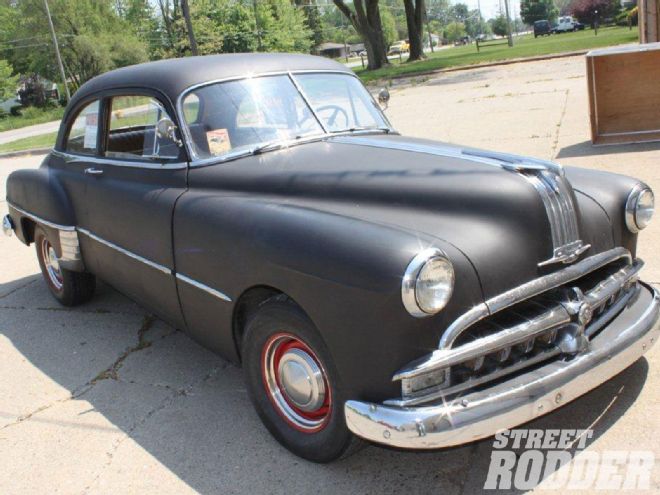
Like we mentioned, the Pontiac used to have a heater before John owned it and we could tell by the piece of sheetmetal screwed over the hole in the firewall and the tied-off heater hoses under the hood. Not surprisingly, the original L-head 239-cid six-cylinder-based powertrain was long-ago swapped in favor of a small-block Chevy backed by a Turbo 350 automatic. Inside, a Naugahyde interior recalled hot rod style from the '70s, which was probably when it was last re-trimmed. The car had definitely been around the block a few times, but was a solid, comfortable and virtually cancer-free cruiser that drove just fine.
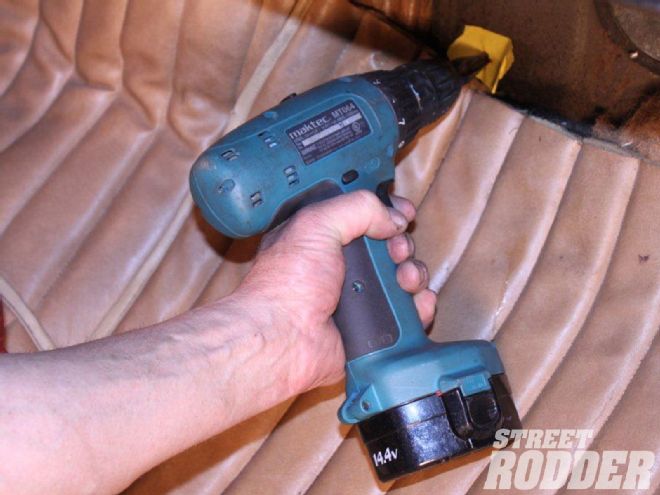
Perhaps the biggest issue with installing the heater kit was one of aesthetics. Like so many cars of its era, the Pontiac's dashboard was slim, jutting only a few inches away from the windshield. That meant there was no room to tuck the heater box behind the dashboard and out of sight. The Maradyne unit is a compact, square piece, measuring only about 7 inches long on each side, but it definitely takes up some space - both physically and visually. That said, there are few other options for adding a heater and, frankly, from the huge, covered-up hole we found in the firewall, the previous aftermarket heater unit must have been a behemoth. Because it's very difficult to turn a wrench and shoot photos simultaneously, we leaned on the guys at Total Performance, in suburban Detroit, to help with the installation. It seriously took us less than two hours for this project - and that included plenty of "freeze" moments to shoot our photos. The only exotic tool required was a hole-saw bit for a drill.
We mean it when we say this is a do-it-yourself project that anyone can tackle. You'll feel the results instantly, too, the moment there's a chill in the air. Perhaps with age our senses are getting a bit dull, but adding a heater didn't seem to slow down this old Pontiac whatsoever. Let's chalk it up to maturity.
Here's our heat-deprived project car - a satin-black '52 Pontiac powered by a SBC and wearing interior threads that date back to the days when Jimmy Carter suggested wearing a sweater. We'd rather go with a real heater to warm up its Naugahyde upholstery.
The heater selected for our project was Maradyne's compact, 12-volt unit, part number H-503012. It has a 12,500-btu/hr rating. It comes with a three-speed fan, but other accessories are required to complete the system. The list price is about $200, but we found it on Amazon.com for less than $130.
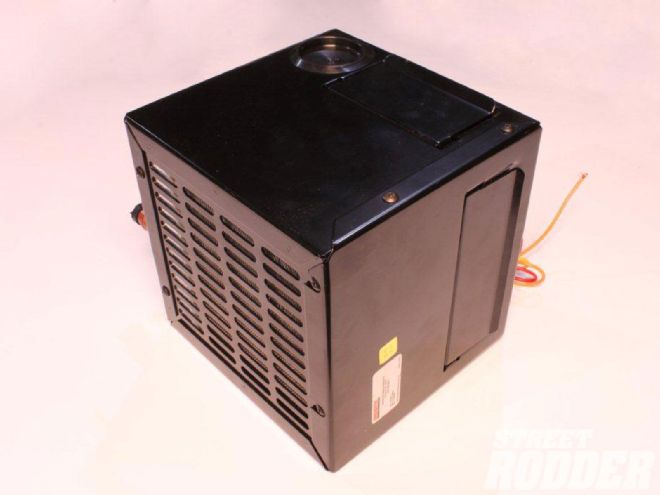
The Maradyne heater is basically a heater core in a box, with the same standard coolant hose inlet and outlets you'd find on a typical OEM system. Heater hoses are not included with the kit.
Although the heater unit itself comes with a three-speed fan, a fan switch and requisite wiring harness must be purchased separately. Again, we found a deal on it at Amazon.com for only about $18.
The final piece of the heater system puzzle is the defroster, which may not even be necessary or desired on some vehicles. But for the closed cockpit of our '52 Pontiac coupe project, it seemed like a smart idea. We wrapped up our Amazon.com shopping at $26 on this, which was only about half of the list price.
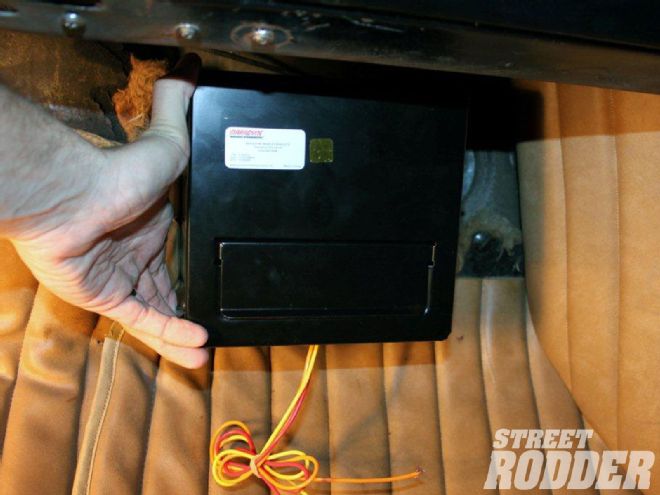
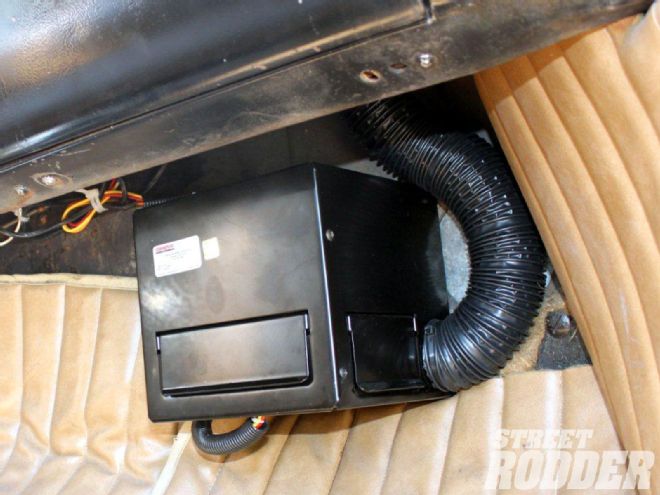
The only real downside to installing the heater was that, because there was no room behind it, we had to mount the heater below the dashboard. This may not be the case for all vehicles, but there was no other option for our Pontiac. We started the project by holding the heater in place to gauge the least obtrusive mounting position.
A paper template for the mounting holes and coolant lines is included with the heater, but because of the contours of the firewall, we found it easier to use pieces of masking tape marked with the drill locations.
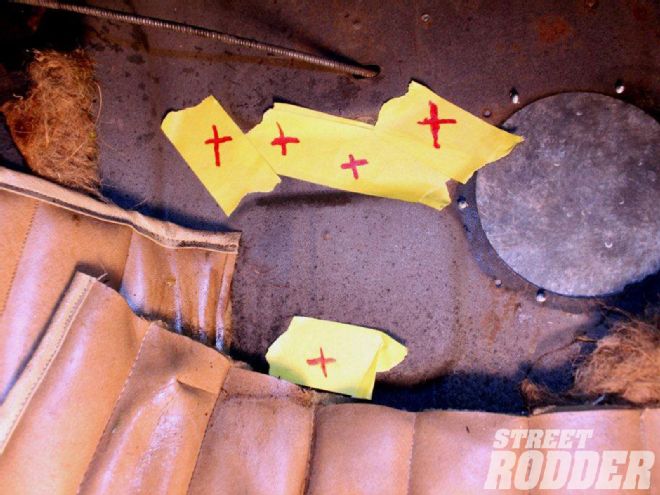
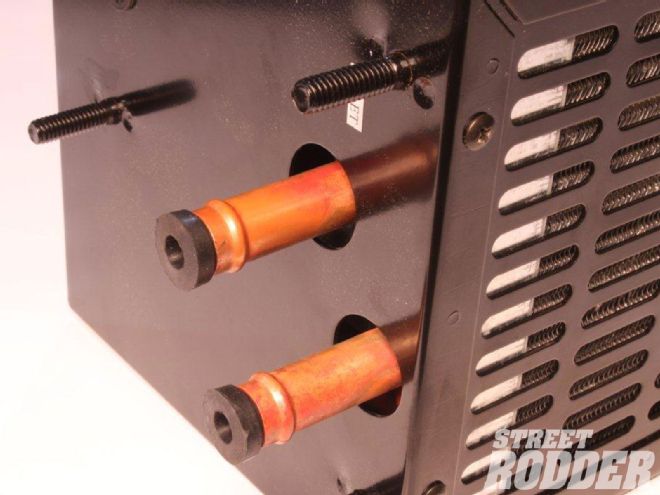
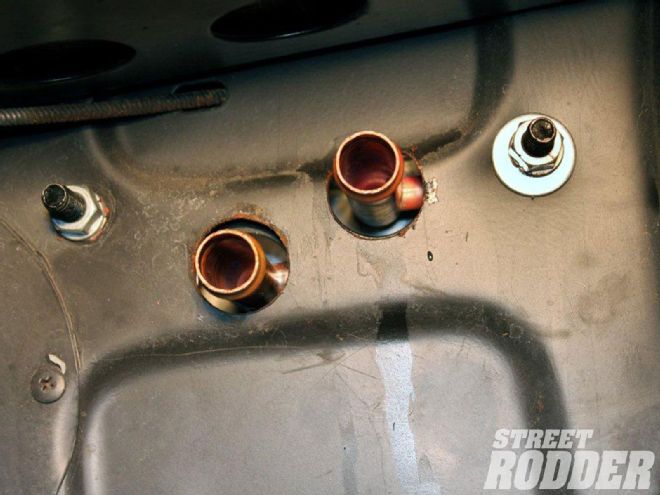
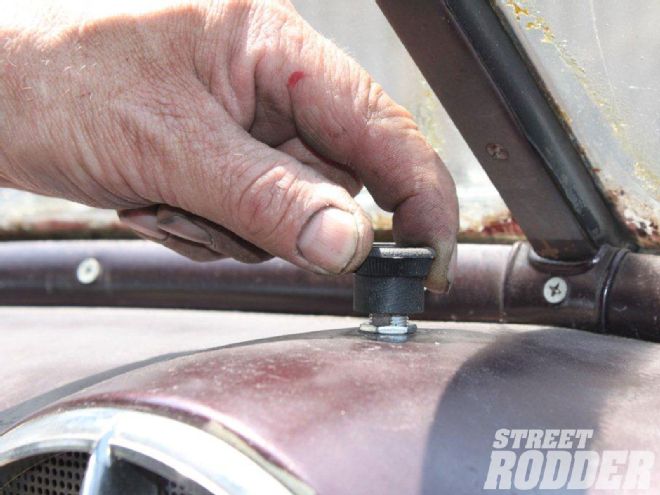
Next, the holes for the heater's mounting studs were drilled through the firewall, after making sure there was nothing on the engine-compartment side that would interfere or be damaged by the drill bit as it pushed through the steel.
After the mounting stud holes were drilled, the larger-diameter holes for the coolant lines were cut out with a hole-saw bit. Easy stuff, so far.
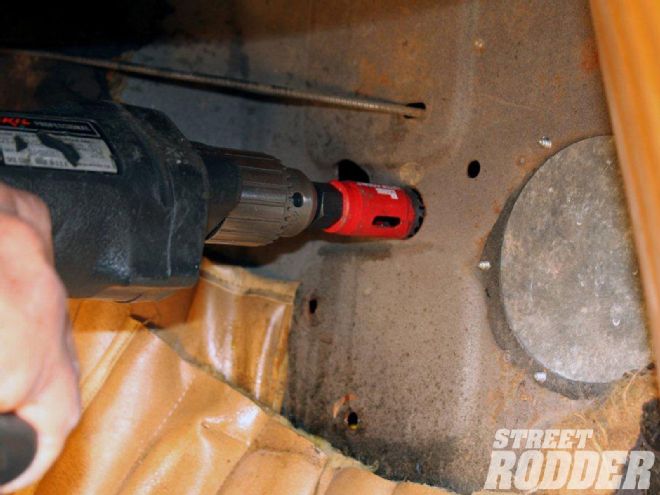
The measurements for drilling through the firewall were confirmed when the heater's mounting studs and water lines slid through without any hang-ups.
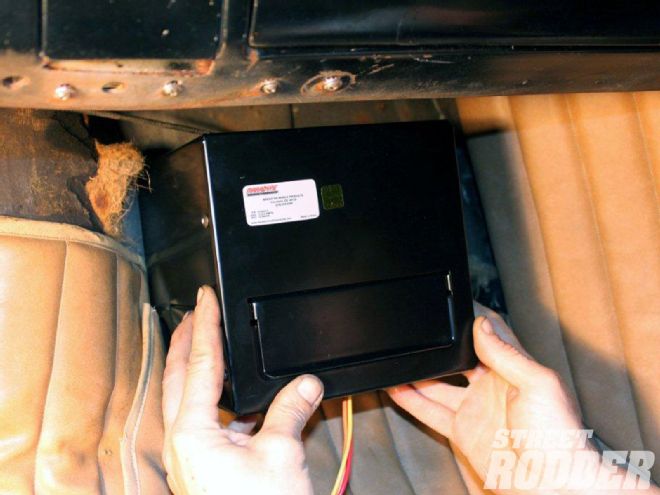
The heater is attached to the firewall from the engine compartment side, secured with simple nuts and washers. We told you this was easy.
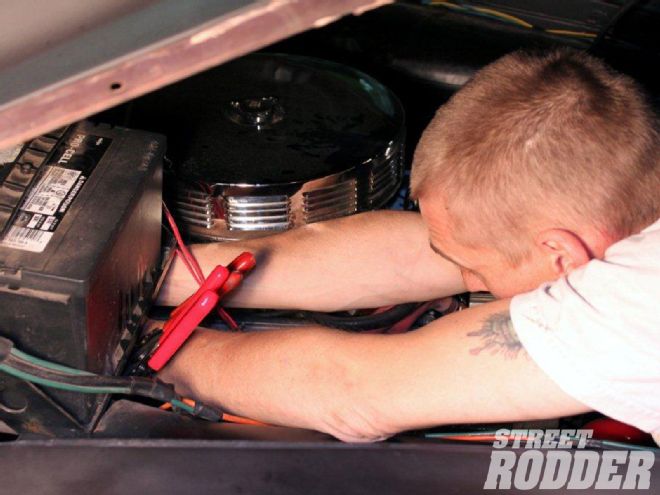
Next, the heater hoses are prepped for installation. There were already tied-off hoses under the hood of the Pontiac and they were re-usable. But whether you install new ones or uses existing one, as we did, there's going to be some coolant drained out of the system, so be prepared for it.
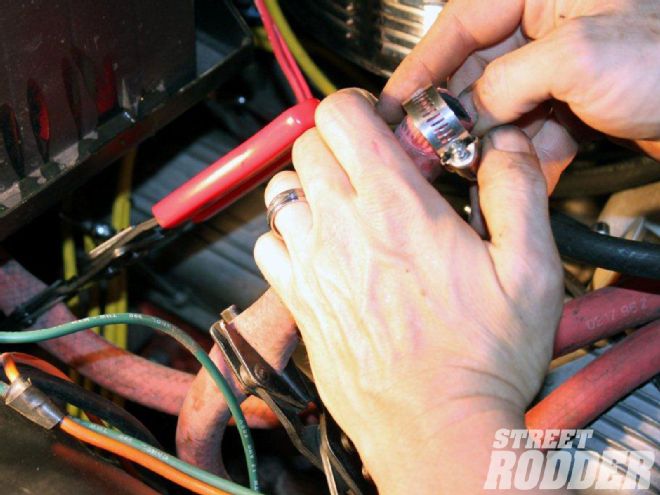
The battery tray made it impossible to photograph the hoses' installation, but if you have even a cursory knowledge of cars, you know how that goes. Again, the project was proving to be one of the simpler ones we've tackled lately.
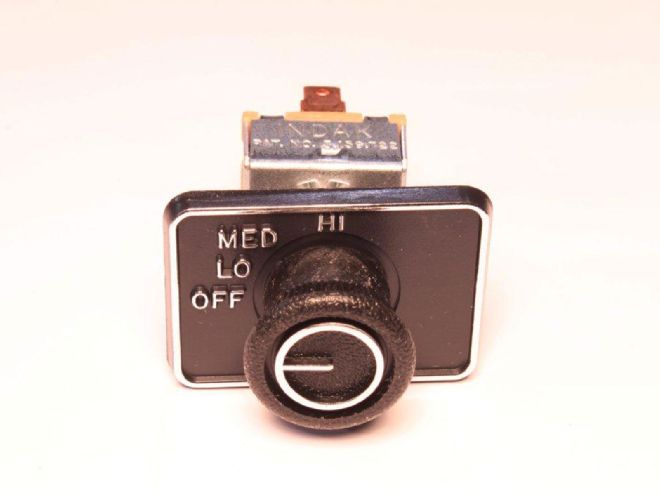
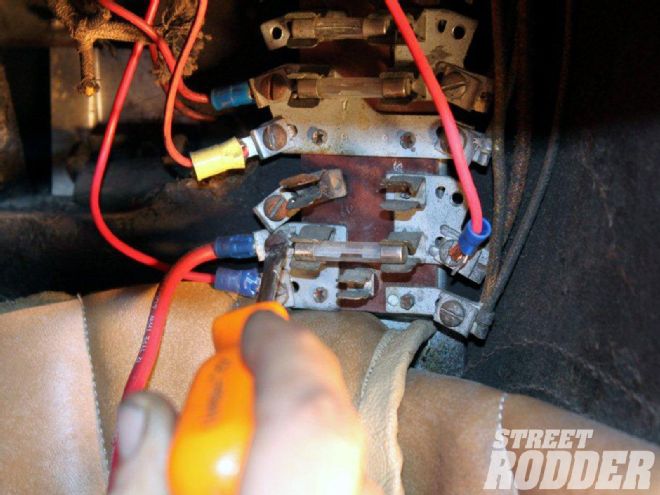
With the coolant lines connected, it was time to tackle the fan switch. It was a simple matter of following the kit's instructions to connect each wire to the correct terminal.
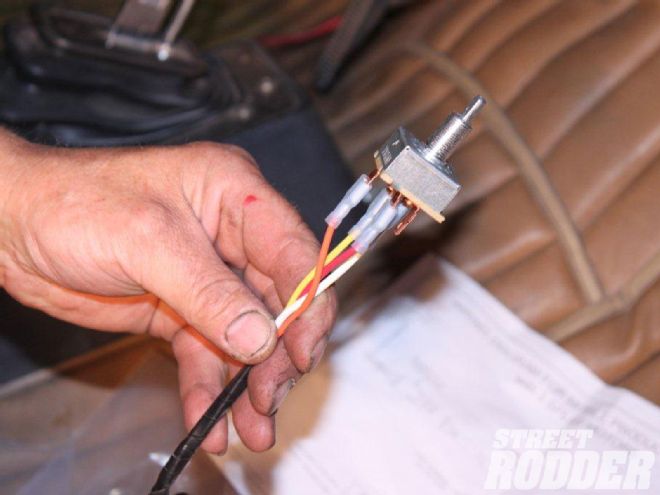
Don't ask us why, but the car's owner wanted the switch to come up through an existing hole at the top of the dashboard. It wouldn't be our first choice for the control's location, but hey, it wasn't our car.
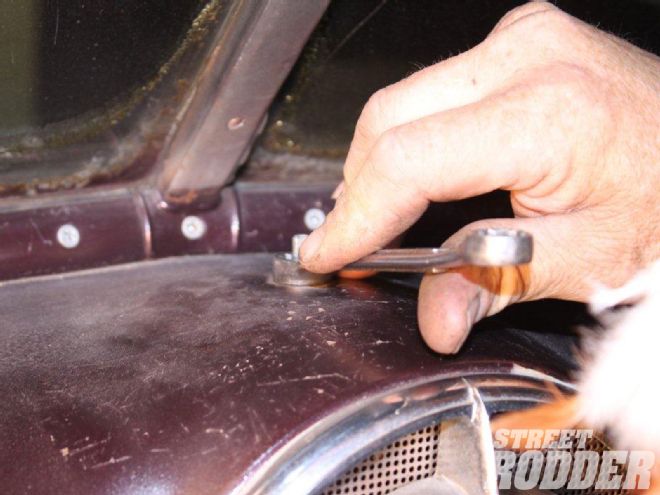
Finally, the power for the switch was spliced into the fuse box. The Pontiac still has the original fuse panel, which could use an upgrade, in our humble opinion. Perhaps that will be a task for a future project.
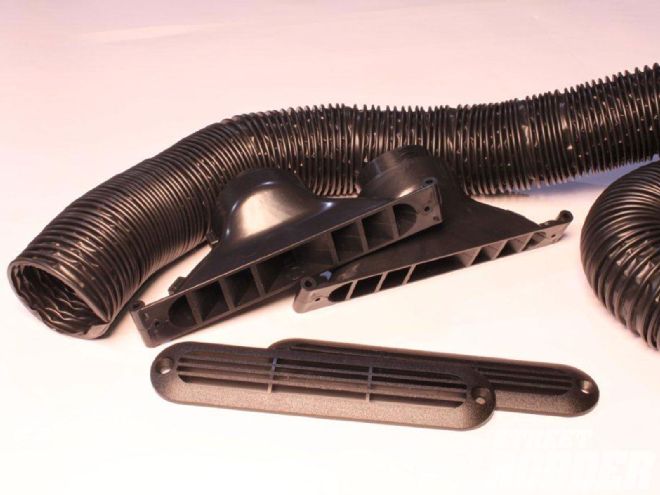
Wrapping up the installation was the routing of the defroster hose (arrow) under the dashboard and up to the base of the windshield. The hose could also be used to carry heat to the opposite side of the interior or through factory vents in the dash.
With the switch and defroster kits installed, we turned on the engine and let it warm up for a couple of minutes before testing the heater. We also checked the coolant lines to make sure there were no leaks. Everything tested perfectly on the first try.
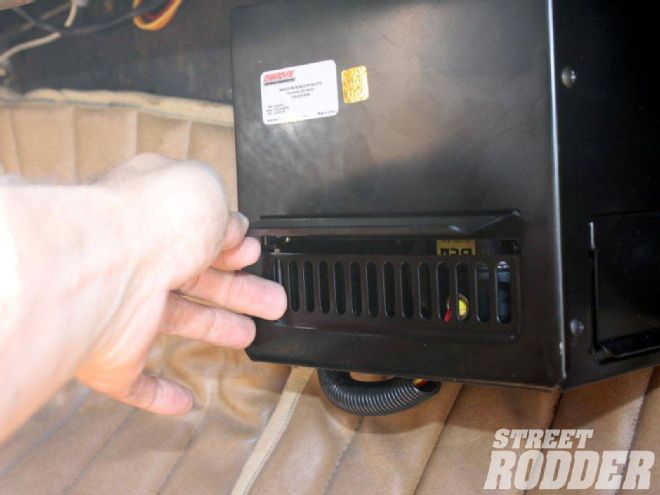
Flaps on each side of the heater box allow for adjustable heated airflow, which can be directed toward the floor to help heat up cold feet - or simply opened all the way for full interior heating. The Pontiac is now a much warmer place for late-seasoning cruising.