It was a late night of fabrication in the Circle Track shop. My back was sore from being hunched over, working on our Mini Stock project car for the past six hours. I took a break from welding and thought about what was next on the to-do list for our Mustang, and I realized it was almost time to start building the 'cage and mount for the fuel cell. I could feel my back tighten up as I thought about building this intricate protective 'cage on the floor in the shop. Then I wondered if the concrete floor was even flat, let alone level enough to build something that needs to be perfectly square. And then it hit me--build a fabrication table!
Now, I know it may sound complicated, but building a fabrication table is fairly simple and something you can do at home. If you fabricate or modify a lot of your own parts, or simply need some solid work surface, a table like this a great addition to any shop. It gives you a solid surface to either weld or clamp parts or brackets to, as well as supplying you with a consistent, level work surface, which will ultimately give you higher quality results.
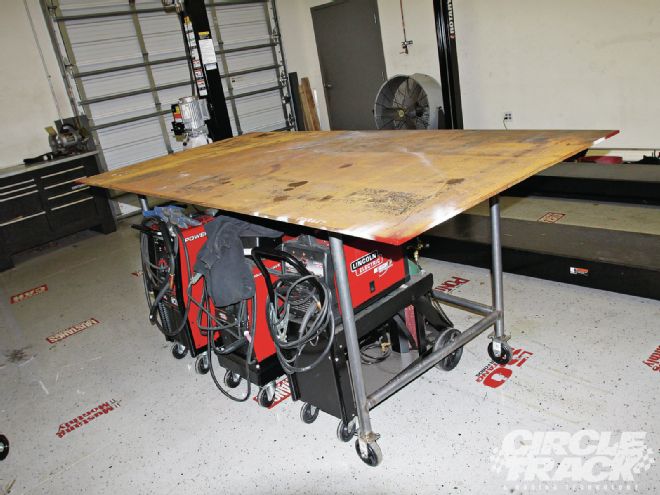
In its most basic and simple form, we're building a table--four legs and a top. Outside of that, the possibilities (size, height, material, and so on) are limitless based on your needs and abilities. Being that our fabrication table will reside in our Snap-on Tech Center, which we share with many of our sister publications, we wanted to build a table big enough for just about anything. We also needed it to be mobile, and act as a storage location for our Lincoln welding equipment.
We started with some extra rollbar tubing left over from the Mini Stock rollcage. Although this is fairly heavy tubing for a table, we had it, and we need the base of the table to be fairly stout to support the weight of the work surface we plan on using (more on that in a minute).
We started by taking some basic measurements. Knowing the top is a 4x8-foot sheet of steel, we wanted to leave enough room around the top to be able to clamp parts down, or simply attach the welder's ground directly to the table.
The first things we built were the sides. Measure twice, cut once, and make sure all of your corners are square. Once you have two identical sides, it's time to attach them. This is where it gets a little tricky. Having a few friends to help keep things in place is a good idea. Squaring the sides to the top of the base is a critical step. If the top of the base isn't square, the work surface may not sit flat, giving you a workspace that isn't level, or worse, something that could fail and collapse if it's supporting large amounts of weight.
Once our base was complete, we headed to Harbor Freight and picked a set of casters. This gave us the ability to move the table around the shop. We went with two fixed casters and two swivel casters, but four swivel casters will work better if you have a tighter area. Once the casters were welded on, it was time to drop the steel top onto the base of the table. Our work surface is a flat rolled 1/2-inch steel plate. The 4x8-foot sheet weights in at a hefty 653 pounds, but this will give us a solid surface for anything we could ever need to fabricate, modify, or fix.
Keep an eye out for our new fabrication table in our Mini Stock series, as well as many of our other project car builds.