Despite its appearance now, I actually used the Purple Pig as my daily driver when I first moved to California, commuting 70 miles a day. With nothing more than a seat inside the car, and temperatures where I lived at the time too much for me to bear on my afternoon drive home, I realized for the first time why installing air conditioning was so popular in hot rods and customs! Bear in mind I'd just moved from a country where heaters and demisters are requirements, not cold air!
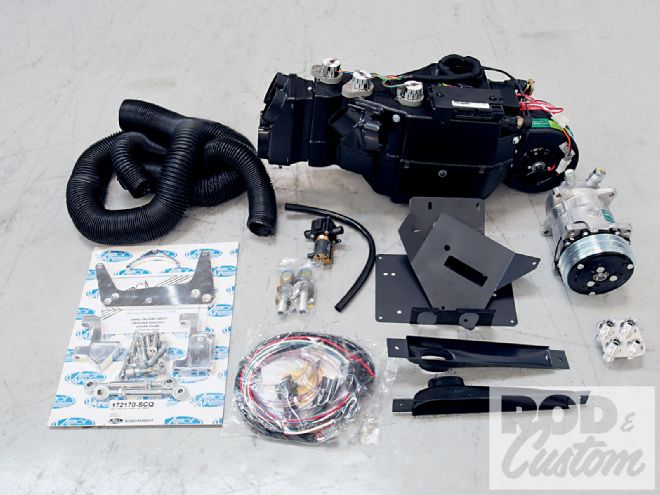
Four years on, and I couldn't imagine not having A/C, so I called Vintage Air to discuss my requirements for the project '49. They sent me a couple of mock-up evaporator units to try under my dash, which enabled me to determine which one would work best, and to drill the mounting holes in the firewall before I welded, filled, and painted it. Once I'd determined the Magnum Gen IV evaporator was going to fit, and indeed fit better than the smaller Compact Gen II version (the shape of the Magnum fit around the sheetmetal under my dash better and allowed the evaporator to sit higher on the firewall), Vintage Air sent all the components I needed.
I ran across a small problem with the location, but that was my fault. I wanted to run the hoses through the firewall, as I thought I could use the stock fresh air tube hole, and proceeded to weld and paint the firewall. May I suggest you fit your A/C system in, then, and only then, start bodywork!
Despite the modern underpinnings and running gear, I am very keen to maintain a vintage look to the interior and exterior of the Chevy (yes I know the evaporator hangs below the dash, but I'll disguise it as best I can later) and as such didn't really want modern A/C controls to show. I could have hidden them in what's left of my glovebox, but I'd rather have them easily accessible. Vintage Air offers conversion kits for owners of some vehicles to retain their stock heater and A/C controls, and their '61-62 Impala kit converts a three-cable system to electric operation. With the '49 Chevy using three cables, I used this kit to convert my stock controls.
If I've connected the cable converters correctly, my TEMP button should now be the thermostat lever, controlling the temperature from hot to cold, the AIR button should control the blower speed from off to high, and the DEF button should be the mode lever, controlling mode positions from dash to floor to defrost. A combination of positions offered by the three levers will provide heat or cold air to the various vents, the sequences shown in the Vintage Air conversion kit instructions. Also shown in the instructions is the calibration procedure, which I haven't done yet because the system needs to be completely hooked up to do so. This will set the range of travel for the cable converters connected to my stock control panel, setting their highest and lowest points.