In the first installment of this two-part series, Steve Frisbie of Steve's Auto Restorations provided us with an inside look at the tools and equipment needed to undertake a professional-quality lead project. In this installment we will follow along as a factory leaded quarter-panel seam in a '47 Ford convertible is cleaned and repaired. Before we get ahead of ourselves, let's recap the necessities. To start we need an oxyacetylene torch, 30/70 lead alloy, tinning flux, wire brush, clean base metal, and baking soda and water solution. To smooth and shape the lead we will need a wooden paddle (at least one), a chunk of bee's wax, and at least one aggressive body file.
The seam we tackled here is a great example of a do-it-yourself repair in which lead is ideally suited. The old lead on our car was poorly applied and in desperate need of repair before the car could head for the body shop. The lead was full of pinholes, which is typically caused by overheating and boiling the lead, and had also begun to blister. Blisters are often the result of contaminants such as rust hiding under the lead and are a telltale sign that the lead has not adequately adhered to the base metal.
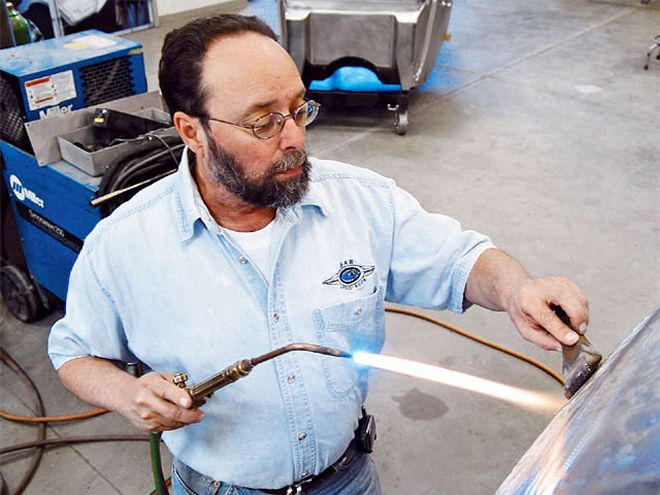
The first step of the repair required getting rid of the old, poorly applied lead. The easiest way to dispose of the lead was to simply melt it out of the seam. The torch was fired up and a medium-intensity flame was moved back and forth evenly over the leaded area without overheating the surrounding sheetmetal. Once heated, the lead easily ran right out of the seam and revealed the underlying contamination.
In order to avoid contamination problems, the area to receive the lead must be clean, clean, clean. A Scotch-Brite pad on a right-angle grinder is great for knocking off surface imperfections and cleaning the metal without marring it. A die grinder with a carbide bit works well in pitted or hard-to-reach areas. A fresh 36-grit sanding disc on a grinder works well too, but care should be taken so the panel is only lightly scuffed. You do not want to grind away material, but instead simply scuff the surface. The use of a fresh disc is important because the adhesive from a worn disc can sometimes leave a residue that can be ground into the surface. Such a residue will inhibit a proper tin. Any sign of rust or contamination must be eliminated before tinning, or you are setting yourself up for a poor repair.
When our seam was sufficiently clean, we could move on to the tinning process. Tinning is a crucial element in any lead work project. If done incorrectly, the lead will simply not stick to the base metal. The process sounds risky, but it's not all that difficult if you pay attention to what you are doing. First, the area to receive the lead and the surrounding metal had to be brought up to temperature. A long, feathery flame was moved evenly over the surface until the metal was warm to the touch. This is where patience and flame control come into play. Once the metal was warm, the surface was scrubbed thoroughly with a wire brush dipped in tinning flux, or hydrochloric acid. The lead bar was then quickly run over the seam and surrounding metal. The lead should melt immediately and be thin and runny. Once the area to be leaded was covered, a clean, dry rag was used to wipe away any excess lead. The tinned surface should be smooth and shiny. If any area looks black or bubbled, the cleaning process must be repeated in that area.
After our seam was properly tinned, the real work began. Now, before we go any further, let us reiterate that an experienced professional laid down the lead. Avoiding expletives and burnt shoes should be considered an acceptable goal for first-timers. By tickling the lead bar with the tip of a feathery flame, the lead will, ideally, slowly flow onto the heated base metal and look something like a metallic-butter weld. In this manner the lead was melted into the seam and onto the surrounding metal. After a sufficient amount of lead was laid out, a wooden paddle, heated and coated in bee's wax, was used to squish and shape the lead while still in its butter-like state. The lead should be built up slightly higher than the surrounding metal so there will be plenty of material to file down to the desired shape, similar to working with polyester filler.
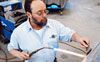
After the torch was put away, the entire area subjected to the tinning flux was wiped down with a clean rag soaked in a baking soda and water solution. The baking soda neutralizes the acid used in the tinning process, which, if left unchecked, will quickly cause your clean parts to rust. Once cooled, the lead can be filed to match the contour of the surrounding metal. Although using a file requires some elbow grease and patience, a grinder can easily remove too much material too quickly and fill your garage with toxic lead dust. Steve insists on using a file because it provides more control with less mess. After the lead was filed, it was roughed up with heavy grit sandpaper and ready for bodywork.
That's all there is to it, according to the professionals. Like anything else, the process just takes some practice. Hopefully Steve has helped demystify the nearly lost art of lead work, and encouraged some of you to get out and try it yourself. If not, the phone at Steve's Auto Restorations is always on.