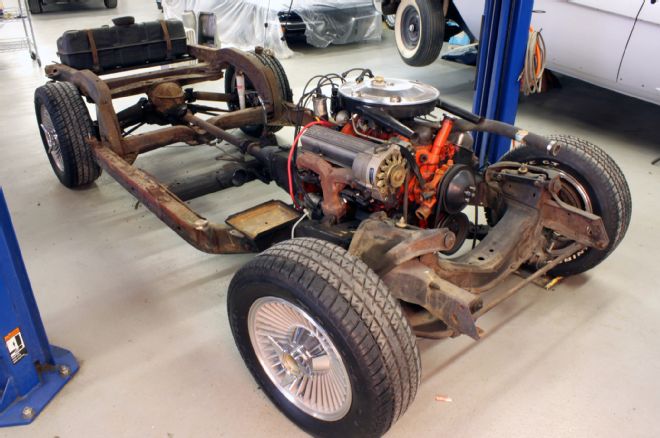
There’s nothing like a rusty frame to quickly dampen the enthusiasm for a project car. It’s the foundation of the vehicle, after all, and when it’s less than solid, there’s little use in investing one’s hard-earned money under the hood.
As with the outer bodywork, there’s rust and then there’s rust, and the degree of corrosion damage determines the viability of repair—and there’s a point when the frame damage is too excessive to make repairs fiscally or technically advisable. But we’re here to illustrate that even significantly corroded frames can be saved.
For the 1964 Corvette frame depicted in this story, Werner Meier of Masterworks Automotive Services, near Detroit, was skeptical about whether the rust-ravaged foundation was salvageable. His frame guy, Mark Bremer, however, believed it could be saved with some traditional cut-and-replace metalwork.
Despite its fully boxed design, there’s nothing unique about the Corvette frame or the repair steps shown here. It’s not a project for the novice, but the procedures are universal and can be applied to any steel frame—and for some rarer cars, where finding a replacement frame isn’t a cost-effective alternative, repairing the frame may be the difference between restoration or resignation of a project vehicle.
The frame in our story was saved with metalworking techniques that are equal parts vocational and artisanal. It’s a craft that fewer enthusiasts are learning, but requires only a welder, grinder, and practice to perfect. The results, as you’ll see by the end of the story, are remarkable and dramatic.
They’re also time-consuming and relatively expensive when performed by a professional shop, but the bottom line is you shouldn’t assume a badly rusted frame is the end of your project. With time, patience, and a welder, it’s achievable—even if you’re starting with the steel equivalent of cheesecloth.
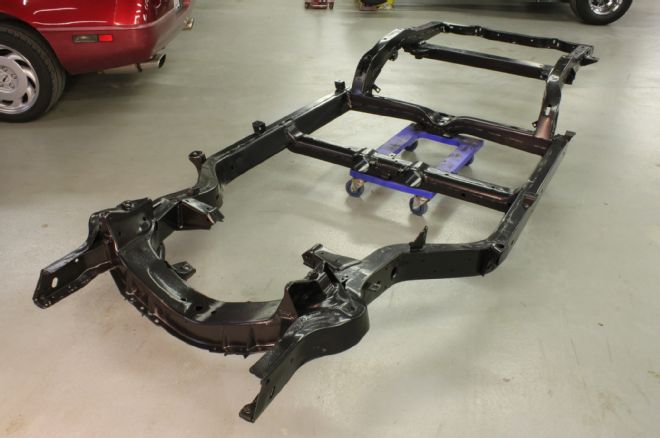
1. Lifting the body off this mid-year Corvette frame at Masterworks Automotive revealed serious corrosion. It wasn’t a surprise, because many full-frame cars of the era suffer the same. Often, the corrosion occurs on the top, sides, and in the corners of the frame, where moisture-soaked debris collects—and it can be difficult to detect during an inspection.
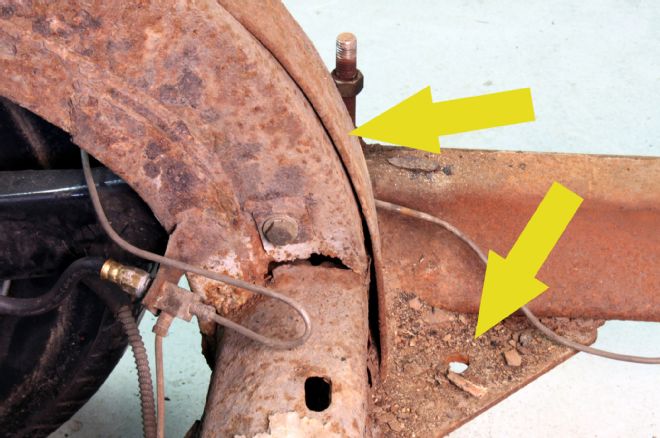
2. On this frame, there were not only rust holes but clear signs of previous rust repair—including an approximately 18-inch-long replacement framerail section on the driver’s side and add-on braces on the front of the axle kick-up section (top arrow), as well as gussets (bottom arrow) clearly added by someone trying to forestall the inevitable.
3. To get a complete look at the damage, the frame went for a dip in an acid bath to remove anything that wasn’t solid steel. At the stripping facility, the frame was prepped with a few hours baking in a 400-degree F oven, which burned off paint, grease, and other contaminants. Then, it was lowered into an overnight stay in a bath, where the active ingredient was muriatic acid.
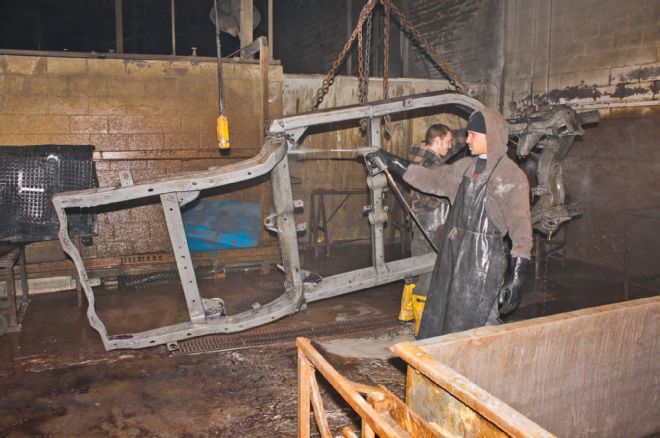
4. After emerging from the acid, the frame was thoroughly rinsed, inside and out. Besides revealing the full extent of the damage, the acid bath cleaned the metal in a way that would promote better surfaces for welding.
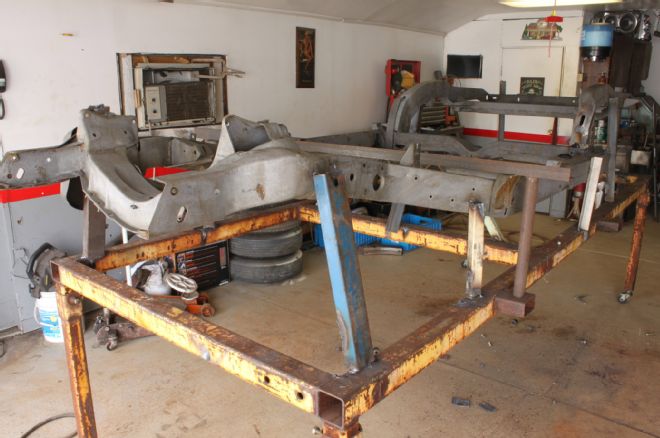
5. The frame was moved to frame repairer Mark Bremer’s shop, where it was attached to a jig to ensure it would be held true and square during the repairs. With significant sections to be cut out of the frame, it was imperative to keep it locked in place.
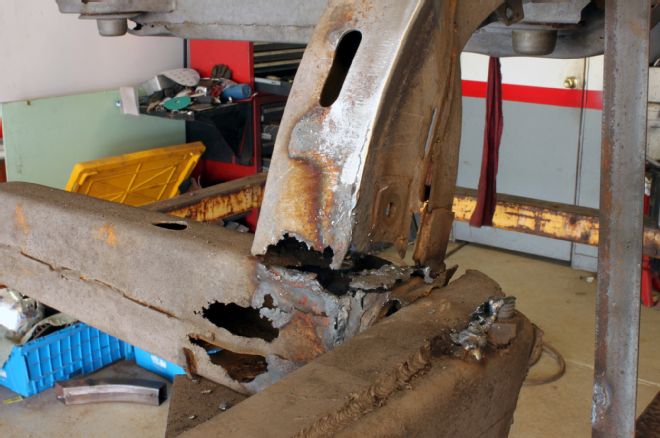
6. With all the rust and scale out of the way, the extent of the corrosion was revealed—and it was worse than it originally appeared. Huge holes in the framerails were expected, but when Bremer cut away the previously added tack-on braces, rust had nearly separated the kick-ups from the rest of the frame.
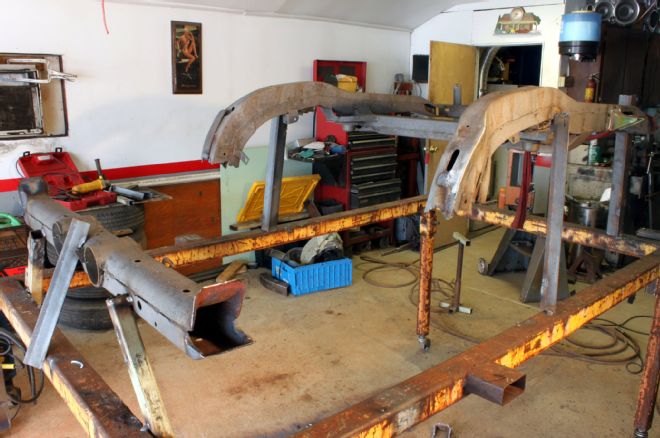
7. Bremer quickly got to work, slicing out the bad sections of the main framerails, which really illustrates the importance of locking down the frame on the jig, because where the bad metal was cut out, there is literally nothing connecting the front of the frame with the rear section. Calling the frame salvageable at this point seemed like a stretch.
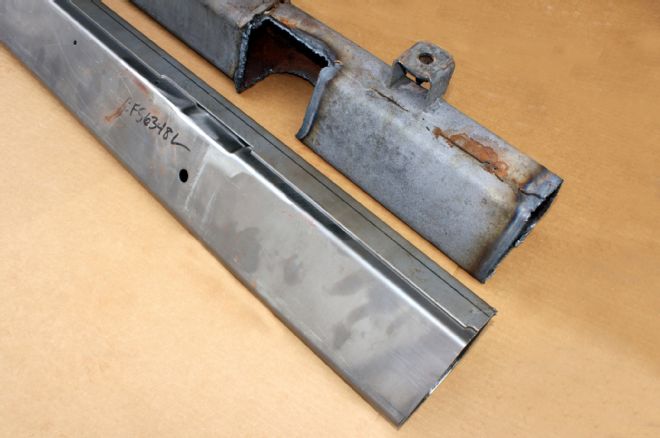
8. Depending on the vehicle, some reproduction frame-repair sections are available. In the case of this project, sections of the main ’rails were available, but additional replacement sections would have to be scratch-built. Shown here is an aftermarket replacement rail next to the cut-out original.
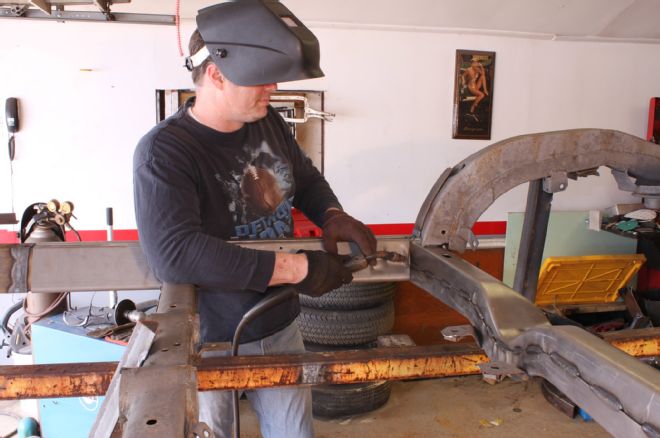
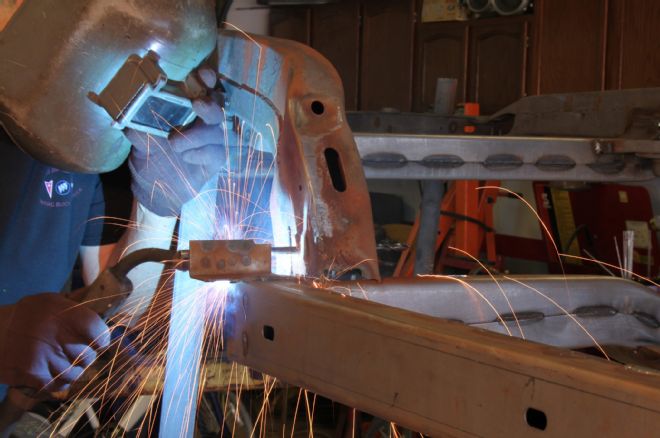
9. The replacement framerails require little prep work before being tack-welded in place. Importantly for boxed frame sections, the top seam of the rail is left un-welded so that the installer can more easily adjust its final fit. Bremer uses a MIG welder for all the work on the frame.

10. Braces are inserted and welded inside the framerails prior to welding the new sections to existing sections. This not only helps locate the new sections during fitment and welding, it adds an extra measure of strength. Unfortunately, this method is not always viable on some open or C-type frame sections where the braces would be visible, but in boxed sections, it’s very helpful.
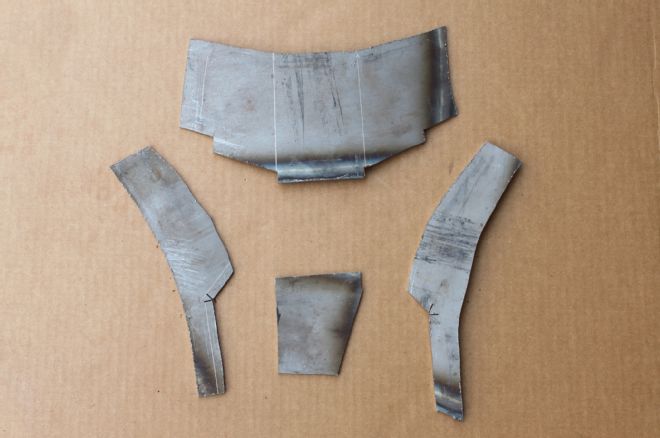
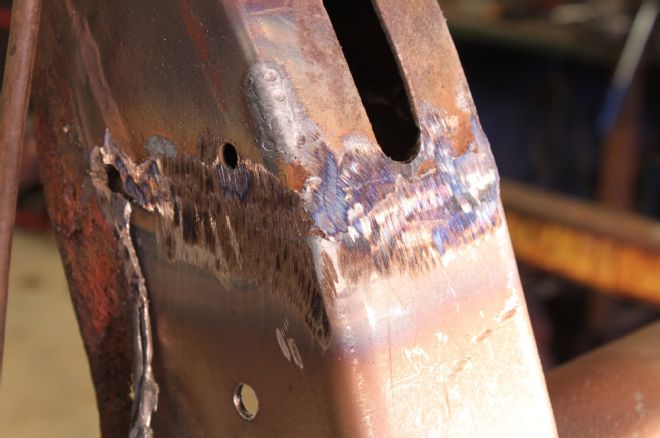
11. Custom fabrication was required for the front sections of the frame’s kick-ups where they meet the main framerails and crossmember. Bremer made rough patterns in cardboard and used them as templates to cut them out of new steel. For most vehicles of the muscle car era, that’s generally 11- or 12-gauge steel (about 1/8-inch). The shapes are rough and cut slightly large because it’s always easier to trim material away than to add it.
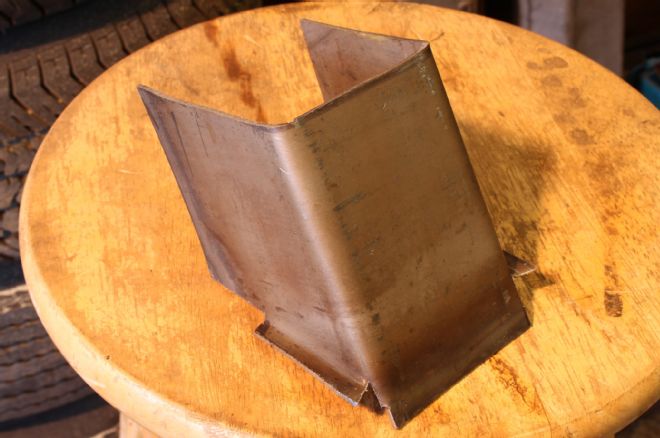
12. The largest piece to be added forms a three-sided insert at the front of the kick-up, and Bremer simply bends the pattern-cut steel on a homemade bender to produce the part. This is the part created from the piece seen at the top of the previous photo.
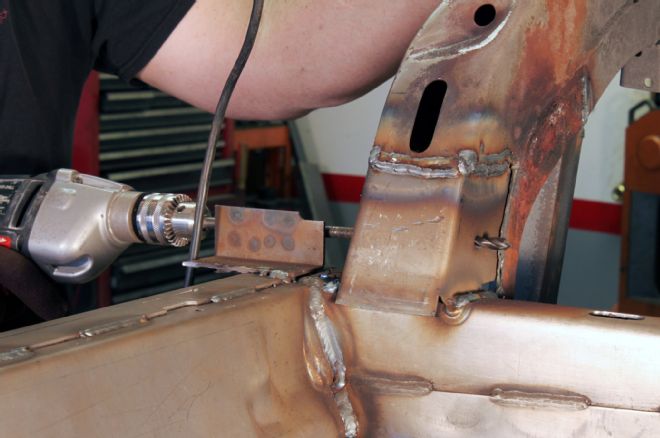
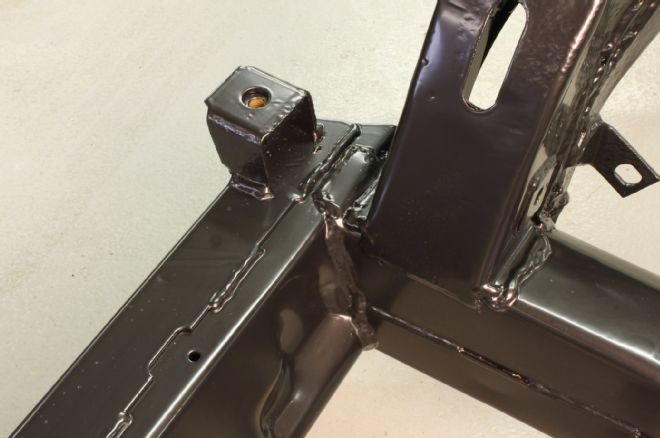
13. Before cutting away the existing, deteriorated frame section and welding in the homemade insert, a small jig is tack-welded to the frame. It is used to locate holes in the frame that are used to mount the trailing arms. When the new frame sections are installed, the jig will allow Bremer to drill the new mounting holes in their exact positions.
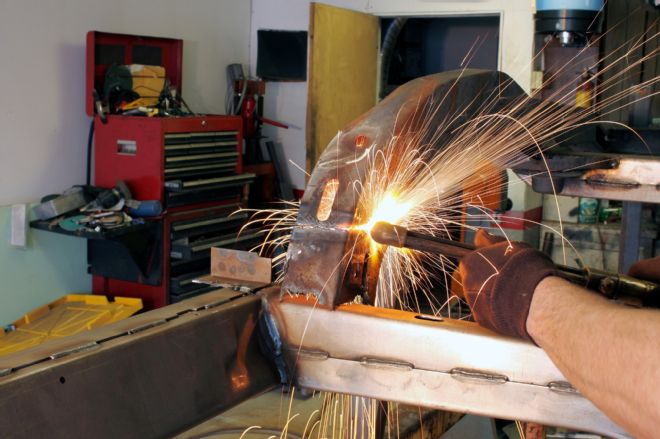
14. Next, the rusted section is cut out of the frame. It can be sliced out with a cutting wheel, but Bremer finds the acetylene torch more efficient.
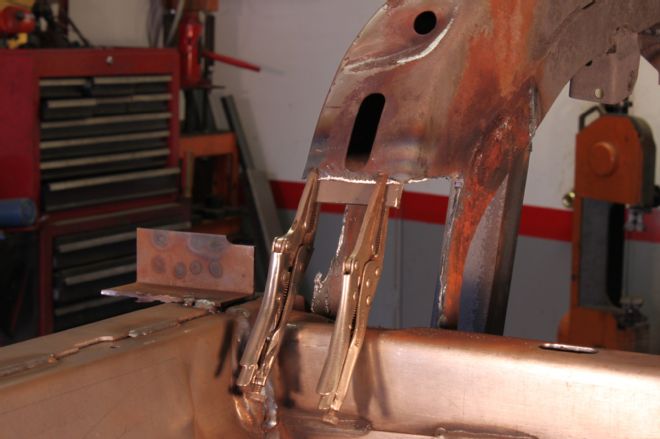
15. As was done with the main framerails, braces are tacked into the kick-up rails to locate the new insert and strengthen the repair.
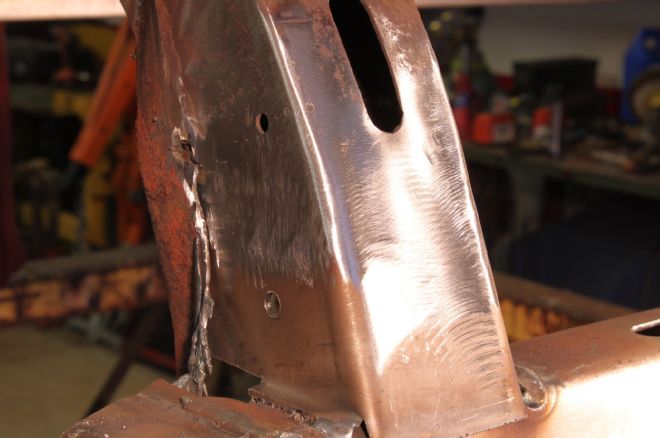
16. The custom insert is carefully tapped into place. It’s a trial-and-error process of test-fitting—typically requiring a little bending here and some grinding there—to get the insert placed perfectly. Like we mentioned earlier, precise dimensions aren’t necessary, because of the trial-and-error fitment.
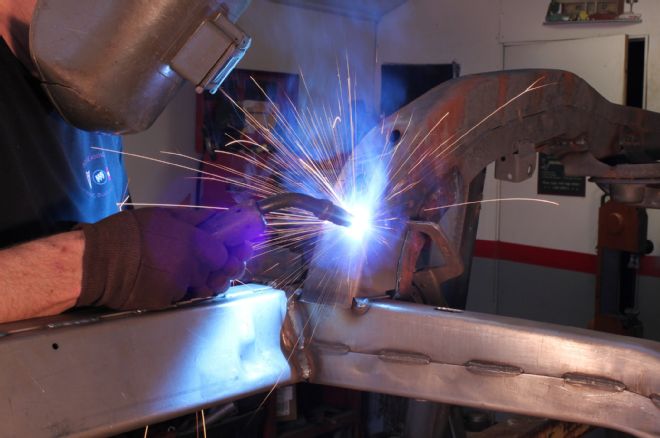
17. With the insert in place, it is carefully welded in place with small stitches at first, then full welds across all the seams.
18. After the insert has been welded in place, the mounting holes for the trailing arms are drilled. They’re located perfectly, thanks to the tack-welded jig attached earlier.
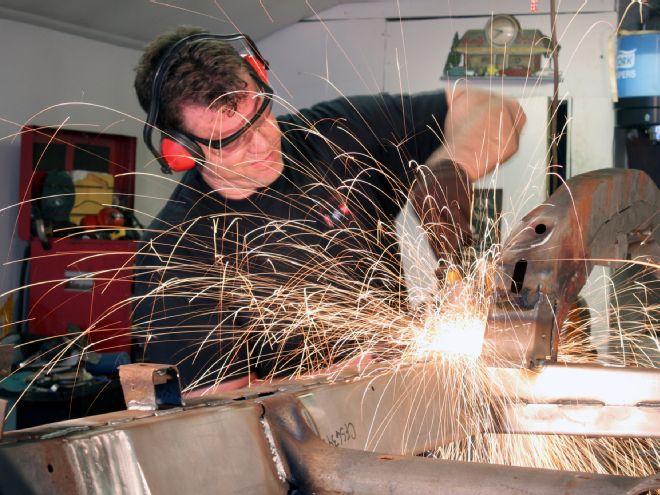
19. With all the basic fitting and welding complete, the welds are ground down as the next step in creating a seamless appearance. The first pass with a hard grinder knocks down the welds, but leaves a rough appearance.
20. Another pass with a flexible Scotch-Brite pad leaves a smoother finish, which can be further enhanced with even finer scuffing. At this point, the metal doesn’t look like it was ever cut and welded.
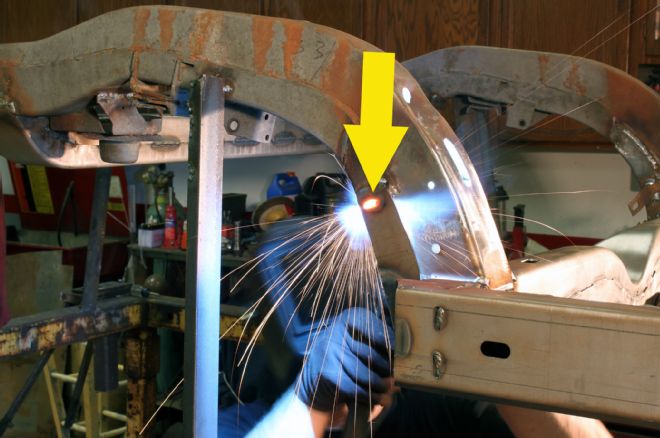
21. A little more welding is required to finish the repair, with the addition of another bracket to the rear of the framerail. The glow permeating the steel is the sign of excellent penetration for the weld (arrow).
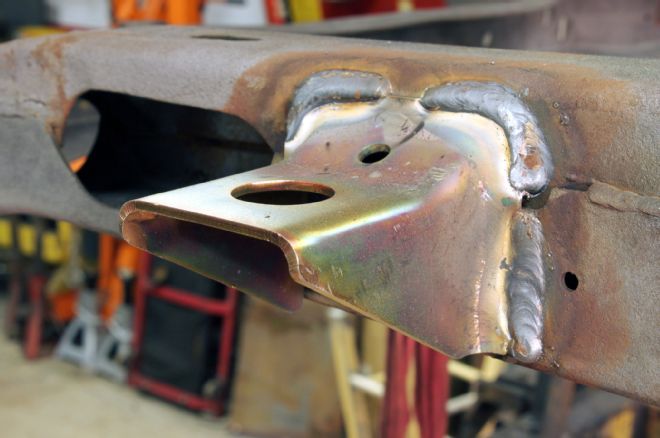
22. Body-mounting brackets require re-installation, too. Some couldn’t be re-used because the original rubber mounting pads created moisture traps that rotted the tops. In that case, new brackets were welded in place. This step wraps up frame’s reconstructive surgery.
23. With the repairs completed, the frame was sent out for powdercoating, which involves sandblasting it prior to coating and “baking” it overnight. It’s true that frames weren’t originally finished in this manner, but it makes no sense to leave the freshly revamped steel exposed to the elements.
24. Compare this shot with the earlier details showing the rotted metal and it’s clear the finished product is a far cry from the cancerous starting point. And with the protective powdercoating, this frame will serve as a firm foundation for decades to come.