This is our third installment on the build of our nostalgia-style altered, a tribute to my Uncle George Ocock's AHRA National Record Holder from the early '60s.
For those of us who dig nostalgia-style hot rods, the race cars of the era represent the Golden Age of drag racing: They were simple and basic, often built with little more than handtools, an electric grinder, a drill, and a stick welder. Today, re-creating one can be relatively inexpensive.
Construction practices are straightforward, with most late '50s and early '60s altereds based on factory framerails, axles, and steel bodies. These parts are readily available at swap meets, and what you can't find is a phone call away from any number of suppliers.
While Model A frames are still easily found, for the cost buying and boxing it, you're better off building one from box tubing. George's original ran an ahead-of-its-time tube chassis, which requires more skill to blue-glue together than most people are capable of. One area that should be farmed out to experienced shops is the 'cage construction. Those pros not only have the right tools and skills, they are also familiar with what tubing thickness and style of tubing is required. Unless you're well versed in these requirements, you could end up building a chassis from tubing that won't pass tech.
We had the chassis fabricated from mild steel tubing rather than chrome-moly so we could MIG weld the rest of it together when we got home. Welding brackets, mounts, and smaller assemblies falls within our abilities. Though mild steel is heavier than moly, it doesn't really matter because we're not racing heads up; it's all bracket racing or index classes today.
It's also vital to know the rules. Either an NHRA or IHRA rulebook will cover the basics for you, and you have to get one before you build the car, unless you plan to run only at unsanctioned "outlaw" tracks. Remember, a lot of today's safety requirements exist because guys killed themselves racing in the old days in exactly the kind of cars we're emulating. Our home track is the NHRA's Atlanta Dragway, so we went with an NHRA book. Either way, pick one and study it.
What will most pertain to us are the 'cage specs, seatbelt specs, seatbelt mounting points and material thickness, fuel tank requirements, rearend mounting, seat mounts, and the like. There are other requirements like dual throttle springs, battery cut-off switches, C-clip eliminators, trans shields, overflow bottles, and so on, but those really dictate parts you purchase to bolt to the car, not the car's design and construction.
For instance, we can run the Moon tank up front, but the rules dictate, "All fuel tanks… must be within the confines of the frame and/or steel body. A positive-locking screw-on fuel tank cap is mandatory on all open-bodied cars." The vintage flip-top tank you scored at the swap meet can't be used, and it can't be mounted way out front like they used to be.
Our seatbelt mounts must be mounted in specific locations relevant to the driver, "mounted in the direction of pull," and be 1⁄4-inch thick. You can't just put things where you think they'll work; you have to design around them.
In this installment, we're wrapping up the front end of the chassis, the steering, seatbelts, and getting everything ready to start the driveline mounting, cooling system mounts, and bodywork. We're not quite at the halfway point of total construction, but we're almost done with the fabrication.
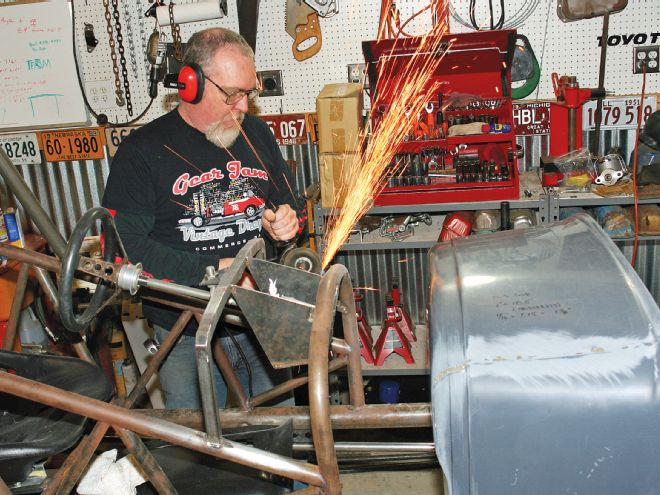
1 We wanted to finish the front suspension this month, which required dealing with the firewall. The original No. 78 had a flat aluminum firewall recessed about an inch, so the molded-in fiberglass firewall needed to be removed. We marked a line around the perimeter and laid down some masking tape as a guide.
2 Using a right-angle grinder and the same thin cut-off wheel we use for steel, we zipped off the firewall.
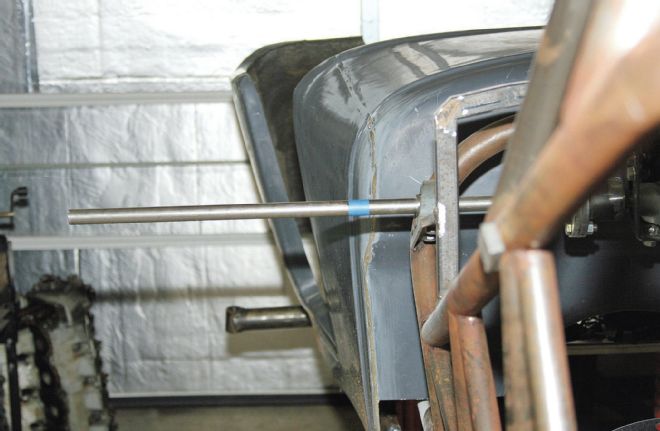
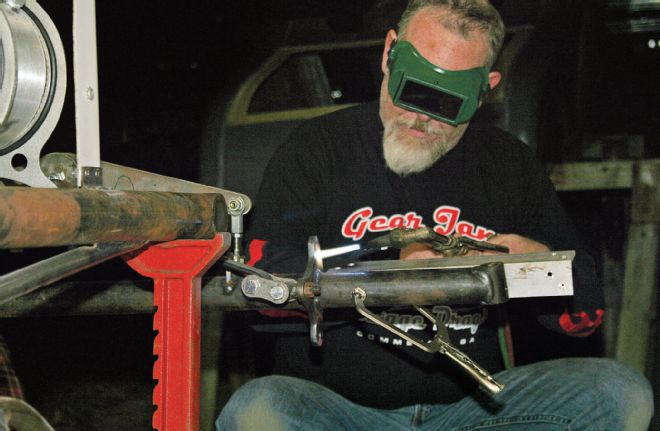
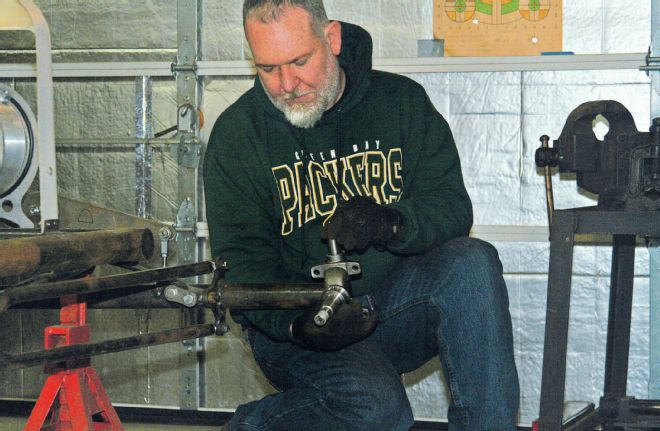
3 The Ron Pope Motorsports Corvair steering box center-steer conversion comes with a long sideshaft so it can be cut to fit for our application. We marked it with a piece of tape, just inside the cowl.
4 Then we did a rough-cut on the steering shaft. Once we have the firewall finished, the body mounting tabs on, and are doing the final assembly work, we'll weld the pitman arm to the shaft. The main point, right now, is to get everything in place so we know exactly where it all needs to be. We want the pitman arm moved as far outboard as possible without sticking through the side of the cowl, to keep all the steering gear as close to square and perpendicular as possible, and give us added clearance around the engine.

5 We mocked up the new firewall with a piece of 3⁄4-inch plywood. This will eventually be screwed to the body to locate the mounting tabs for the aluminum firewall. For now, we just set it in place so we can see where the steering arm comes through and runs forward.
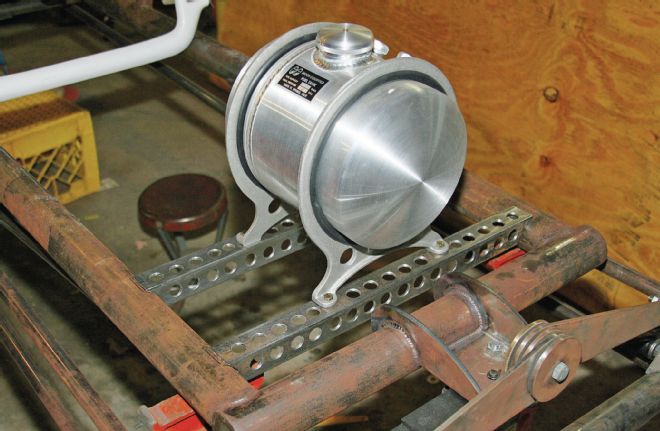
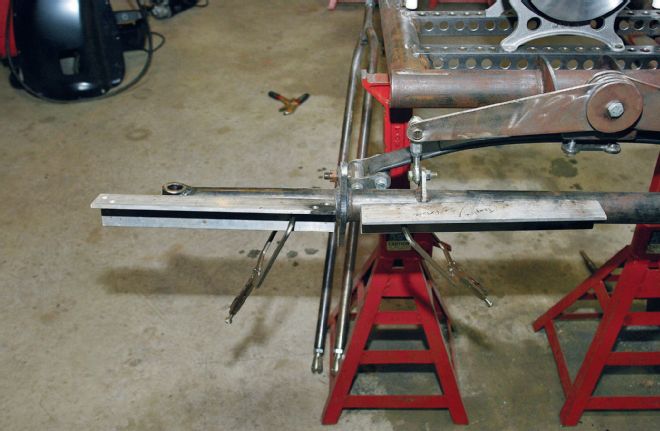
6 The iconic Moon tank is one of the strongest visual aspects of the front end. We don't know how the original was mounted, so our options were open. We could have gone with a modern style, using a small-diameter round tubing crossmember with a couple of mounting tabs on it, but tubing is harder to work with and fit, while angle iron is easier to work with, cheaper, and easier to come by (at home improvement stores). Visually, the angle was very clunky and made the front of the chassis look cheap and undetailed. Thirty-one holes in each solved that.
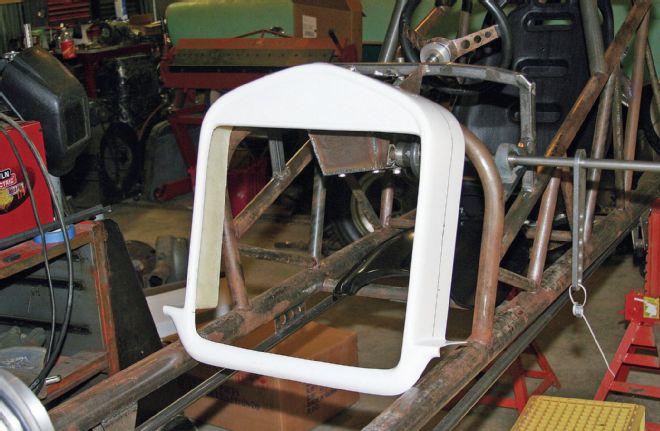
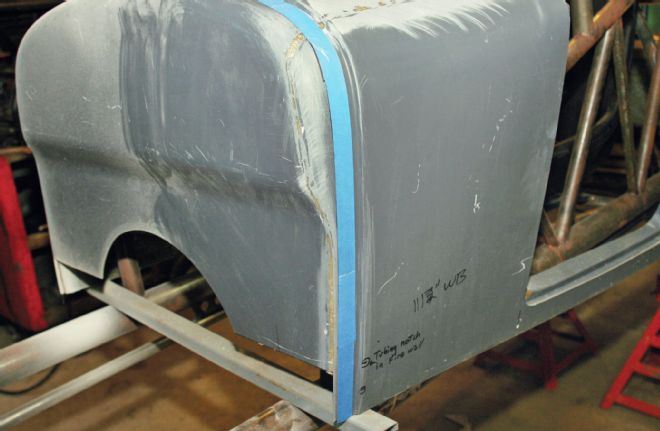
7 We ordered a fiberglass T radiator shell from Ron Pope. It's deeper than an original shell, and has the lower section attached, so it'll need trimming.
8 We didn't want to deal with the grille shell cracking from flex, so we built a fairly beefy mount at the bottom of the shell. With two screws going through the fiberglass, it was still a little flimsy.
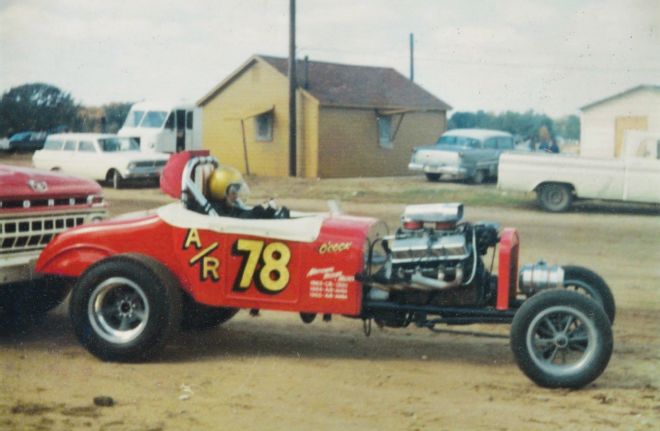
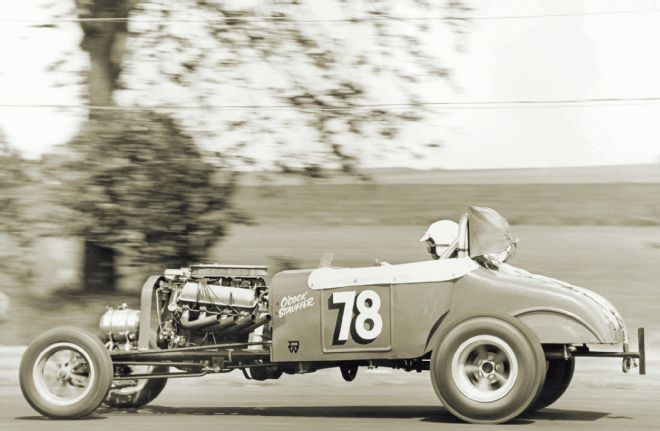
9 We have two profile pics of the original car to work from, this static one and the black-and-white at speed. In this shot, the grille is straight up and down, while in the pic earlier in the car's life, at speed, it looks angled back several degrees. We suspect that's from wind resistance.
10 To stiffen the grille shell, we made a ribbed sandwich plate to mount on the inside of the shell. With the plate installed, the shell is extremely stable. Prior to it, there was a fair amount of flex.
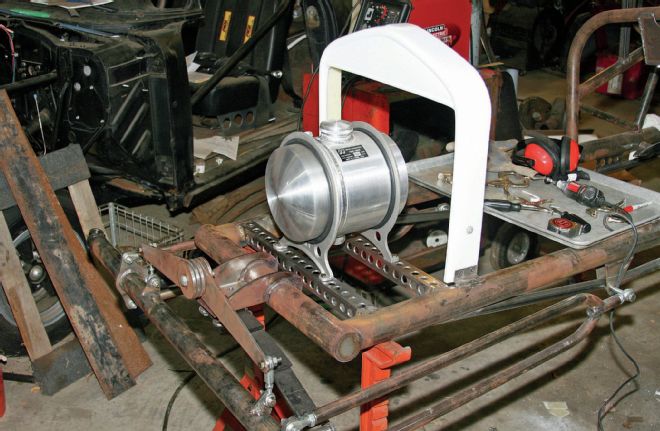
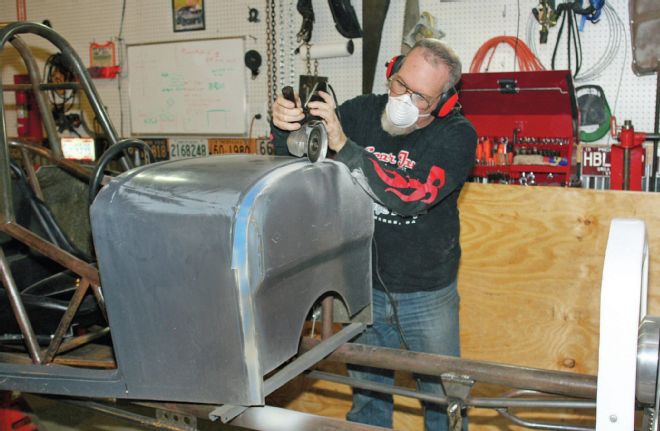
11 Part of the perfect, classic look of this car is the front end. Getting the radiator shell mounted and the Moon tank on its drilled crossmembers was a big morale boost.

12 The original had the tank mounted several inches ahead of the grille shell; we suspect the forward mounting feet were off tabs welded to the front chassis crossmember. NHRA's current rules dictate the tank be "within the confines of the frame." We didn't want to run the risk of having a tech inspector bounce the car because it crossed the plane of the rear of the front crossmember tubing, so we mounted it farther back. When we mounted the grille, we drilled the holes so it has a 3-degree angle to it, rather than being perfectly upright. We like the way it sits in the at-speed pic.
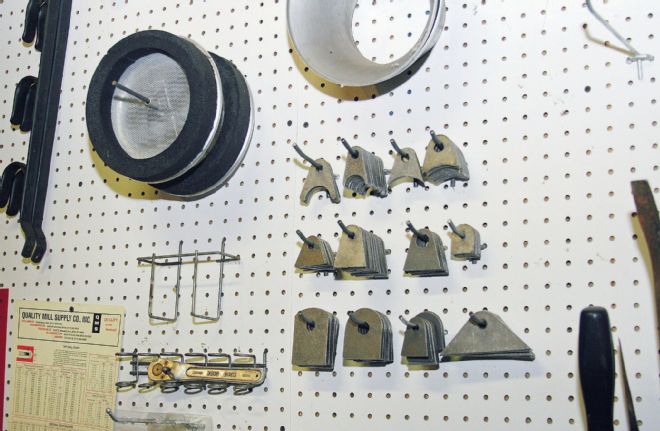
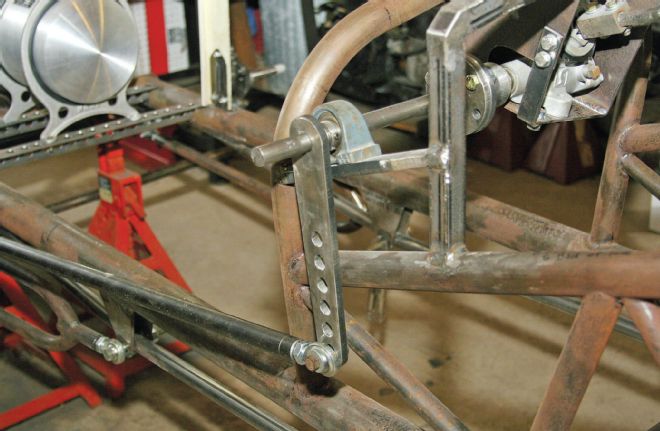
13 We got a tip from a high-end builder years ago: He ordered two of every tab available from his supplier and put them in a drawer so he could use them to mock up during fabrication, then he'd order the appropriate tabs from the supplier. Ron Pope has an assortment of laser-cut 1⁄4-inch-thick steel tabs that come in handy during a build. We ordered a bunch and have them ready to go.
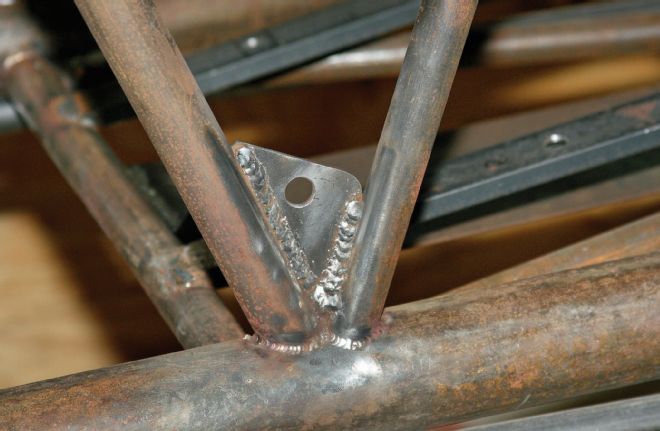
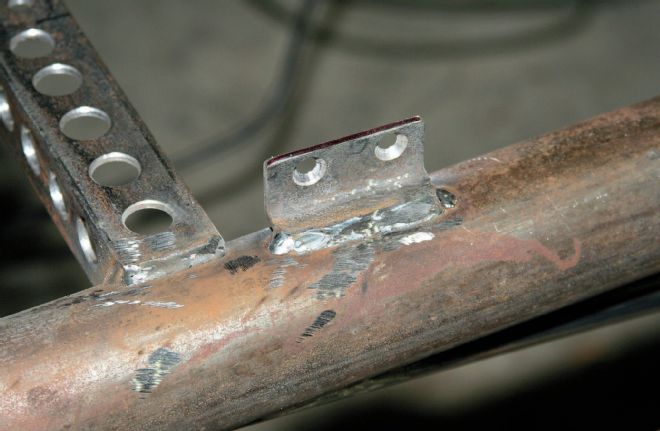
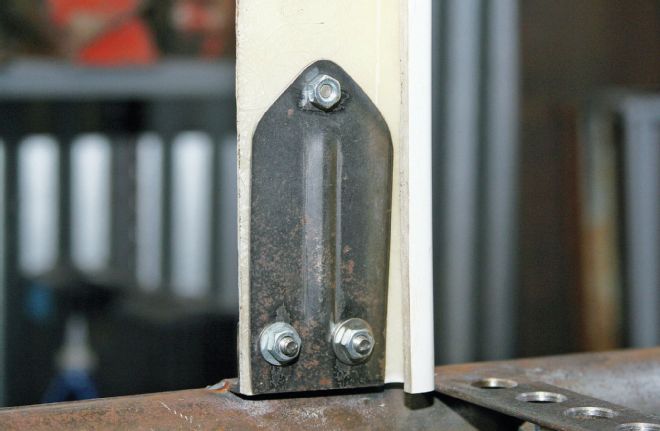
14 Two of the Ron Pope tabs got used for the lap belt mounts at the rear of the 'cage. We ordered five of the triangular tabs without holes and then drilled them where needed.
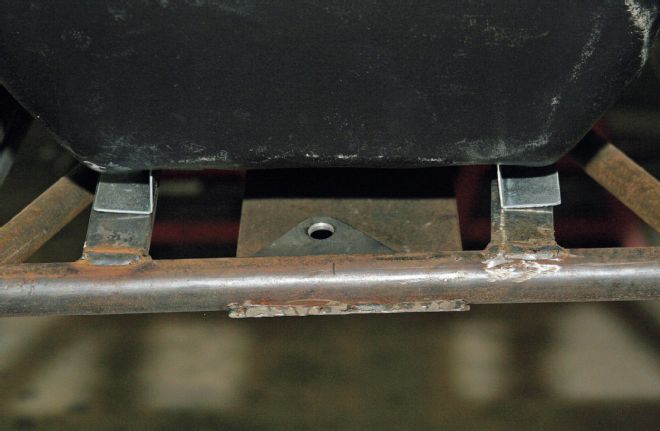
15 Another of the Ron Pope tabs got used for the anti-submarine belt. Demonstrating again why it's important to have an NHRA rule book, we were surprised to learn the crotch strap's anchor point has to be behind or in line with the driver's shoulders, rather than attached to the required crossmember at the front of the seat.
16 We used 1-inch x 0.250 C-channel in last month's issue for the seat mounts, and this month we used a piece for the shoulder strap mounts. Rules dictate the mounting point be 4 inches below the driver's shoulders.
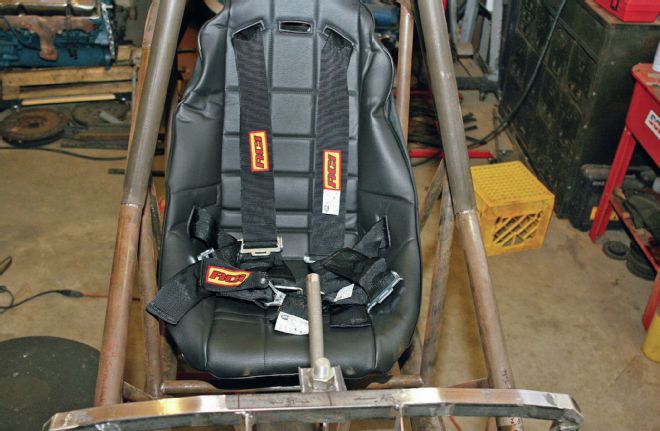
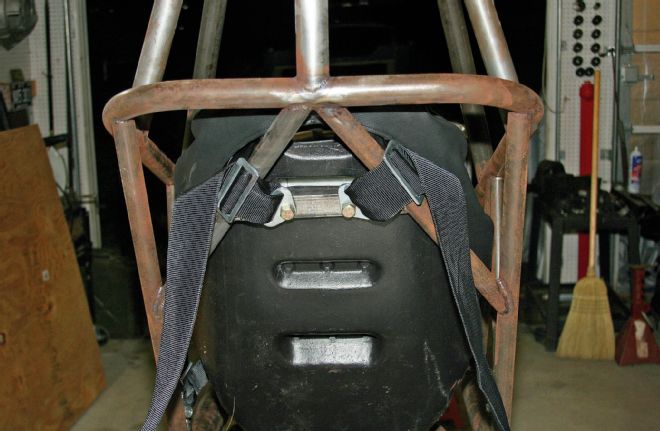
17 The seat, seat cover, and RCI harness came from Summit Racing. There is an enormous selection of harnesses and different styles of shoulder belts. When we ordered the belts, we weren't sure where the shoulder mounting points would be. A call to the RCI tech guys suggested we go with the cut-to-fit shoulder belts so we could fit them specifically to our final location.
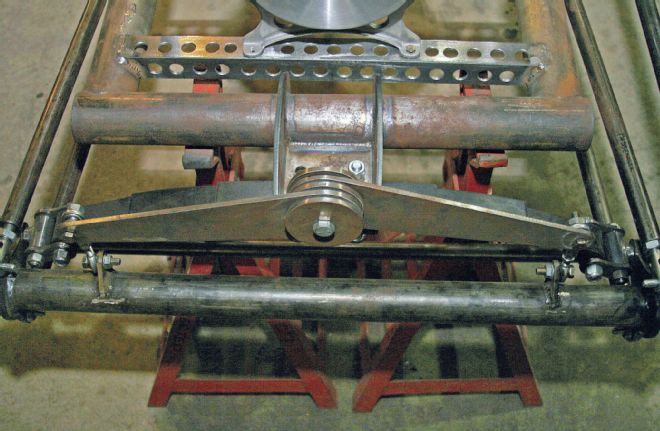
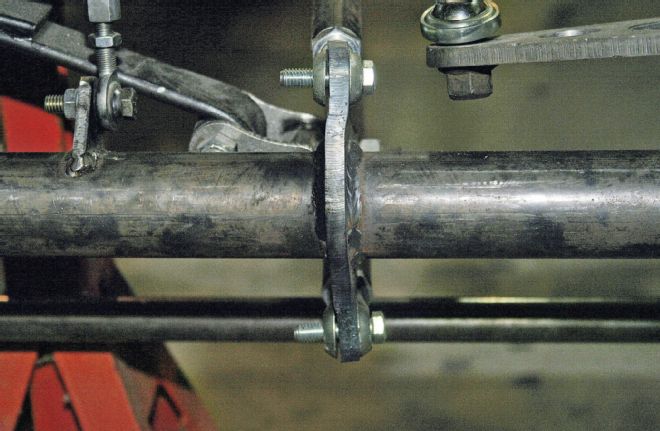
18 The front friction shocks came from Ron Pope and are simple 1⁄4-inch-thick arms, with a sandwiched stack of alternating 1⁄4-inch-thick steel and rubber discs. On another car, the flat arms would lend themselves to a few of ascending-radius holes, but the original didn't have them.
19 The endlinks and mounting tabs came with the shocks. The tabs are to be welded to the tube axle once everything is fitted together.
20 The friction shock's arms are offset from one another, which plays a role in how the endlinks and axle's tabs are located. We kept everything symmetrical by adding a spacer shim to the back side of the passenger-side arm, so the endlink would be mounted in line with its counterpart on the driver's side.
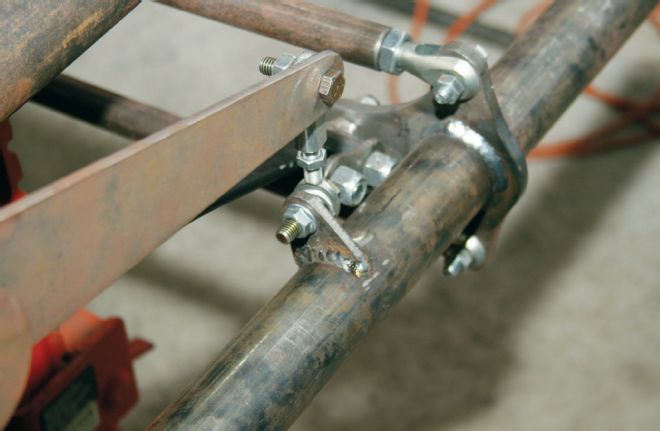
21 The original No. 78 had a CAE front axle, and Ron Pope built ours based off photos. The batwings are 3⁄8-inch thick and were straight, not angled inboard for the hairpins to pick up their mounts. Looking at restored vintage FEDs and altereds, we saw two things about batwings: They were frequently not as beefy as these, and they were all clearly heated and bent so the radius rods taper back to the chassis. We broke out the torch.
22 To minimize the risk of warping the tube, we clamped a couple 1⁄4-inch-thick pieces of aluminum angle to the axle to act as a heat sink. This might have been over-cautious, but we were putting heat into the batwing, and therefore the axle tube, in a concentrated area. Better safe than sorry.
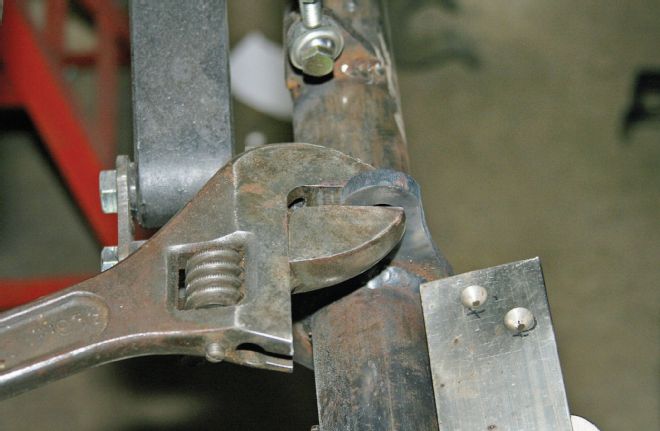
23 Once heated (it goes from cherry red to no color faster than we could get set up for the photo), we used a giant adjustable wrench to bend the mount a few degrees. Adjustable wrenches suck for actual wrenching, but they're great fabrication tools for bending anything from flanging sheetmetal to bending sheet steel.
24 Just a few degrees in the bolthole areas of the batwings, and the hairpin clevises didn't bind when the rear heim joint was bolted to its mounting plate on the side of the chassis.
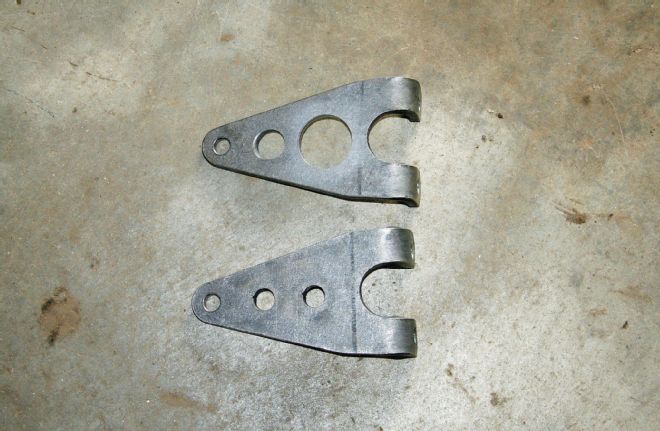
25 The steering arm, like the rest of the front end components, is from Ron Pope. It arrived with the drag link hole, and two other decorative holes to break up the flat expanse of metal. We re-cut the two holes on the drill press with the hole saw, to make it visually less heavy and to give it some detail.
26 We spec'd the kingpin ends for 7 degrees of camber and 8 degrees of caster. Pope offers both Chevy and Ford spindles—we went with Chevy, for no particular reason.
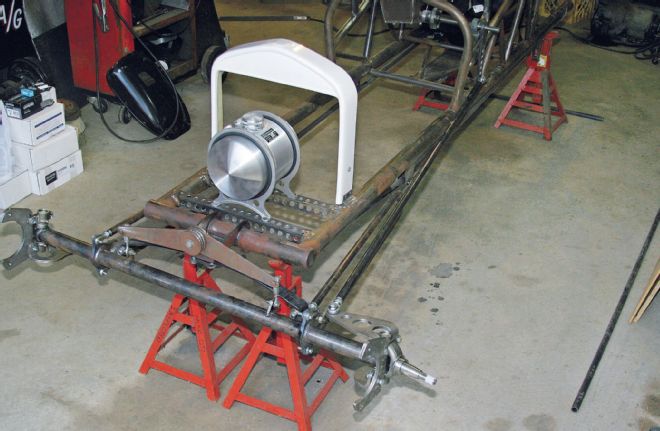
27 Front axle, steering gear, and spindles mocked up, along with the gas tank and grille. At this point the front end is pretty much finished, except for brake lines.
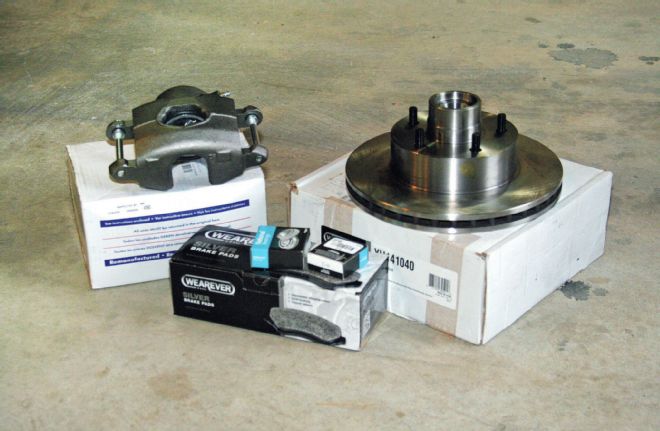
28 With the Chevy spindles, brake hardware and bearings are '75 Camaro. For the Ford spindles, Mustang II pieces are used. New rotors, calipers, pads, and bearings were only $150 at the corner parts store. None of it is lightweight race car stuff, but for a nostalgia car that's running brackets or index classes, there's little reason to spend the long dollar on lightweight brakes.
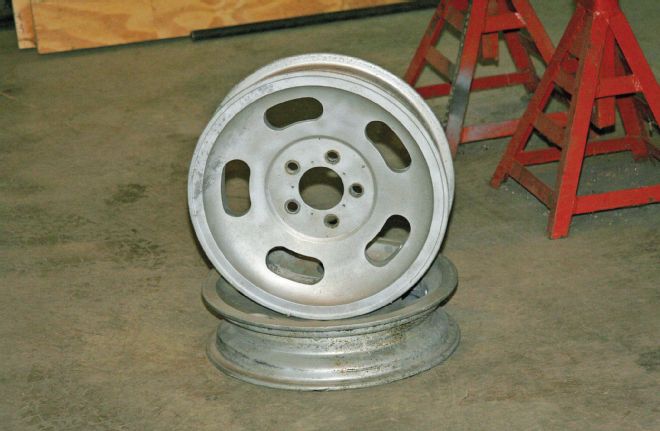
29 We spec'd the axle for Chevy spindles; if it uses Ford spindles, the kingpin bosses are different. After we got our axle, we found these 15x3.5 Fenton Gyros at a junkyard for $100, but with a Ford bolt pattern. These won't go on this car, but if they were, we'd have a problem because the axle uses Chevy spindles and rotors. To solve a mismatch problem like this, Ron Pope has disc brake kits available with GM rotors and calipers that fit a Ford bolt pattern. This opens up your swap meet wheel options for the tube axle on your altered or gasser.
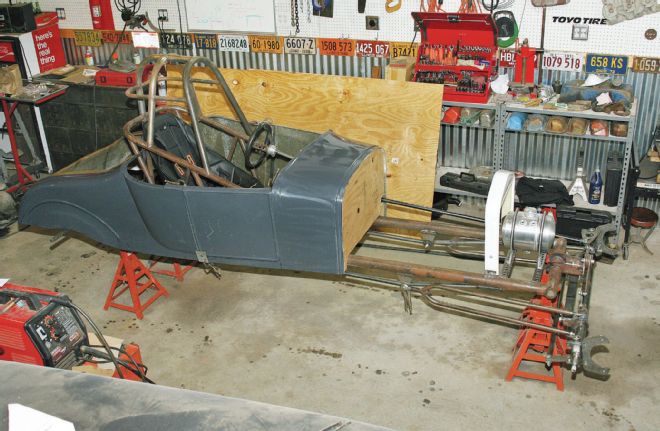
30 With the front of the car together, the firewall template, and the seat, steering and body in place, the car is really starting to come together.