It’s hard to beat the looks and performance of tubular control arms, tuned coilovers, and large-diameter disc brakes, right? But are those higher-end components necessary for every classic Chevy? Absolutely not.
Though known for their abovementioned performance chassis components, Classic Performance Products also caters to the “classic” classic Chevy lovers, as well as those on tighter budgets (or those who simply don’t see the need to upgrade to such a high level of aftermarket componentry). Whether it’s a Tri-Five, a ’58 Impala, or a ’64 Biscayne, CPP’s stock-type control arms could just be the perfect solution you’ve been looking for. At a fraction of the cost of tubular A-arms, the money saved can go elsewhere in your Chevy—say, replacing the spindles, steering linkage, etc., all of which they carry as well.
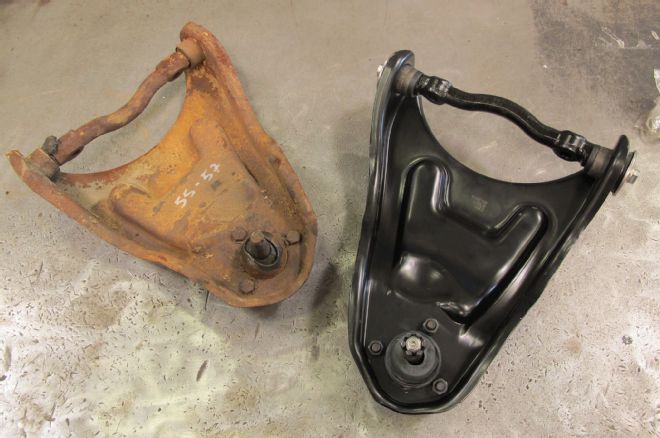
Obviously, rebuilding a set of worn-out cross-shafts and replacing pivot bushings is an option—but why bother going to all the effort when CPP’s already done the hard work for you? (Ultimately, how much is your time worth?) Furthermore, not only is it a drop-and-swap deal, you’re not stuck with the tedious detailing chores when you go with a complete replacement control arm, as they come powdercoated as well as fully assembled.
It’s an easy job; really—something you and a buddy could tackle in an afternoon—requiring little, if any, specialized tools other than a good quality spring compressor. Whether you’re freshening up an old classic or building an economical hot rod, you won’t be steered wrong with CPP’s new and improved OE-type suspension components. The following R&R on a 1955 Chevy hardtop might help illustrate that point.
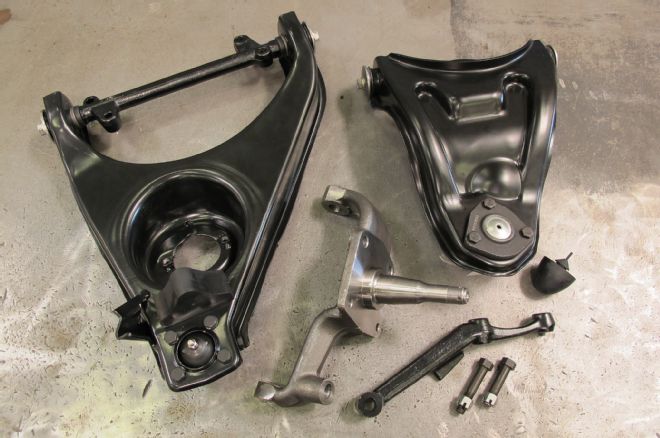
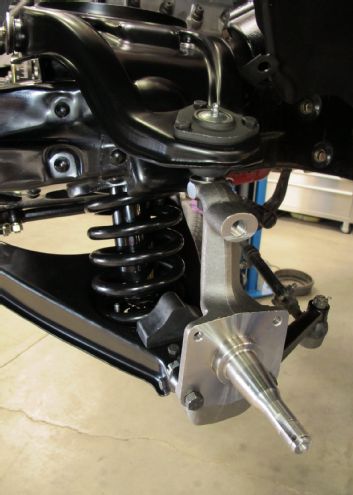
1. Along with complete frontend kits (tie rods, idler arms, ball joints, etc.), Classic Performance Products’ OE-style suspension parts are highlighted by their stamped-steel control arms and further complemented by original replacement spindles and steering arms.
2. Preinstalled, brand-new cross-shafts, bushings, and ball joints are standard—why even bother hassling with rehabilitating your old, beat-up arms?
3. Additionally, CPP’s upper control arms have 5 degrees of caster built in, not added—a for sure “plus” for power steering equipped Tri-Fives.
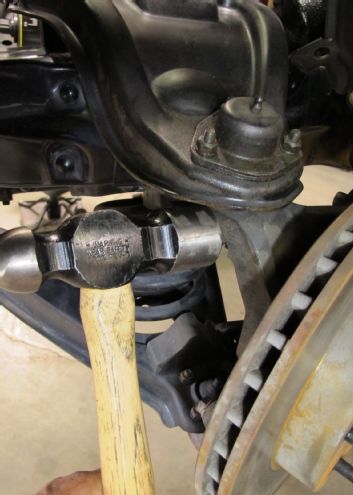
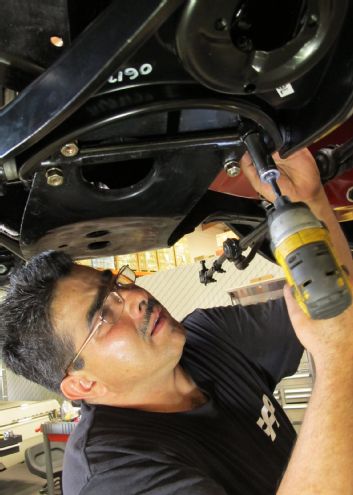
4. Our R&R initiated with the removal of the stock ’55 front suspension already equipped with a standard type disc brake kit. First, with the ball joints’ nuts loosened up (“not” removed), the spindles are given a few good whacks with a heavy hammer to help ease separation—no pickle forks used in this process.
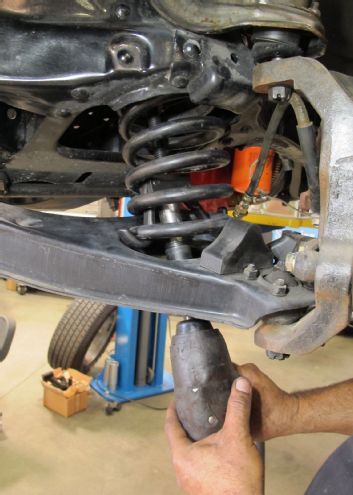
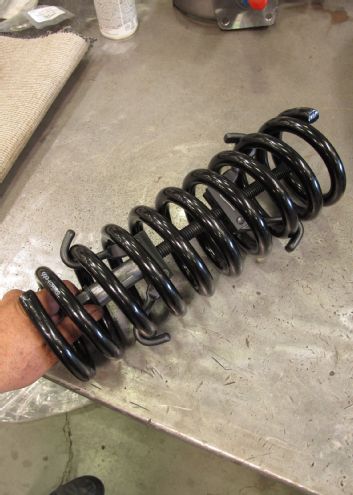
5. Because the coil is under extreme load, a spring compressor is securely installed with the spindle still attached. Once the coil is compressed, a floor jack is placed under the lower control arm and the upper ball joint nut is removed.
6. Very carefully, after the upper control arm is set free, tension on the jack is released and the collapsed coil spring safely removed.

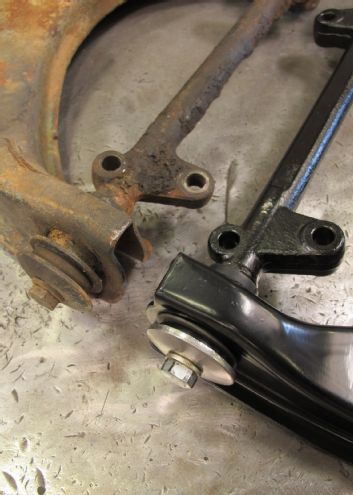
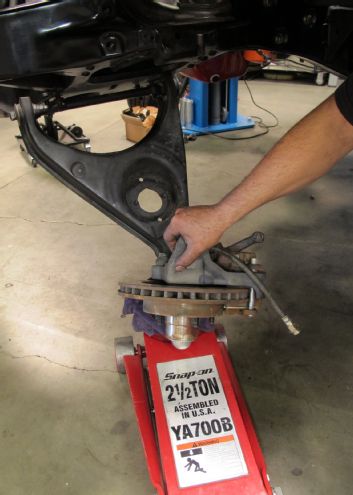
7. Note the amount of alignment shims that were used, if any, as you remove the upper control arm. Also, if the pressed-in crossmember studs are damaged, loose, or come out altogether, simply replace them with 7/16-20 Grade 8 bolts (2 to 2 1/2-inch length).
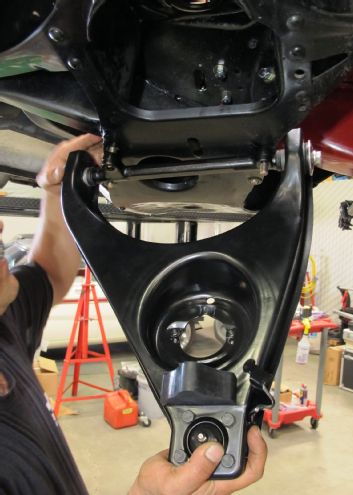
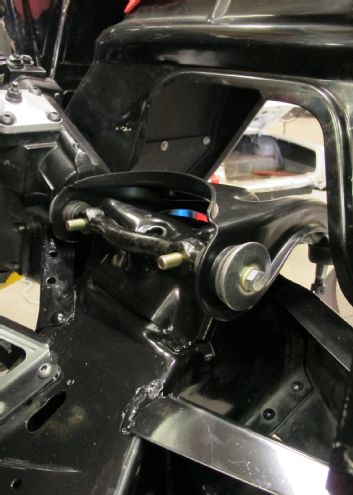
8. Instead of spending however much time pressing bushings and replacing ball joints, you could simply attach a whole new control arm and be done with it—as such.
9. New Grade 8 hardware is used on both uppers and lowers.
10. The use of a longer (Grade 8) bolt allows for more camber adjustment, if even necessary.
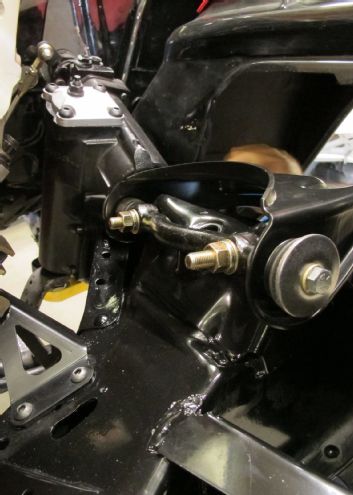
11. Bolts can be installed pointing in either direction, but for increased header/engine bay clearance, facing outward, towards the fender, makes a big difference.
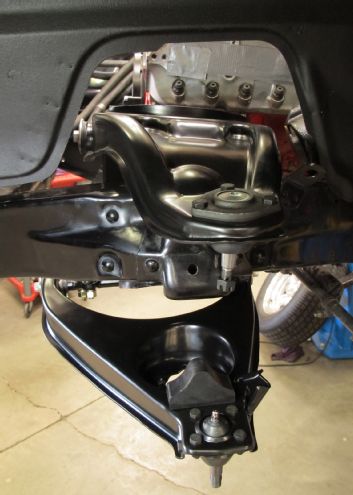
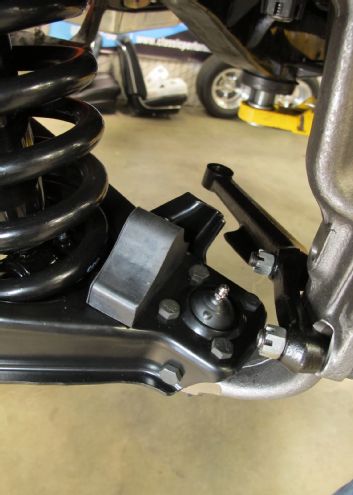
12. Controls arms installed and ready to be mated with new coils, spindles, and steering linkage. Note the orientation of the upper control arm by the location of the ball joint in relation to the lower one—if it appears further forward, you’ve got the sides swapped.
13. Even though we’re installing a 1 1/2-inch lowered coil, the spring still needs to be compressed for both safety and ease of installation.
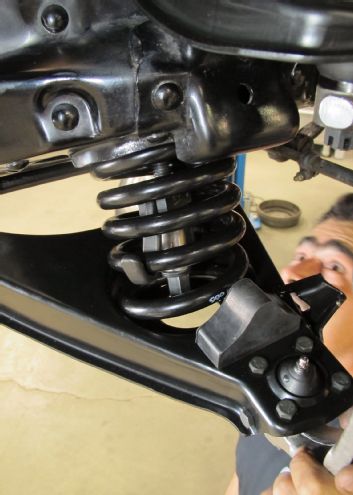
14. Compressing a dropped spring may eliminate the need to use a floor jack to button up the spindle to the upper control arm—but if any resistance is experienced, don’t risk it.
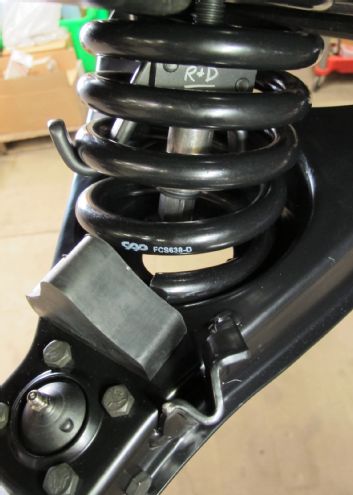
15. The coil won’t seat properly unless it’s positioned/clocked correctly in the lower spring pocket.
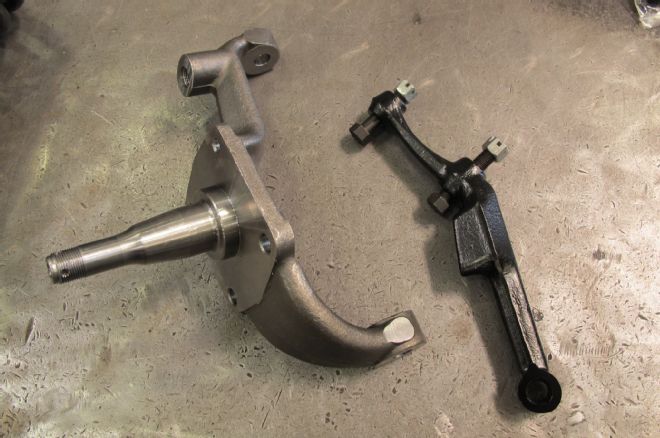
16. CPP’s forged steel spindles and steering arms are designed and engineered as direct replacements. To the trained eye, the spindles incorporate the best of all three Tri-Five variants.
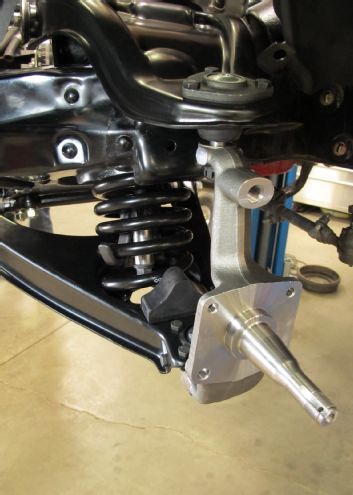
17. The only differences between the replacements and the originals in most cases is that the axle pins are perfect and the ball joint tapers are not worn-out.
18. Once the ball joint nuts are securely fastened and cotter-pinned, new Black Magic nitrogen gas shocks are installed.
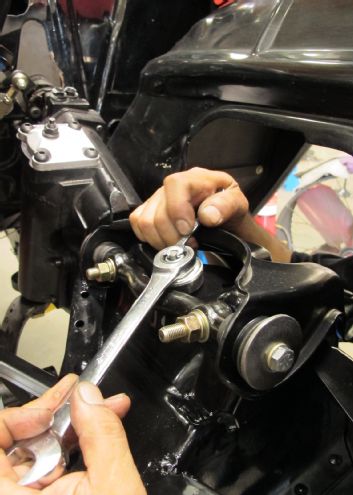
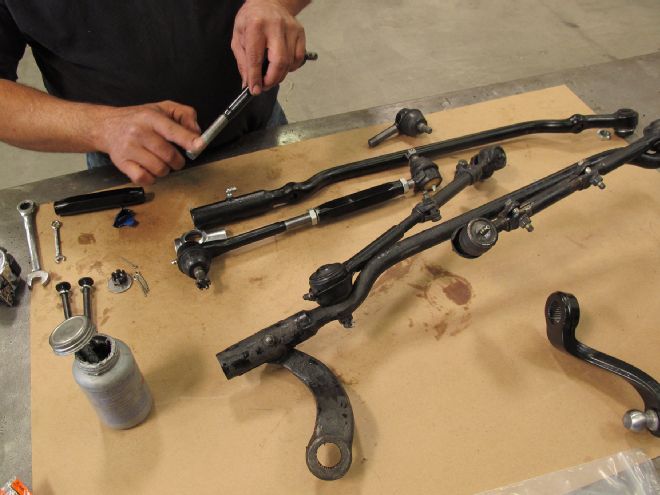
19. CPP builds these specifically for lowered vehicles, so there’s no worry about blowing out a stock-length shock.
20. With the control arms “buttoned up” so to speak, the new steering arm is installed and either reconnected with the existing linkage or…
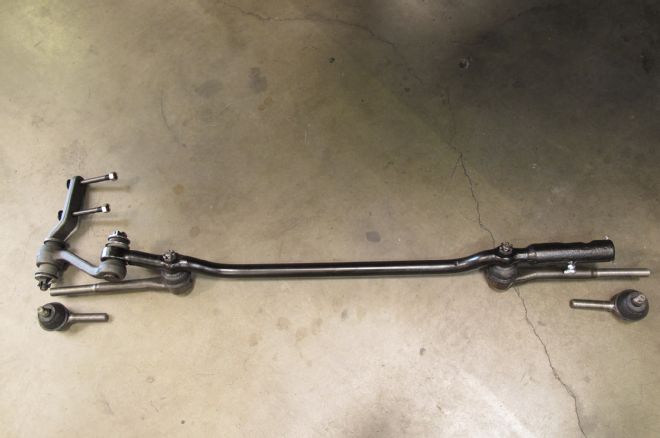
21. …the job continues with the assembly of a new drag/centerlink and complete frontend kit (which includes all-new tie rods, idler arm, adjuster sleeves, and related hardware).
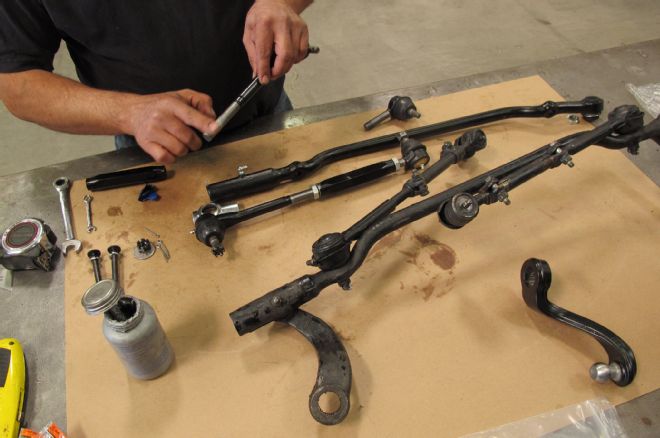
22. If replacing the entire assembly as such, it is probably best to disassemble the old linkage as a whole, which will allow you to assemble the new parts with similar geometry. Note the addition of CPP billet aluminum tie-rod adjusters.
23. The only thing left before putting the 1955 Chevy Bel Air back on the road—and off to get professionally aligned—is installing a new brake system. Stay tuned.