If there is an ubiquitous Pro Touring car in the world today, it would have to be the first-generation Camaro. Because of its popularity this car has received more attention in the Pro Touring world than the rest of its Chevrolet cousins. When we began our red 1967 Camaro RS suspension conversion a few years back, the Front Speed kit was the only coilover conversion kit that Detroit Speed offered. Since then, Kyle and Stacy Tucker released the much-heralded Hydroformed front clip that includes current-generation camber curves, rack-and-pinion steering, and a host of other amenities. Of course, those advantages also come at a price. The entry-level Hydroformed front clip starts at $7,000, while the Front Speed Kit 2 is a more affordable configuration starting at $2,600. So, if your budget doesn’t allow for you to step up to a front subframe, here is a look at what it takes to perform a coilover upgrade on an early Camaro/’68- 72 Nova front subframe.
Despite the fact that this kit does not make radical changes to the camber curve, there are several advantages. The new upper A-arm mounts raise the front roll center while also dialing in a significant amount of antidive, which is extremely helpful under hard braking. This upward angle of the leading edge of the upper A-arm tends to reduce forward pitch under hard braking, which places more weight on the rear tires for more traction under braking. If you take a side view of a C4 Corvette upper control arm, you will notice a similar upward pitch to the upper control arm. This is an example of how antidive helps a performance car under braking because you never see a C4 or newer Corvette bury the nose or lift its tail under aggressive braking. That’s antidive. Another advantage to the Detroit Speed Inc. conversion, besides the tubular uppers and lowers, is the ability to easily change ride height with the adjustable coilovers. Plus, as your budget allows, it will be easy to upgrade to more advanced coilover shocks. This is no small point, as more double-, triple-, and now electronic-adjustable shocks enter the market. Eventually, competition and sheer numbers will make these shocks even more affordable.
Unlike the bolt-in nature of Detroit Speed’s Hydroformed version, this kit requires some fabrication skills. We are not fabricators, but we found the modifications certainly within the realm of most wrench-capable car guys. We did outsource the TIG-welding to our buddy Tim Moore, but except for that step, we completed the conversion ourselves.
One other note is that we used a different ’68 Nova subframe so we could keep our Camaro on the road during the conversion. With the subframe sitting on the floor, we noticed it looked odd, almost diamond shaped. Some quick work with a tape measure confirmed our suspicions. The right front corner must have been hit at some point and pushed back nearly 3/4-inch! This demanded a session at the frame straightener to return it to square. So the caution here is that unless you have intimate knowledge of the entire history of the frame you are working with, careful scrutiny as to its condition might be useful.
Now that we’ve set the stage, let’s dive into what it takes to assemble one of these kits.
Parts List Description PN Source Price Detroit Speed Front Speed Coilover Kit 2 31302 Detroit Speed $2,618.00 Detroit Speed Front Speed Coilover Kit 3 31303 Detroit Speed 3,627.00 Detroit Speed Hydroformed kit, Base Kit 32001 Detroit Speed 7,000.00 Detroit Speed / JRi coilover shock kit (pair) 31001 Detroit Speed 500 Detroit Speed 600 Steering Box 90204 Detroit Speed 595 Detroit Speed Front Anti-Roll bar, 1 1/8" 31401 Detroit Speed 210 Detroit Speed Rag Joint, 90205 Detroit Speed 99 Detroit Speed Front Service kit 31601 Detroit Speed 315 Detroit Speed Camber Shim Kit 31714 Detroit Speed 85 Detroit Speed Caster Tuner Kit 31731 Detroit Speed 60
01. Assembling Detroit Speed’s Front Speed Kit 2 coilover conversion isn’t difficult but does involve some metal fabrication work. The good news is you can do this conversion in your garage.

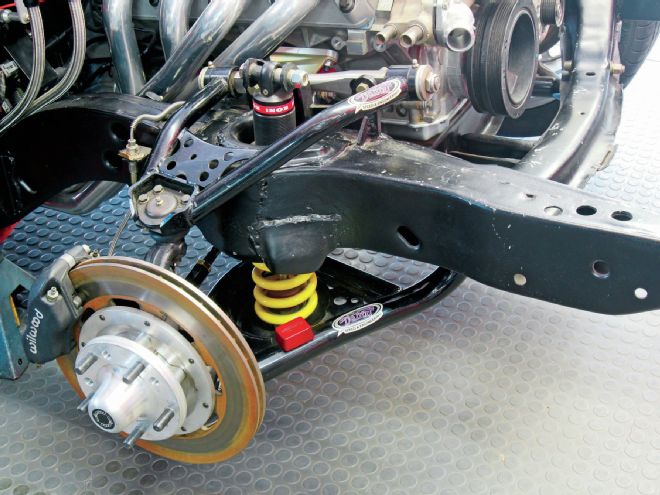
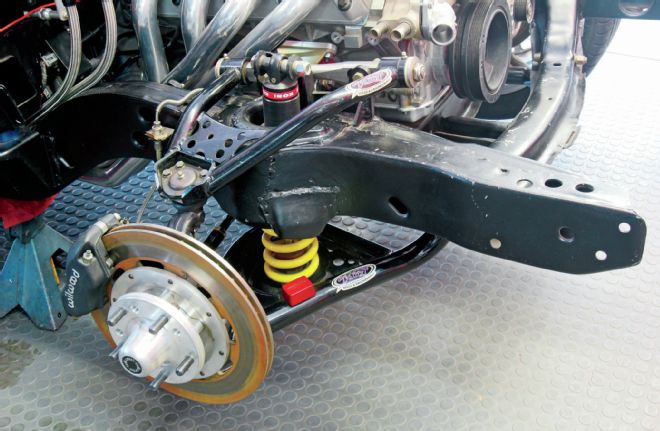
02. We’ll spare you the details of stripping the front clip. We removed it to make it easier to do all the fabrication work. While it doesn’t look like much, this is the heart of the Detroit Speed Front Speed Kit 2. The uprights relocate the upper control arms, making significant changes to both roll center and the antidive characteristics. The entire kit includes tubular upper and lower control arms and the coilover shocks.
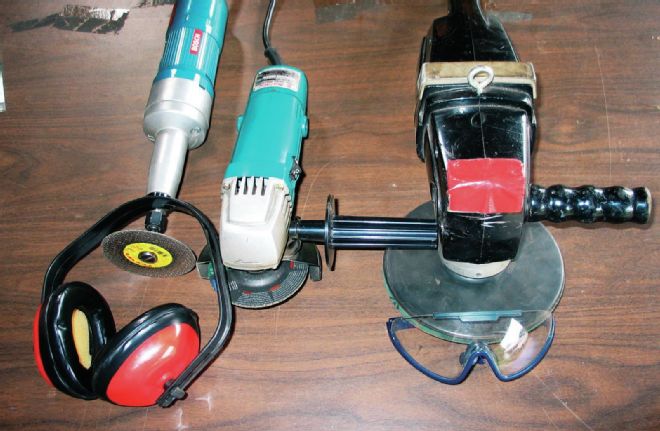
03. Besides basic handtools, these are the major fab tools required to modify the stock subframe, including a cutoff wheel, large disc grinder, and safety eyewear and hearing protection. We also used an air-operated short blade reciprocating saw not shown in this photo.
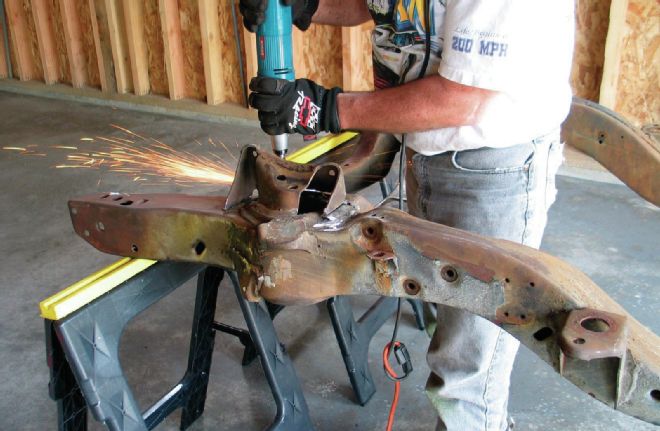
04. We started by removing the stock upper control arm mounting brace with a cutoff wheel.
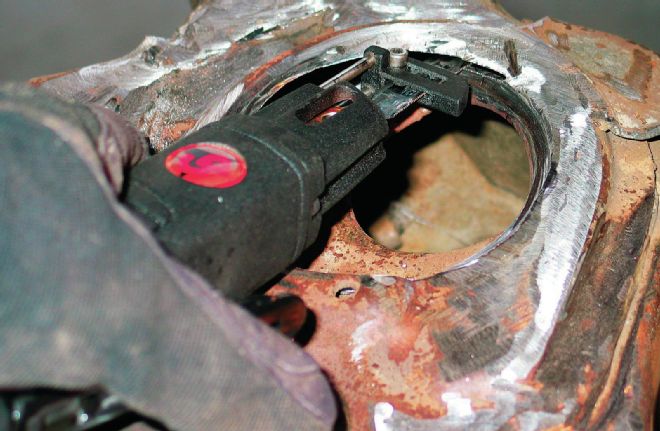
05. Next, we used a pneumatic saw to open up the inner diameter of the original coil spring pocket. This creates room for the coilover shock body.
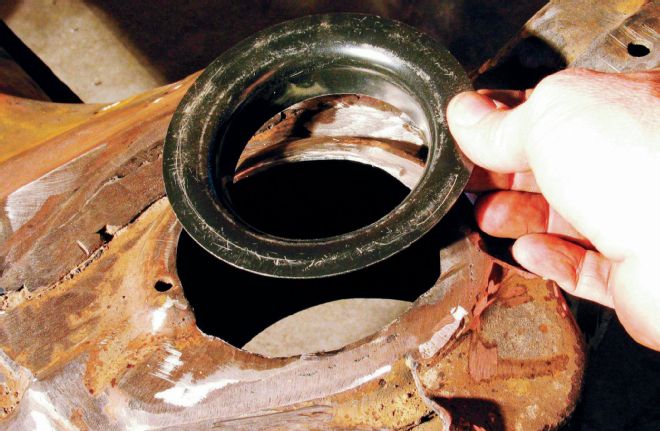
06. Detroit Speed includes this cover, which must be welded to the top of the spring pocket. It’s more for appearance than structural support.
07. Part of the kit is this jig that bolts to the subframe and locates the upper control arm positions. Note that the slots for the new mounts have yet to be cut.
08. In this photo, the slots have been carefully cut and the upper arms are now bolted in place to the jig. Once you are finished with the jig, you can return it to Detroit Speed for a refund.
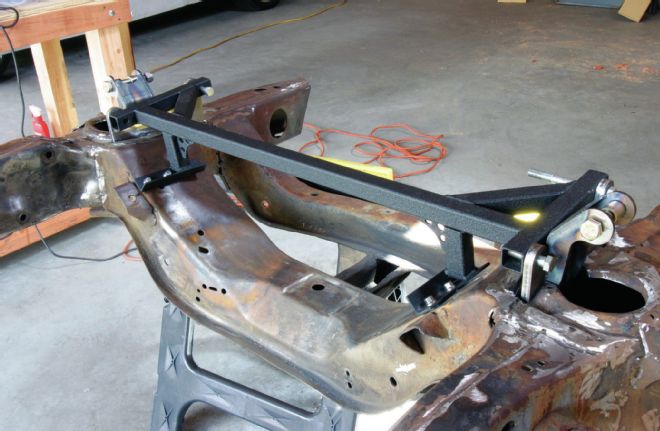
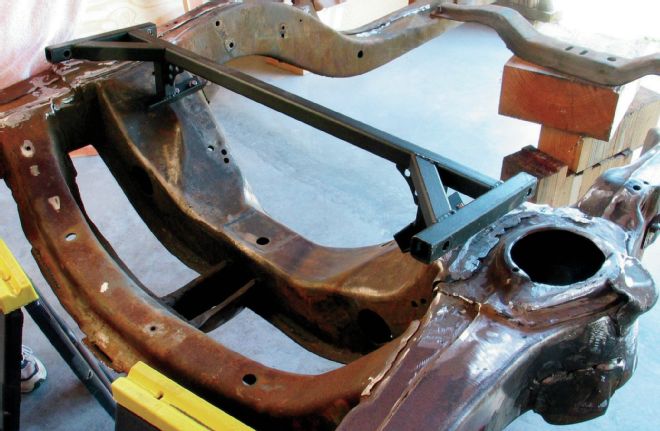
09. This shows the entire system jigged in place and ready for welding. Note that the circular covers are not installed yet. They will be welded in place only after the main uprights are fully welded.
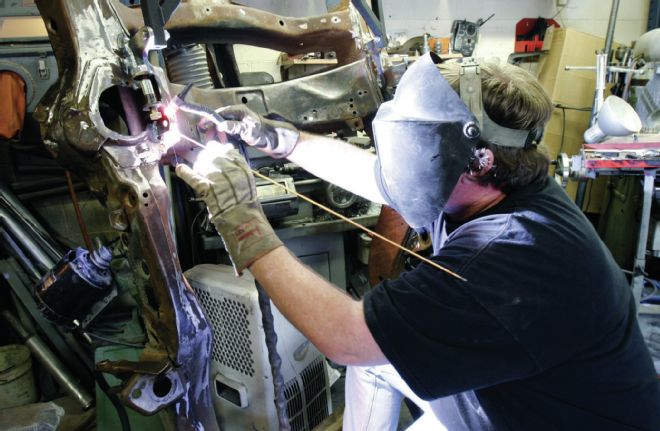
10. With the jig in place, we trucked our subframe over to our buddy Tim Moore, who used his water-cooled TIG welder to ensure the uprights will never move. This required a few hours with time in between to allow the welds to cool. Afterward, we rechecked the diagonal measurements to ensure the subframe did not move, which it did not.
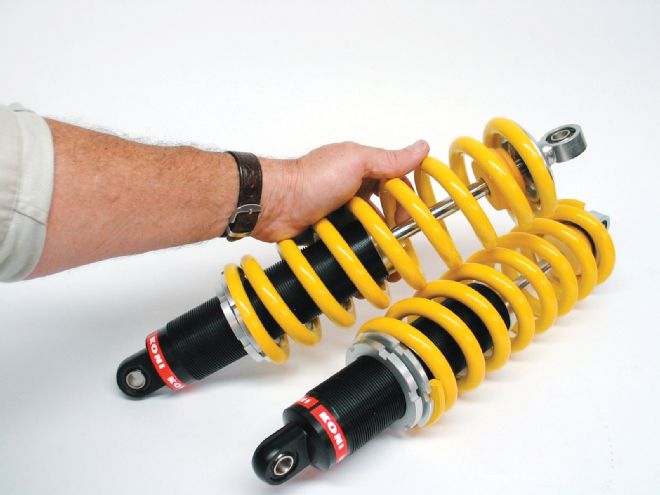
11. At the time we photographed this installation, Detroit Speed supplied Koni coilover shocks. Since then, Detroit has switched to JRi shocks. All three versions of Detroit’s coilover kits use a Detroit Speed-tuned non-adjustable shock.
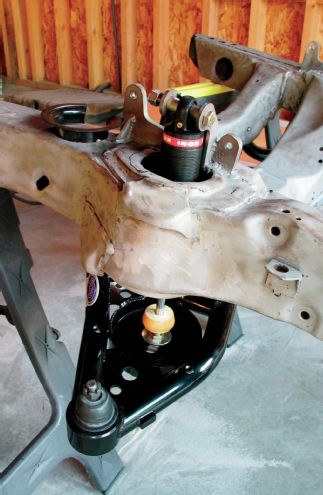
12. We then pre-assembled the upper and lower tubular control arms in the frame to check for clearance. Note that the shocks mount in the chassis upside down. This is intentional and done for clearance, but has no effect on shock operation.
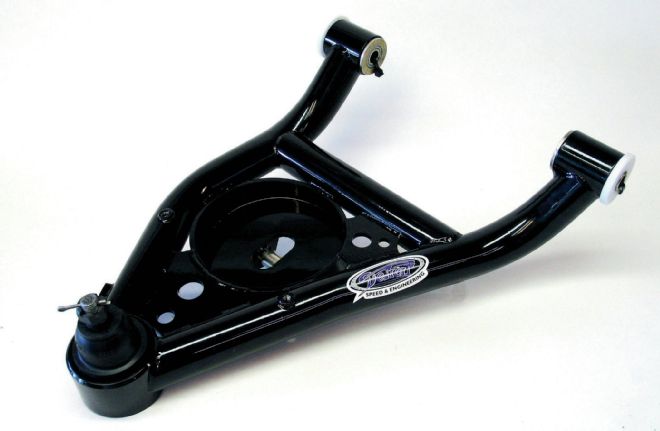
13. Crucial components of the Detroit Speed kit are the tubular upper and lower (shown) control arms.
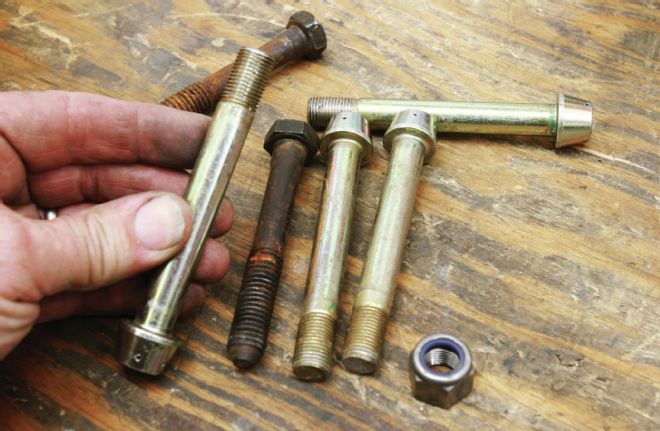
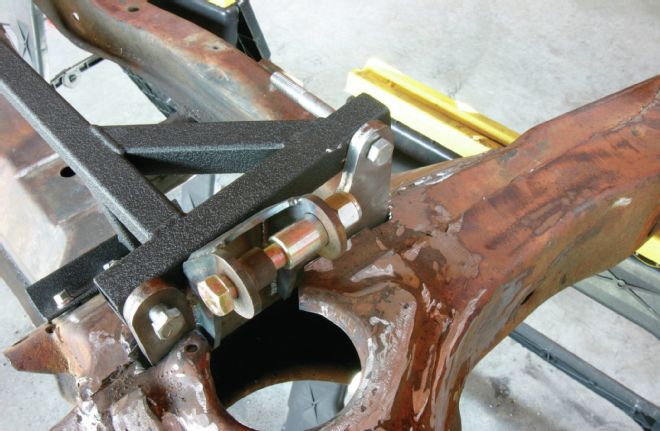
14. The lower control arms use a stepped bolt with two different bolthole sizes in the stock frame. We did not want to reuse stock bolts, so we carefully drilled the smaller hole to allow using aircraft bolts. We were careful to choose bolts with a full shank through the entire frame so that the bolt shank would locate on the frame, not on the threads. We then used several washers to make up the difference in the longer shank length and used a locking nut.
15. After some final detailing of the frame and a quick paintjob with Eastwood Chassis Black paint, we assembled the Detroit Speed kit on the bare frame.
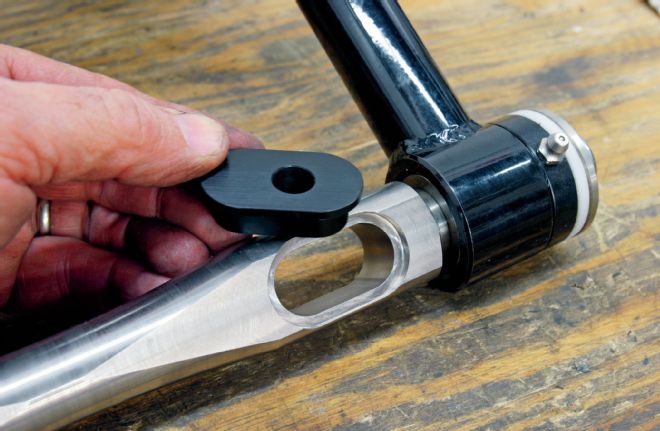
16. One of the slick adjustments incorporated into Detroit Speed upper control arms is this adjustable slot that can quickly move the upper control arm reward to gain caster. Combined with Detroit Speed’s slick billet aluminum camber adjustment shims, this makes custom alignments a little easier.
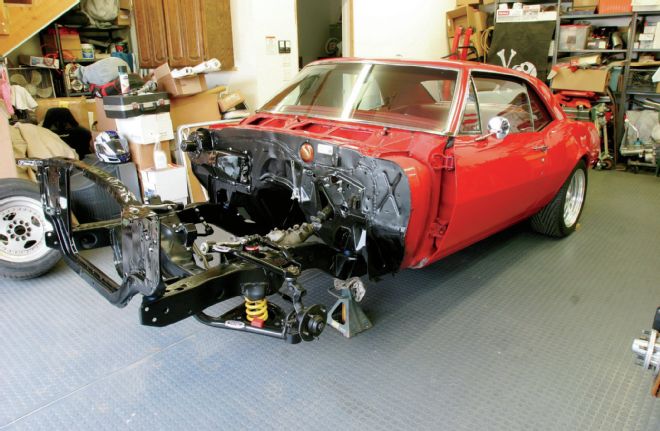
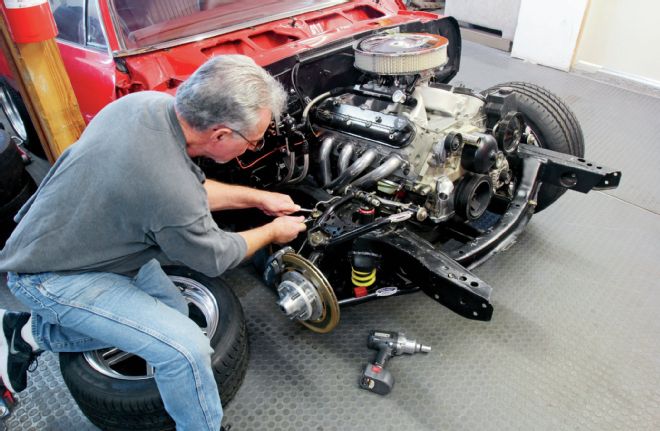
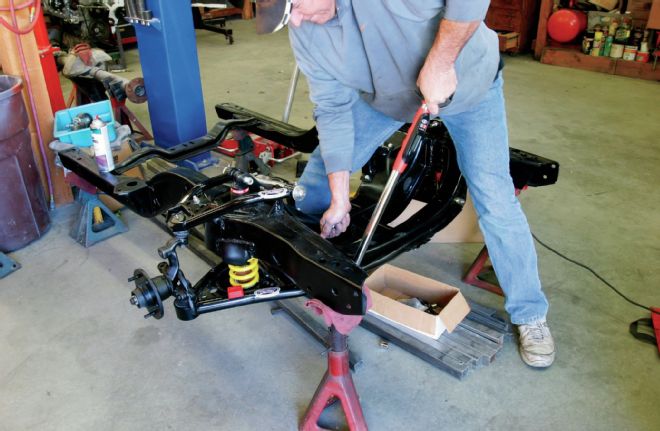
17. After reassembling the subframe under our Camaro, we were ready for the engine and drivetrain.
18. Here is our finished Detroit Speed subframe conversion with our all-aluminum 5.3L conversion complete with Wilwood disc brakes, Hooker LS engine mounts, headers, and F-body accessory drive. We dimpled the subframe slightly to clear the alternator, but it fits really nice. Another worthwhile option is Detroit Speed’s 600 steering box.