Car Craft's ZedSled 1978 Chevrolet Camaro Z28 was in extremely rough condition, which was why we were able to buy it so cheaply: $1,300 and we drove it onto the trailer to get it home. Not bad! So far we've spent $750 on sheetmetal, $1,400 on the Junkyard LS engine and cam upgrades, $240 on some DSE chassis improvements, and roughly $110 on some Eastwood coatings to prevent rust on the original sheetmetal. At this stage, we're into this tub for a little less than $4,000. By the time it's all done, hopefully, we won't be upside-down and will have a great car to beat on. Truthfully, ZedSled should have been a parts car, but it was all there, it was a true Z, and it is solid enough to bring it into this century with some performance upgrades.
Now that it's rust-free, we can pay some much-needed attention to the chassis. Plans for power include a salvage-yard, iron-block 6.0 LQ4 out of a wrecked truck, backed by a used 4L80E automatic transmission. With the potential of 500 naturally aspirated horsepower easily in reach, the rest of the car had to be brought up to the new level of performance. Classic Performance Products offers very well-designed systems for many different vehicle platforms, but we're particularly excited about the company's Stage III Pro Touring kit for second-gen F-body Camaros.
Everything on ZedSled is worn out, and let's face it, technology has left 1978 in the rearview mirror, so we're upgrading everything with CPP's Pro Touring system. We decided to add the 500-series close-ratio steering box, along with C-5 Corvette 13-inch brakes up front, 12-inch discs out back, redesigned antiroll bars, and a much-needed lowered ride height (3 inches in front, 2 inches out back) with QA-1 single-adjustable shocks all the way around. Yes, it's bolt-on, but it will make this car hold its own with the cool kids in the Pro Touring world—for a fraction of the money a full custom suspension costs.
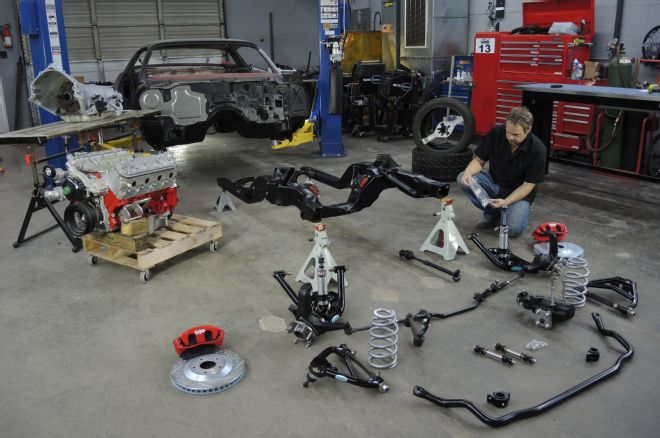
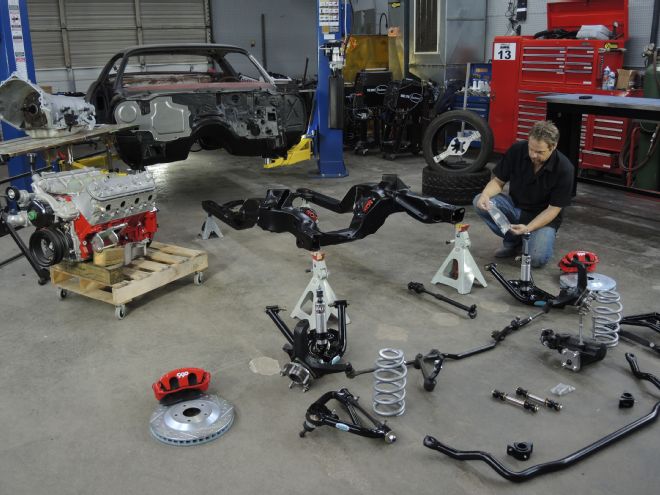
01 This is the front half of CPP's Pro Touring Stage III system, along with the 500-series steering box. We've got the uprights with the C-5 hubs bolted to the lower control arms and the QA1 adjustable coilovers installed to speed up assembly.
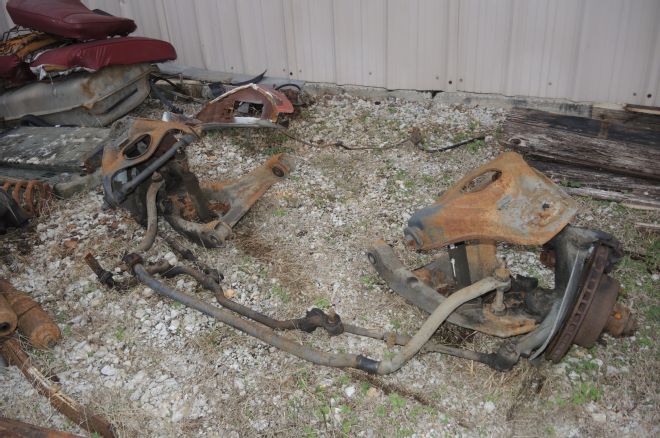
02 This is the stock suspension sitting in the ZedSled graveyard. It is totally worn out in every way. It could be rebuilt, but would cost a lot, especially when you figure in labor, and we wouldn't have tubular arms, a bigger sway bar, urethane bushings, and especially not Corvette brakes.
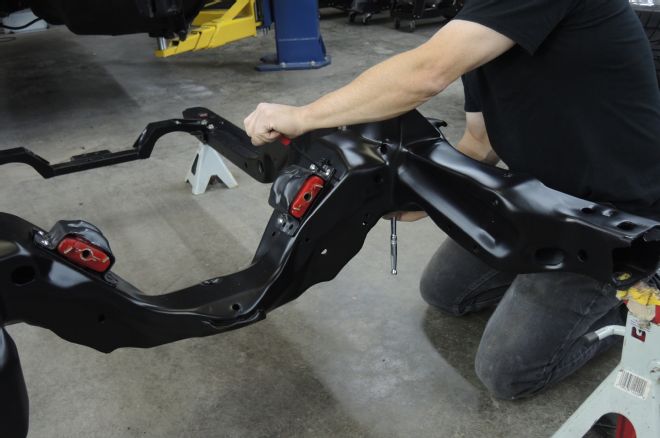
03 The stock subframe was smoothed and finished with Eastwood fillers, primers, and Rat Rod Flat clear over black base. We're installing the urethane engine mounts now since access to fasteners is a challenge with the control arms in place.
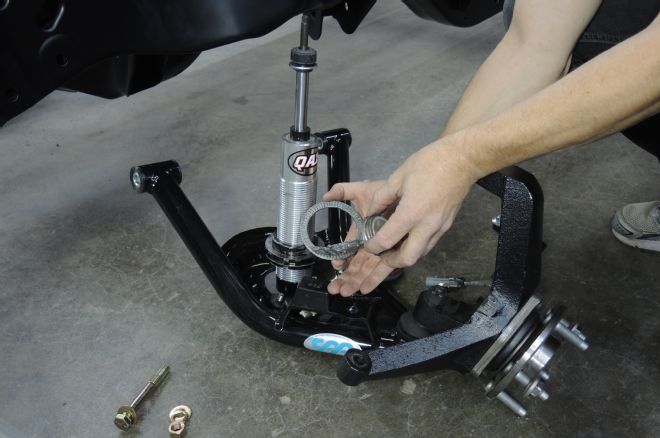
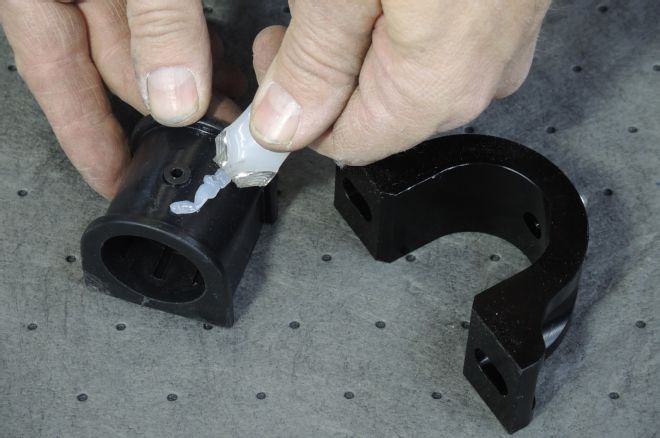
04 CPP designed its own spindles to morph the late-model C-5 hubs into the F-body, unequal-length, A-arm system. Here we're applying antisieze to the Torrington bearing that sits under the coil spring so it's easier to adjust under load.
05 An acrylic hammer is your friend when attempting to "persuade" bolts into freshly painted parts. CPP uses all Grade-8 hardware for attachments.
06 We're installing the upper arms without shims for now. The alignment shop will make those adjustments later.
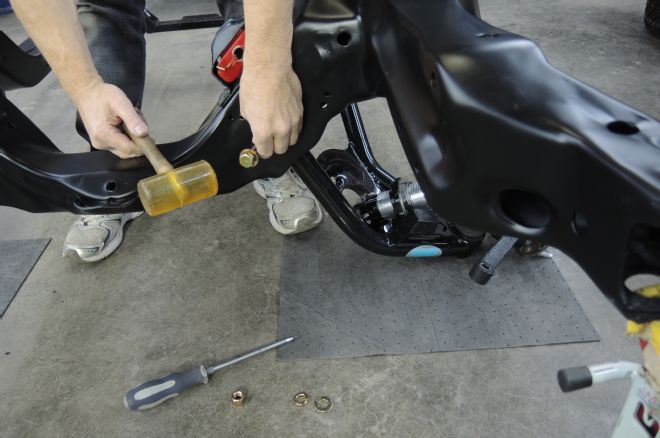
07 With the coil spring seated on the shock adjuster, a ratchet strap works great for compressing the spring enough to thread the top nut onto the shock stud. This will hold the lower arm in place by itself for now.
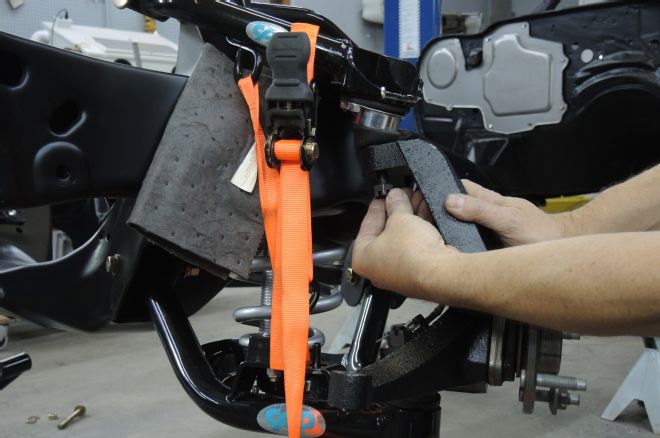
08 Carefully loosening the strap allows you to adjust the arms enough to get the upright into place when you're working by yourself. Even though it's not much pressure, make sure to use a quality strap that's not frayed anywhere.
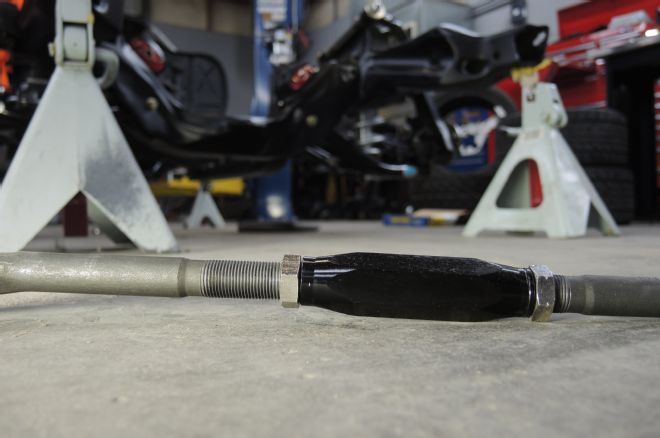
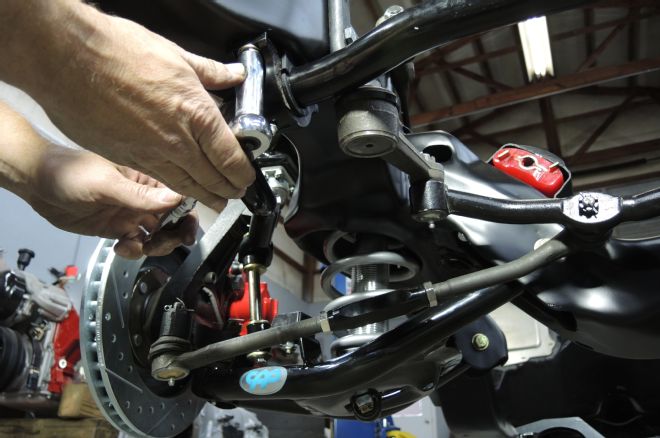
09 Here's the new billet tie-rod adjuster, complete with jamb nuts on either side, which will make alignments much easier.
10 We're also installing new Moog inner and outer tie-rods, castle nuts, and cotter pins.
11 Pitman and idler arms are wear items, and both were junk on ZedSled. Yes, we know it's backward; yes, we changed it around after taking this picture.
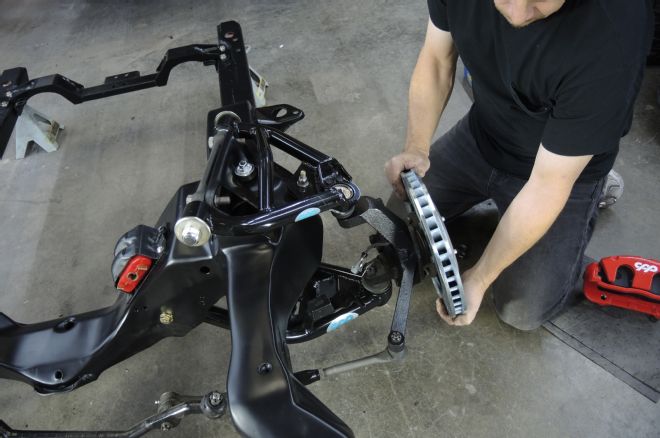
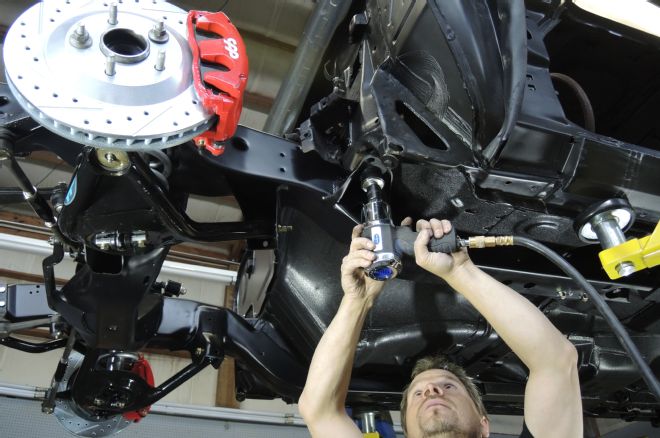
12 The colossal 13-inch Corvette rotors slip over the C-5 hubs before the calipers are attached. Note: You'll be switching to an M12 thread size with the new hubs, so make sure you have the correct lug nuts if you're doing this swap.
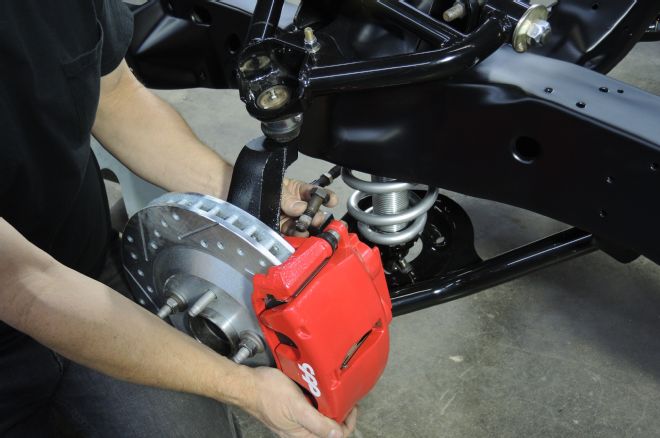
13 The twin-piston Calipers come with thread locker on the bolts. If you are just mocking the parts up prior to final installation, be sure you reapply Loctite on your final assembly.
14 The 500-series steering box replaces the sloppy stock unit. These have a 14:1 ratio, are made with all-new parts, and utilize the original-style pitman arm, which we're replacing as well.
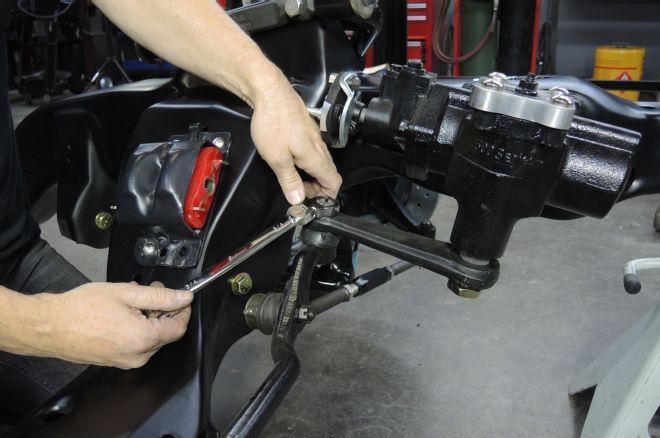
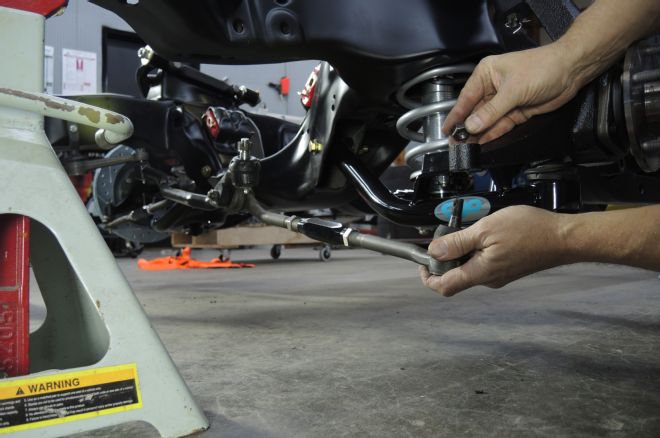
15 The center link is the only part from the original steering system we're reusing, because there's really nothing to wear out and it wasn't bent. We blasted it and sprayed on a coat of paint so it matches the rest of the parts.
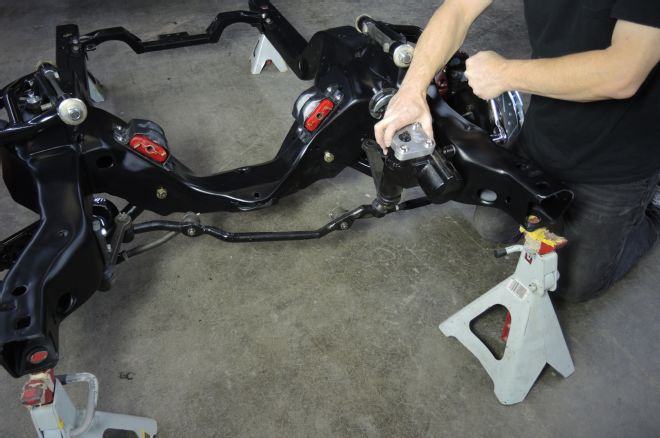
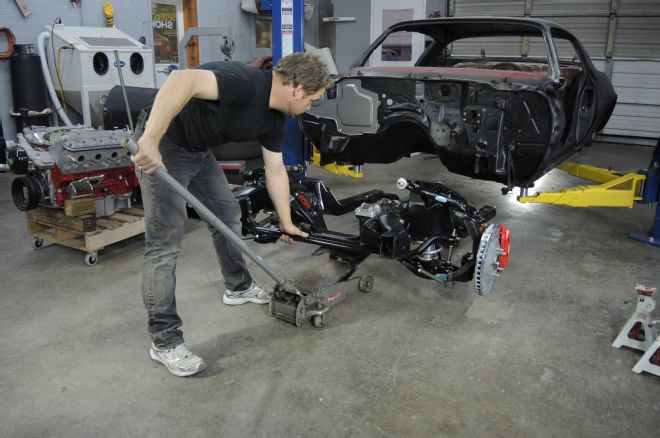
16 The antiroll bar (sway bar) is larger diameter than stock and features urethane bushings and anodized billet mounts that are serviceable through a grease fitting.
17 The endlinks are urethane as well, and the sway bar alone would improve chassis stiffness as a stand-alone upgrade. The mounts install easily into the stock mounting points.
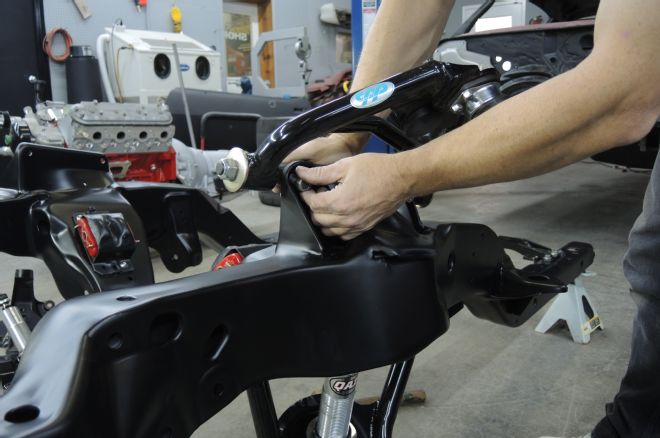
18 With the trans crossmember supported with a wheel dolly, the loaded subframe gets rolled under the body.
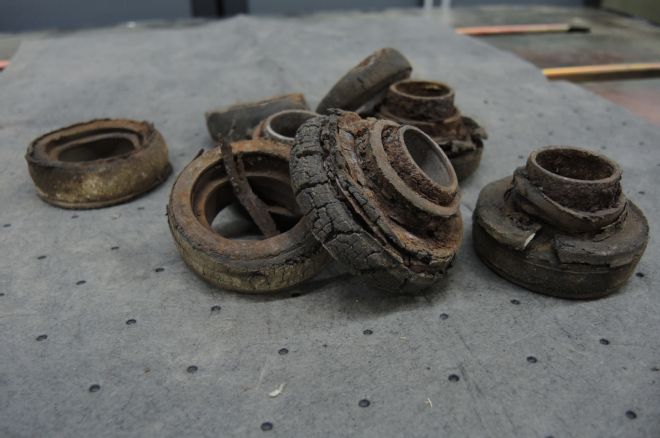
19 These are the original body bushings that came out of this pig! Nothing more to say here.
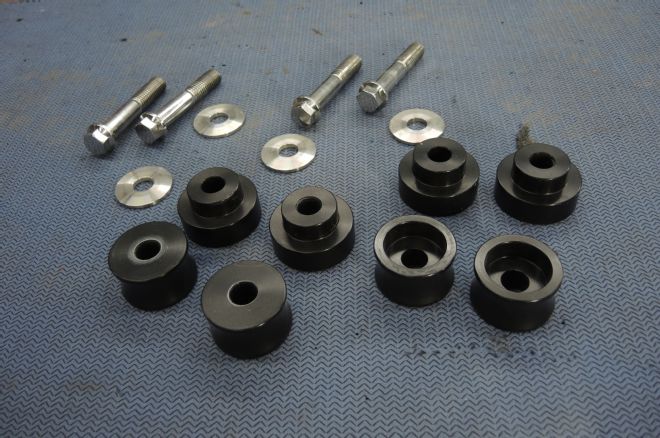
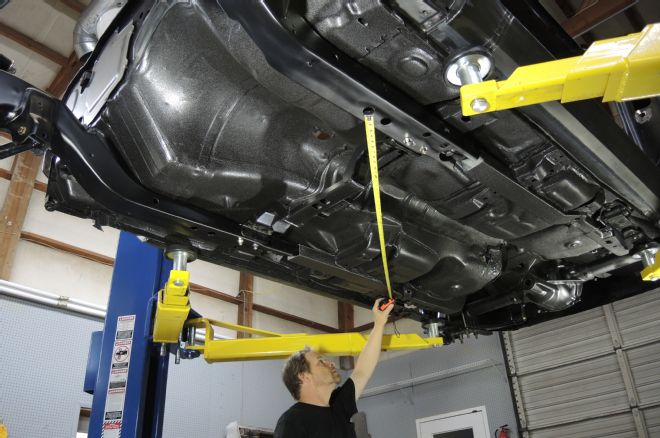
20 Swapping to DSE's stock-height, solid-body mount kit was a no-brainer. There's no loss in comfort, and we're after rigidity that can't be achieved with rubber isolators.
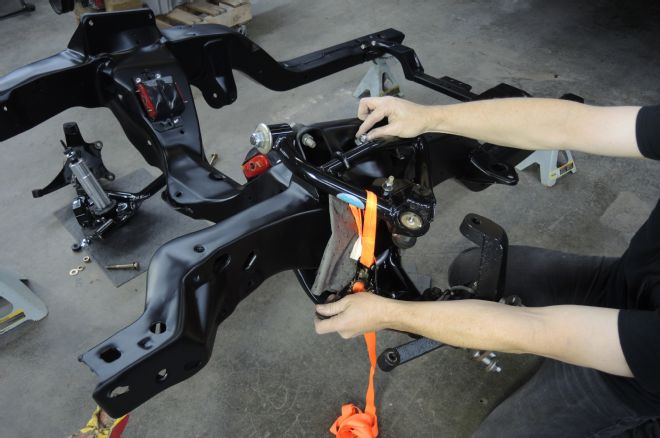
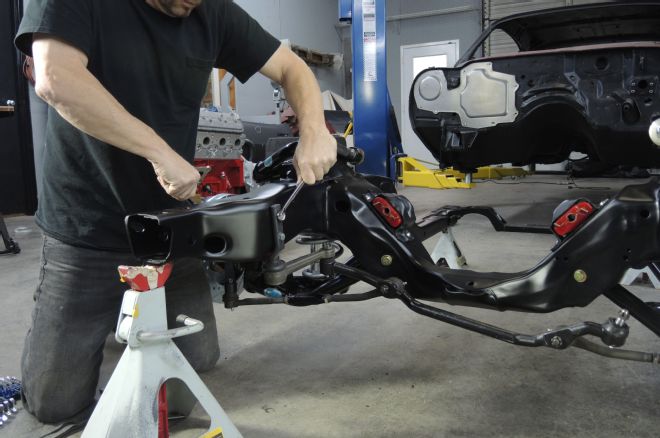
21 The subframe is snugged up, but not totally torqued down until we can verify that it's square on the body.
22 A cross measurement as well as a reading front to rear is necessary to make sure the subframe is not misaligned. It's critical that you check this, especially if you're welding in subframe connectors. Correcting a dog-tracking problem is a pain with the frame welded in! With the subframe parallel and square, all four body bolts are run in tightly.
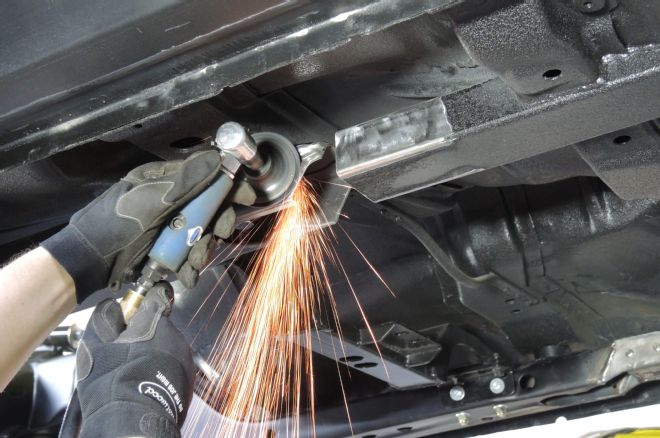
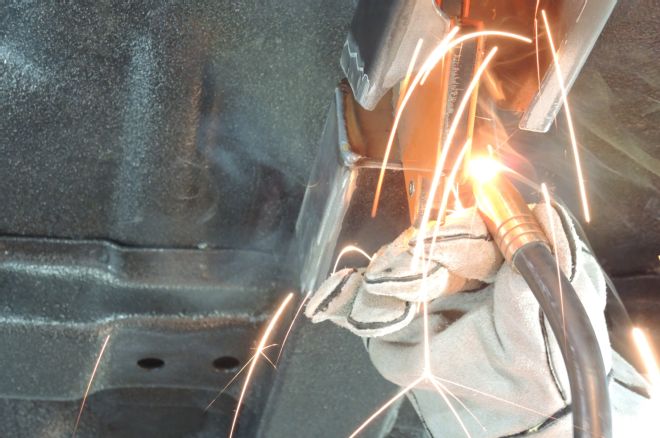
23 We had previously mocked up the subframe and installed the DSE frame connectors into the floors—now we can grind the paint off the frame stubs and connector ends for welding.

24 The end caps are welded in first, followed by the side braces. Magnets are your second set of hands that never get burned.
25 It may not look like it, but with the small-ish nozzle of Eastwood's MIG 175, we have enough clearance above the connector to weld the top seams.
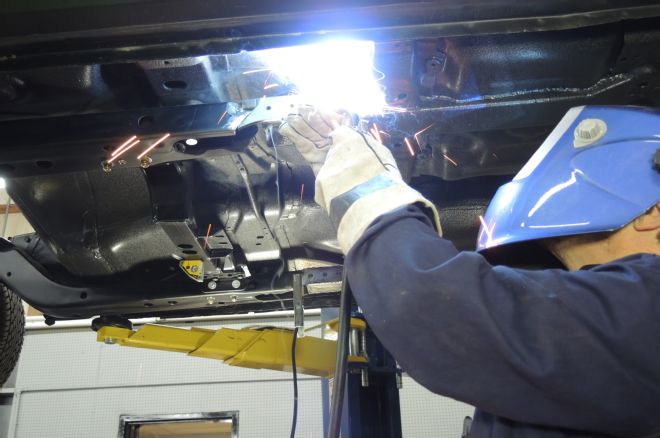
26 The side caps are burned in on each side of both frame connectors. DSE has clear instructions and a cool DVD that shows you how to do this installation on whatever vehicle you have.
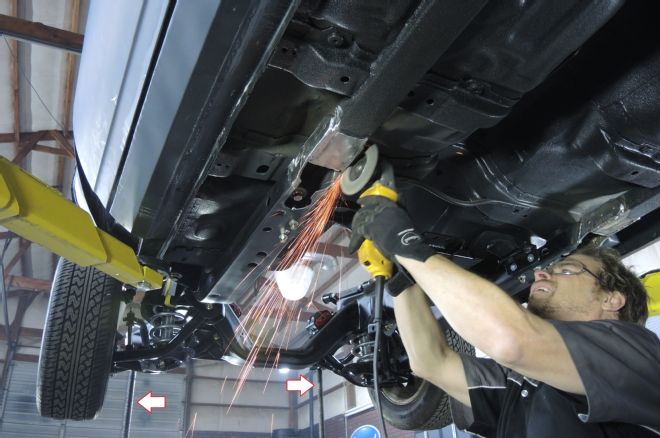
27 Dressing the welds with a 40-grit flap wheel smooths the transition out. Note the location of the screw jacks supporting the front frame stubs, ensuring that the chassis wasn't drooping during the welding process.
What's Next?
All that's left to do is make it pretty! We can either go with the bedliner that's on the underside or use Eastwood's Chassis Black to blend into the subframe. Either way will look good, and the improvement in performance is guaranteed to make all the persnickety work worthwhile. We'll address the rear suspension and the peg-leg rear axle soon. We're not getting rid of the 10-bolt, though; there's plenty of guys throwing tons of power at them, so we'll show you how we upgraded ours to hold up to the new LS power and throw on the rest of the Stage III Pro Touring kit from CPP.