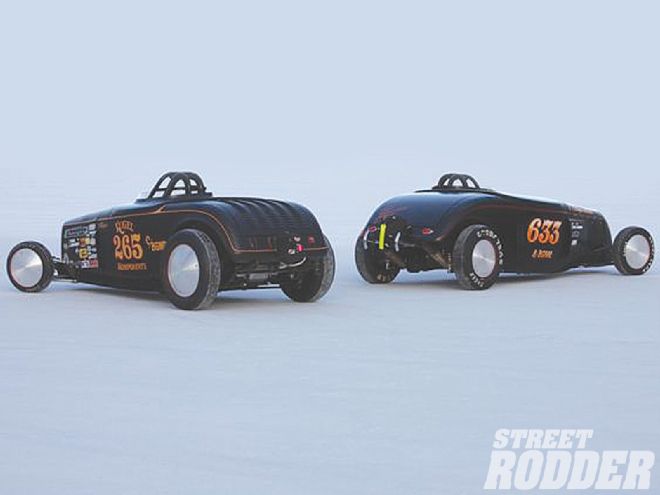
Ever since racers discovered the quarter-turn fasteners invented by William Dzus and often used in aircraft panels, rodders who wanted convenience in attaching hood sides and other panels on their hot rods fell in love with them. They were cool and had that no-nonsense, go-fast connotation. Likewise, when attending dry lakes and Bonneville meets, guys with street rides were equally captivated with the spun-aluminum wheel covers produced by the late Dean Moon starting around 1950. Ever since, Moon discs have been a very popular choice of wheel treatment for rods with a traditional style. The racer look is achieved at considerably less expense than a set of four magnesium Halibrands.
Moon discs (there are other companies making aluminum disc wheel covers, but Moons are the defacto standard) appeal to a surprisingly wide audience. When you park somewhere, the number of people who comment on the Moons, especially people outside the hot rod community, will far outweigh the interest generated by billet wheels that cost 10 times more than those classic aluminum circles with the "sun ray" finish.
So what's the problem with Moon discs? It's a question of aesthetics in mounting them. Whether we're building a low-dollar traditional rod or a high-ender, most of us rodders feel bound by certain accepted fashion principles, written down a thousand years ago on two finned-aluminum tablets found in the desert around Muroc Dry Lake. With Moon discs, it's considered bad form to punch a hole in the discs for the tire valve stems to stick through; it interrupts the flow of the swirling finish. We must mention that Mooneyes still makes Moon discs with a ring of "snap on" clips on the back, and they offer a clean look when installed, but taking them on and off to check your tires will eventually chip paint from your rims. This style is available in diameters from 12 inches and up.
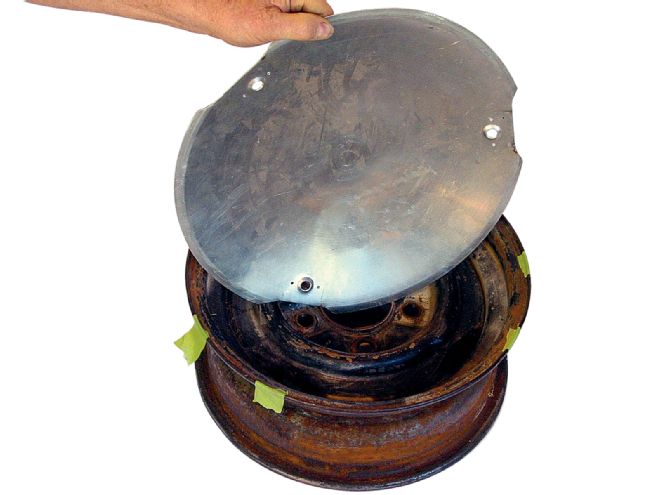 A complete setup for installing discs to steel wheels is available from Moooneyes with a deposit on the tool. Bonneville racer Harry Hoffman has his own tooling, the main item being a setup disc that has three equally spaced notches (Hoffman's 15-incher seen here) and dimpled holes for the buttons.
So what do you do about checking your tire pressure? You attach the disc to your steel wheels with screws around the edges, but every time you check your tire pressure, you have to remove the screws from all four of your Moons, lay the Moons down carefully where they won't get scratched, then put all the screws back in when you're through checking the air in the skins. If you're like most of us, where you placed the screws on your disc may vary slightly from wheel to wheel and you have to mark your discs (left-front, right-rear, etc.) and also make orientation marks so each disc lines up with the right spot on its designated wheel.
As you can guess if you've never had Moons on a car, this gets to be such a colossal pain that you keep putting off checking your tires and even convince yourself "that tire's still got plenty of air left." Sounds like much ado about nothing you say, but there are other annoyances. When you attach discs to steel wheels, you can use self-tapping screws or better, drill and tap the rims for small fine-thread screws. We'll admit that small black Allen screws do look cool on a disc. Unfortunately, the rim of a steel wheel isn't that thick, so you have screws that are secured in a paltry amount of threads. One misstep in attaching the discs when you're in a hurry and you can easily strip or jam the screws. As if that weren't enough, we've seen rodders drill their wheels while the tires were still mounted, which sometimes results in a tiny air leak that eventually causes you to have to check that tire even more often. When we ran a Comp Coupe at El Mirage and Bonneville for 10 years, our road entourage sported 14 screw-secured Moon discs. There were four on our tow vehicle, four on the trailer, and six on the race car (front wheels had Moons inside and out). We carried a small, battery-powered screwdriver with an Allen bit in it just for removing Moons to check all these tires. It was easier but still a pain. With the Bonneville tires and the extreme heat, you have to keep checking for changing pressure, so the Moons on the race car weren't screwed on until just when we got near the starting line.
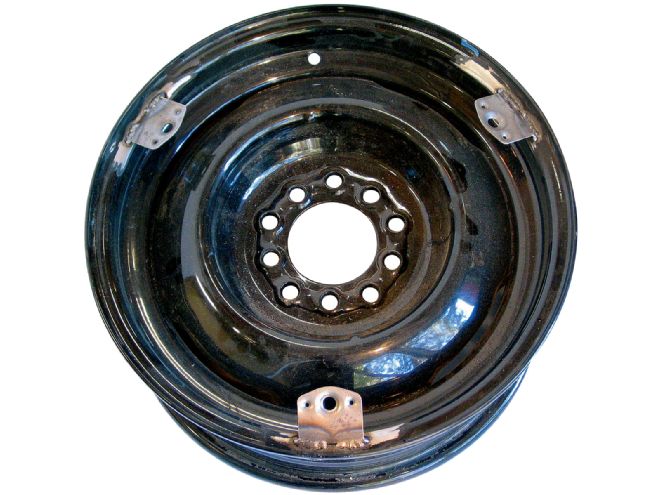 Even when the Moon discs aren't in place, the three tabs give your old steelies a purposeful, race car-serious look.
That's probably enough whining about disc screws. Most enthusiasts love the look of Moons enough to put up with the inconvenience. The alternative method of securing discs to steel wheels is with Bill Dzus' marvelous fastener, which for trivia fans came out the same year as another rodder-loved product, the Deuce. There is some work involved in setting up your wheels and your discs to accept the Dzus buttons, but if you're tired of removing/installing Moons that are screwed to the rims, you'll love this setup.
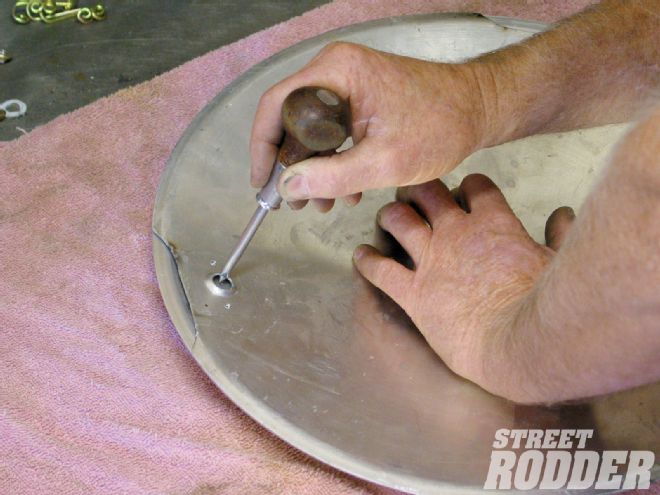 Carefully align the template disc over one of your new Moons and scribe through the template to mark the location of the holes for the buttons. With the Mooneyes kit, your new disc will already have the dimpled holes in them.
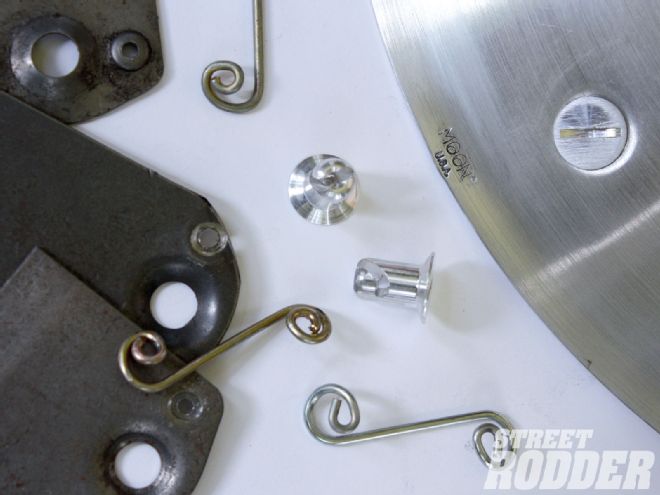
From the outset, we should mention that Mooneyes sells their discs in several forms, including ones that are already punched for three Dzus buttons, in fact they have a kit of the parts, tools, and instructions that you can have shipped to you with pre-punched/dimpled discs by simply paying a $50 deposit on the tools. You get the deposit back after you return the tools to Moon when you're done. The parts kit includes buttons, tabs, and springs for four wheels (PN MDK-4), and the pre-drilled and dimpled discs are $43 each (PN MD-1151DZ for 15-inchers).
Another Bonneville racer you're familiar with, Roy Fjastad (Full-Bore Racing Products) sells an alternative to traditional Dzus buttons, called a Superbutton. It operates like a Dzus, but instead of a slot in the middle, these have a hex hole, so they can be turned with an Allen wrench. The advantage of using these on a race car is when fastening panels in a hurry the tool can't slip out of the button and scratch the paint. Fjastad also has a cool tool to carry around in your glovebox.
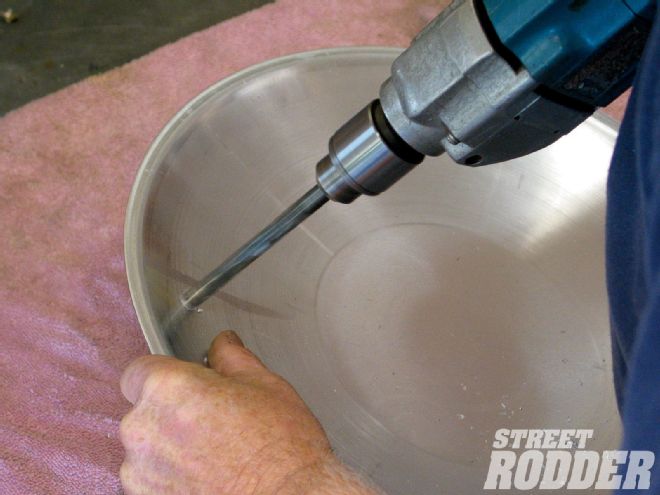 Take care when drilling the new holes through the disc. You want to go slowly and keep your angle consistent.
Fellow Bonneville racer Harry Hoffman has performed this buttoning operation many times over the years, and has his own tools to do it, as you'll see in the accompanying photo sequence. It takes some time, but it's not rocket-science either. You can do it yourself; if you don't have a welder, one of your buddies can handle that part of the job.
A note about your choice of steel wheels: We found that some wheels that are otherwise for the same vehicle in every respect except possibly year of manufacture can have a different width of gap around a standard disc. With small hubcaps and trim rings, you'd never notice a variation. You may like a minimal amount of rim showing, or a larger gap to expose more of the color of your painted rim. It's your call, but you certainly want the amount of rim edge exposed to be the same on all four wheels. Try a Moon disc over all four of the wheels you want to use and center it, checking that all rim lips really are identical.
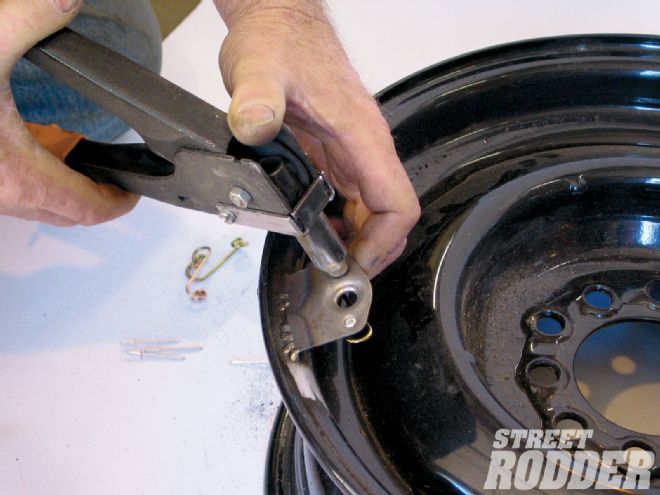 You must use the correct spring height for the buttons to quarter-turn into. Attach the springs to the backside of the tabs with pop rivets.
What's cool about the attachment method illustrated here, aside from avoiding the problem of screws, is that the discs are retained more securely (SCTA rules specify that if screws are used on a race car, you have to have six per wheel but only three Dzus buttons are required) and they are flush with the Moons. The look is clean. In our case we opted for using aluminum Dzus buttons, which can be sanded so they blend in even more subtly with the aluminum of the discs. The standard buttons are steel and can take a lot of abuse, but you have to be careful not to gouge the softer aluminum type. Buttons, springs, and plates are available from Moroso or your local speed shop. Living with Moon discs means you'll be carrying a removal tool in your glovebox. In a pinch, a quarter can be used (which lends another dimension to the term quarter-turn fastener), but avoiding slipping off the button and potentially scratching your discs demands a strong tool that perfectly fits the curved slot in the buttons. If this classic look appeals to you for your current or future project, or you're just tired of steeliness with the usual Merc hubcaps and trims rings, give the Moons-and-Dzus combo a try! It's hard to believe, but Mooneyes makes standard discs in diameters from 10 to 46 inches. You could put Moons on a fire truck or a semi.