Typically, when it comes to lowering a leaf spring-equipped vehicle, it's a pretty straightforward affair. A pair of lowering blocks and perhaps some longer U-bolts are usually all that's needed. When it comes to lowering a similarly equipped classic truck, it's oftentimes a bit more involved as many of these old trucks had the springs located above the axle. This requires a "flip kit" of some kind to get the springs under the axle before a set of lowering blocks can be installed. The good news is, the very act of "flipping" the axle can yield up to a 4-inch drop, making the addition of a large lowering block unnecessary.
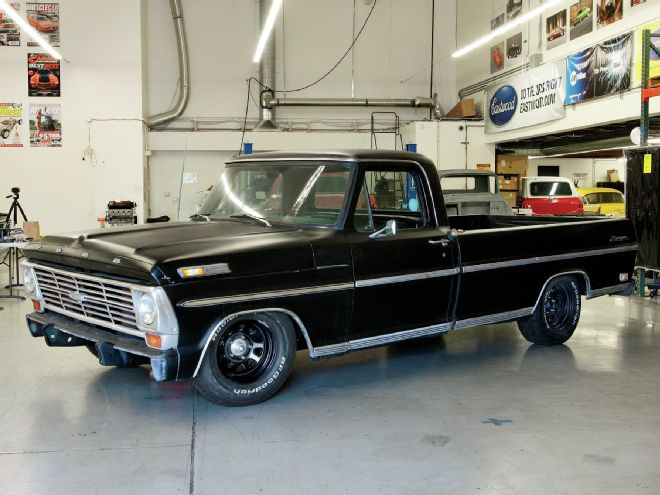
Our project '69 Ford F-100 falls into that spring-over-rear design, which makes the task of dropping the back end of our Effie worth a mention. You'll remember last month, we got rid of the stock, twin I-beam front suspension in favor of a Fatman Fabrications Mustang II IFS. That gave our old Ford a full 6-inch drop up front. This month, we're looking to lower the rear a similar amount.
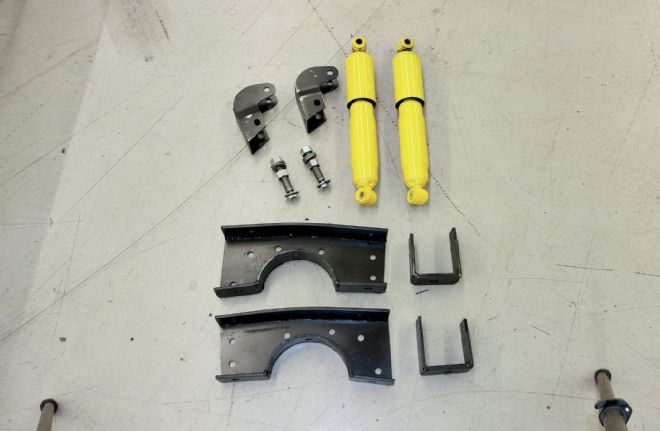
01 The components needed to get our Ford nice and low are simple: extended shock brackets, shocks, and hardware, flip blocks, and C-notch reinforcement brackets.
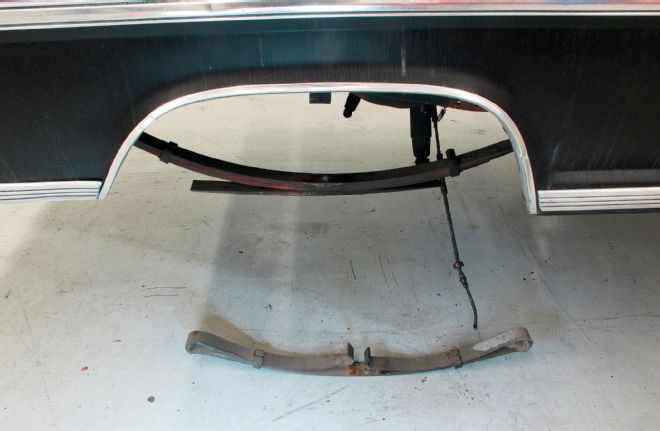
02 Once the original rearend was removed from the truck, the stock "helper" springs were cast aside, leaving the main, four-leaf pack. To make the install easier, the front mounting bolt of both springs will be removed and the spring allowed to hang from the rear shackle.
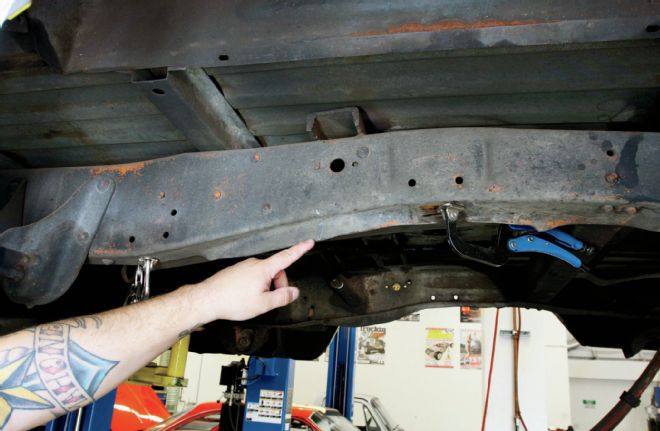
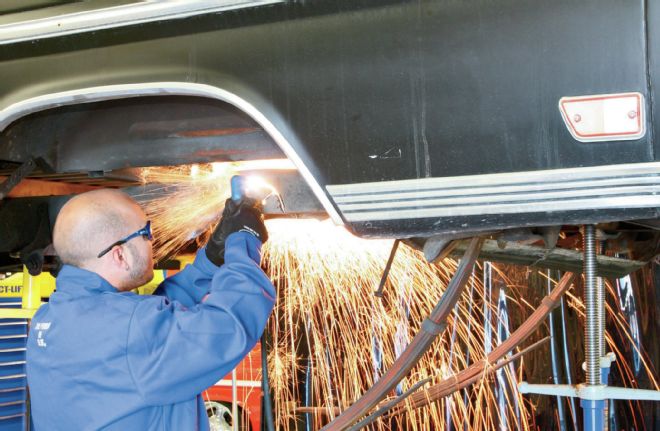
03 Both sides of the chassis feature this lip from the factory that needs to be heated and hammered flat so that the C-notch brackets can slide over the framerail.
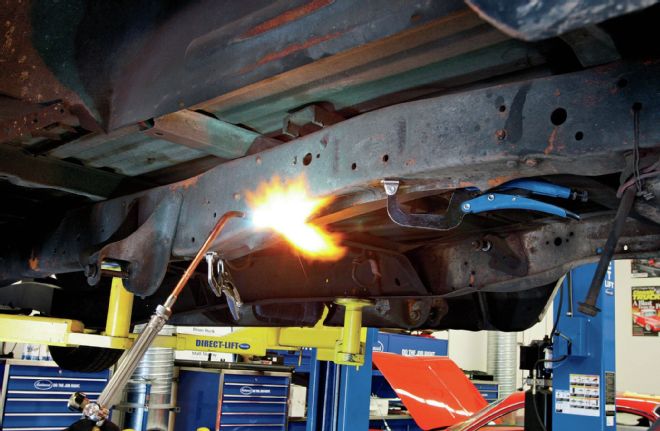
04 To get the lip flat, first we clamped a section of 3⁄8-inch steel on top of the lower framerail to act as a backstop. Then, we used our Miller oxyacetylene torch to get the area nice and hot…
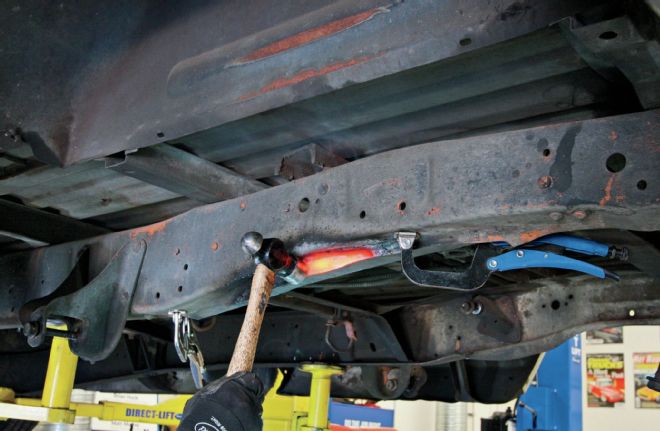
05…before hammering the lip flat.

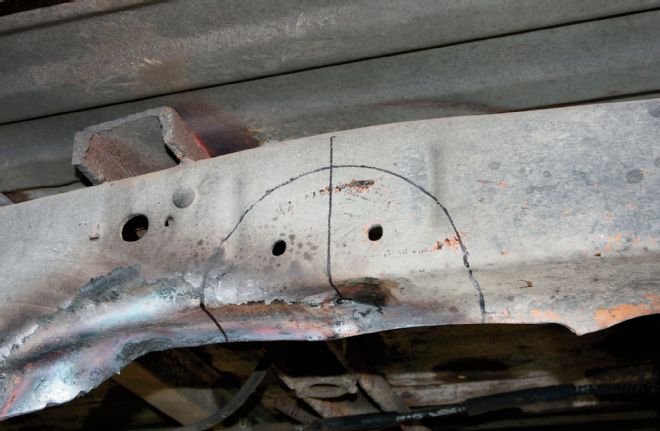
06-07 Next, the C-notch reinforcement bracket was placed against the framerail, centered using the old bumpstop bolt hole, to mark the notch that will be cut into the framerail.
08 With both C-notches marked, it's time to bust out the Miller Spectrum 625 X-Treme plasma cutter to cut the notch. Note that the rear portion of the frame is being supported by jackstands to keep the frame from bending before the reinforcement plates are installed.
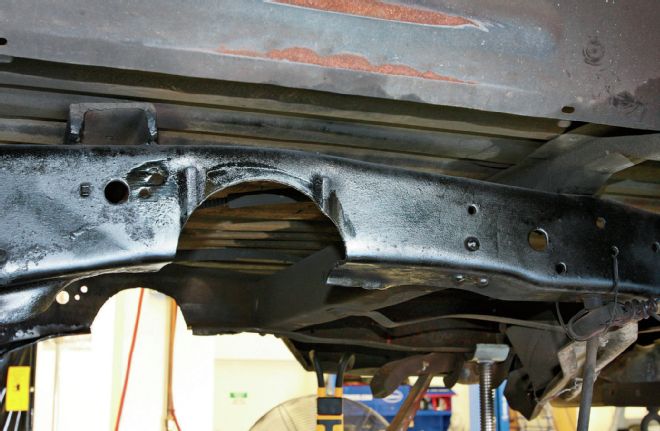
09 Once both sides are cut out, a quick coat of Eastwood Extreme Chassis Black ensures the area behind the brackets won't rust.
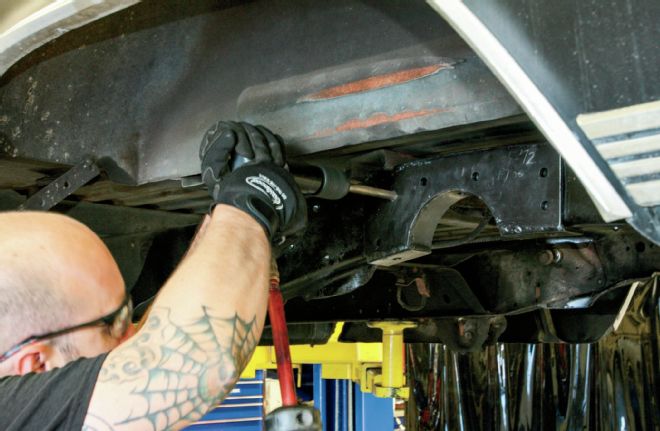
10 The upper front hole on the C-notch reinforcement bracket corresponds with a hole on the framerail, making locating the proper position of the bracket in relation to the axle centerline a no brainer. Here, I'm reaming the hole slightly so that the provided hardware fits without interruption before I drill the rest of the holes in the frame.
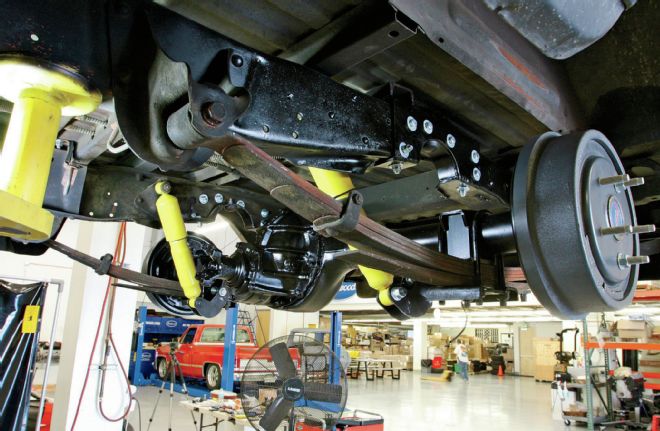
In order to gain such a large drop in altitude, the aforementioned rearend flip will be made, utilizing a pair of Fatman Fab flip blocks. These were designed to use the stock leaf spring mounting pads on the rearend, bolting the relocated leaf spring (stripped down to the four main leaves) in place underneath the rear with no welding or fabrication. Since the rearend will now be much closer to the chassis, a pair of shock extensions will be added to the mix, allowing us to use a standard-travel shock mounted in the original upper location and utilizing the stock angle. Another side effect of the relocated rearend is the need to notch the frame to prevent any unwanted contact between the chassis and rearend. This will be solved by cutting a C-notch in each framerail and installing a bolt-in Fatman Fab C-notch reinforcement bracket.
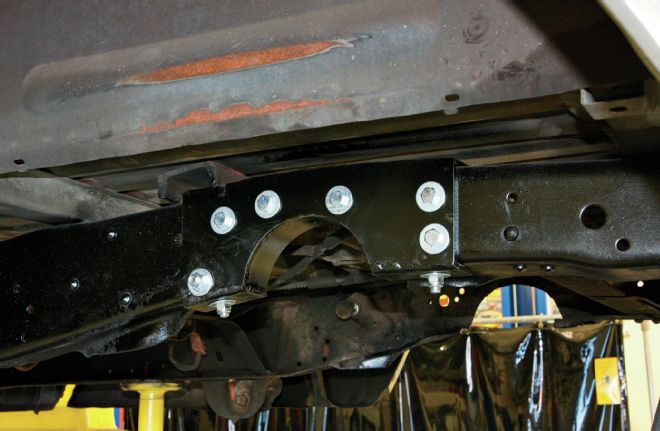
11 With the holes drilled and the fasteners tightened up, it's time to install the low-profile bumpstop provided in the Fatman kit before we move on to the other side.
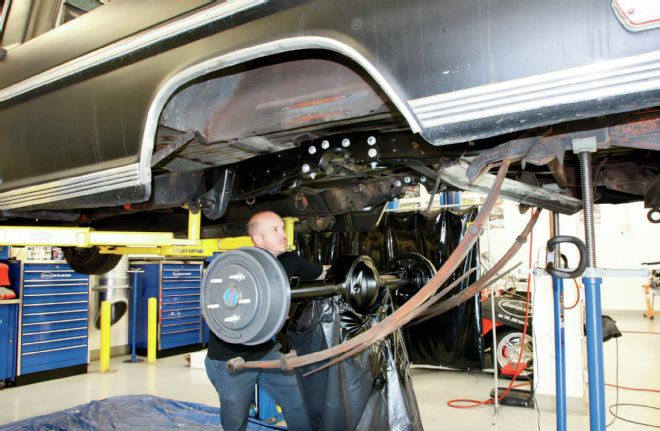
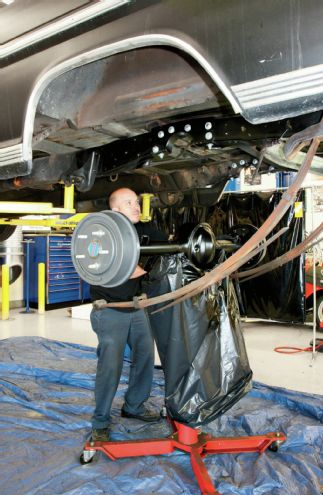
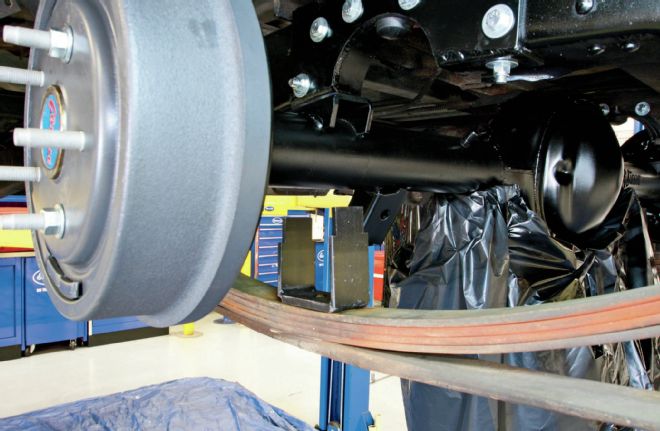
12 Next, our Currie-prepped 9-inch is ready to slide back under the Effie. We once again used Eastwood Extreme Chassis Black to protect the rearend and ensure that it looks good for years to come.
13 With the rearend jacked up, the leaf springs can be fastened to the chassis and the flip blocks placed on top of the leaf spring centering bolt. Note the orientation of the flip block with the taller side toward the rear. This ensures the original pinion angle remains unchanged.
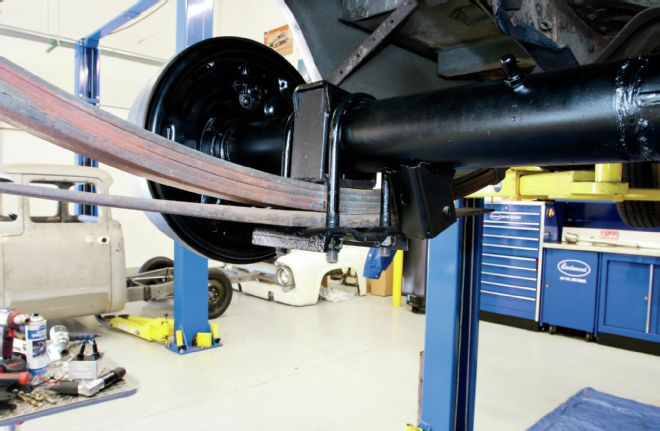
14 Using the original U-bolts, nuts, and axle plates, the rearend is mated to the springs a full 6 inches higher than before.
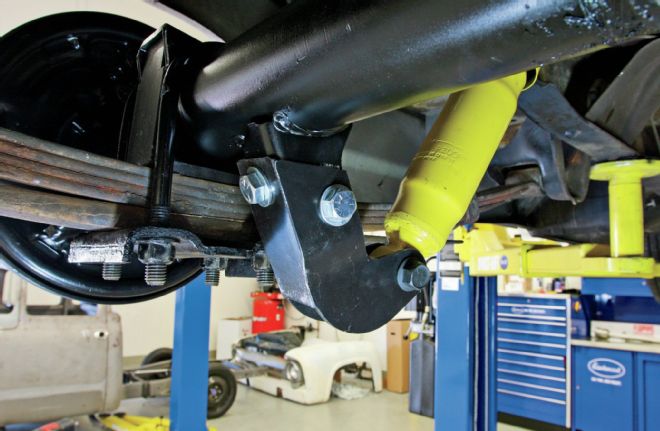
15 The shock extensions bolt to the original rearend shock brackets using the provided 1⁄2x1-inch bolts. Using a standard-length shock, the extensions ensure that the proper suspension geometry is retained even though the truck will be 6 inches closer to Mother Earth.
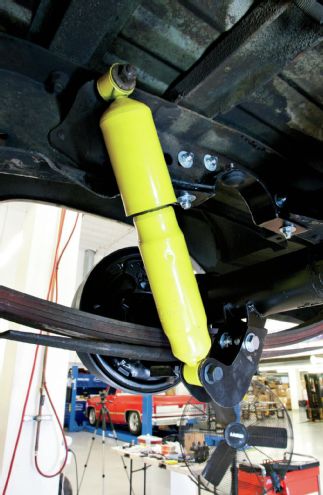
16 A pair of Monroe shocks is part of the kit and bolt to the stock upper shock mount on the chassis.
17 The finished assembly is a simple, yet effective way to lower any '65-'79 Ford F-100.
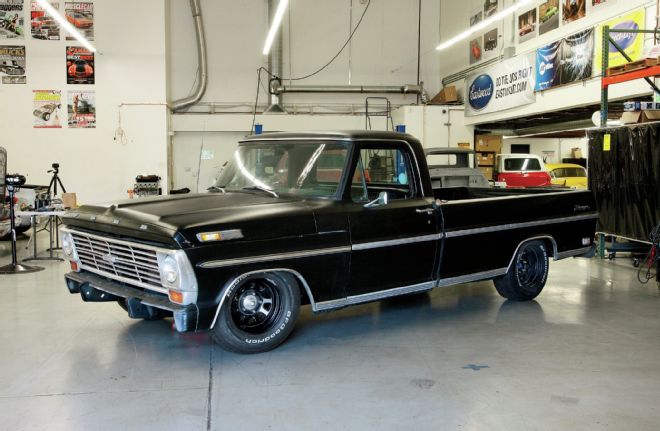
18 Of course the proof is in the pudding once the dropped Effie is back down on all four tires. You can't beat a lowered Ford, especially one of '60s vintage, as there aren't too many cruising around due to the fact that in the past, there wasn't a good way to do so without compromising ride quality and safety. With Fatman's kit, however, it's now easier than ever to lower a vintage Ford and not only improve the aesthetic, but the performance, safety, and handling as well.