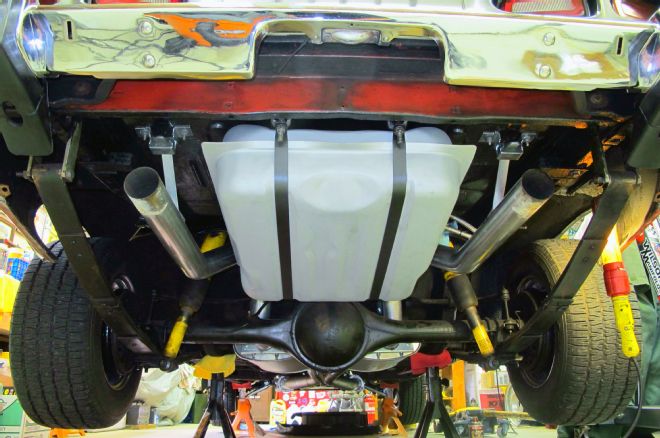
Back in the '70s, most gearheads took pride in the appearance of the rear undercarriage of their muscle cars. Because many were jacked up in the rear, the goal was a clean, cool look for those following you. Some sported the stupid long shackles and bright colors, while the cool guys would keep it black with white air shocks. Traction bars (ladder or slapper) were also an accepted look—as long as it looked clean. The in-the-know Moparite used the infamous pinion snubber that was hidden from the view of the competition. My first car at 17 years of age was a two-door '65 Belvedere I. The first thing I did was paint the 8 3/4 rear semigloss black and get white air shocks to lift up the rear end for 60-series rubber.
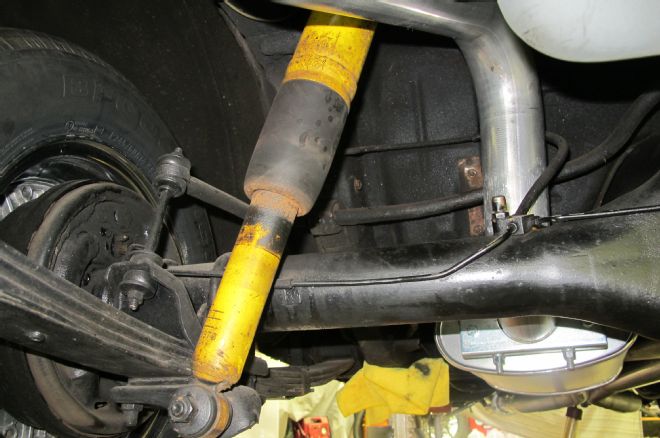
Our project Challenger has that period look with deep-dish 14x8 Cragar SST wheels and 60-series rear tires. Like yesteryear, our first desire was to ditch those ugly long shackles and yellow air shocks. Also, the original saggy leaf springs couldn't handle the torque of the recently implanted 416 LA stroker without serious wheelhop issues. We employed an old pinion snubber to cure the wheelhop, but it needed to rest against the floorpan and didn't allow sufficient suspension travel. The antiquated air shocks needed over 50 psi for adequate tire clearance and that right-looking rake (1 to 2 inches higher in the rear), but returned a poor ride and road holding. Past experience told us beefier leaf springs and QA1 shocks would bring the ride and handling into the 21st century.
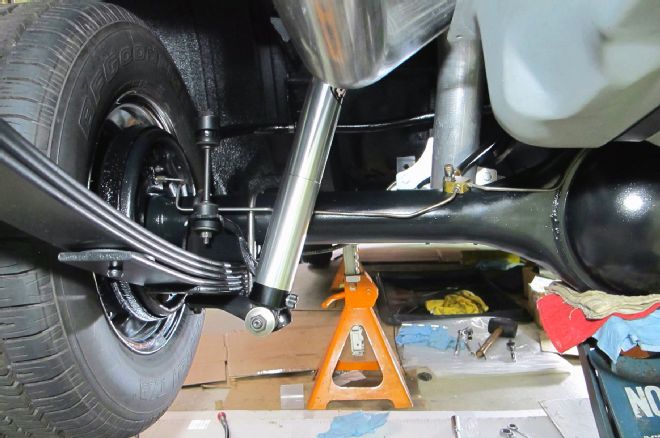
We ordered custom Hemi-style leaf springs from Performance Suspension Technology (PST), with an added arc of 2 inches for that period-correct stance (1 to 2 inches higher in the rear). A set of QA1 single-adjustable shocks would be put in service to match the QA1 tubular K-member front suspension from a previous story. After researching shackles, we decided on a heavy-duty set from Hotchkis Performance to rid our E-Body of those hideous long ones. Once the rear and related parts were rolled out and out of the way, there was plenty of access room to apply Eastwood restoration supplies to the undercarriage and suspension components. The quality Eastwood products will help maintain that clean look to the rear for a long time.
After lowering the car to full rest, we did the hands-down test to check for suspension movement and noise. The new suspension felt stiffer, but demonstrated proper movement at all the pivot points (shackles, shocks, and hangers). At first our car sat a little high, but settled down an inch in a week for the stance we wanted. Our first drive showed us the mushy rear suspension was a thing of the past. The ride was firmer without being harsh, but more importantly we improved the road holding and cornering agility. We initially set the QA1s on zero clicks but moved to three clicks for a comfortable ride that has better handling than most stock-suspension muscle cars. We look forward to the Slick Challenger showing the competition its beautiful rearend!
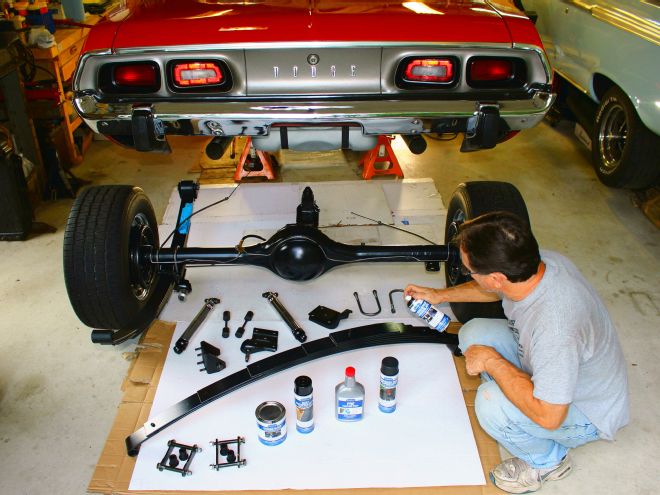
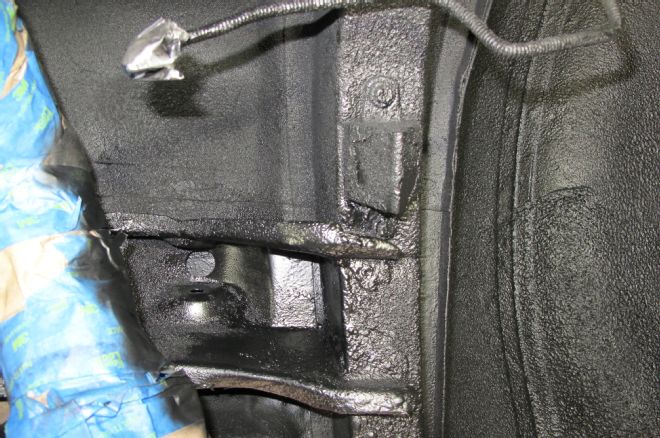
1. The dirty, grimy 8 3/4 rearend with its tired, original leaf springs were unbolted and rolled out from under the Slick Challenger. Be sure the car is raised high enough for tire clearance to roll out the rearend assembly. This procedure eased access to unbolt the leaf springs and upper shock bolts, while aiding in the restoration of the axle and undercarriage.
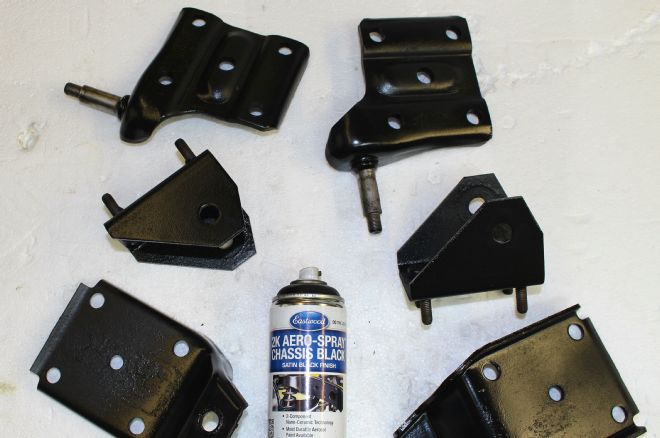
2. We used a friend's sandblasting cabinet to clean up the shock plates, spring hangers, and sway bar brackets. First, a light coat of Eastwood's Rust Encapsulator (PN 16060Z, $19.99) was applied, then a couple coats of 2K Aero-Spray Chassis Black (PN 14146Z, $24.99) for long-term durability from dreaded rust.
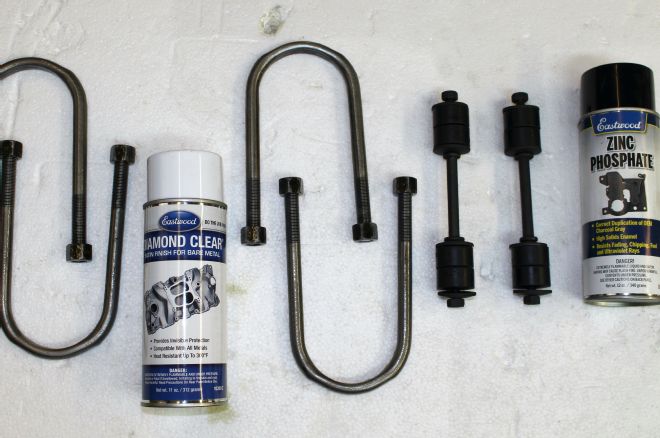
3. Back in the home garage, a bench-top wire wheel was used to remove rust and paint from the original U-bolts and sway bar endlinks. Eastwood's Diamond Clear Satin (PN 10300Z, $12.99) will protect the U-bolts while the Zinc Phosphate (PN 10281Z, $14.99) will give the endlinks that stock black oxide look. We replaced the rubber endlink bushings with black polyurethane units (PN 9.8103G, $6.97 each, pack of 2) from Energy Suspension. Minor trimming of the bushings was required.

4. We were glad to rid this car of the long shackles (right) and old bushings. Hotchkis stock-length shackles with poly bushings (PN 17367, $92.00) will return proper spring geometry and suspension movement for better ride and handling. These U.S.-made heavy-duty shackles feature 1/4-inch steel with Grade 8 hardware. The bolts feature a shoulder to prevent over tightening the poly bushings.
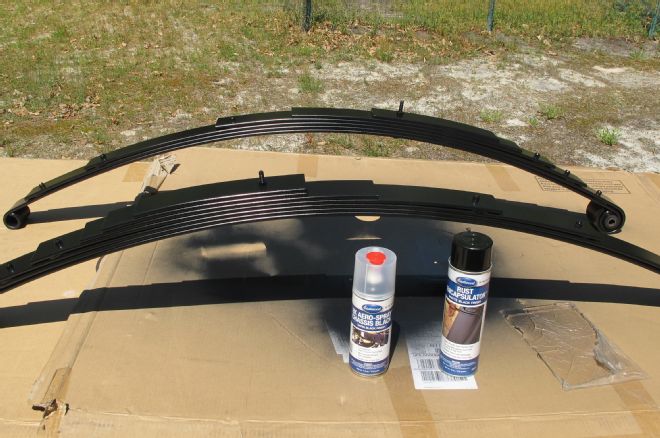
5. Performance Suspension Technology made it easy to order these "custom" Hemi-style leaf springs (PN LEAFSHD, $519). We wanted an extra 2 inches of arc to the 7-leaf (right side) and 6-leaf (left side) springs for a period-correct street machine stance. The new springs were similarly treated to Eastwood's Rust Encapsulator and 2K Aero Spray Chassis Black as their related components.

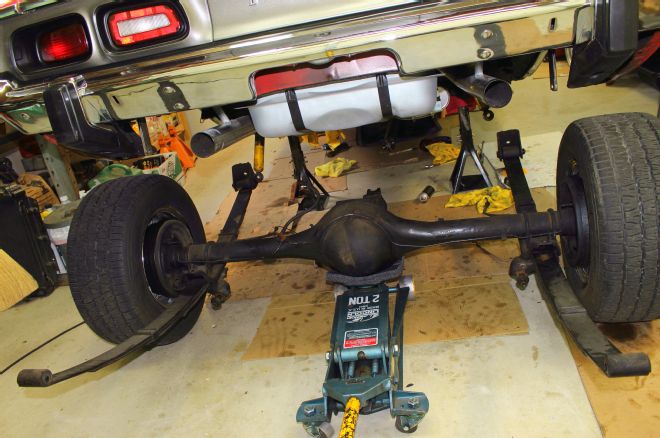
6. Our 3.55 Sure-Grip 8 3/4 rear axle was stripped of the '80s paint and sanded down smooth. The brake lines received the wire wheel treatment and were clearcoated with leftover Eastwood Diamond Clear. Here we're applying Rust Encapsultor then following-up with four thick coats of 2K Aero Spray Chassis Black.
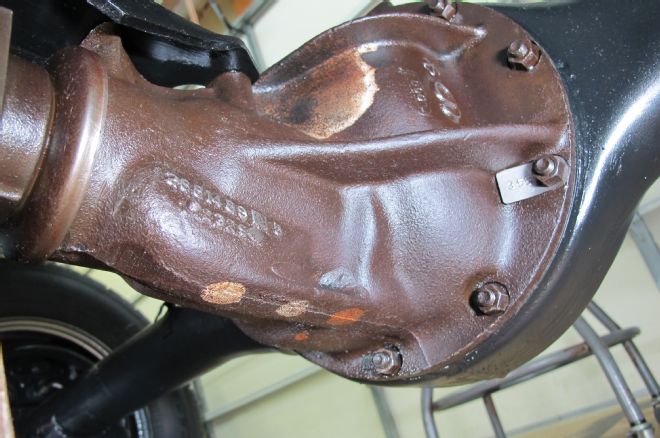
7. While cleaning off the old paint we discovered that all the original paint dabs were still present. The original paint dabs were just too cool to cover up. We decided to preserve the paint dabs for future reference with coverage of the aforementioned Eastwood Diamond Clear. For our old pinion snubber, we replaced the rubber bumpstop with an Energy Suspension polyurethane unit (PN 9.9101G, $14.97 pair).
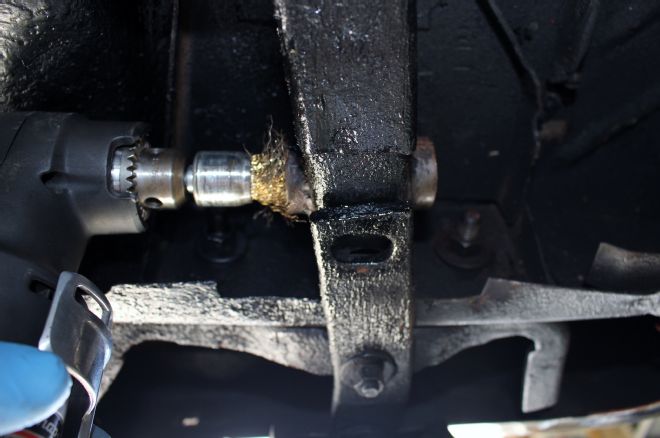
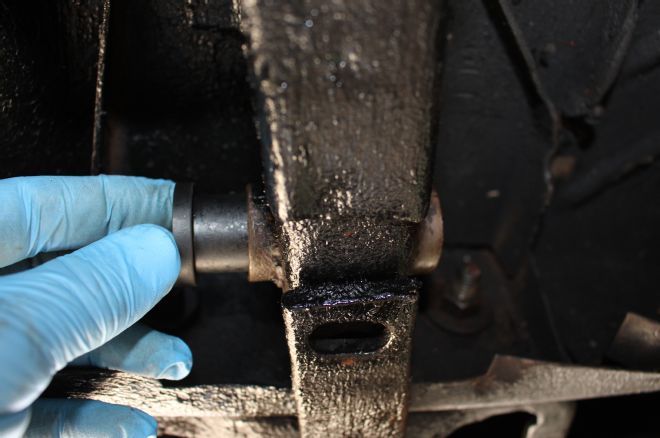
8. & 9. The hole in the framerail for the shackle bushings had years of rust and scale that needed to be removed to enable the poly bushings to slide into position. We coated the shackle bolts and bushings with chassis/wheel bearing grease before installation. The same lube-treatment was given to the main bolt for each front spring hanger.
10. Rags soaked with Eastwood's PRE (PN 10194ZP, $16.99) were used to lightly wipe off dirt and grime from the underside. A follow-up with compressed air removed any loose dirt or old undercoating. The entire back half of the undercarriage and the wheelhouses were sealed off with six cans of Rust Encapsulator.
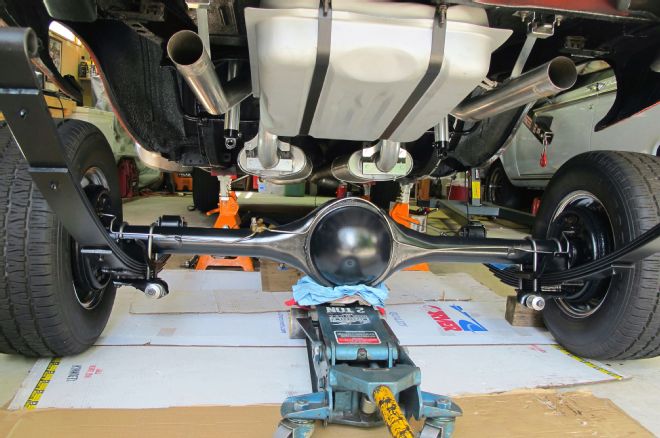
11. Before rolling the assembly back in place, we took advantage of the room to access the upper shock bolts and installed new QA1 Stocker Star single-adjustable shocks (PN TS901, $159 each) to match the front QA1 dampers. The front spring hanger and U-bolts were snugged to only 20 ft-lb. All the fasteners were torqued to spec once the car was down.
12. & 13. Here's looking at the ugly "before" and beautiful "after" shots. The factory rear sway bar and brackets received a couple coats of the leftover 2K Aero Spray Chassis Black. The Eastwood products will keep our rearend lookin' good for a long time.
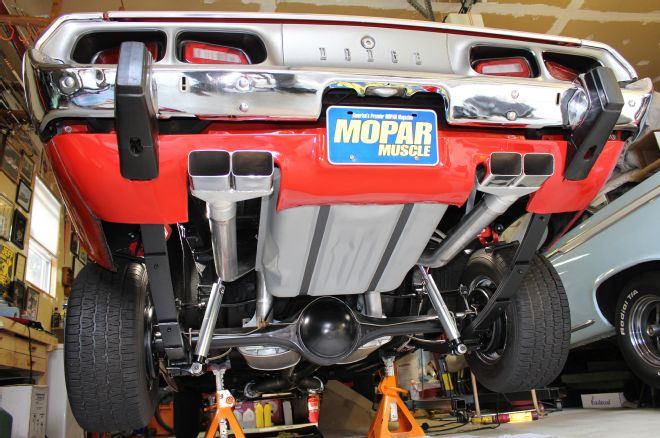
14. & 15. In the "before" shot you can see the outdated long shackles, yellow air shocks, saggy leaf springs and everything else painted black for an uninspiring look. Now, the view of our detailed rearend is dressed to impress. The ride and handling is so much better, proving that all of our handiwork was time well spent.