For whatever reasons, whether the technology didn't exist or counting beans was an issue, the braking system installed by the factory on early Chevrolet and GMC pickups isn't exactly the hot ticket for stopping. Not even in their day were the early C10 drum brakes equipped with a single (reservoir) master cylinder famous for stopping. If one drove through water, the brakes went away, and if they drove down a winding mountain road, the brakes smelled like toast because they were. If the single master-cylinder failed, the only hope was downshifting and yanking the emergency brake to scrub speed.
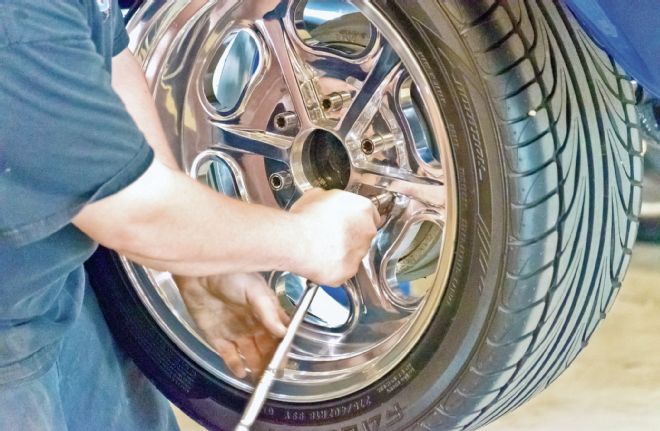
The focus here is GMC and Chevy C10-series trucks, but it should be mentioned that the universal cure-all for improving the stopping ability of any classic truck is to upgrade to a dual-master system with, at the very least, front disc brakes. For each series of Chevy C10, the range of what's available in front disc brake options, from improved rear drum designs or converting to four-wheel disc brakes, is a large category. Relating specifically to the C10 featured here, one look at the investment Wylie Clough made in wheels and tires and it's clear he wanted to stick with a six-lug bolt configuration.
It's a situation I've seen before. My friend Herman has a '57 Chevy 3100 and wanted to upgrade to four-wheel disc brakes, but didn't want to abandon his vintage six-lug Ansen Sprint wheels because he liked the look of an uncommon wheel. Herman bought CPP's six-lug four-wheel disc brake kit engineered for the 3100 and 3200 series of Chevy, so now Herman is known as “Happy” Herman. Another reason is when a person wants to stick with the original steel wheels or doesn't want the added expense of having to buy five-lug axles.
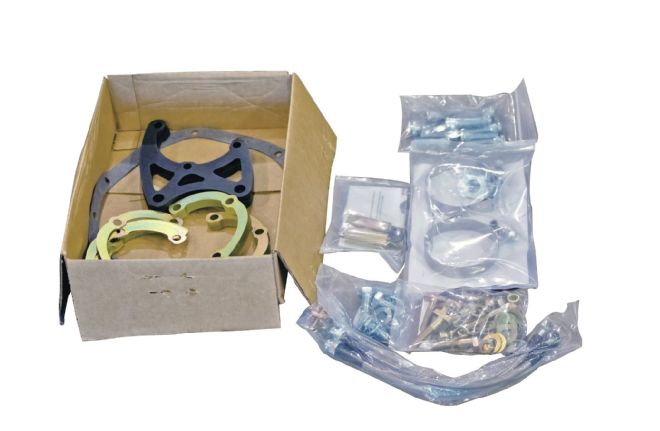
No matter the motivation for maintaining six-lug wheels at all four corners, our friends at Classic Performance Products in Placentia, California, are ready with a complete six-lug four-wheel disc brake system that includes a dual-master cylinder with a power booster, and proportioning valve. And of course, as shown here, there's an individual kit that handles the rear axle only. The installation of CPP's rear six-lug disc brake conversion for 1963-'87 C10 series trucks is a pretty straightforward proposition. Disassembly is where the problems usually arise. One of the obstacles one can expect is difficulty removing the rear drums because they are rusted to the axle or excessively worn brake shoes have dug a groove and locked the shoes into the drum. This situation is occurring if the brake drum releases easily only to snap back like it's attached to a return spring. Thankfully reassembly is usually a snap if the following steps are adhered to. That's because you're dealing with brand-new parts that are engineered to fit. The most common reason a new part will not fit is because an attachment point, whether through age or accident, no longer conforms to the adjoining part's original dimensions. Please note this article is intended to be used as a supplement to the instructions CPP includes in its kit.
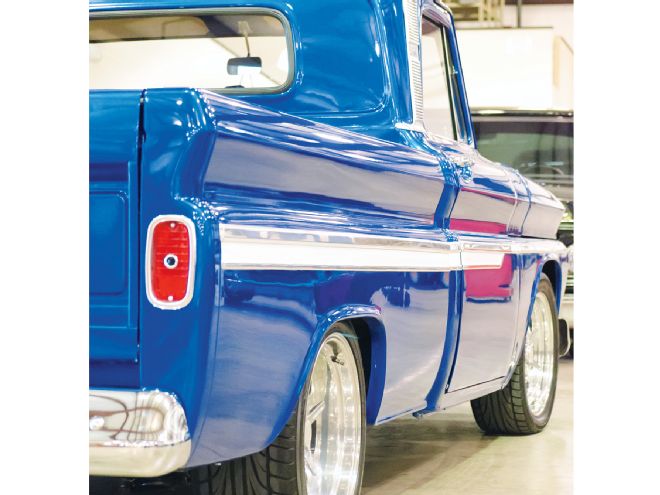
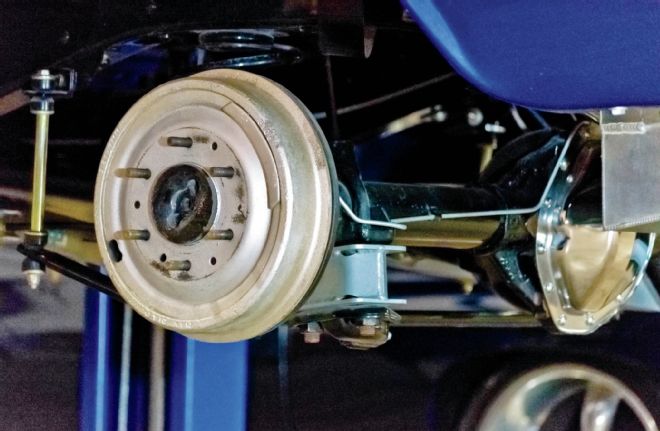
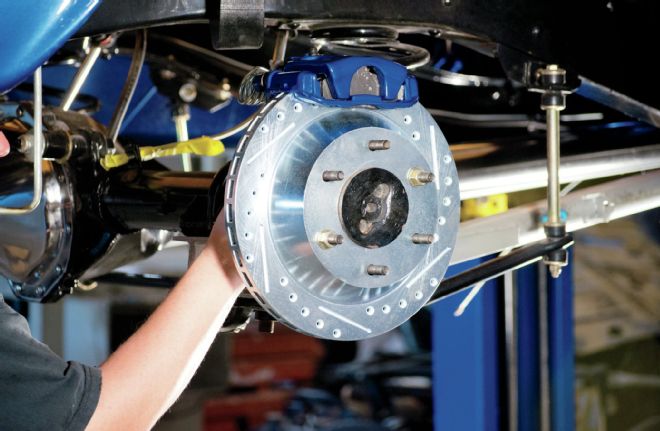
1. Wylie's choice of a six-lug wheel design gives his 1964 Chevy C10 an uncommonly distinctive look that pays homage to six-bolt Chevys of yesteryear. Adding four-wheel disc brakes keeps him from plowing into the rear of a new Chevy.
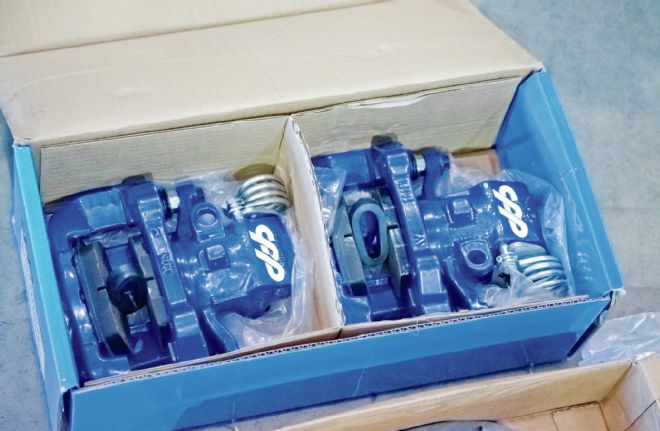
2. It almost looks like Wylie painted his 1964 Chevy C10 to match his brakes. Classic Performance Products offers four different color options for its brake calipers: red, black, silver, and blue.
3. It's a very good idea to install new brake flex-hoses anytime a truck's brake system is serviced or parts have been replaced. Old factory original flex-hoses or new cheap rubber hoses allow for volumetric expansion. That means a soft pedal, or one that doesn't return.
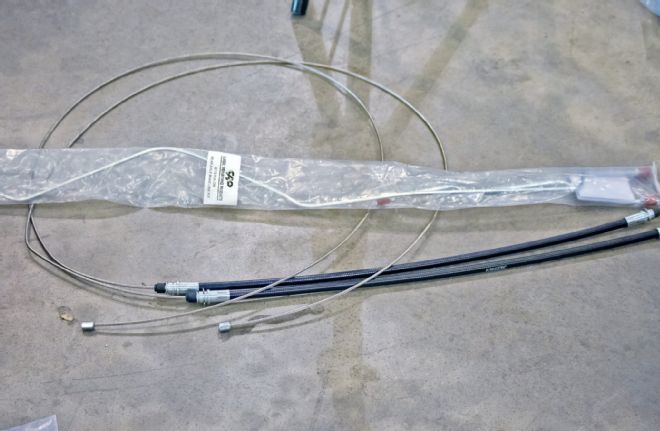
4. With every old truck come rusty old emergency brake cables that often do not work properly. The CPP kit contains new flex-hoses and emergency brake cables.
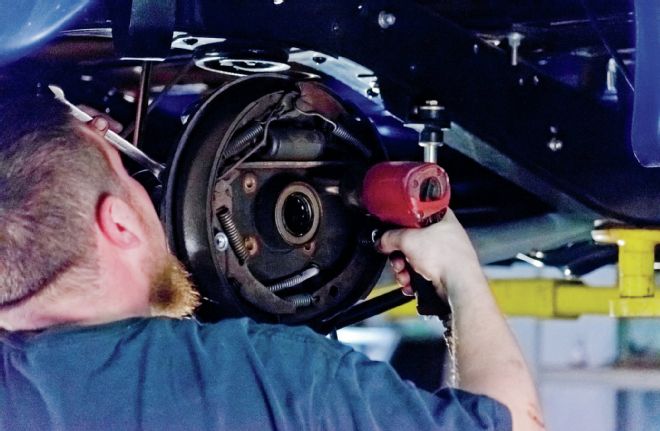
5. Removing a stock brake drum might require cranking (adjusting) the brake shoes inward. Don't worry about destroying the old brakes to get the drum off.
6. Often the brake hard lines are rusted and will not unscrew from the brake wheel cylinder. Cut; don't worry about unbolting the hard lines, the CPP kit comes with new hard lines.
7. The six-stud rear axles will be reused, but new wheel studs are included in the kit. Pay special attention to which parts will or will not be reused before removing.
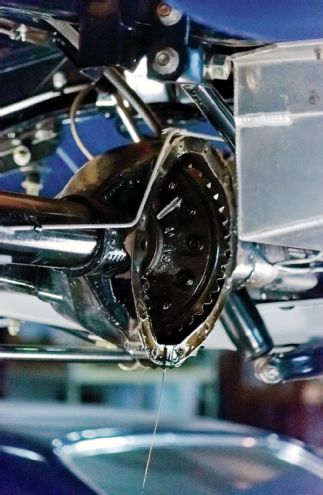
8. To remove the rear axles, the tin differential cover must be removed. Gear oil will drain out so have a drain pan handy. Do not reuse the gear oil. Clean sludge from inside the differential.
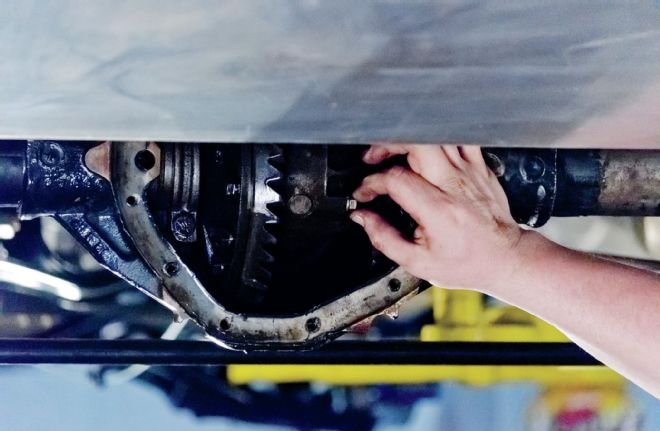
9. Turn the right rear axle, spinning the diff gears until the pinch nut retaining the center pin is in view. Remove the nut.

10. Next remove (extract) the center pin from the differential gears. Note a buildup of gear oil varnish might need to be cleaned off before the center pin will come out.
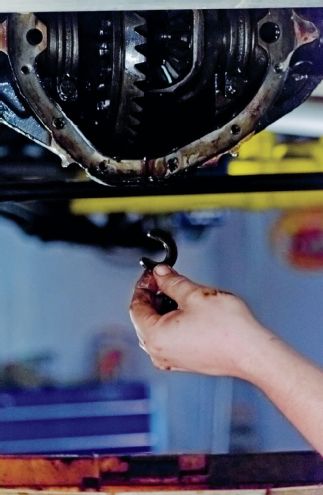
11. With the center pin removed, push the rear axles inward creating a gap that will allow the C-clips to be removed.
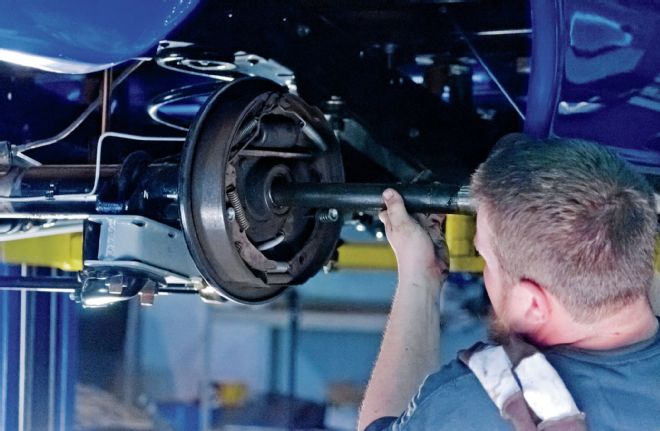
12. With the C-clips removed, the axles can now be withdrawn from the differential housing. Stubborn axles can be removed with a slide hammer.
13. With the axles extracted the four bolts retaining the backing plates can be removed. The backing plate makes a good killer Frisbee.
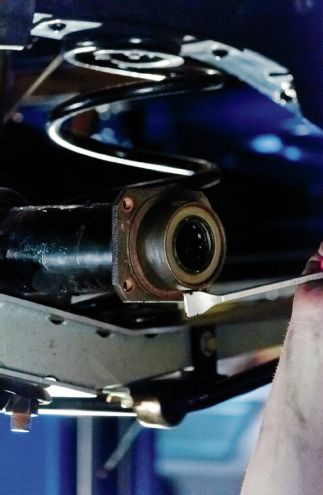
14. Inspect to ensure the rear axle bearings spin freely and are void of gall marks. If not, replace with new axle bearings and always replace the axle bearing grease seal with new.
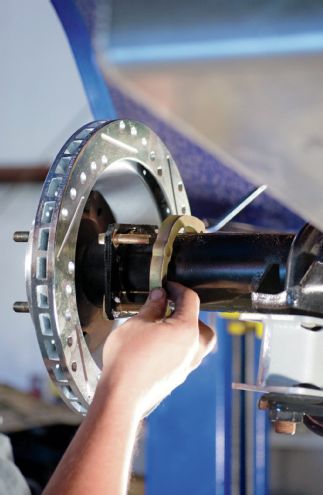
15. Install the two caliper mount studs before mounting the brake rotor. Next slide the caliper mount spacer over the two studs.
16. An assortment of shims is included to center the brake caliper over the brake rotor.
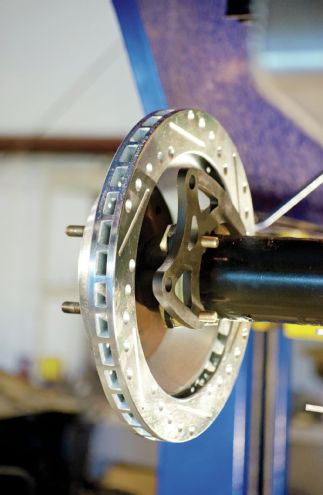
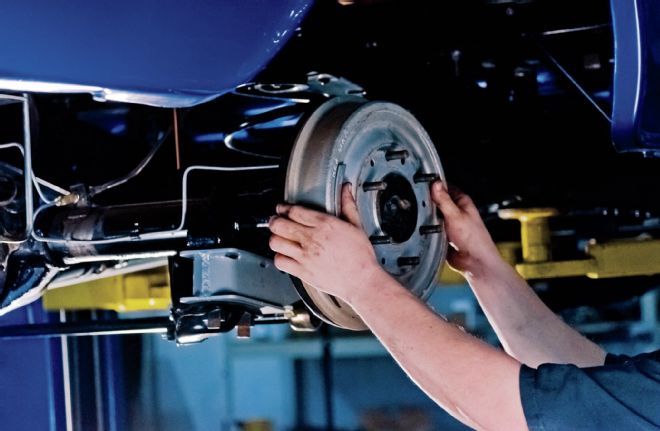
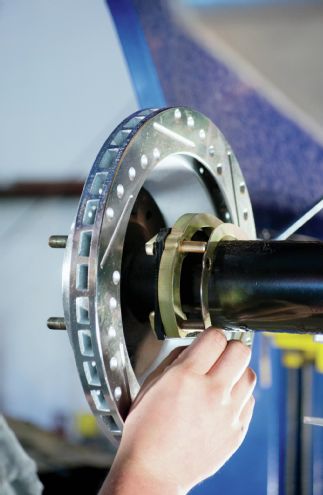
17. Next, slide the caliper mount into place and bolt it up. Make sure the brake caliper is properly centered.
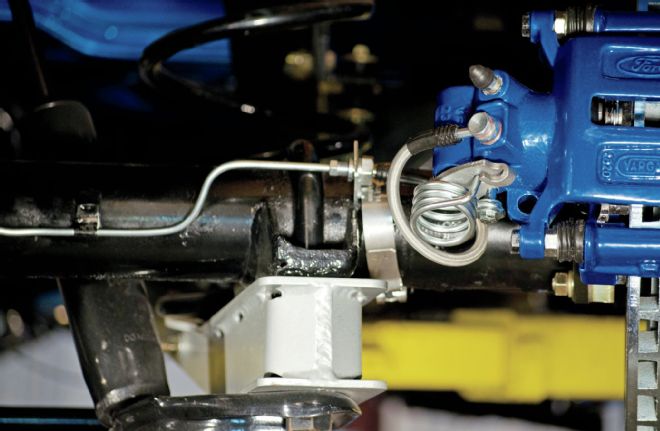
18. Notice two nuts are placed onto the wheel studs to prevent the brake rotor from flopping.
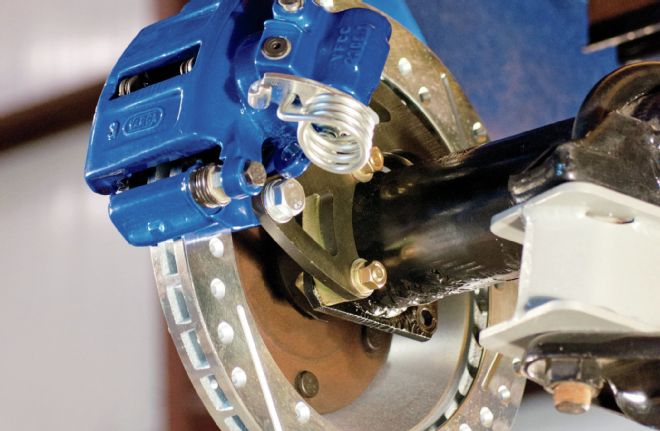
19. Turn the axle to spin the brake rotor to ensure nothing is rubbing. Check to make sure the bridge of the brake caliper does not contact the brake rotor.
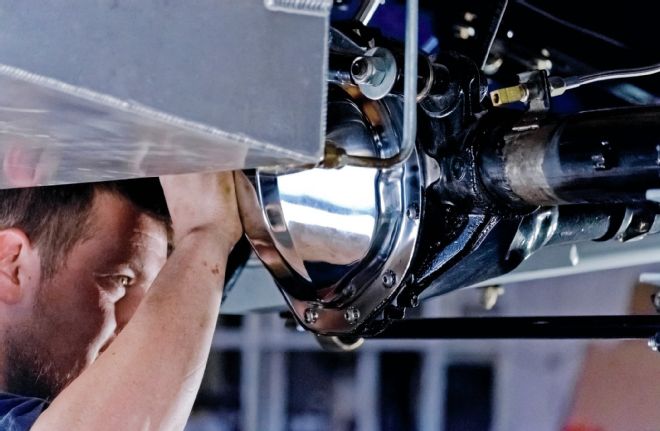
20. Reverse the steps taken to remove the axles to reinstall. Replace the differential housing, cover and refill the rearend with appropriate gear oil.
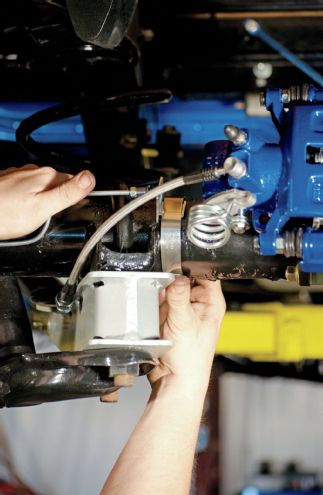
21. Use the stainless steel included clamps to affix the brake line mounting bracket to the differential axle housing. This bracket is where the hard line meets the braided stainless steel flex line (included).
22. CPP advises using a quality brake fluid. This means ensure the brake fluid is at least DOT 3 rated to be used with disc or drum brakes. Even better, DOT 4 has a higher boiling point.
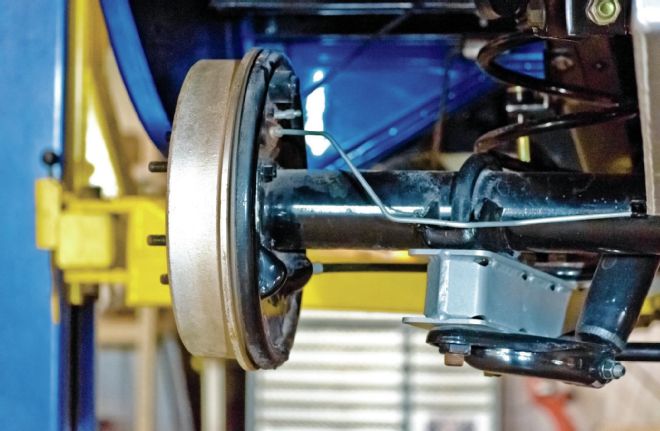
23. Whether CPP tubular or stock pressed tin, the emergency brake cables run along the trailing arms.

24. A dual-master cylinder with a high-capacity reservoir such as CPP's Corvette style is an absolute must with two- or four-wheel disc brakes.