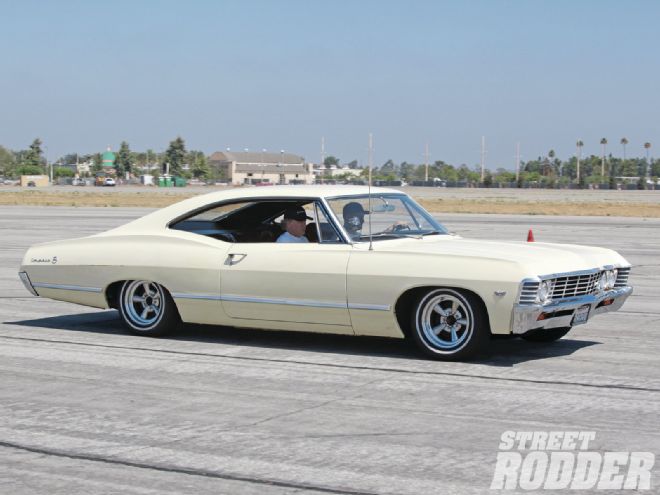
When Jeff Holt bought this 1967 Chevrolet Impala (from a little old lady in Pasadena-no lie!) the car had only 36,000 original miles on it. Having a freeway cruiser like this was a dream for Holt, and he really liked the fact the original paint was still on the car, and didn't mind that it was of the "no power anything" variety.
The only modification he's done to the car is install a Jamco 3-inch suspension drop and a Nitro shock and spring kit, but everything else is still in its original factory location. Powered by a 283 backed to a Powerglide trans, Holt thinks he'll get a 700-R4 for it someday, and maybe add a crazy Watson-style paintjob for the roof, but the only thing that scared him about the car was its brakes.
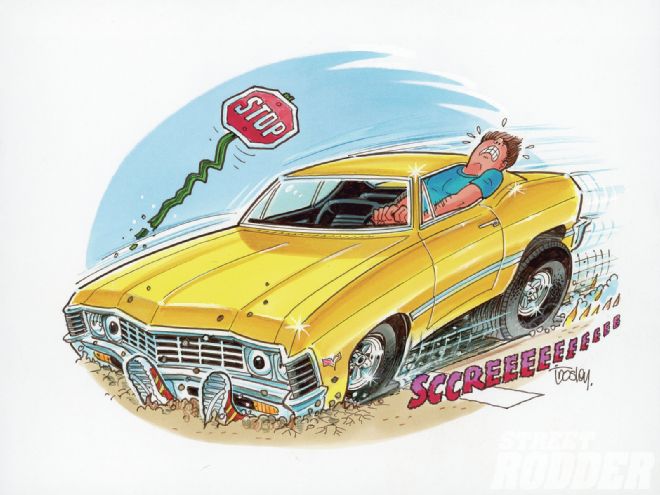
Trying to stop the nearly 18-foot-long, 3,600-pound behemoth while driving with his 5-year-old (Rosie) in the car required both feet on the brake pedal, and that effort would only slow it down. For both safety and peace of mind, Holt decided to upgrade the front drums to disc brakes and add a power booster while he was at it.
As it works out, Classic Performance Products (CPP) in Anaheim, California, has just the stuff he needed. Making everything from performance-based subframe kits to a host of suspension pieces for most any cool car, CPP is well known for their brake systems-from stock replacement parts to large-diameter front and rear disc conversions kits.
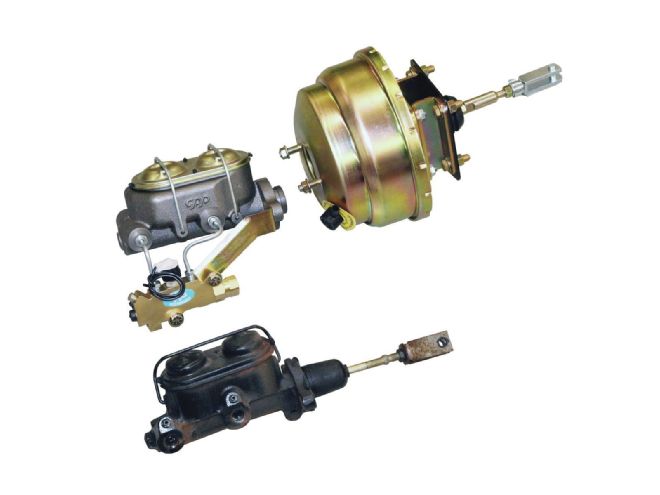
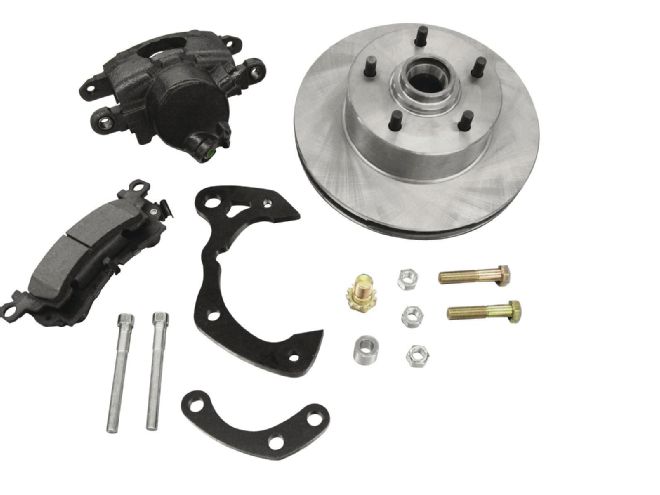
What Holt needed was a drum-to-disc conversion setup and a new brake booster, which he found with CPP's firewall brake booster kit (PN 670BB2) and disc brake kit (PN 6568CBK-S ) that fits '65-70 fullsize Chevys with stock (not dropped) spindles. In certain applications where drum brakes are replaced with disc brakes, some kits will move the wheels outboard by almost an inch, so pay attention to what your fenderwell clearance will be in those instances.
CPP also includes all the necessary items you need to do the job at home, from the little flare nuts to the proportioning valve. We followed along as the work was done-first with converting the drums to discs and then upgrading the master cylinder to a new power booster (which CPP sells in 7-, 8-, and 9-inch diameters).
But before any work was done, the Impala was taken out for testing at the El Toro Field proving grounds by STREET RODDER's crack test team and braking numbers were generated and recorded. After the work was completed we took the car back out to the El Toro Field to see what difference could be determined. Before the disc brakes were added, the car took an average 190.56 feet to stop from 60 mph and, after the CPP disc brakes were added to the front, it took 169.12 feet-just over a 21-foot improvement.
Of course the skinny tires Holt has on his ride now become the weak link and with tires made of a softer compound and a width of 7 or 8 inches he could really affect his car's stopping distance. But for now he's glad his Chevy will stop where he wants it, and he's looking into improving the steering next.
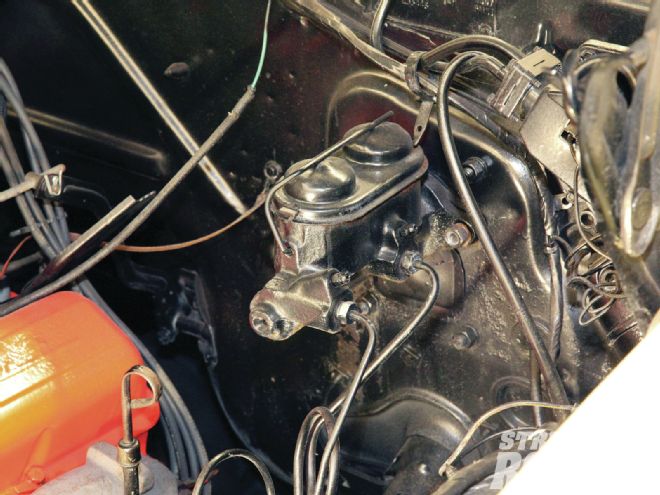
Here’s what we’re dealing with: the stock master cylinder for a ’67 Chevy Impala is in the foreground, and the new master and power booster unit from Classic Performance Products (CPP) is above.
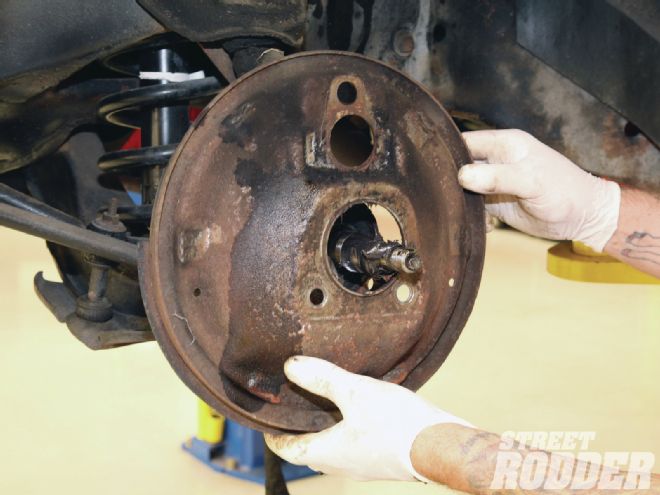
With the dust cap, cotter pin, lock nut, keyed washer, outer bearing, and brake drum removed, we’re ready to start the update.
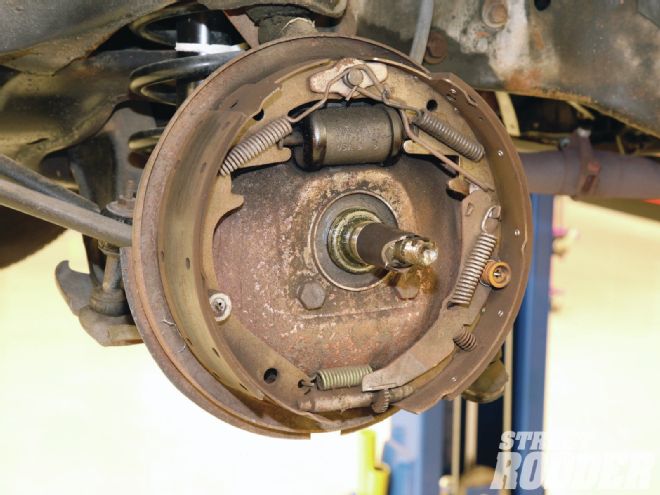
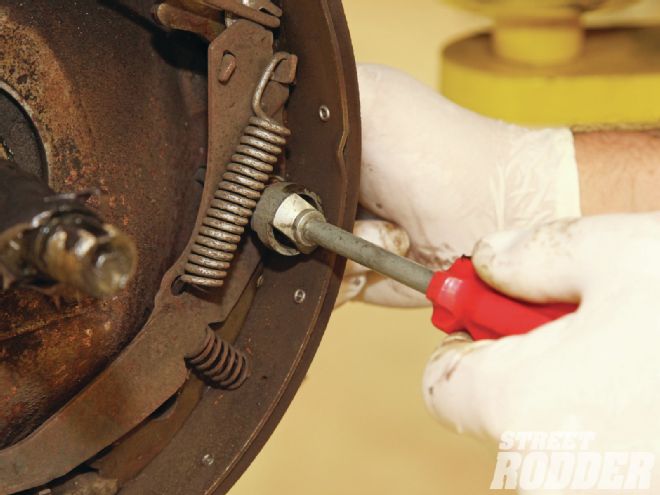
Just about any local parts house will carry the tool that makes releasing Chevy brake shoe springs easier, and they will probably have the hold-down cup removal tool, too. With the springs and cups off, you can then remove the two brake shoes.
With the springs and cups off, you can then remove the two brake shoes.
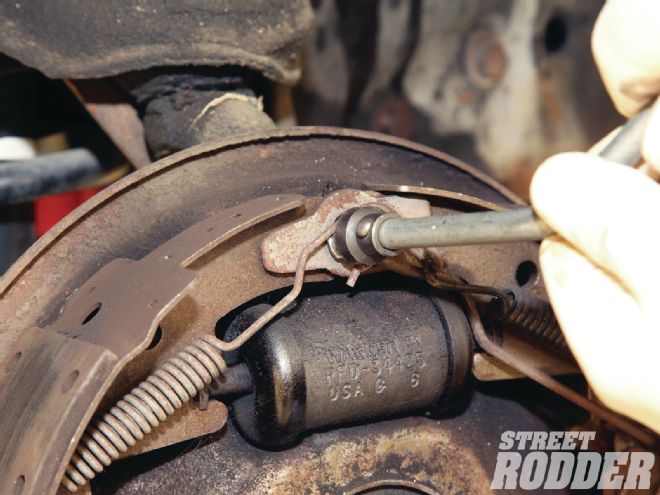
The edge of screwdriver will allow you to pry the folded tab off the nut securing the anchor pin, thus allowing you to then remove the wheel cylinder.
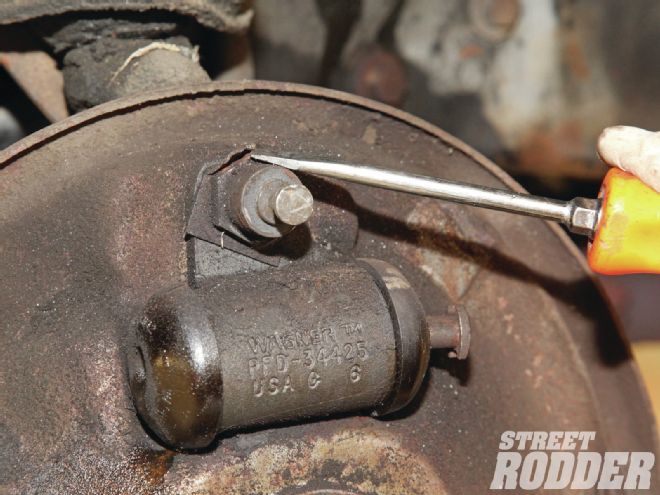
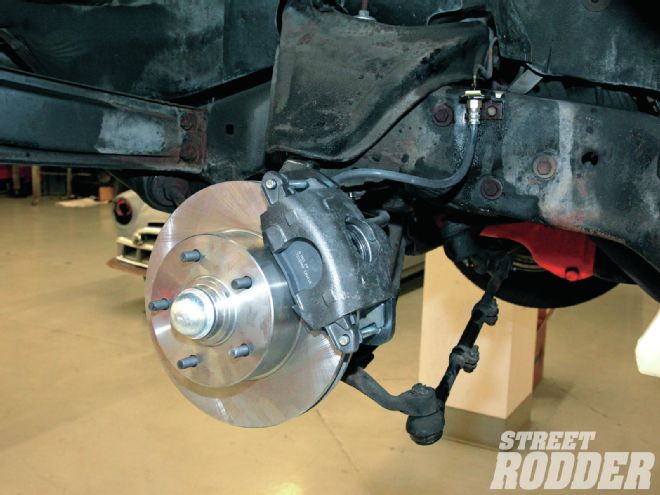
After removing the two remaining hold-down nuts, the backing plate should pop right off. Here are the basic parts for each wheel’s disc brake upgrade: the caliper, two pads, the rotor, a couple of brackets, and the necessary bolts, nuts, and spacers.
Here are the basic parts for each wheel’s disc brake upgrade: the caliper, two pads, the rotor, a couple of brackets, and the necessary bolts, nuts, and spacers.
The caliper bracket is the first item to be attached.
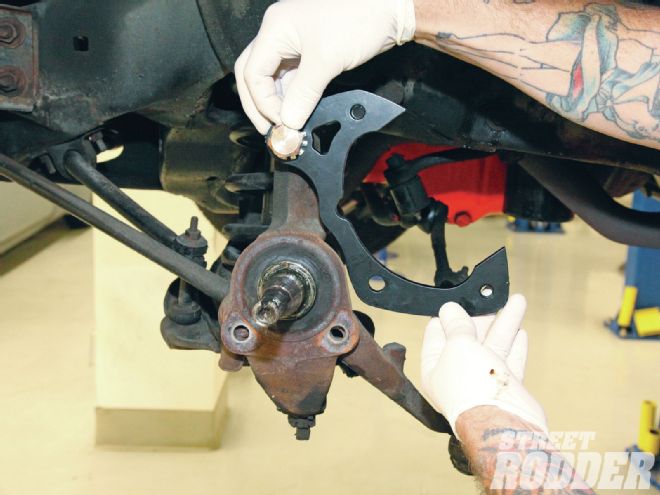
The remaining, smaller bracket is attached to the spindle and is secured to the caliper bracket with a supplied spacer that fits between the two brackets.
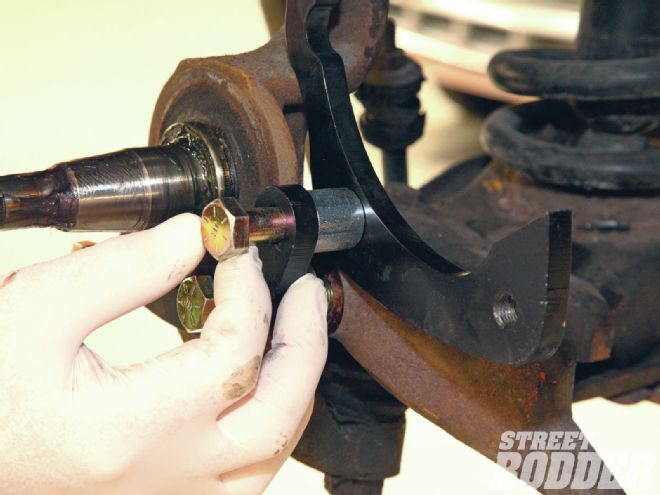
Make sure there is enough threaded area to secure the washer and nut to the backside of the spindle.
After packing the inner bearing with grease, drop it in place and evenly install the seal.
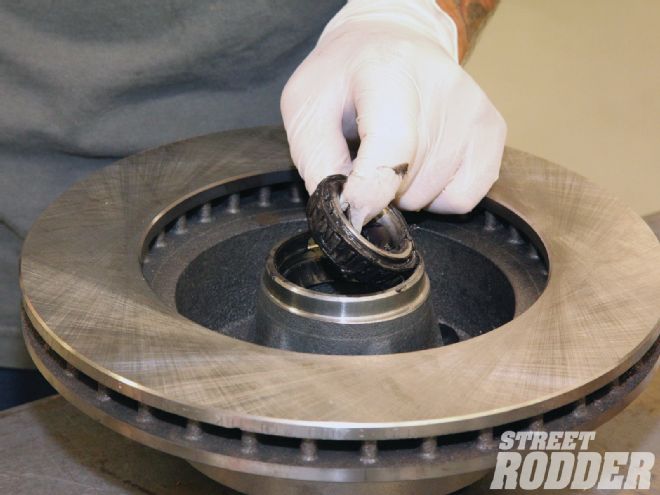
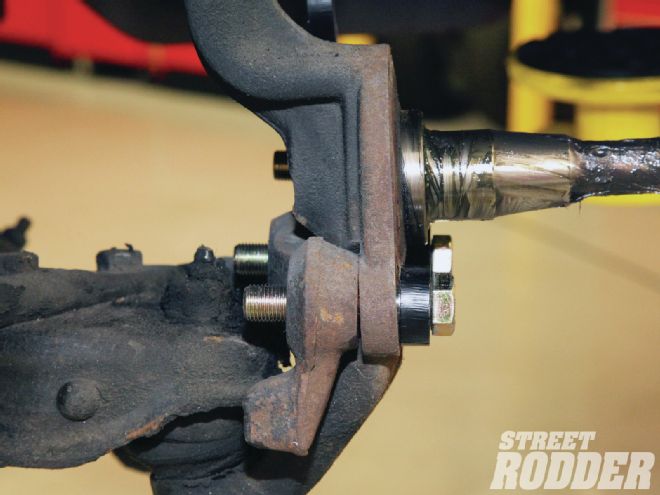
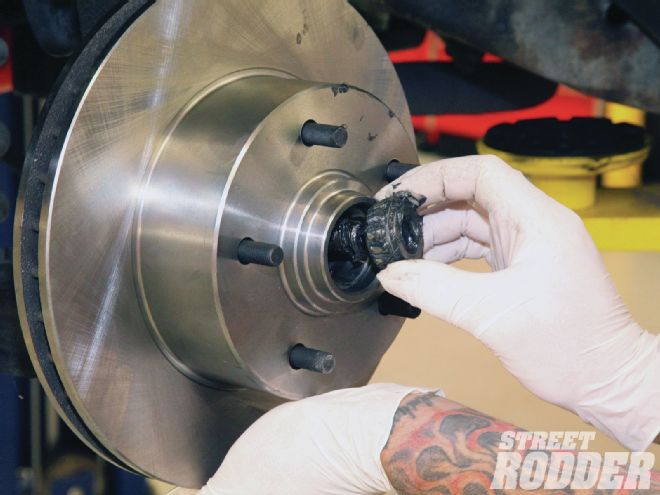
Pop the rotor assembly on the spindle and reattach the bearing, keyed washer, castle nut, cotter pin, and dust cap.
You might need to push the brake piston back into the caliper so you can install the brake pads.
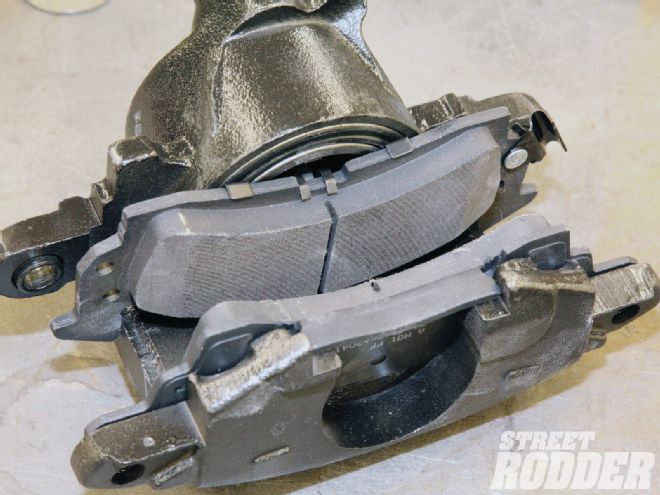
The caliper goes on the bracket and is secured at the top and bottom with two long threaded bolts.

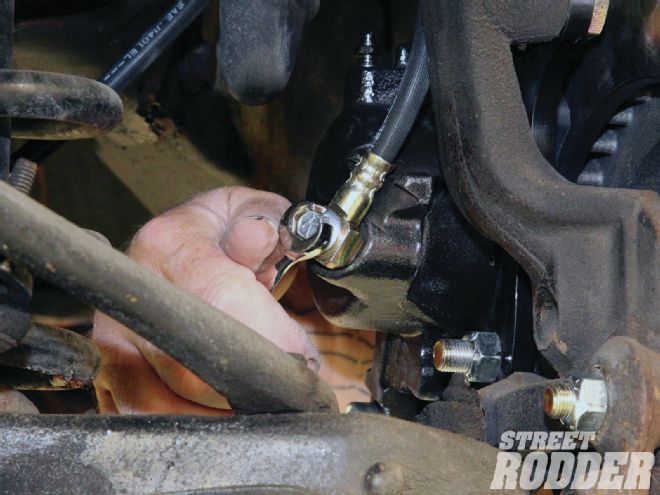
New brake hose lines are also installed, with the banjo end attaching to the caliper.
The driver side is done. Now go do the other side!
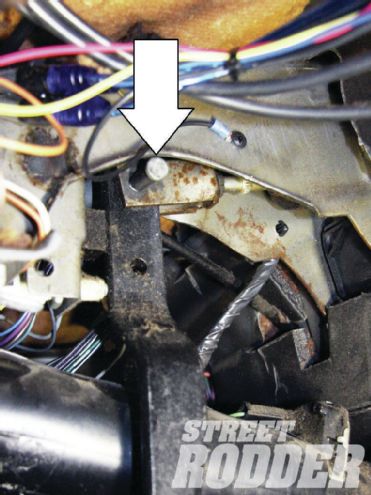
To upgrade the master cylinder, you first have to unclip the plunger from the top of the brake pedal (see arrow).
Disconnect the hard lines leading to the old master cylinder as well as the mounting nuts, and the whole assembly should pull away from the firewall.
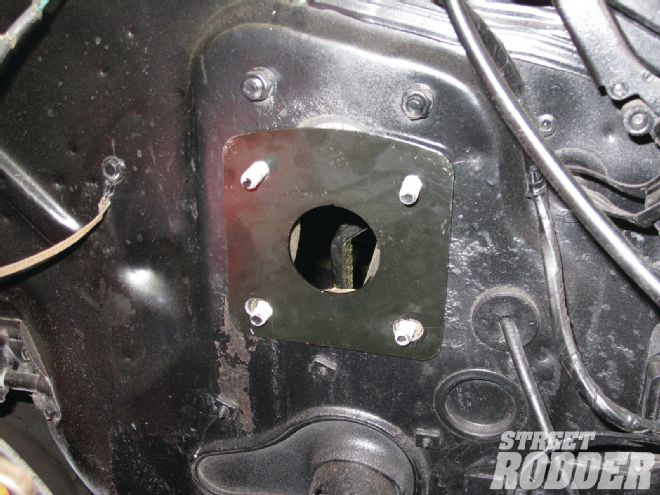
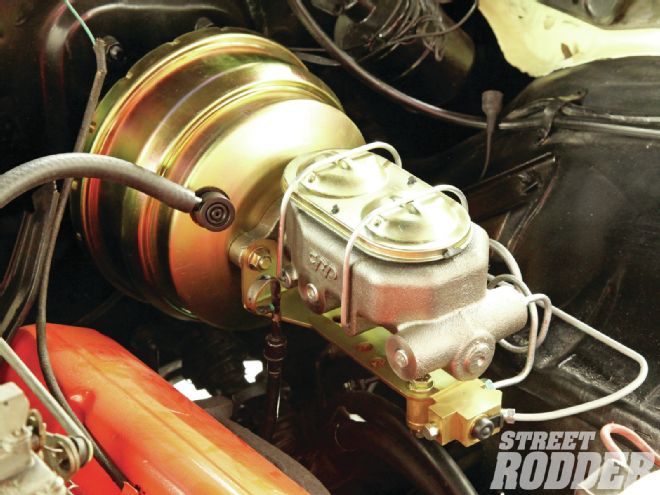
A new mounting plate from CPP was installed, and fits over the four studs that should be sticking out of the firewall.
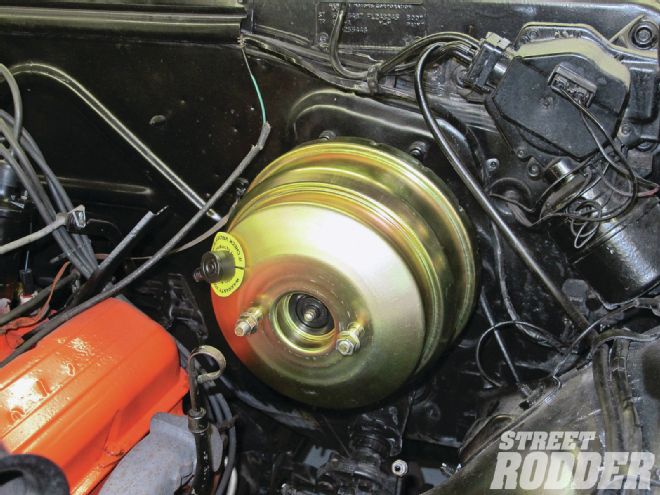
The new CPP power brake booster gets installed.
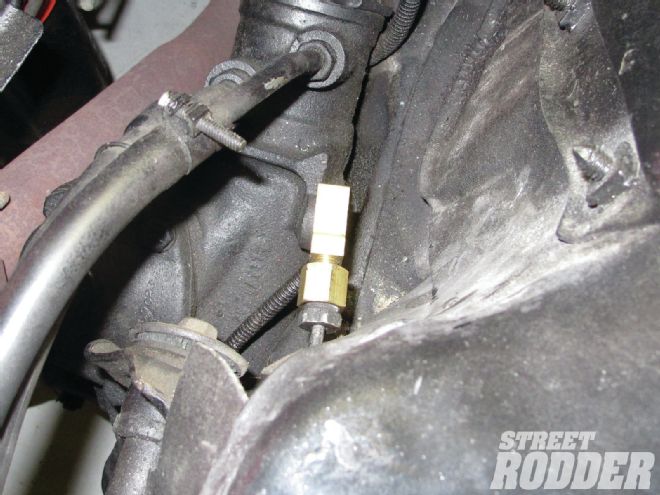
Down near the car’s steering box you can see where the brass T that separates the “out” brake line from the master into a front left and front right brake line.
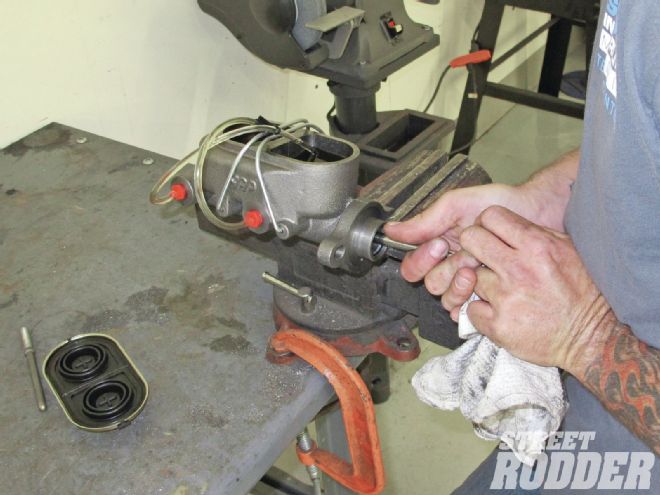
It’s a good idea to bench bleed the master before installing it on the firewall by filling it with brake fluid and hand pumping it to get rid of any internal air pockets.
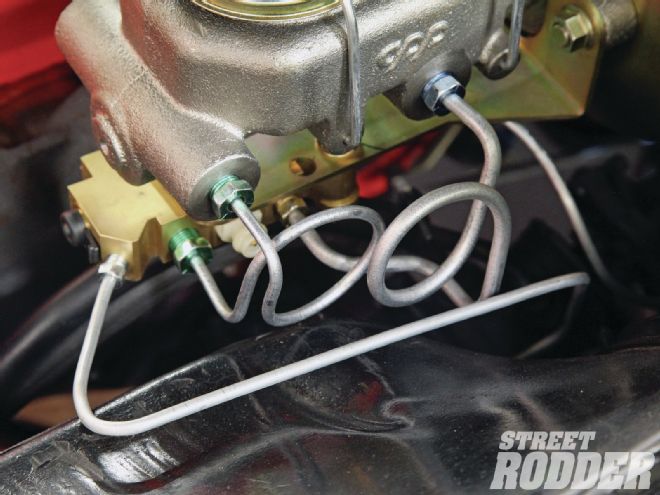
New brake lines were bent into shape and the appropriate loops were added to aid in the system’s flexibility (which helps prevent the hard lines from cracking).
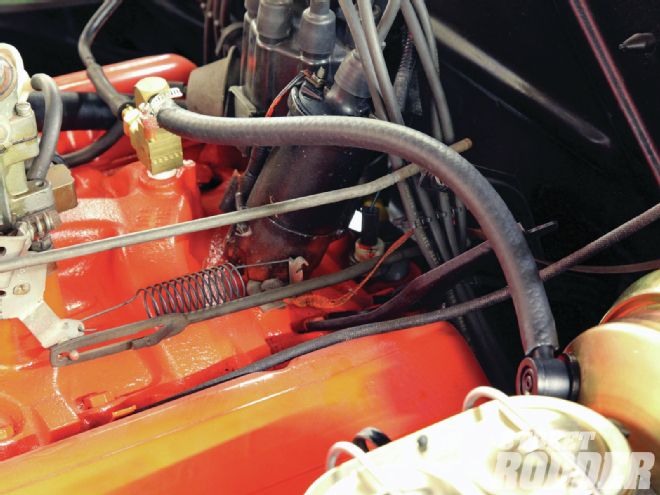
A new vacuum line runs from the booster to the intake manifold.
The new CPP power brake booster and master cylinder in their proper place.
Just by adding the CPP disc brakes and power booster to his ride, Holt’s car was able to come to a stop from 60 mph during testing at an average of 21 feet sooner than with four-way drums.