While it's only been a couple of months since we brought you the huge undertaking that is the floor replacement in Editor Fortier's '47 Chevy, we recently replaced a front floorpan in a friend's mid-'60s Impala. It occurred to us that such rust repair is far more common than replacing an entire floor, and the procedure would be of use to many readers attempting to perform such a repair for the first time. It's an easy "Saturday morning" job, if you know how.
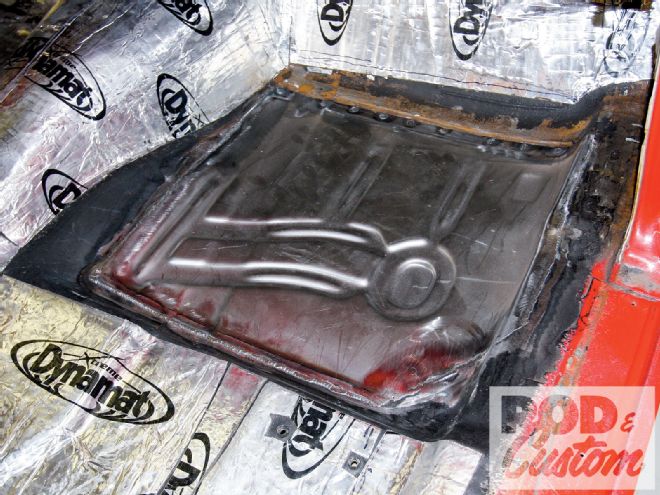
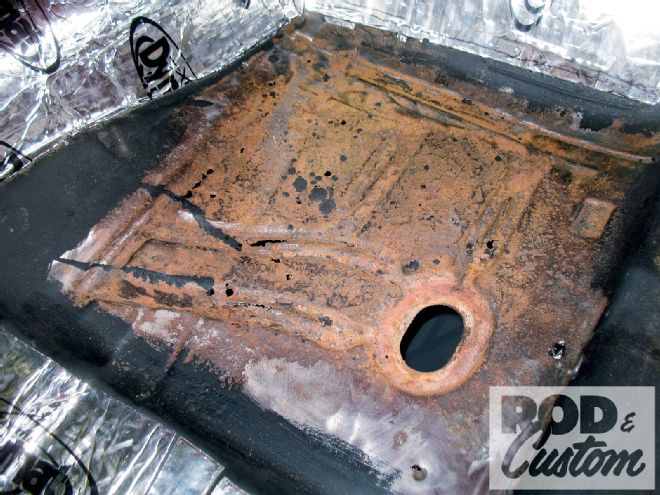
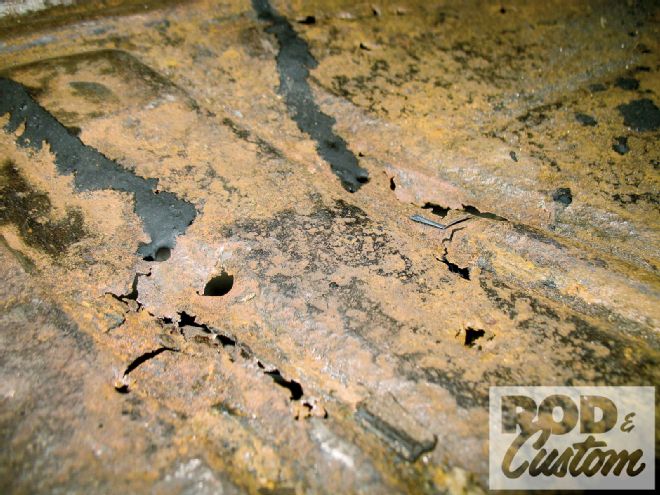 While the picture above right gives some idea of the condition of the passenger side front floor, this close-up really shows what we were dealing with. There's no option here but to replace the sheetmetal if you want to do the job correctly.
Replacement panels are available these days for a huge number of older vehicles, but unless you're a practiced bodyman, it may not occur to you to only use a portion of the new panel, simply fitting the whole piece, and making a lot of unnecessary work for yourself. The front passenger side floor in our subject Impala had rusted through, but only in the middle. (Why only this side, when usually the driver side rusts first? Possibly a leaking heater in the past?). While the patch panel from CARS was a good fit, with all the factory pressings and swage lines faithfully reproduced, there was simply no reason to replace the side of the transmission tunnel or the lower part of the toeboard in this instance.
Given that there's a stock seam across the floor just below the latter, it made sense to trim the new panel to fit as per the original, as well as to trim it to be welded on the flat section of floor rather than get involved in cutting the tunnel. While it was trimmed outside the swage lines for ease of cleanup later, we were able to reduce the amount of welding required quite substantially, retain more of the original floor, and make a neat repair at the same time. Of course it also meant we didn't have to remove any of the Dynamat that the owner had already installed on the majority of the floor, but we'd have trimmed the CARS panel anyway.
Safety First!
Be extremely careful when replacing floor sections in any car, but especially one that is currently being used on the road. Check the location of fuel and brake lines, and move them as far away as possible from the repair area. It's very easy to weld to a fuel line and ignite the entire vehicle. Don't ask me how I know! Never rely on others to tell you where the lines are; check for yourself. Check the condition of the lines too, for leaks, in which case they should be replaced anyway, and cover them with fire-retardant blankets (or aluminum sheeting, as weld spatter won't stick to this) during cutting and welding.

Keep a fire extinguisher on hand too, as it's easy to ignite the oil and grease that is often present on the underside of the floor on older vehicles. We're not trying to scare you, just warn you of the dangers of this type of work!
We should also mention that the interior and inside of the windshield should be protected against weld spatter or sparks, again using a fire retardant blanket (available from Harbor Freight) or even cardboard taped to the glass.