
When we left off last month, we were in the thick of things regarding the Fatman frame stub install on our '56 Ford Courier. The stock frame section forward of the firewall was hacked off and we had all our preliminary measurements marked on the shop floor. This month, we're going to keep moving forward, installing the new frame stub and suspension components to finish up the front end and get the car back on solid ground.
At this point, it's going to be painfully obvious if all the measurements we took last time were accurate enough to install the new frame stub with a maximum deflection of 1/8 inch at any given point. That's kind of an industry standard when it comes to building chassis, suspension components, etc., as that little bit of difference can typically be made up in alignment adjustments. But just to be on the safe side, I like to get within 1/16 inch whenever possible so that's what we'll be shooting for as we mock up the Fatman frame stub before tacking it into place.
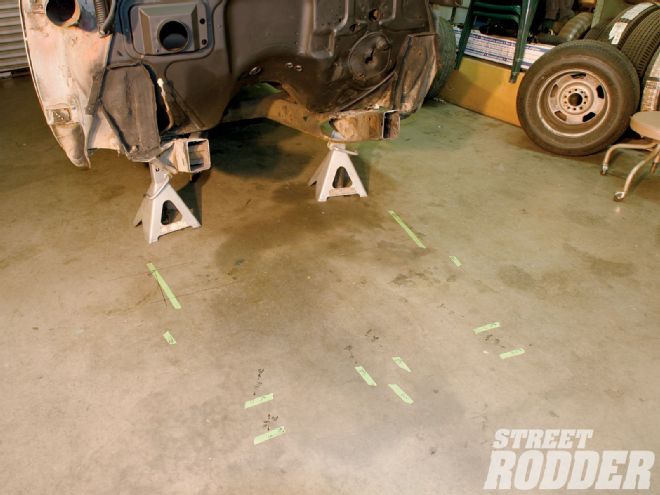 Here's where we left off last month, with the stock front frame section removed and all our measurements on the shop floor. It should be noted that since then the car hasn't moved (OK, it hasn't been a month, simply overnight in the photos!) the chassis is still level side to side and front to back.
This kind of chassis modification is not for the weak hearted nor is it for the amateur hobbyist, but never fear, all it takes is a good welder (man and machine) and a lot of patience and careful measurements. And remember what your old shop teacher taught you and "measure twice, cut once".
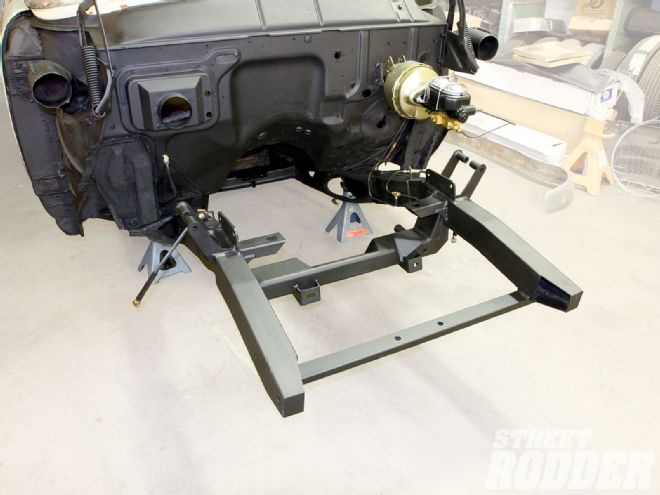
Once the frame stub is tacked, it's simply a matter of bolting on the suspension components, checking the assembly one last time for fitment (axle centerlines, core support, etc.), and welding the puppy up. Fatman provides all that's necessary to weld up the stub with plenty of support, but as you'll see, we decided to take it one step further just to be safe. I'm by no means a certified welder in any regards but I've welded up my share of chassis components, engine mounts, etc., and never had anything break, but I still like to go that extra step to ensure nothing comes apart when it comes to chassis and suspension components. Call it overkill; but I like to call it peace of mind.
Once the front suspension was bolted up, we then set our attention to the rear of the wagon. When we originally picked up the Courier, it already had a few upgrades made to the stock components, one of them being the installation of a Ford 8-inch rearend. Unsure of the state of the rear, we ran the ID tag on the differential cover and found it to be from a mid-'70s Maverick. Since we're not setting out to race the car, we figured the rear would be more than strong enough to handle the 302 Ford motor we planned on dropping in the Courier. A rebuild however, would be a good idea and for that end, we opted to make a trek down to Currie Enterprises in Anaheim, California, and have the boys go through the axle before we installed it back in the wagon on new Eaton springs and QA1 shocks. Currie installed a 3.55 ring-and-pinion as well as a 28-spline TSD (torque sensing differential) limited-slip differential, new 10-inch drum brakes, bearings, and seals before a set of Rocket Racing Fuel Gray wheels shod in 215/70R15 Coker Redline Tires were bolted up at all four corners.
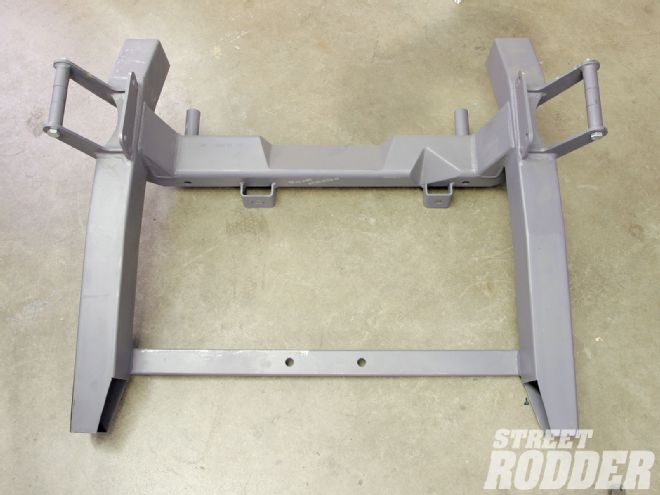 The frame stub as it comes from Fatman for our application is set up to accept Mustang II rack-and-pinion steering and coilover shocks. Note that the crossmember is notched for oil pan clearance.
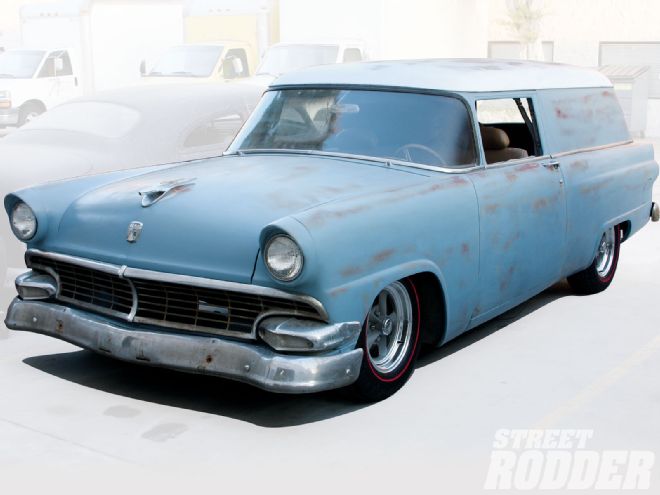
Last but not least, we decided that the old '70s brown and off-white paint scheme had to go, replacing it with a slightly weathered blue and white two-tone job similar to the stock paint scheme. Once back on the ground with its new stance and wheel/tire combo, it became obvious that the wagon project was really starting to hit its stride as it was sitting right and the color was once again tolerable. Now all we gotta do is get it to move under its own power, but that's a job for another month.