Since this is Car Craft, where do-it-yourself rules, we just know you secretly harbor an intense desire to get familiar with the basics of alignment and at least know what all those obscure terms mean. This will be especially important the next time you're stranded on a lost Pacific island and the cannibals offer to crown you king if you can dial in the right caster and camber on their Pro Bamboo car. More realistically, what if you want to test your car at the dragstrip after a suspension rebuild, but the alignment shop can only fit you in a week from Wednesday? Just do it yourself and you'll know it's right. We'll cover the basics and get into how to set your own alignment at home with a few simple tools that any good car crafter should have in his toolbox. Even if you don't intend on becoming the neighborhood chassis specialist, at least you can talk intelligently when the bench racing turns to camber and caster. You might actually find this stuff fascinating-we do...
Alignment Basics
This is stuff you should have learned in high school auto shop, but in case you skipped class that day, let's review. Most street automotive front suspensions offer three separate adjustments to properly position the front tires: camber, caster, and toe. Camber is easy to visualize. Face the front of your car and look at the front tires. If the tops of the tires are tilted inward, it is called negative camber. Conversely, if the tops of the tires are tilted outward, that's positive camber. This is a serious tire-wear angle that has a huge impact on vehicle handling in a corner with minimal effect on straight-line driving.
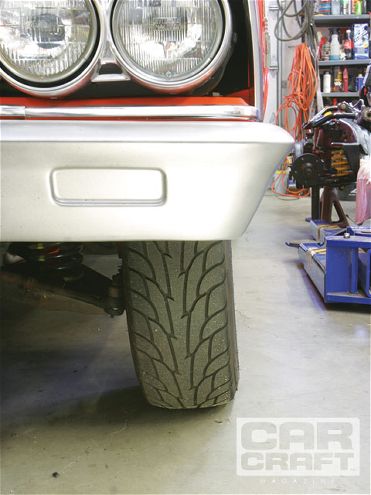 Camber is most easily seen from the front of the car looking directly at the front tires. If the top of the tire tilts inward, as in this photo, that's negative camber. If the top is tilted outward, that's positive camber.
Caster is a little less obvious. If you look at a bicycle from the side, the top of the spindle is angled rearward toward the rider. This is an extreme example of positive caster that creates high-speed stability-the effect that allows the rider to let go of the handlebars while the bike tracks straight. Positive caster creates an aligning torque by positioning a portion of vehicle weight behind the tire, which helps position the tire straight ahead. It is this same torque that requires more effort to turn the wheel. The opposite situation is negative caster, where the top of the spindle is tilted forward past its vertical centerline. This creates a grocery cart-like situation, where the wheel centerline is behind the spindle centerline. Negative caster reduces steering effort because the weight moves forward of the spindle vertical center but also detracts from high-speed stability. Virtually all vehicles employ positive caster, but excessive amounts can lead to camber problems, since these two angles directly affect each other.
Toe is perhaps the easiest to understand. Look down at your feet and point your toes inward with your heels angled outward. It's not surprising that this is called toe-in. Substitute front tires for your feet and the effect is the same. The opposite, toe-out, is where the leading edges of the front tires are angled outward. Both of these situations are significant tire-wearing angles, so setting toe is critical to handling and tire life. Toe-out is the worse of the two angles, since a car with excessive toe-out will have skittish steering, often darting to either side of the road very easily. The usual spec is slight toe-in to compensate for angular pressure that forces each tire outward as the car rolls down the road.
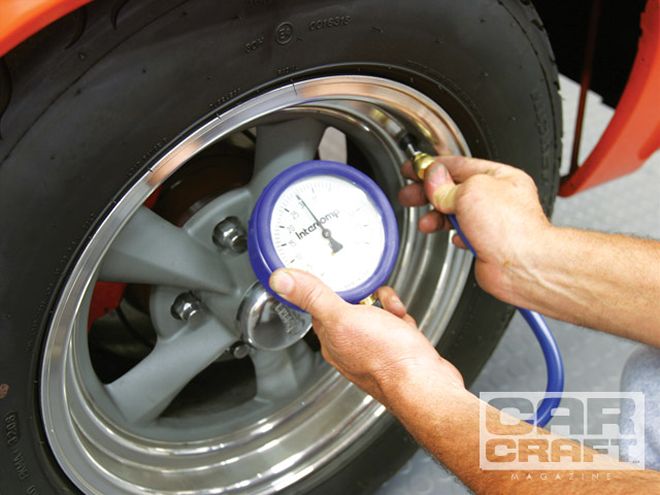 After establishing ride height and placing driver weight in the car, check the tire pressure. This slick, 60-psi, analog gauge from Intercomp is much more accurate than those cheap pencil gauges we used to use. We also took the time to convert our old, rusty lug nuts to a set of McGard tapered-seat lug nuts.
What Tools Will You Need?
Like any other job, the better the tools, the more accurate the result. We've experimented in the past with digital angle finders, which work very well but require math to calculate caster angle. Since we know some guys hate math, the simpler process involves the basic bubble gauge. This technology has been around almost as long as the automobile, and if you pay attention, you can do a great alignment with almost any bubble gauge. We found a great billet aluminum bubble gauge at Intercomp through Summit Racing for only $169.95, which sounded reasonable. If you are lucky enough to own several cars, you could easily recoup the typical $50.00 alignment charge in only three jobs. Plus, you'll have another bitchin' tool to upgrade your toolbox. That alone is worth the price of admission.
There are plenty of sources that claim you need a set of turn plates to do an alignment correctly, but while handy, they are not essential. Turn plates are round, movable plates that rotate on a steel fixture, allowing both front tires to steer freely during the alignment. This allows you to perform the 20-degree turn-in and turn-out for measuring caster. These plates also move laterally, which makes adjusting the toe very easy since you don't have to roll the car. We found a set of used turn plates at the swap meet for $30.00, which is a super price because new ones can cost $600.00 or more. We also used a set of aluminum toe plates from Intercomp to measure toe. Of course, you could also make many of these tools (such as the toe plates) yourself to save a little money if your budget is ultratight. If you can only afford one tool, go with the bubble gauge.
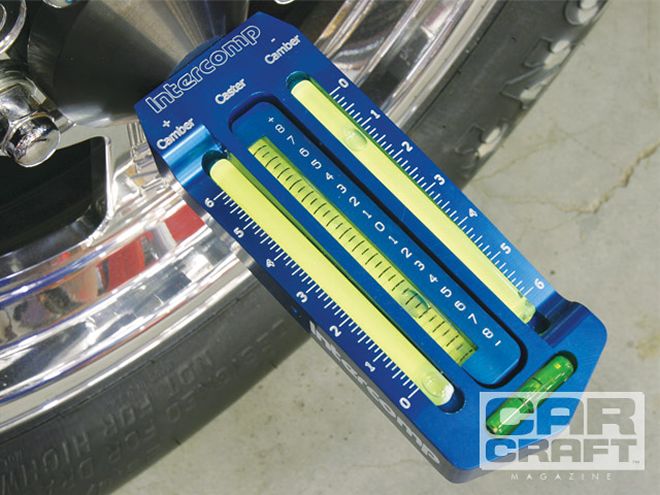 Reading camber is really easy. Just place the bubble on the brake hub, level the gauge, and read the camber on either the positive or negative scales. Only one scale of the two will be active, in this case negative camber. The bubble indicates 3/4 degree of negative camber.
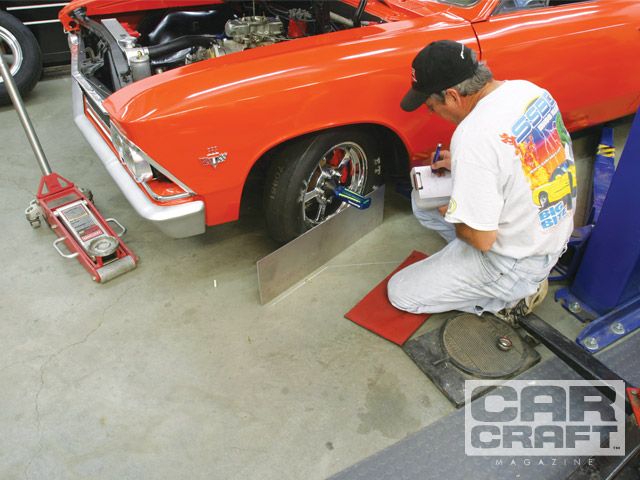
The first step to a quality alignment is to establish the car's ride height. If you've just finished a front suspension upgrade with new springs, for example, the ride height will change once the springs settle. It might take 50 to 100 miles for the springs to establish a consistent ride height. Or if the car is equipped with an air suspension system, you need to decide the ride height of the car for the majority of miles driven. Anytime the ride height changes, camber, caster, and toe will also vary. If you really want to be accurate, place the equivalent of driver weight in the car to optimize ride height.
Once the ride height is set, the next step is to check the camber setting. Most bubble gauges are equipped with a magnetic adapter that allows you to place the gauge on the brake hub. Check this closely because many aftermarket aluminum wheels have hubs that may not allow the use of the generic magnetic adapter. Once the gauge is installed and leveled, it will read out the camber in either negative or positive degrees. Let's say the gauge reads 1/2 degree positive camber. A good muscle car starting point is 1/2 degree negative. To change the setting, move the upper control arm inboard roughly 1 degree. Cars equipped with an upper control arm are generally mounted with a cross-shaft. Inserting an equal number of shims between the framerail and the cross-shaft on both mounting bolts moves the upper control arm inboard on both studs and creates the necessary negative camber. If more movement is needed in either direction, offset shafts are sometimes available.
 The final adjustment is toe. Again, the car must be at ride height. We used toe plates and two tape measures to compare the distance between the trailing edge and the leading edge of the front tires. We discovered a significant amount of toe-out in our El Camino, which explained the car's tendency to wander.
Once you've established the camber, caster is the next angle to check. With the bubble gauge installed on the hub, turn the tire inboard 20 degrees and level the gauge. Using the center caster adjustment knob underneath the gauge, zero the caster reading. Now turn the tire 20 degrees out and the gauge will read the amount of positive or negative caster. A safe starting point for caster is 2 to 3 degrees of positive caster. Positive caster is achieved by either adding shims to the rear bolt or removing shims from the front attachment point for the upper control arm. This will probably affect camber, so you will want to check it again after modifying the caster. On early Mustangs, for example, Ford employed a strut rod attached to the lower control arm that can be moved either in or out to adjust the caster. Shortening the rod (moving the lower control arm forward) increases positive caster by moving the bottom of the spindle forward.
An interesting point is that the 20-degree turn-in and turn-out figure is not critical. The 20-degree figure is popular because the more degrees the wheel moves, the more accurate the measurement. What is important is moving the tire the same number of degrees in and out.
Once you have set the camber and caster, you can adjust the toe. When we did our first home alignment, this was where we screwed up. We learned that every time you adjust the toe (without turn plates), you must push the car backward and then forward roughly 10 feet. This loads the front tires to produce the most accurate readings. Toe is always set last because adjusting camber or caster moves the control arms, and that changes the toe. Most domestic cars use left- and righthand threads with a threaded sleeve and locking nuts to prevent the adjustment from changing. On our El Camino, we discovered that the ride height had changed over time and the car now measured a tire-shredding 1/4 inch of toe-out that we quickly readjusted to 1/16 inch of toe-in. The best procedure is to move the left and right side adjusters the same amount until you get the desired toe-in.
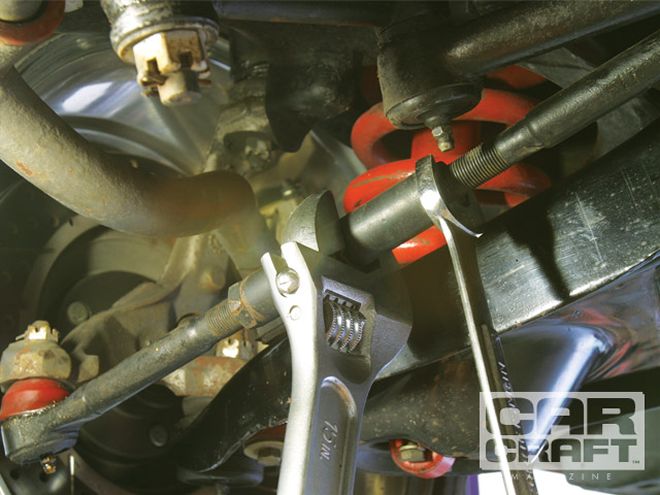 Our El Camino is equipped with heavy-duty Global West tie rod sleeves that have a nice hex, which allows for easy adjustment. We turned both sleeves roughly 1/2 turn to eliminate the toe-out. After adjusting the toe, always push the car backward and then forward about 10 feet to simulate load. This is only necessary when not using turn plates.
After adjusting all three settings, take the car out for a leisurely testdrive and pay attention to how it reacts to different pavement and driving situations. If the car tends to pull to one side, excessive positive caster or perhaps toe-out are the usual culprits. If the car still pulls with accurate alignments, try switching tires side to side to eliminate a bad tire as a possible cause. Once you've done your first alignment, you'll realize how easy it is and that you've now climbed another rung on the gearhead master mechanic's ladder.
Front-End Alignment Specs
Since this story is not aimed at a specific vehicle, we'll fling you a set of generic alignment specs that will work for most '60s street-driven vehicles. We've also included typical specs for a single-purpose drag car. Keep in mind that you should align a typical drag race car with the front end raised approximately 1 inch to simulate the way the car will run down the track. A 2-inch front-end rise changed the camber by almost 2 degrees on our Chevelle, which would also affect the toe and can cause tire scrub. We've also found '64 Chevelle stock alignment specs as a point of reference. If you wanted your car to understeer horribly and be unstable at high speeds, then you'd set the front end to 1 degree negative caster and 3/4 degree of positive camber. Ugh!