Our 1999 GT project has a ProCharger shoving more air into it than it could ever ingest on its own, but that doesn’t mean there isn’t more room to make our engine a better air pump. All that atmosphere being forced into an inefficient intake will limit the engine’s power potential almost as much as poor head design. Unfortunately, the intake on 4.6 Two-Valve engines falls into the category of “not optimized for high horsepower.”
That’s because it was designed for providing a good power curve for the modest stock output of the 2V, and while it flows well enough to support impressive power with boost, the intake will always be an impediment to the engine’s overall potential. The guys over at Trick Flow know this; after all, they are the ones who brought us the Twisted Wedge Track Heat heads that cure all of the ills of the stock 2V heads. Thankfully they didn’t stop there; they added complementary intakes to their 4.6L repertoire.
Trick Flow took the same route designing the two 2V intakes as they did with the heads: a clean slate. While the Streetburner and Track Heat intakes will bolt right up to the 2V heads (or Trick Flow, of course), pretty much nothing else carries over from the original design. Since it was designed to work well on engines with an operating range of 2,500 to 7,000 rpm, the StreetBurner is ideal for street cars and moderate track cars, making it perfect for our project. The StreetBurner has a small cross-section with 13.300-inch runners, factory PI (Performance Improvement) 1.700x2.000-inch port size at the head, and 1.750x1.750-inch port size at plenum. What that translates to is more air moving more freely through the intake and into the heads. If more power at higher rpm is what you need, the Track Heat intake specs are similar, but it features 11.000-inch runners and a different, larger-diameter upper inlet that shifts the intake’s operating range up into the 3,500-8,000 rpm range.
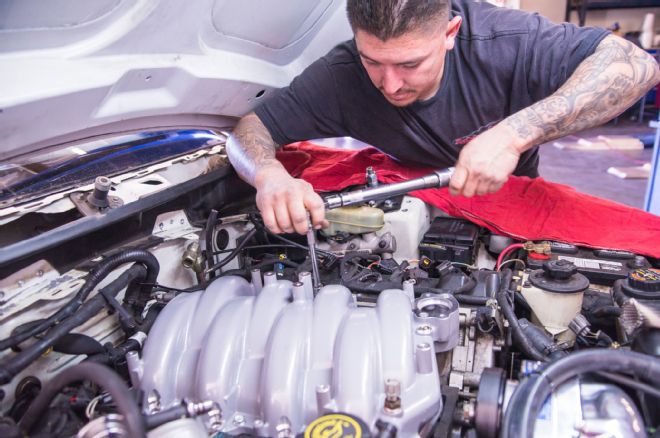
While there are more exotic options, Trick Flow’s two intakes for the 2V hit that perfect balance of power supporting capability, affordability, and ease of installation. They may be a radical departure on the inside, but either one will fit under the stock hood and won’t require any large changes, which is exactly what we wanted for this project. Plus, the Streetburner has EGR provisions, so the stock emission system stays in place. A 2V intake swap is a fairly simple one-day, swap-in-the-garage project, but we once again turned to the experts at Addiction Motorsports to handle the task for us since this is a swap they were very familiar with and could handle in short order.
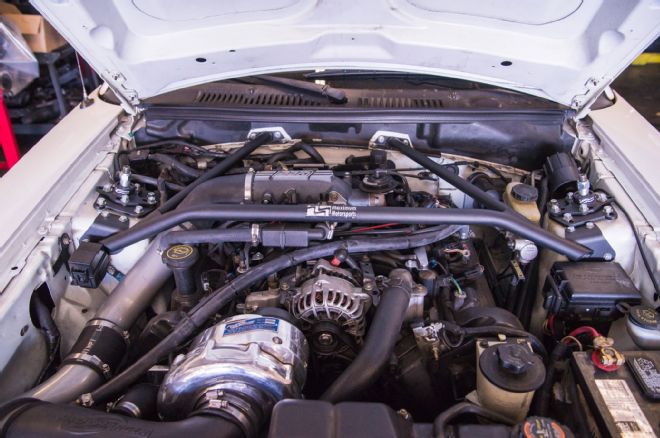
1. Our 1999 GT is looking good under the hood, packing a complete ProCharger system, but even with the advantage of our BBK intake elbow, we know that the restrictive stock intake is holding back what our engine can do.
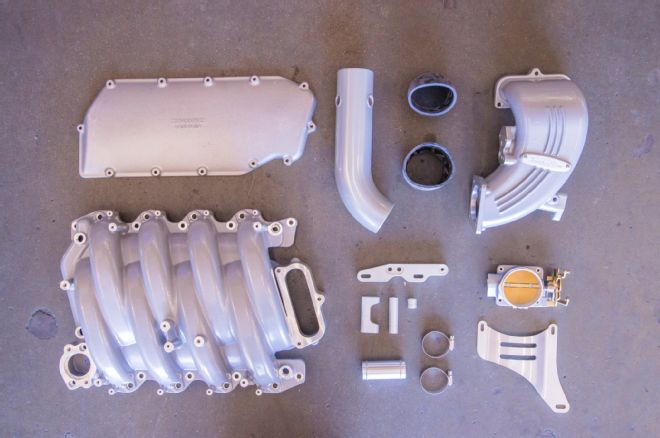
2. Here’s the StreetBurner intake package from Trick Flow. It’s easy to see here that this intake is a clean-slate design that shares very little with the stocker. From the runners to the inlet elbow, Trick Flow did little more than make sure it would meet the ports on the heads and fit under the stock hood; everything else was open for performance gains.
3. To start, the inlet for our ProCharger has to be removed. Of course the process is a bit different for a stock induction car, but the idea is the same: Remove the air inlet.
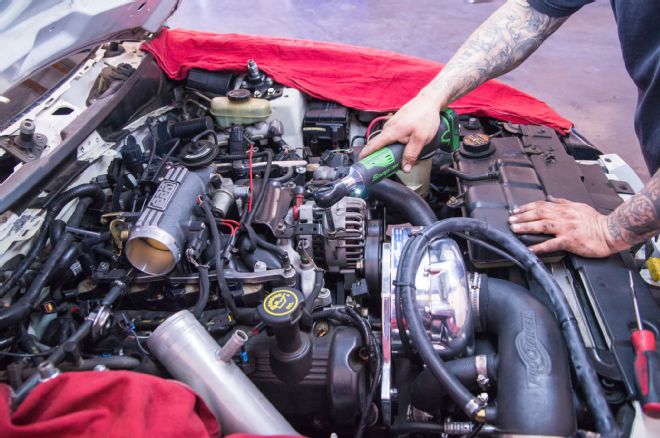
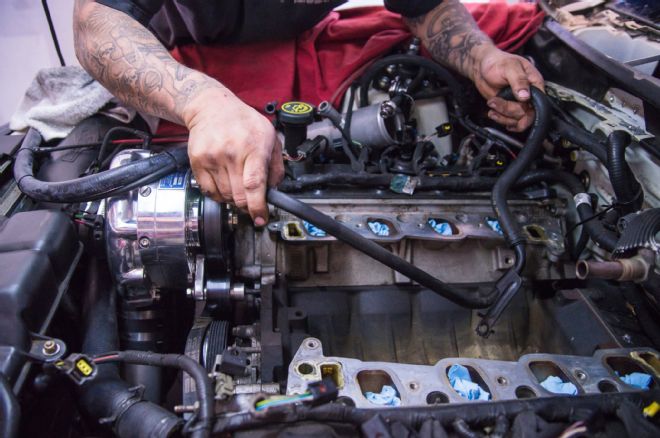
4. The top bracket for the alternator is next to come off. We won’t be reusing this part since the redesigned StreetBurner needs a different style bracket.

5. The StreetBurner reuses the factory EGR valve, so unbolt this from the intake elbow and set it aside for now.

6. Once the torx screws are loosened, the intake elbow should remove easily from the lower intake.
7. After carefully removing the clips from the engine harness, and the single retaining bolt on each, pop out all eight coil-on-plugs.
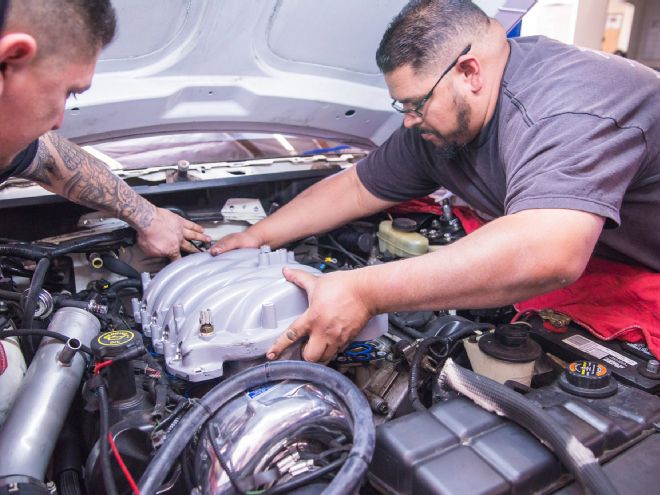
8. The rest of the intake assembly can come out together, so once the intake-to-head bolts are removed and the alternator moved out of the way, the intake is ready to part with the 4.6L.
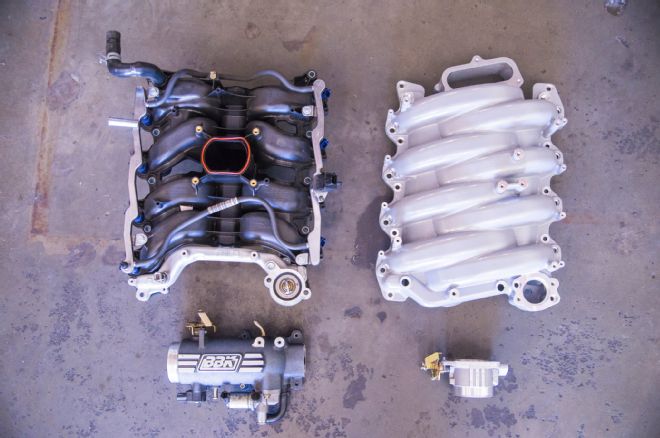
9. Here’s the stock non-PI intake next to the Trick Flow StreetBurner. Other than bolt pattern, they really share nothing in architecture. Note the most obvious revisions: The air inlet is moved to the rear of the intake rather than the middle.
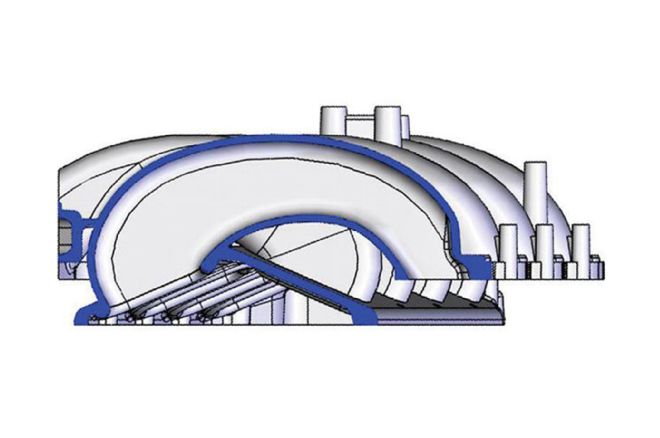
10. Here’s a cross-section look at those long runners and smooth transitions that Trick Flow developed to increase horsepower and torque across the entire operating range over stock.
11. We have to do some modifications to the cooling and emissions systems to replumb them, plus make room for the intake. Luckily Trick Flow is detailed on this in the instructions and provides all the necessary bits so you won’t be running to the hardware store.
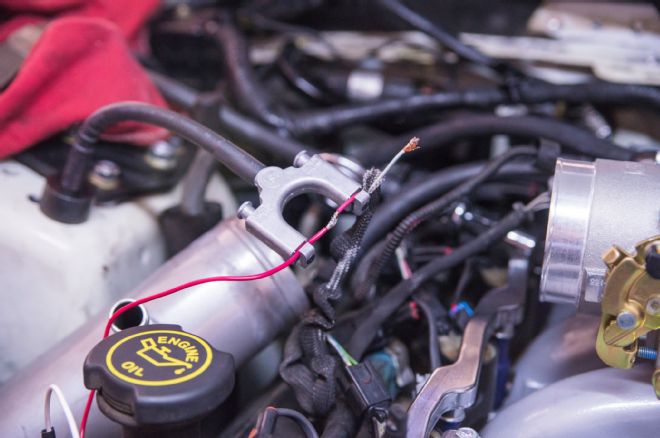
12. The OE coolant tube gets removed from the back of the water pump and from the heater core; a new trim-to-fit coolant hose will be used instead.
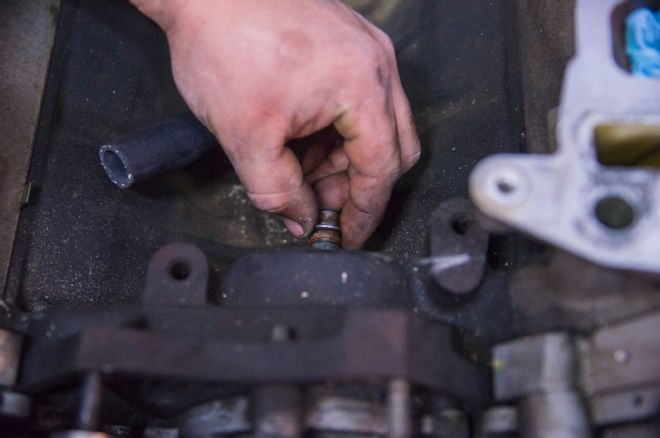
13. These hose barb clips are slipped into the grooves on the nipple on the back of the water pump and on the heater core to help ensure a leak-free seal. (Note: This is critical since this one is under the intake.)
14. Make sure to slide the hose as far as possible onto the nipple before clamping it down. A leak here means pulling the intake again.
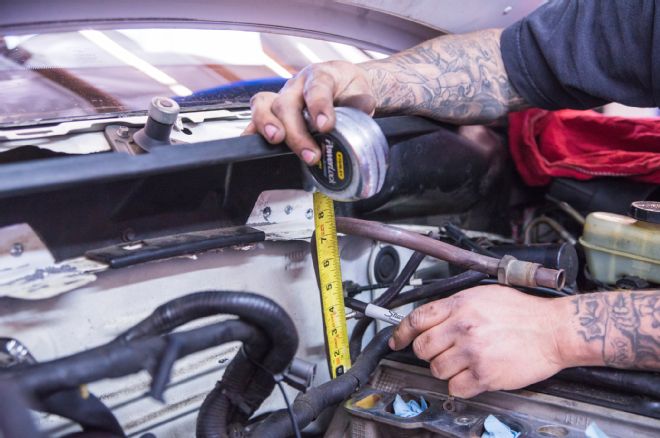
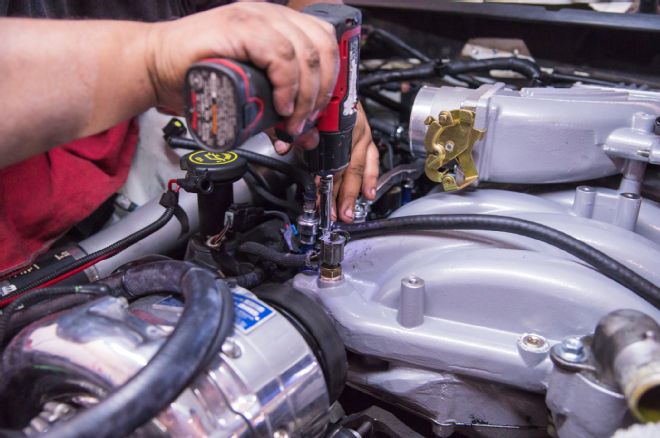
15. The next challenge is the EGR tube. First we have to carefully bend the tube toward the driver side so that the vertical portion of the tube is aligned with the top bolt boss on the cylinder head. Then we measure up 4 1/4 inches above the intake face and make a mark to cut.
16. If you don’t have a tubing cutter in your arsenal, make sure to pick one up before attempting this. The cut needs to stay clean and the tube round and free of debris.
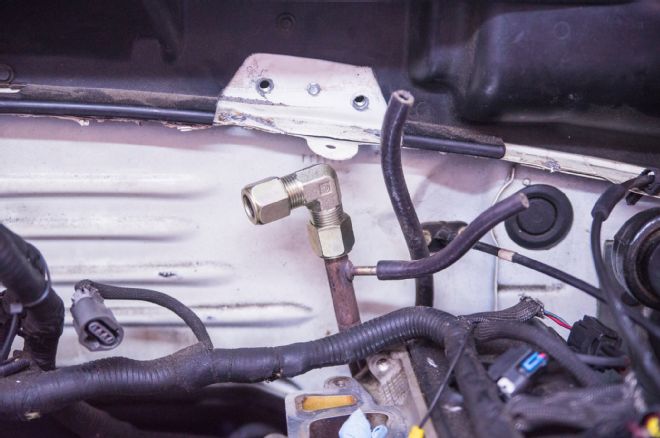
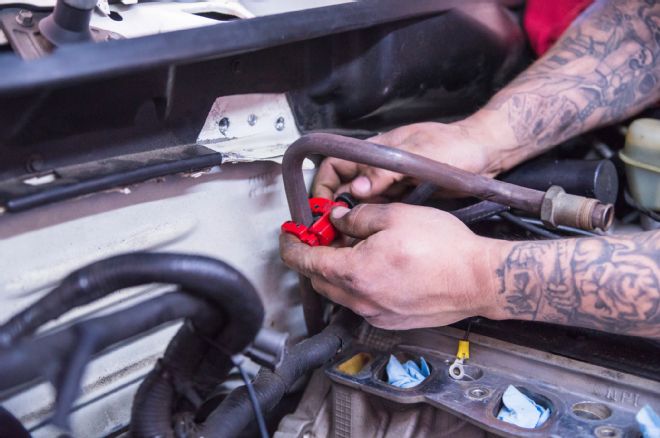
17. A 90-degree compression is installed onto the EGR tube, but only snug it down for now. It will get tightened after the intake is on.
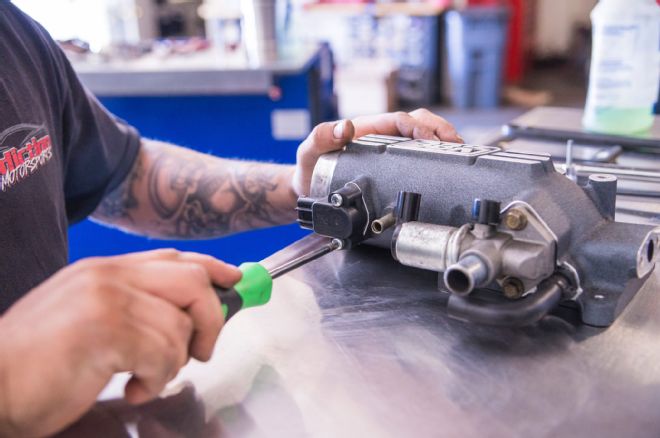
18. Now it’s time to start prepping the StreetBurner for install. Pull all of the sensors off of your stock inlet (or the BBK in our case) as they’ll all be reused.
19. Same with the intake; we need the fuel rails and injectors, so just pull them off as one piece by removing the retaining screws. The rails will need to be slightly modified by swapping the stock plastic crossover tube with the supplied EFI hose.
20. The StreetBurner is paired with a 75mm throttle-body option, while the Track Heat has a twin 57mm option. While a stock throttle-body could also be used, the inlet will restrict down to 65mm, which isn’t ideal. For our application, we installed a BBK Power-Plus series 75mm throttle-body (PN 1700).
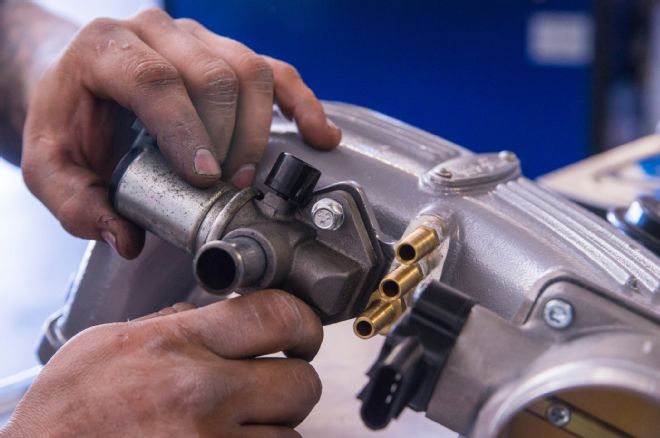
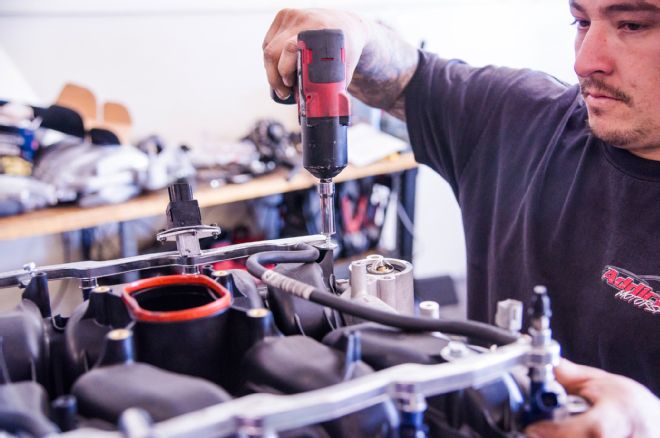
21. Believe it or not, there is a difference in size on the IAC used Windsor and Romeo built 2V engines, but either will fit on the StreetBurner’s inlet. It’s important to note that there are a few barbed hose ports that need to be installed with Teflon tape just ahead of the IAC.
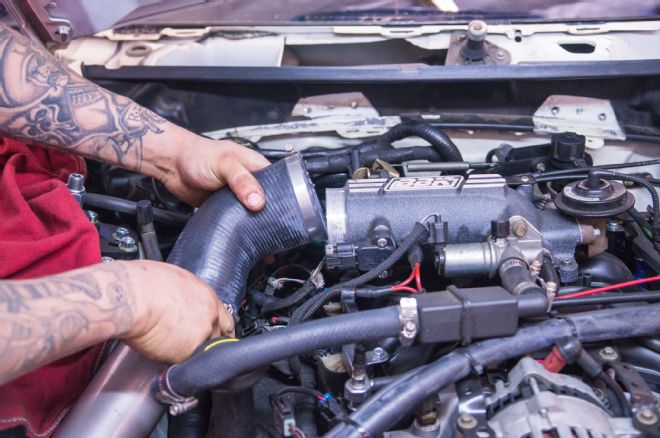
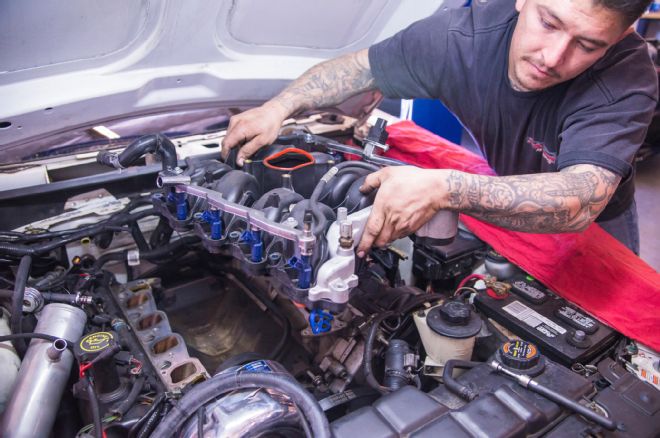
22. Here’s the inlet fully assembled with the EGR valve and all other necessary sensors and hardware. It stays separate from the intake for now and gets installed afterward.
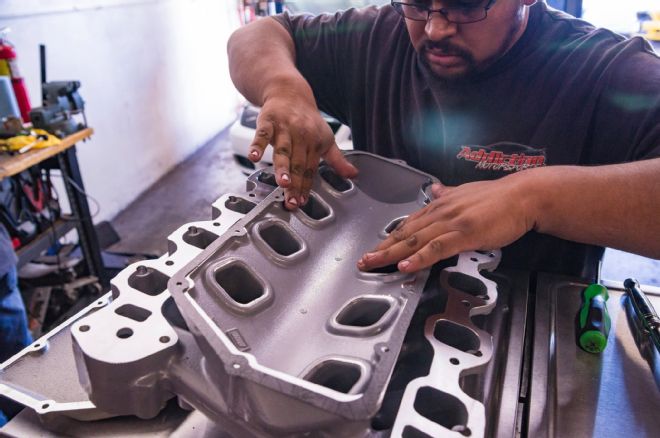
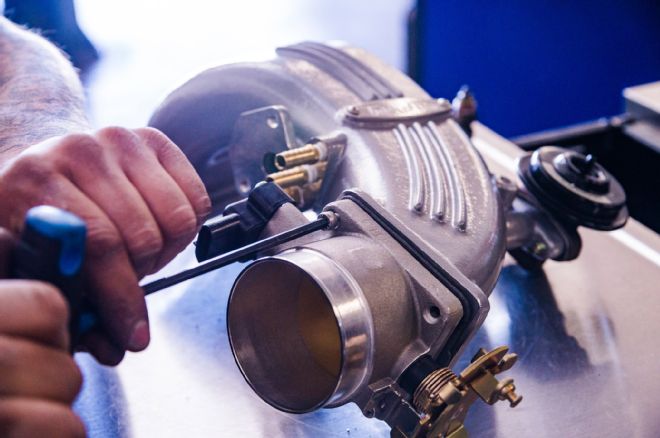
23. Check out the ports on the StreetBurner. Those bad boys can flow up to 280 cfm, easily eclipsing the 180-200 cfm the stock one can muster. Plus, the new manifold has enough plenum volume to support 8,000 rpm.
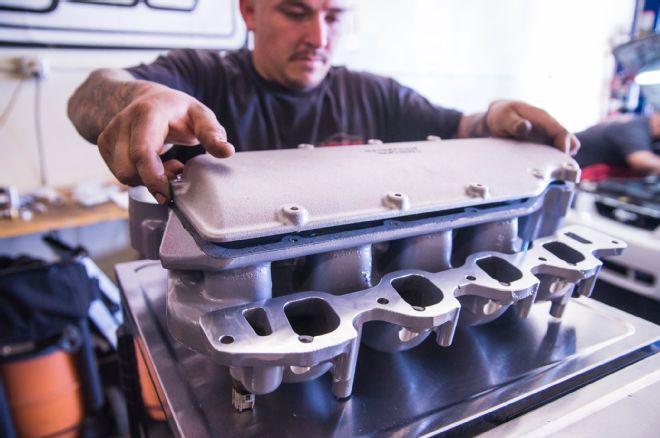
24. We love that Trick Flow makes it easy to access the ports with this removable bottom panel. A gasket is provided, but a gasket sealer is recommended as well to prevent vacuum leaks. Go light on the bolt torque, though—only 10-12 lb-ft.
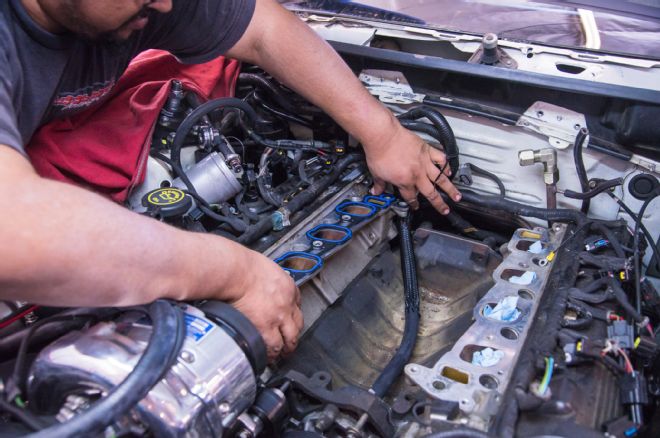
25. Time for the intake gaskets. Some gaskets have a tab located on the passenger-side rear that will need to be trimmed off for clearance.
26. The lower part of the StreetBurner has to go in without the upper inlet to maintain access to bolts and for routing. The intake bolts are also lightly torqued at 18-20 lb-ft in a particular sequence that is detailed in the instructions.
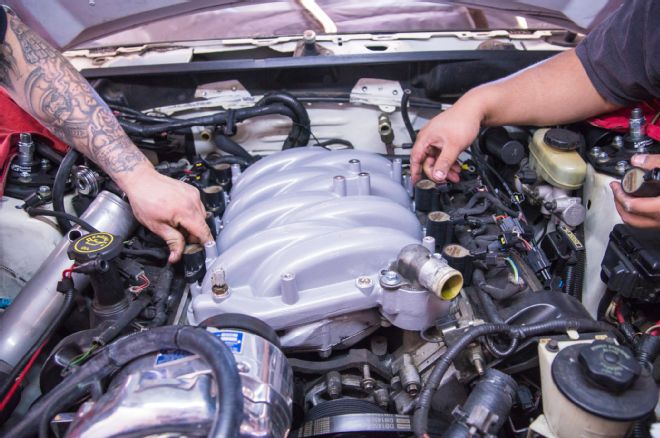
27. The StreetBurner intake works with either the Romeo or Windsor water necks. If you’re using the Romeo style, you must reuse the original bolts. If you have a Windsor, Trick Flow included cap screws that you will use instead. The coils can be reinstalled now as well.
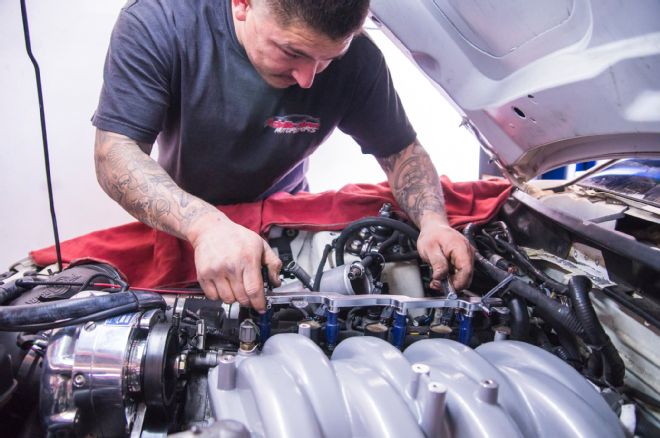
28. The rails and injectors with the modified crossover tube can now be dropped onto the intake and bolted down.
29. As you’re installing the inlet part of the intake, make sure that you adjust the injector and coil harnesses, as well as the fuel rail crossover tube and vacuum lines, so that they move freely between the upper and lower sections.
30. Now is the time to reinstall the temp sensors, as well as connect and tighten up that compression fitting on the EGR tube. The DPFE EGR sensor and EGR solenoid on the firewall will need to be removed from their original brackets and reinstalled with self-tapping screws.
31. There is a little bit of wiring extension needed for the IAC, but Trick Flow supplies a kit to make it easy.
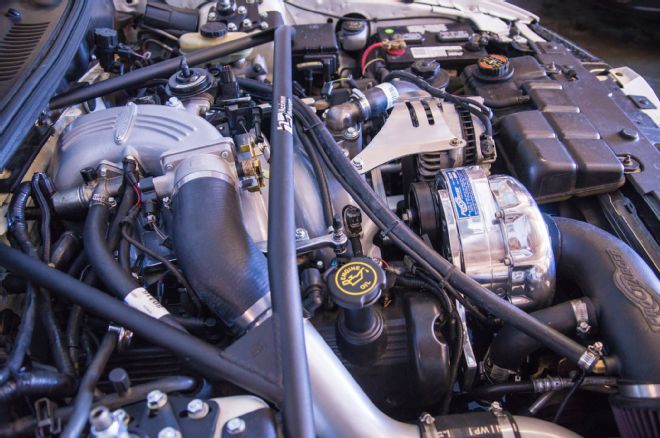
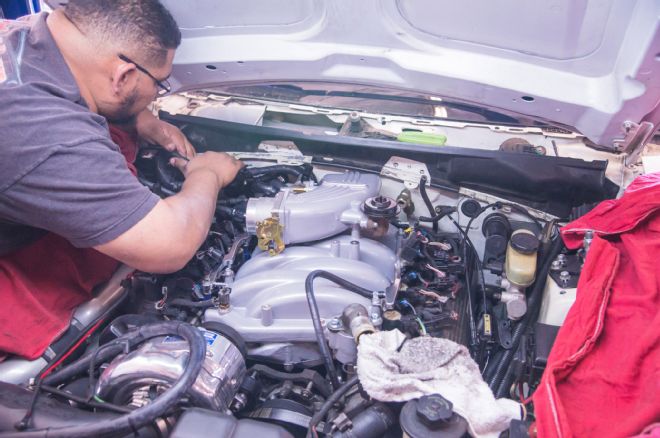
32. Almost there! Windsor engines have an air temp sensor that will need to be installed into the MAF coupler. A 3/8-inch hole is drilled into the boss, and a straight 3/4-inch barb is installed rearward for the IAC. The 5/8-inch, 90-degree bard on the front side is for the PCV system. After reinstalling the alternator with the new bracket, the last task is installing the throttle and cruise control brackets since they install upside-down compared to OE. The stock bracket will work with some slight modification, per Trick Flow’s instructions.
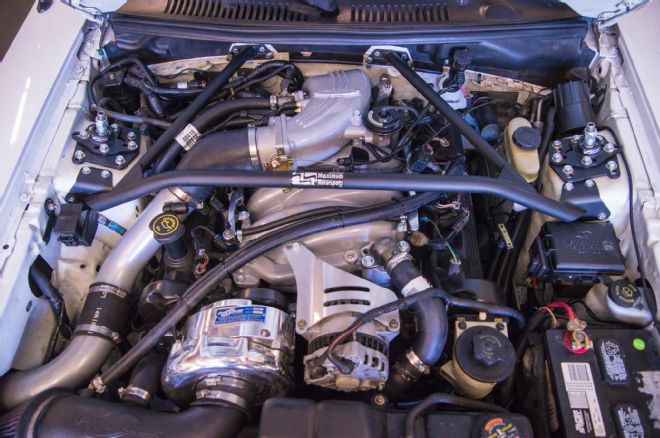
33. So what did it make? Using a power loss estimate of 0.18, per Performance Automatic’s in-house testing, that put us making around 434 hp at the flywheel. At 368 rwhp, our high mile stock bottom end is safe for many more miles—or at least until we get our stroker combination built.